
 This week on Weekday Escape! Adventure, excitement and mystery! Rinnogogo's beautiful game could be an animated short film - art and atmosphere are amazing. Not many escape games involve emotions...well the latest one by Neat Escape also does, but of a different kind - prison breaks are emocional (and adrenaline) activity after all. Selfdefiant's asylum is mysterious and a (very) little scary, as always.
Have a good time and enjoy!
Lovely (and adorable) Rinnogogo's game starts with little language barrier, definitely not unbeatable - I did it, you can too! All you need to know are kanji for some heavenly bodies - and Google Translate can help you with it.
You play for a little girl who has lost something she shouldn't. Some chores must be done to get the lost property back - being a little girl helps, but you can enjoy playing even if you aren't. Cute animals included.
The cursor is not changing, autosave, one ending.
Neat Escape's game is a remake of an older game, and it's thrilling escape from a prison! Seems that you are imprisoned for many days yet, so many, that you don't remember how long you've been here - and today is the day D! Freedom! On your way out you have to cope with guards, and be careful as they can catch you and return you to the cell - however, they leave it unlocked then - low cost prison, probably. Can you escape?
The cursor is not changing, save button plus autosave, one good ending plus few bad.
P.S. Prison escape by Place of Light, Loom Custody, is more of a challenge...
You're back in another Selfdefiant's haunted asylum with purple orbs flowing around and many locked doors, which can be opened with colorful keys only. These orbs are medium of exchange in asylum little shop - notice that the crystal ball the shop offers isn't necessary, just makes playing more comfortable as can be used for teleportation. Your first task is to find a sacred jar (bright green bottle) for collecting orbs, and after that comes the classic escape - hints and puzzles, keys and blood red gems. Seven sockets appear on asylum's walls with discovery of the seventh gem, and when is the last gem placed, the exit door opens. Another dark place is ghost free, thanks to you!
The cursor is changing, autosave, one ending.
We love escape games, and our readers love talking about them and sharing hints! How about you? Let us know what you think, ask for clues, or help out other players in the comments below.


On "Escape From The Cage":
The game is particular about how you use the telescope. In the room with the two security guards, use it to look at the ID poster in the corner on the left side of the room, and aim for the center of the white area. The hotspot for where you can aim the telescope is quite small, and you'll probably alert the guards a few times before you find the proper spot to look at. Once you see the clue it provides, just back out of the room without clicking anything else.
Quite enjoyed this one, except for the lockers room. Unless you have amazing memory, solving the lockers is definitely going to require screenshots of previous clues.
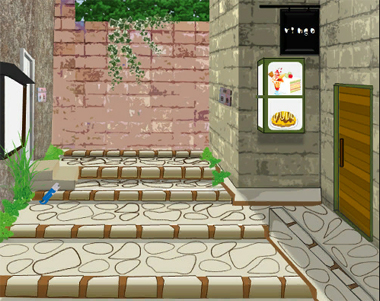
Otukai Escape / A Small Errand
Your mother has left her pocketbook at the shop, and asked you to go alone to retrieve it. Also, don't drop the key.
…Of course, you've lost the key by the time you arrived, so now you have two problems.
Exploration
(There's no feedback for items you can get, but hotspots that change the view are highlighted with a translucent rectangle.)
You're in the street right outside the shop, which appears to be a cafe. As you can see by turning to the right, the shop door is locked and the box beside the door has sun, star and moon buttons. Pick up the can opener in the street, and look at the name plates which read 赤星 and 日田.
Just to the left of the right name plate, you can click to turn the corner. The cat from before is here… holding your key! It wants some cat food though. There's also another name plate here reading 月島.
Cosmic
Use the clues from the nameplates to unlock the crate outside the shop.
All three surnames seem to be quite rare, and some have even more uncommon readings. Thankfully, translating their kanji is easy:
(137) 日田 Hita: 日 = sun, 田 = rice paddy
(25) 月島 Tsukishima: 月 = moon, 島 = island
(46) 赤星 Akahoshi/Akaboshi: 赤 = red, 星 = star
So the house numbers indicate that you need to press the sun, moon, sun, star, moon, star, sun buttons. Do so, and the box opens up so you can take a can of cat food!
Feed
Use the can opener to open up the cat food can and give it to the cat, who drops your key on the ground.
Unlock / Exploration 2
Use the key to open up the shop. A girl sitting on a stool isn't wearing much, but you take the bowl from her head anyway.
"It's cold and embarrassing, *sob* "
Look at the round kelp picture above her, then examine the tables on the left. The one closer to the door has nothing interesting about it, but the one in the corner has an extra stool as well as a hexagonal octopus coaster.
Click the right side of the screen to walk behind the counter. Take the dirty dress under the coffee pots, and look beneath the counter to find a locked (fridge?) cabinet. Also pick up the mop whose end is just barely visible in the lower right corner.
Turn right to find shelves of glasses and cutlery. There's also a cupboard with three vertically arranged colored buttons which cycle through digits, and the drawer below that has three silhouettes and a text input box. You also see a fish picture above the flower vase and "Hawaii" below.
Go back to the entrance and turn around to face the door, and you hear a clattering sound that means you just knocked over a water bucket (whoops). Ignoring that spill for now, you notice that there's a red ellipse on the bucket and a poster on the wall introducing you to toy blocks. Also, the door seems to be locked but maybe that's the game telling you there's no need to leave.
Puddle
Use the mop to clean up the spill, making green letters appear.
Spell
Use the clues around the room to get the password for the bottom drawer.
The silhouettes in the drawer's clue match the aquatic subjects of the pictures in circular, hexagonal, square frames.
On the building blocks poster, the blocks with those shapes are labeled c, u, te.
So type
cutein the box (all lowercase) to open it and get a magnifying glass and a note that just reads "Nippon".Enhance
Use the magnifying glass on the bucket to find some tiny colored numbers within the red circle.
So use that clue to unlock the three-color cupboard.
The colored digits tell you to look at the 2nd letter of the red word, the 3rd and 4th of the green word, and the 5th and 6th of the blue word.
What do those spell?
The letters indicated are I, IV, II, which are roman numerals for 1, 4, 2.
Enter that into the lock to unlock the cupboard and find a pink balloon that's too high to reach.
Inflated
Place the chair directly under the balloon, which you can now take.
Then use the can opener to burst the balloon and get the silver key.
"The key is out. Oh, seems like something fell."
Look at the (2nd/3rd) coffee cups beneath to find a detergent pod.
Unlock 2
Use the key to unlock the cabinet under the counter, and take a bottle of water from it.
Clean
Fill the bowl with the water, add the detergent, and add the dress.
After scrubbing it with all your might, you get a clean but wet dress.
Not good enough to wear, so how can you dry it?
Place the wet dress on the empty table, directly under the sunbeam.
Back out, zoom in again, and pick up the dress.
Now you can give the dress to the girl, who gives you the notebook, ending the game!
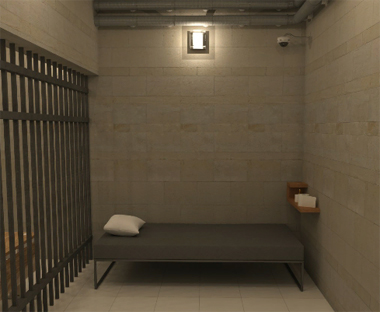
Escape from the Cage
Gloomy piano music accompanies your stay in this jail cell. Not for much longer, as you have decided to break out!
Exploration
There doesn't seem to be much to use in here. The sink doesn't even work, and the tap handle just comes off as you turn it! At least the toilet looks normal, but you can open up its tank to find a whetstone. Great, but it's still not enough to get past the locked gate on the right.
Turn around to find the camera in the corner that watches your every move. (No touching!) The bed under it is minimal, but its pillow hides a towel.
Look through the bars on the left at the guard who's also watching you. You can click on the table to take a closer look at his coffee and cookies. No stealing, of course.
Whittle
Click the handle to remove the top part, leaving a long-ish stick.
Then use the whetstone to sharpen it.
Looking through the bars again, you find that the guard has fallen asleep.
Yoink
You can now pull the plate of cookies away from the guard. What's more important than cookies? The pair of handcuffs behind them.
While you're messing with him, reach under the table and untie his shoelaces.
You can also see the keys hanging from the back wall. How do you reach them?
Tie the shoelaces together, then tie the stick to the end.
With your superhuman throwing skills, you manage to thrust the stake directly into the hook, causing the key to slide off and down the string.
Unlock
You can use the key to unlock the cell gate, but if you try to leave right now the alarm will sound and you'll get a Game Over.
(Don't worry about saving: you don't lose any progress on failure as long as you hit the Restart button.)
However, you can just cover the camera with the towel and walk right out.
Passing through the nearest door, you come to a heavy metal shutter that refuses to stay up.
Held
Hang the handcuffs off the upper bar and use them to hold the shutter up.
Exploration 2
That leaves you free to walk into the corridor which turns the corner to end at… another locked gate! It's not a dead end, because there's one more door to open in the corner.
That door opens into a room with monitors of closed-circuit footage. A guard is too distracted by his laptop to notice you entering, but he will definitely notice if you try to touch anything.
You can, however, turn around to access another laptop that has a four-digit lock… wait, the zeros turn into shapes when clicked! There's also a small six-digit locker on the ground belonging to "Mike".
Knock the guard out with the whetstone, and now you're free to look at the monitors. One of them is entirely black, and you can use the keyboard/mouse beneath the monitors to tint all of them gray instead of sepia.
Camera
With the guard knocked out, you can now safely return to your cell and remove the towel, and still access the surveillance room.
You can now see your cell in the top left monitor, but switching it to grayscale reveals a secret in the floor tiles!
So use that clue to unlock the laptop behind you.
If you play around with the shapes on the lock (especially the lower right one) you'll find that the shapes in white must match the darkened tiles.
So click the buttons
4 9

2 3
times, and unlock the laptop to find a list of names and ID numbers.
Mike
Use a line from the laptop to unlock the locker underneath.
Enter Mike's ID (915357) into the lock, and open the locker to find a key.
Unlock 2 / Exploration 3
Use the key to open the gate, and walk through it (and around another corner).
The door on the left opens into a room with five lockers, each with their own name.
Continuing on, you reach a door with a warning sign. Peeking to the right, you find two people in front of a metal detector, and a noticeboard on the distant left wall. Looks like the old whetstone trick won't work here.
The warning door opens into a dark room whose exit is blocked with lasers. A compartment in the left wall has its handle tied shut. On the right, you can climb over the railings to access a large machine.
You can also look to the right of the machine, but it's too dark to find anything.
Colleagues
Which of the five lockers can you open?
The left one (Nina) and the middle one (Chris) have names that appeared on the laptop.
So enter their IDs (658713 and 782439) to open them and find a flashlight and pliers.
Lit
Turn the flashlight on, and use it to look in the corner beside the machine to find a stepladder.
Place the stepladder in front of the machine, and click it to climb up.
It's dark here too, so use the flashlight again to find a handheld telescope.
Zoom
Use the telescope to read the clue on the noticeboard.
Then use that clue to open another locker.
The layout of the white stripes matches that of the ID list, even up to the position of "ID".
So the red rectangles each indicate a digit, and you can assemble those digits from top down to form a six-digit code.
But where would you use that code?
Reading the names on the list from top down, you find that the initials spell MONICA.
So enter 345294 into her locker to open it and find a golden key.
Cut
Use the pliers to open the panel in the laser room, and push the OFF button there.
With the lasers off, you can use the key to unlock the door and escape!
The first thing you do after escaping is to have a lavish meal at a restaurant.
Illsylum
Why do we keep getting trapped in asylums? Why are they all filled with evil spirits and floating orbs? Why do they all have similar confusing layouts? Don't think too hard about these questions, or you could go mad.
Getting the jar
Disregarding what the exit signs say, the asylum's exit is behind you but it's magically sealed. To get it unsealed you need tools, and to get those tools you need those purple orbs, and to get the orbs you need a sacred jar.
What, you were expecting to find it just by wandering around? Not a chance. This time, you'll need to go north, north, and west to a room with some huge washing machines, and pick up the glove in the left doorway.
Then go east, south, east, east, east to the toilet, reach in the toilet bowl using the glove, and take the purple key after you unclog it.
Then go west all the way until you come to a door with a purple keyhole, and unlock it to enter a room with some decent-looking curtains… there it is! The sacred jar is on the floor in the lower left, and now you can use it to pick up 4 orbs in the room just by moving your mouse over them.
Shopping
Let's explore the previous rooms and collect some orbs. As usual, I'll list the number of orbs on each screen in parentheses.
Go east to a room (4) with a clue written on a bed and a chest with five buttons that cycle through red symbols.
Go east (4), east again (2). The fireplace here is unlit and the north door of this room needs a silver key.
Go east again (4) to the bathroom, where the sink indicated with an arrow has a stuck drain cover with something red beneath.
Go west thrice back to the room with the bed clue, and then go north (4) and north (4) again to a room with a chest having eight buttons. The west door of this room needs a blue key.
Go north (4) to a room with a cloaked figure, which you should recognize by now as the Orb Shop.
You should now have 30 orbs (if you're missing some, feel free to explore some other rooms).
Resist your temptation to get the jeweled items for now. Just buy the map and crystal ball.
In case you're unfamiliar with how this works: the map shows you where you are and lets you take your own notes within the game, and having the crystal ball lets you teleport to any visited room by clicking on it on the map.
Exploration (remaining rooms)
You can now teleport back to G(5) and A(4), where you may have noticed a red candle on the right wall.
Teleport to D and go north to I(4). The north door here needs a green key.
That's it for now, we can start on the puzzles!
Initialism
Since you're a seasoned puzzler, you should recognize that SEWN (from the bed) consists of the initials of South, East, West, North.
Where can you use that code?
Those points are marked on your compass, which is included with your map!
Open the map and touch the points S, E, W, N which makes a silver key appear.
Unlock: Silver
At E, use the silver key to open the north door.
This puts you at J(2). Go east to K(5), where something shiny catches your eye.
It's the empty lighter just under the middle of the screen.
Then go north to P(2), where a huge machine has a red arrow clue drawn on its front. You also notice the pile of laundry at the back, and find a blue key in the jeans pocket.
Teleport back to J and go north to O(4).
In the left window, you can peel off the loose paint to find a red gem.
Go north to S(2), whose east door requires a gold key.
Go west to R(4), which has an evil spirit. Zoom in on the phone to find another clue with red arrows.
Unlock: Blue
At M, use the blue key to unlock the west door.
L(4) is a small bathroom with shirts hanging from hooks, the right one containing a green key in a pocket.
Unlock: Green
At I, use the green key to unlock the north door.
N(4) is a storeroom with some mattresses that are obviously the wrong side up. Take the lighter fluid from the wardrobe on the right.
Light
Use the lighter fluid on the lighter, and use it to light the candle at A, which makes a gold key appear.
Also use the lighter on the fireplace at E, which makes a red gem appear on the photo above.
Unlock: Gold
At S, use the gold key to unlock the east door.
T(4) is also haunted, and you notice that the open drawer holds a screwdriver.
Exorcise
Now that you've been everywhere, use the orbs you've found to buy up the cross and sacred dagger from the orb shop at Q.
Use the dagger on the ghost at R and the cross on the ghost at T, and take the 2 red gems they drop.
Driver
Use the screwdriver to remove the drain cover at F, and take the red gem beneath.
Zig zag
Use the red arrow clue from P to unlock the chest at M.
The shape of each arrow indicates a triple of buttons, one for each column. (The red button in the middle doesn't do anything.)
So the left arrow tells you to press the top-left, bottom-middle, top-right buttons, and the right arrow tells you to press the bottom-left, top-middle, bottom-right buttons:
153

- -

426
The chest opens to give you a red gem.
Commands
Use the red arrow clue from R to unlock the box at C.
The arrow heads on the phone are shaped like the symbols on the box.
So click the buttons 1, 0, 1, 2, 3 times to match the shapes and open the box to get a red gem.
Apparition
Collecting all 7 red gems from C, E, F, M, O, R, T has caused seven hexagonal receptacles to appear on the walls.
So place the red gems in the receptacles at B, D, F, L, N, P, S.
This removes the spell, allowing you to leave through the south exit door at A!
get all Wells Fargo routing numbers
Update