

![]() There's something about creeping down dark corridors, ancient and mysterious symbols and objects littering the walls and floors, that makes Egyptian tombs so irresistible, whether they be in movies, games, or even real life. Now beloved room escape designer Kotorinosu is back and has set its latest attempt in a place that looks like Indiana Jones, Lara Croft or the Mummy would be right at home in. Welcome to Sphinx! (Cue spooky music)
There's something about creeping down dark corridors, ancient and mysterious symbols and objects littering the walls and floors, that makes Egyptian tombs so irresistible, whether they be in movies, games, or even real life. Now beloved room escape designer Kotorinosu is back and has set its latest attempt in a place that looks like Indiana Jones, Lara Croft or the Mummy would be right at home in. Welcome to Sphinx! (Cue spooky music)
 Navigation through this tomb could have been extremely complex if Kotorinosu hadn't created another elegant solution: each room in the tomb is a "one-wall" puzzle, everything in the room can be accessed by facing the front of the room, so that moving from place to place is as simple as moving forward or backwards, without any rotation to confuse the player. The puzzles themselves are Kotorinosu's usual mix of logic and use of found objects, involving a lot of observational skills. While the puzzles haven't reached the heights of complexity found in other works from Neutral (remember the hand-held game found within Lights?) or Valentin Sagrario (I still have nightmares about the radio puzzle in Sagrario's Room Escape), they are pretty challenging and more importantly fit beautifully into the overarching themes that dominate the game. The inventory system is easy to master and there is a save function if you feel the need to walk away for any reason, hopefully not a ragequit but you never know.
What makes Kotorinosu escapes rise head and shoulders above the pack is the care that goes into expressing a theme throughout the game, whether it be the shapes, reflections, or in this case the pictures and symbols of ancient Egypt. Kotorinosu's puzzles and solutions are quiet, elegant, and echo the theme as well, creating a massively entertaining experience that is so much more than "throw a bunch of random puzzles into a four-wall room" that permeates so much room escape design. The delicate balance of theme, puzzle, solution, and space gives Kotorinosu games a unique feel that makes them so popular and so fun to play. Time to get your inner Indiana Jones (or Lara Croft) on and brave Sphinx! Promise, there are no snakes.


Walkthrough Guide
(Please allow page to fully load for spoiler tags to be functional.)
Sphinx Walkthrough!
It's my first, I hope it's not too bad.
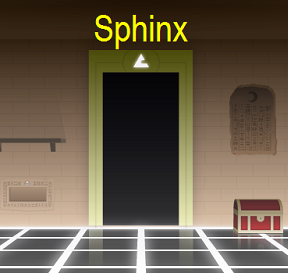
Exploring the first room:
First off, note that this game only has one view per room, unlike most escapes.
On the top left is a shelf with a camel figurine and a die. Take both. Some parts of the camel can be moved, and the die can be rotated around.
Directly underneath is a compartment with a round indent. We can't open it yet, but keep it in mind.
On the top right, there's a stone tablet- well, part of a stone tablet, and a space for where the rest should go.
On the bottom right, there's a locked chest and a tablet piece. We don't have anything to open the chest with, so take the tablet piece. It doesn't appear to fit together with the rest of the tablet, so let's come back to that later.
Let's look at that door now. Time for question 1.
Solving question 1:
Hint-through:
What else have we seen that this shape might correspond to?
What else is made up of six squares and has numbers?
Check the die.
The little white bits are hinges, and show where two panels are joined. It helps to draw it out.
The side that connects to four others is 2.
Solution:
Map out the die, and we get something that looks like:
_ 4
8 2 1 7
_ 5
Enter in "8217".
Exploring the second room:
On the top left, there's a figure of a person behind a set of bars. Awww, poor guy's in jail. Unfortunately we can't free him yet.
Below are two pots. Check the left one- there's another tablet piece. The right one's full of oil. Something's a little strange about that wall, too.
Does one of those bricks look funny?
Take the key.
On the right is a device that looks like a face, with one round glassy eye. Doesn't seem to be doing him any good, so take the marble.
Question 2 is on the door, but we've got a few things to do before we can answer it.
Preparing to solve question 2:
What can we do with the key?
We can't jailbreak the human figurine quite yet.
Try the chest in the first room. Take the bird figurine, take the paper and unfold it.
What can we do with the marble?
Where have we seen this shape?
In the compartment on the wall of the first room. Open it and take the tablet piece. You should have enough pieces to fix the tablet by now. Take your marble back when you're done.
Solving question 2:
Hint-through:
Look at the clock. There are hieroglyphics where the time would be, and each hand is marked with a different shape.
Where have we seen hieroglyphics before? Where have we seen those shapes?
The tablet has hieroglyphics, and the paper has all of those shapes. Both also have a moon at the top.
Hold the paper up against the tablet.
Solution:
Circle is the scales, square is the ankh, and cross is the one that looks like two lightning bolts on their sides. Turn the circle hand (longest, bottom) to the 5:00 position, turn the square hand (medium-length, in the middle) to 6:00, and turn the cross hand (shortest, top) to 11:00.
Exploring the third room:
On the very left is a hole in the wall. There's a stick poking through- grab it. Look through further and you'll see a lever on the other side.
There are two torches standing up on either side of the door.
In the center is a lever. Note the shapes and colors at the bottom- currently, it's switched to blue. There's something missing, and we can't move it quite yet.
On the door is question 5. It looks like we aren't ready for that quite yet.
On the right is an open door. That's new, let's check it out.
Exploring the right room:
Wait, it's too dark to see!
What could we do to lighten things up?
There's fire in the last room. Could we do something with that?
We've got a stick.
But the fire goes out as soon as it's lit. Is there anything we can use to make it stay lit?
Maybe something in the second room?
Dip the stick in the oil, then light it, and use it on the dark right room.
Look around. On the top left, there's a picture of three figures marked with the cardinal points. What might those figures represent?
Down below, there's a lever, currently set to blue. This one's pullable and has a hexagonal switch. Let's switch it to red and see what happens.
...Oh. The doors in the main room change, and now the left one is open, but since the right one is closed, we can't get out. Let's put it back to blue.
On the right, we have a blue hourglass in a circular hole in the wall.
The panel in the middle contains question 3.
Solving question 3:
Hint-through:
Look at those holes and grooves in the panel. Have we seen anything that might help us use that clue?
We have, right in our inventory.
It's the camel figure. Its ears are shaped like triangles, and its humps are circular. Find the pose that matches the shapes on the door.
Where might the camel go once it's in the right pose?
You stick it right on the panel. Keep that in mind when you pose it.
Solution:
Put the camel directly onto the panel. The camel's head is turned to its left, and only the middle two humps are raised.
Preparing to explore the left room:
It looks like the camel doesn't need to be stuck in the panel anymore. Retrieve it.
Take the handle from the slot underneath question 3. Note its circular shape. Where might this handle go?
There's that lever we couldn't pull before.
Go back to the third room, and put the handle on the lever. Switch it from blue to red, and we can go into the left room now.
Exploring the left room:
On the left, there's a red hourglass in a circular hole in the wall. Is something else in there? Zoom in, and take the key.
On the top right, there's another picture of three figures with the cardinal points labelled.
Underneath is another lever, this time switched to red. The handle is square. Try switching it to blue.
No luck, we just end up trapping ourselves again.
In the middle is an arcade cabinet like thing containing question 4.
Preparing to solve question 4:
Where did we need a key?
Maybe in the second room?
The poor little man is still in jail. Let's break him out. Unlock the panel, push the button, and get the figurine.
We've got everything we need for question 4 now.
Solving question 4:
Hint-through:
What might the grid mean? What might the feet marks mean? What objects should we place on the grid?
There are three figures in the pictures in the left and right rooms, and you have three figurines.
Play with your toys. Note the articulation points in each figurine. The camel can turn its head and any of the humps can be up or down, the human can rotate his head and have either arm up or down, and the bird can only turn its head.
What can we learn about the figurines from the pictures?
When studied together, the pictures can tell us how to position the figurines. It might be helpful to draw a diagram or take a screenshot of each picture.
But where do we put them on the grid? Notice the feet marks on each square- when put onto the grid, the figurines face forward.
We'll need the pictures in the left and right room again. Note the directional points. Try to map out where they'd be on a 3x3 grid based on the cardinal directions.
The human is east of the camel and the camel is east of the bird. The camel is south of the bird, and the bird is south of the human.
Assume we started the game facing north.
In that case, when looking at the cabinet, wed be facing west.
So the back of the cabinet (top row of the grid) would be the farthest west, and the front of the cabinet (bottom row) would be the farthest east. The left of the grid would be the farthest south, and the right of the grid would be the farthest north.
Solution:
Put the figurines on the panel.
The bird (head turned to its right) is in the top row, in the center.
The camel (head turned to its left, only the two back humps raised) is in the middle row, to the left.
The human (head straight, both arms up) is in the bottom row, to the right.
Take the rope. Now we're ready to solve question 5.
Solving question 5:
Hint-through:
Go back to the third room, and look at the door. What might those colors and shapes mean?
Think of the levers.
The lever with the square handle needs to be on blue, the lever with the round handle needs to be on blue, and the lever with the hexagonal handle needs to be on red.
In other words, the lever in the left room needs to be on blue, the lever in the third (middle) room needs to be on blue, and the lever in the right room needs to be on red.
But if we pull the lever in either of the side rooms, you're trapped inside. How do you get around this?
What about that hole in the wall?
Solution:
Attach the rope to the lever in the left room. Then, go to the third (middle) room, switch the lever to blue, and pull the rope from the hole in the wall. Go to the right room, and switch the lever to red.
Exploring the final room:
On the left is a key-like device. Take it and examine it, it's actually a prying device.
On the right is a panel with a hexagonal center. There's nothing we can do with it for now.
In the center, there's a pair of doors. There's a shape over the center similar to the markings above the other doors. Take note of it.
Preparing to solve the final question:
What can we do with the prying device?
Is there another item in our inventory that could somehow be opened?
There was that black shape on the die...
Open up the die with the prying device, and you get another marble. Click on the die again and it'll fold out, becoming a map.
What can we do with the item we just found?
Remember the face-shaped device in the second room?
Give him back both his eyes. Take the wheel?
And what can we do with that?
Where's the only place left to put something new?
Put the wheel on the panel with the hexagonal center in the final room. Then turn it.
Solving the final question:
Hint-through:
Is there anything else shaped like this device?
The map (and the game area itself) share a shape with this device.
Might there be an area of this device that could change something inside the current room?
The top node corresponds to this room. Let's see if it does anything.
Something changed. What was it?
Look at the symbol above the door.
Clicking the center of the circle rotates the gap in the triangle clockwise once. Clicking the outer ring makes the entire symbol do a half-rotation.
Now we know how to change the symbols. What are we trying to change them to?
See the big symbol on the door?
Solution:
Make all the symbols in the game match the symbol on the door.
For the the final room: on the node that corresponds to the final room's placement, click the center ring once.
For the third room: click the outer ring once.
For the left room: click the center ring once, click the outer ring once.
For the right room: click the center ring twice.
For the second room: click the center ring twice, click the outer ring once.
For the first room: leave it as is.
Take the key, unlock the door, and you're out.
Posted by: Alice |
April 18, 2012 7:03 AM
|
April 18, 2012 7:03 AM