JayisGames.com is now available ad-free!
Jay is Games recommends Cheat Happens with 8,000+ games and 35,000+ trainers!

Pearl Room Escape


  • Currently 4.3/5
  • 1
  • 2
  • 3
  • 4
  • 5
Rating: 4.3/5 (137 votes)
Comments (25) | Views (13,000)

Weekday Escape

ElleSummer is the perfect time to escape to a tropical seaside, sip an umbrella-sporting cocktail, and—why, not?—go diving for pearls. Too bad the door to your hotel room won't budge and you're trapped, only able to gaze longingly out the window at the deep blue waters and lush palm forest, your only company being a mean-looking piranha. What kind of twisted operation puts piranhas in their guest rooms? Apparently it's the same kind of hotel that forces patrons to plunder their rooms searching for keys to doors locked from the outside. Don't trouble yourself by asking more questions because the soothing atmosphere and quiet surroundings make this scenario a happy one. So begins Pearl Room Escape, the most recent release by TomaTea who is proving to be an up-and-coming star in the genre.

Pearl Room Escape
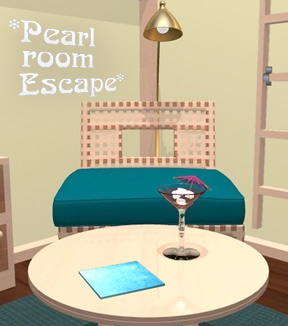
Described by the developer as a "five-minutes room escape game," Pearl Room Escape is not short on pleasing visuals, intuitively logical puzzles or enjoyment. The room is decorated in relaxing aquamarine and soft peach-colored accents. Dolphin statues, jars of colorful pearls, and a cool ceiling fan add to the mood of warm-weather relaxation. Keeping with the theme, collecting pearls is counted as one of the puzzles and finding solutions requires very little note-taking as per the "five-minutes" epithet. While not all players will make their way out within the abbreviated time frame as advertised, the game is leisurely enough for anyone to dive into, providing a vacation from the ordinary milieu.

Like previous TomaTea games such as Orient Express Night and Blossom Spring Escape, the changing cursor is notably absent from Pearl Room Escape. This shouldn't be a problem, though; the environment is bright, crisp and well-designed, making pixel hunting unnecessary (although tempting at times). Usually, puzzle pieces are often obvious even if the solutions are not. Also missing is music or ambient noise, which might be a disappointment to some: the ocean view is diminished without the accompanying roar of waves crashing on the shore. Instead, sound effects consist merely of an occasional chime when an inventory item is first discovered. Door handles do not rattle and silence is the only response to an incorrectly-entered code.

Yet despite rigidly unchanging cursors, disobliging sound effects, or toothy fish who intercept players' pearl retrieval efforts, TomaTea provides assistance with the "I have no clue how to solve this" message, which goes a long way toward directing escapers toward puzzles we're equipped to solve and those that have yet uncovered clues. Inventory items are on ready display needing only a simple click to use or examine. As for other features, anyone whose first reaction upon opening a game is to click the "mute" button will be glad for the lack of background music. On the other hand, busy-types who are routinely interrupted might mourn the absence of a save button.

Initially, Pearl Room Escape may seem too short or lacking in features to garner much attention, yet this mini-escape is a true pearl of delight. It might not be long before TomaTea is ranked near such room escaping jewels as Tesshi-E, Robamini, and Neutral. TomaTea has been consistent in presenting eye-pleasing, cogent, amusing escape games and Pearl Room Escape is no small reminder of that potential. You won't want to overlook this little gem!

Play Pearl Room Escape

Walkthrough Guide


(Please allow page to fully load for spoiler tags to be functional.)

Walkthrough

zoom in to table & grab blue tile. While you're there grab the umbrella. This must be useful. Click umbrella to turn it over. Oh! We have pictures and colours. Zoom out

click on window to zoom in. Click on rope to open blinds. Collect blue tile and zoom out

let's look at the fish tank. it keeps swimming around and around. Oh we have 3 cabinets above. Zoom out from fish tank and zoom on the cabinets above it. Click on lock on first door. We have a colour code. Click on middle cabinet, looks like pictures and numbers... Looks like the clue on the umbrella. Last cabinet requires a number.

lets unlock the middle cabinet by matching the code on the umbrella. We find a blue tile to collect and a big knife.

let's look at the door. Looks like beads hanging above and a blue tile!! Collect tile. The colours on the beads look very similar to the first cabinet lock. Use white beads above each string to count down to the correct colour. Zoom out

click on first cabinet and use bead colours to open lock. Another blue tile to collect and a code. Alphabet code. How many numbers are tin the alphabet? Zoom out

click on balls in jars above the seat to zoom in. Does the wood look like numbers? Make a note. All the marbles look the same except one. Click on the odd colour marble to retrieve first pearl. Zoom out.

click on last cupboard. We need a 4 digit number code. Use the numbers we have already seen on bottle shelves and push button to open cupboard. We find another blue tile and a screwdriver and a picture of the dolphins.. hmm... zoom out

zoom in to ladder and notice bracket holding it to the wall. Looks like screws. Use screwdriver to remove screws on bracket. Click to remove bracket and click ladder to collect. Zoom out. Notice on the floor near where the ladder was a wooden floor board raised. Lets pry that openwith the knife.lo and behold, a blue tile!

click on middle shelving with blue tiles and zoom in on bottom shelves. Ah ha! Another blue tile on the floor! Collect the tile. On the bottom drawer is a lock. But we need an alphabet clue. What did we see in the first cabinet? T=20. T... tee? Tea? Are there Tea canisters in the room? YES! above the dolphins! How do we get to it? it's too high! We have a ladder.!!

Place ladder near the dolphins and zoom on the Tea canisters. There are numbers. Match the numbers with each letter of the alphabet and you get a 4 lettered word. Zoom out.

zoom back to the last drawer under the blue tiles and enter code. We have another blue tile and fish food. Hm. That fish did look hungry. Zoom out.

zoom on fish. Let's feed it with the fish food. While it is eating click on the shell in the tank. Look at shell in inventory and use knife to pry open. We have another pearl!! Zoom out.

zoom in to blue tiled wall. The last tile is right there. Lets solve the puzzle. Its a sliding puzzle.

its a mermaid with a pearl. Remember that top drawer below which didn't open? Zoom out

zoom into top drawer and retrieve ring box.open to reveal a pearl ring. Lets pry that pearl off with the knife. We now have 3 pearls. Didn't we see 3 little holes somewhere? Oh! The dolphins! Zoom out

zoom into the dolphins and place pearls in holes. We have a door key! Huzzah! Use key to escape!

Pearl Room Escape Walkthrough

General Information

  • There is no navigation this time around, everything is in front of you on three walls.

  • There are some color-based puzzles, so this walkthrough will contain directions for the colorblind.

  • Don't forget to examine items you pick up, they may hold a clue.

  • The name of the game is Pearl Room Escape, so pearls might play a part in the escape. Just saying.

  • Good luck!

Exploration

  • You begin facing the room in the only view you'll get. On the right wall are a window and a ladder. On the left wall is the door out.

  • Click on the window on the right for a close up.

  • Pull the cord for the blinds and you will get a lovely view of the tropics, and a small blue tile sitting on the windowsill. Take the tile (tile 1).

  • Back up.

  • Now that the blinds on the window are open, you see a patch of sunlight below the window on the floor. Click on this patch for a close up.

  • Hmmm, there appears to be a raised board here, but we can't open it. Back up.

  • Click on the ladder for a close up. Okay, it's screwed down. Back up.

  • There's a round table in front of you, click on it for a close up.

  • On the table is a tasty cocktail with a purple umbrella in it. There is also a tile (tile 2). Take the tile and the umbrella.

  • While the umbrella is in close up click on it to turn it over. A clue! A yellow moon, a red star, and a blue gear.

  • Back up.

  • On the right side of the back wall are some shelves near the ceiling divided into eight cubbyholes, each holding a jar. Click on the cubbies for a close up.

  • Okay, we have jars of various numbers and colors of marbles.

  • Does the shape of those shelves look funny to you?

  • On the bottom row, second jar from the left, that particular jar has three marbles, but one of the marbles is not the same color as any other in any jar. Click on that marble and take it (pearl 1).

  • Back up.

  • In the middle of the back wall is a large wall that looks like it has some blue tiles in it. Click on that wall for a close up.

  • Yup, blue tiles, with some missing spaces. If you count the missing spaces you will realize you need to find 10 blue tiles in the room. And one of them is sitting on a shelf right in front of the wall, take it (tile 3).

  • Below the tile wall are some drawers, click on them for a close up.

  • On the floor to the right of the drawers is tile 4, take it.

  • The top drawer won't open, and the bottom drawer needs a four letter code which we don't have. Back up.

  • On the left side of the back wall are some more high shelves with some opaque jars. Below the shelves is a figurine which appears to be of dolphins. Click on the figurine for a close up.

  • Hmmm, there are three holes in the base of the figurine. Back up.

  • We can't click on those high jars for a close up, but maybe later.

  • On the left wall is an aquarium, click on it for a close up.

  • And that looks like a piranha, so let's not stick our fingers in the aquarium just yet. All that is in there is a flesh-eating fish, a clam, some colored gravel, and a plant. Back up.

  • Above the aquarium are three cabinets, click on them for a close up.

  • Each cabinet is locked, and each needs a different code. The left cabinet needs a four color code, the middle cabinet needs a code that involves symbols and colors, and the right cabinet needs a four digit code. Back up.

  • On the left wall, above the door, are some pretty light fixtures. Click on the fixtures for a close up.

  • Okay, each fixture has beads on it, a different number of white beads, and five colored beads in different orders. There is also a blue tile up there, take it (tile 5).

  • Back up.

  • Let's solve some puzzles!

The Right Cabinet

  • Click on the three cabinets on the left wall for a close up.

  • The right cabinet needs a four digit clue.

  • The clue for this lock is the cubby shelves on the upper right part of the back wall, the ones that hold eight jars with marbles.

  • Didn't those shelves look a little...odd?

    • If you look closely, the shelves are actually in the shape of numbers.

    • The code is 3285.

  • Enter the code into the right cabinet lock and push the button underneath.

  • There's some stuff inside. Take the screwdriver and the tile (tile 6).

  • There is also a drawing inside that appears to show a ladder against the shelves where the dolphin figurine is. Hmmm....

  • Back up.

The Middle Cabinet

  • Click on the three cabinets on the left wall for a close up.

  • The middle cabinet appears to need a code involving both symbols and colors.

  • Where have we seen these symbols before?

    • We've seen the symbols before on the purple umbrella we got from the cocktail. It showed a yellow moon, a red star, and a blue gear.

    • For the colorblind: each symbol starts out as a blue star. Click it once and it turns red, twice and it turns yellow. On the third click it changes to a blue gear.

    • To enter the code properly (from left to right): eight clicks (yellow moon), one click (red star), and three clicks (blue gear).

  • Once you enter the code the cabinet opens. Inside you will find a knife and another blue tile (tile 7). Take both.

  • Back up.

The Left Cabinet

  • Click on the three cabinets on the left wall for a close up.

  • The left cabinet needs a clue involving four colors.

  • Note that the lock only shows four colors, yellow, red, blue, and green.

  • Where have we seen those colors before?

    • You've seen those colors in the beads on the light fixtures above the door on the left.

    • Also on the light fixtures are a fifth color, purple, and some white beads.

    • The white beads are the key. The number of white beads indicates which colored bead (from the top) is the correct color for that position.

    • The first fixture (on the left) has three white beads. The third color down is blue.

    • The second fixture has four white beads. The fourth color down is yellow.

    • The third fixture has three white beads. The third color down is red.

    • The fourth fixture has four white beads. The fourth color down is green.

    • For the colorblind: The four digit color code starts on yellow. The combination is blue, yellow, red, and green, so you click the buttons from left to right: three times, zero times, two times, once.

  • Once you've entered the color code, click on the button below the lock and the cabinet will open.

  • Inside you will find a blue tile (tile 8). Take it.

  • There is also a note inside the door, T=20.

  • Back up.

The Loose Floorboard

  • Remember that raised floorboard below the window on the right? Click on it for a close up.

  • Once in close up use the knife on the floorboard.

  • The floorboard will pop up and you will find another blue tile (tile 9).

  • Take the tile and back up.

The Ladder

  • Click on the ladder for a close up.

  • Yep, still screwed down. But now we have a screwdriver!

  • Use the screwdriver to remove both screws. Once they are gone, take the ladder and back up.

  • Remember the picture in the right cabinet?

  • Click on the shelf with the dolphin figurines for a close up.

  • Use the ladder on the space to the right of the figurines.

  • Yay, it fits!

  • Click on the colored jars above the ladder and you can now see them in close up.

  • From left to right, they are a brown jar with the number 2, a green jar with the number 5, a yellow jar with the number 1, and a pink jar with the number 4. I'm sure that means something.

  • Back up.

The Bottom Drawer

  • Let's turn our attention to those two drawers below the wall of tiles.

  • The top drawer is mysteriously locked, but the bottom drawer needs a four letter code, so we should be able to get into that one.

  • Click on the drawers for a close up.

  • But what four letters do we use?

    • There are two clues for this puzzle: The note inside the left cabinet (T = 20) and the colored jars with the numbers 2514.

    • Ignore the color of the jars, the only important thing is the numbers.

    • T=20 is how you break the code. T is the 20th letter of the alphabet.

    • Therefore the number code 2514 stands for BEAD (B = 2nd letter, E = 5th letter, A = 1st letter, D = 4th letter).

  • Once you enter the four letter code click on the button underneath and the drawer will fall open.

  • Inside you will find some piranha food and the last tile (tile 10). Take both and back up.

The Tile Wall

  • You should now have found all 10 blue tiles.

  • Click on the tile wall for a close up then use the tiles on the wall. This will trigger a puzzle.

  • Swap two tiles at a time until you create the picture (a mermaid).

  • Screenshot.

  • Once you have the puzzle complete you will hear a small chime. Back up.

  • Click on the drawers beneath the puzzle for a close up.

  • You can now open the top drawer.

  • Inside is a red box, take it.

  • Back up.

The Pearls

  • You should have already found the first pearl, it is in one of the jars in the upper right shelf/cubbies (bottom row, second from the left).

  • Pull up the red box from your inventory. Once it is in close up open it.

  • Inside is a pearl ring! Use the knife on the ring to pry out the pearl (pearl 2).

  • Now click on the aquarium.

  • Once the aquarium is in close up, use the piranha food on the left side of the tank (where the plant is).

  • Once the fish stops swimming and starts eating, click on the clam to take it.

  • Pull up the clam from your inventory. Once it is in close up, use the knife on it to shuck it open and take the third and last pearl.

  • Back up.

Getting Out

  • Now all you have in your inventory are the three pearls.

  • Click on the dolphin figurine for a close up.

  • Look at the base, there are three round holes there.

  • Place the pearls in the holes in the base of the dolphin figurine.

  • When all three are placed a hidden compartment opens up, revealing a pearl key. Take the key and back up.

  • Click on the door for a close up. Use the key on the door and you're out!

  • Enjoy the tropical scenery!

25 Comments

nerdypants June 15, 2011 12:21 AM

Out! That was nice and easy. I kind of wish there'd been four walls, though. Putting everything on that one wall made it a little cluttered.

Reply

I've got to the point with the ladder and have the 4 jars with numbers. I'm thinking the numbers and colors are key, but can't figure out what the colors are based on. If it's text, then Red, Green, Orange, Purple?
Numbers are 2, 5, 1, 4, so enop. But that's not working.

Based on jar color, Brown, Green, Yellow, Purple, so rnyp. That's not working either, though.

Reply

Even in an easy escape with only three walls, I still get stuck. I currently have

a pearl, 8 blue tiles, and a knife. I've used the ladder and seen the clue it leads to, but don't know how to use it to unlock any of the two remaining locked cabinets/drawers.

Reply
phdavoid June 15, 2011 1:16 AM

Jade

Which doors do you still have closed an how did you get the

pearl

Reply
nerdypants June 15, 2011 1:19 AM

Jade:

The clue at the top of the ladder goes with the drawer. There's also another hint for the drawer inside the left-hand cabinet.

Reply
phdavoid June 15, 2011 1:20 AM

Never mind found it
But i can still help with at least one more door

Reply

@phdavid:

I've opened the middle and right cabinets so far. The left cabinet and lower drawer (can't open the upper drawer for some reason) are still locked to me. I got the pearl from one of the ball-containing jars, although I'm not really sure if it's a pearl or just a plastic ball - it looks more gray than white, actually.

@nerdypants:

I see. Unfortunately, I haven't figured out how to unlock the left-hand cabinet yet. I've unlocked the other two cabinets, but I don't know how to unlock that one. I think it might have something to do with the beads hung above the doors, but I don't know exactly how.

Reply
nerdypants June 15, 2011 1:30 AM

Jade, about the beads above the door:

What matters is the number of white ones, and the colors of the others.

Reply

Have a gander at the white pearls at the top of the bells.

Reply

Thanks, nerdypants! Things were pretty easy once I figured that out. It really was a very quick escape, though.

Reply

I got stuck on the code word for the cabinet/drawer for a minute because I was overthinking it. I combined the number clue with the dolphin statue's colour pattern. ;P

When I figured it out, I smacked myself.

Reply

That was a nice, enjoyable escape. Was nice to run into some puzzles that put my brain in gear without overtaxing it. :]

Reply
spike21 June 15, 2011 2:36 AM

Out -- took me more like 20 minutes but this is the first escape I'm managed without using a walkthrough.

Reply
fuzzles June 15, 2011 2:46 AM

Walkthrough

zoom in to table & grab blue tile. While you're there grab the umbrella. This must be useful. Click umbrella to turn it over. Oh! We have pictures and colours. Zoom out

click on window to zoom in. Click on rope to open blinds. Collect blue tile and zoom out

let's look at the fish tank. it keeps swimming around and around. Oh we have 3 cabinets above. Zoom out from fish tank and zoom on the cabinets above it. Click on lock on first door. We have a colour code. Click on middle cabinet, looks like pictures and numbers... Looks like the clue on the umbrella. Last cabinet requires a number.

lets unlock the middle cabinet by matching the code on the umbrella. We find a blue tile to collect and a big knife.

let's look at the door. Looks like beads hanging above and a blue tile!! Collect tile. The colours on the beads look very similar to the first cabinet lock. Use white beads above each string to count down to the correct colour. Zoom out

click on first cabinet and use bead colours to open lock. Another blue tile to collect and a code. Alphabet code. How many numbers are tin the alphabet? Zoom out

click on balls in jars above the seat to zoom in. Does the wood look like numbers? Make a note. All the marbles look the same except one. Click on the odd colour marble to retrieve first pearl. Zoom out.

click on last cupboard. We need a 4 digit number code. Use the numbers we have already seen on bottle shelves and push button to open cupboard. We find another blue tile and a screwdriver and a picture of the dolphins.. hmm... zoom out

zoom in to ladder and notice bracket holding it to the wall. Looks like screws. Use screwdriver to remove screws on bracket. Click to remove bracket and click ladder to collect. Zoom out. Notice on the floor near where the ladder was a wooden floor board raised. Lets pry that openwith the knife.lo and behold, a blue tile!

click on middle shelving with blue tiles and zoom in on bottom shelves. Ah ha! Another blue tile on the floor! Collect the tile. On the bottom drawer is a lock. But we need an alphabet clue. What did we see in the first cabinet? T=20. T... tee? Tea? Are there Tea canisters in the room? YES! above the dolphins! How do we get to it? it's too high! We have a ladder.!!

Place ladder near the dolphins and zoom on the Tea canisters. There are numbers. Match the numbers with each letter of the alphabet and you get a 4 lettered word. Zoom out.

zoom back to the last drawer under the blue tiles and enter code. We have another blue tile and fish food. Hm. That fish did look hungry. Zoom out.

zoom on fish. Let's feed it with the fish food. While it is eating click on the shell in the tank. Look at shell in inventory and use knife to pry open. We have another pearl!! Zoom out.

zoom in to blue tiled wall. The last tile is right there. Lets solve the puzzle. Its a sliding puzzle.

its a mermaid with a pearl. Remember that top drawer below which didn't open? Zoom out

zoom into top drawer and retrieve ring box.open to reveal a pearl ring. Lets pry that pearl off with the knife. We now have 3 pearls. Didn't we see 3 little holes somewhere? Oh! The dolphins! Zoom out

zoom into the dolphins and place pearls in holes. We have a door key! Huzzah! Use key to escape!

Reply

Pearl Room Escape Walkthrough

General Information

  • There is no navigation this time around, everything is in front of you on three walls.

  • There are some color-based puzzles, so this walkthrough will contain directions for the colorblind.

  • Don't forget to examine items you pick up, they may hold a clue.

  • The name of the game is Pearl Room Escape, so pearls might play a part in the escape. Just saying.

  • Good luck!

Exploration

  • You begin facing the room in the only view you'll get. On the right wall are a window and a ladder. On the left wall is the door out.

  • Click on the window on the right for a close up.

  • Pull the cord for the blinds and you will get a lovely view of the tropics, and a small blue tile sitting on the windowsill. Take the tile (tile 1).

  • Back up.

  • Now that the blinds on the window are open, you see a patch of sunlight below the window on the floor. Click on this patch for a close up.

  • Hmmm, there appears to be a raised board here, but we can't open it. Back up.

  • Click on the ladder for a close up. Okay, it's screwed down. Back up.

  • There's a round table in front of you, click on it for a close up.

  • On the table is a tasty cocktail with a purple umbrella in it. There is also a tile (tile 2). Take the tile and the umbrella.

  • While the umbrella is in close up click on it to turn it over. A clue! A yellow moon, a red star, and a blue gear.

  • Back up.

  • On the right side of the back wall are some shelves near the ceiling divided into eight cubbyholes, each holding a jar. Click on the cubbies for a close up.

  • Okay, we have jars of various numbers and colors of marbles.

  • Does the shape of those shelves look funny to you?

  • On the bottom row, second jar from the left, that particular jar has three marbles, but one of the marbles is not the same color as any other in any jar. Click on that marble and take it (pearl 1).

  • Back up.

  • In the middle of the back wall is a large wall that looks like it has some blue tiles in it. Click on that wall for a close up.

  • Yup, blue tiles, with some missing spaces. If you count the missing spaces you will realize you need to find 10 blue tiles in the room. And one of them is sitting on a shelf right in front of the wall, take it (tile 3).

  • Below the tile wall are some drawers, click on them for a close up.

  • On the floor to the right of the drawers is tile 4, take it.

  • The top drawer won't open, and the bottom drawer needs a four letter code which we don't have. Back up.

  • On the left side of the back wall are some more high shelves with some opaque jars. Below the shelves is a figurine which appears to be of dolphins. Click on the figurine for a close up.

  • Hmmm, there are three holes in the base of the figurine. Back up.

  • We can't click on those high jars for a close up, but maybe later.

  • On the left wall is an aquarium, click on it for a close up.

  • And that looks like a piranha, so let's not stick our fingers in the aquarium just yet. All that is in there is a flesh-eating fish, a clam, some colored gravel, and a plant. Back up.

  • Above the aquarium are three cabinets, click on them for a close up.

  • Each cabinet is locked, and each needs a different code. The left cabinet needs a four color code, the middle cabinet needs a code that involves symbols and colors, and the right cabinet needs a four digit code. Back up.

  • On the left wall, above the door, are some pretty light fixtures. Click on the fixtures for a close up.

  • Okay, each fixture has beads on it, a different number of white beads, and five colored beads in different orders. There is also a blue tile up there, take it (tile 5).

  • Back up.

  • Let's solve some puzzles!

The Right Cabinet

  • Click on the three cabinets on the left wall for a close up.

  • The right cabinet needs a four digit clue.

  • The clue for this lock is the cubby shelves on the upper right part of the back wall, the ones that hold eight jars with marbles.

  • Didn't those shelves look a little...odd?

    • If you look closely, the shelves are actually in the shape of numbers.

    • The code is 3285.

  • Enter the code into the right cabinet lock and push the button underneath.

  • There's some stuff inside. Take the screwdriver and the tile (tile 6).

  • There is also a drawing inside that appears to show a ladder against the shelves where the dolphin figurine is. Hmmm....

  • Back up.

The Middle Cabinet

  • Click on the three cabinets on the left wall for a close up.

  • The middle cabinet appears to need a code involving both symbols and colors.

  • Where have we seen these symbols before?

    • We've seen the symbols before on the purple umbrella we got from the cocktail. It showed a yellow moon, a red star, and a blue gear.

    • For the colorblind: each symbol starts out as a blue star. Click it once and it turns red, twice and it turns yellow. On the third click it changes to a blue gear.

    • To enter the code properly (from left to right): eight clicks (yellow moon), one click (red star), and three clicks (blue gear).

  • Once you enter the code the cabinet opens. Inside you will find a knife and another blue tile (tile 7). Take both.

  • Back up.

The Left Cabinet

  • Click on the three cabinets on the left wall for a close up.

  • The left cabinet needs a clue involving four colors.

  • Note that the lock only shows four colors, yellow, red, blue, and green.

  • Where have we seen those colors before?

    • You've seen those colors in the beads on the light fixtures above the door on the left.

    • Also on the light fixtures are a fifth color, purple, and some white beads.

    • The white beads are the key. The number of white beads indicates which colored bead (from the top) is the correct color for that position.

    • The first fixture (on the left) has three white beads. The third color down is blue.

    • The second fixture has four white beads. The fourth color down is yellow.

    • The third fixture has three white beads. The third color down is red.

    • The fourth fixture has four white beads. The fourth color down is green.

    • For the colorblind: The four digit color code starts on yellow. The combination is blue, yellow, red, and green, so you click the buttons from left to right: three times, zero times, two times, once.

  • Once you've entered the color code, click on the button below the lock and the cabinet will open.

  • Inside you will find a blue tile (tile 8). Take it.

  • There is also a note inside the door, T=20.

  • Back up.

The Loose Floorboard

  • Remember that raised floorboard below the window on the right? Click on it for a close up.

  • Once in close up use the knife on the floorboard.

  • The floorboard will pop up and you will find another blue tile (tile 9).

  • Take the tile and back up.

The Ladder

  • Click on the ladder for a close up.

  • Yep, still screwed down. But now we have a screwdriver!

  • Use the screwdriver to remove both screws. Once they are gone, take the ladder and back up.

  • Remember the picture in the right cabinet?

  • Click on the shelf with the dolphin figurines for a close up.

  • Use the ladder on the space to the right of the figurines.

  • Yay, it fits!

  • Click on the colored jars above the ladder and you can now see them in close up.

  • From left to right, they are a brown jar with the number 2, a green jar with the number 5, a yellow jar with the number 1, and a pink jar with the number 4. I'm sure that means something.

  • Back up.

The Bottom Drawer

  • Let's turn our attention to those two drawers below the wall of tiles.

  • The top drawer is mysteriously locked, but the bottom drawer needs a four letter code, so we should be able to get into that one.

  • Click on the drawers for a close up.

  • But what four letters do we use?

    • There are two clues for this puzzle: The note inside the left cabinet (T = 20) and the colored jars with the numbers 2514.

    • Ignore the color of the jars, the only important thing is the numbers.

    • T=20 is how you break the code. T is the 20th letter of the alphabet.

    • Therefore the number code 2514 stands for BEAD (B = 2nd letter, E = 5th letter, A = 1st letter, D = 4th letter).

  • Once you enter the four letter code click on the button underneath and the drawer will fall open.

  • Inside you will find some piranha food and the last tile (tile 10). Take both and back up.

The Tile Wall

  • You should now have found all 10 blue tiles.

  • Click on the tile wall for a close up then use the tiles on the wall. This will trigger a puzzle.

  • Swap two tiles at a time until you create the picture (a mermaid).

  • Screenshot.

  • Once you have the puzzle complete you will hear a small chime. Back up.

  • Click on the drawers beneath the puzzle for a close up.

  • You can now open the top drawer.

  • Inside is a red box, take it.

  • Back up.

The Pearls

  • You should have already found the first pearl, it is in one of the jars in the upper right shelf/cubbies (bottom row, second from the left).

  • Pull up the red box from your inventory. Once it is in close up open it.

  • Inside is a pearl ring! Use the knife on the ring to pry out the pearl (pearl 2).

  • Now click on the aquarium.

  • Once the aquarium is in close up, use the piranha food on the left side of the tank (where the plant is).

  • Once the fish stops swimming and starts eating, click on the clam to take it.

  • Pull up the clam from your inventory. Once it is in close up, use the knife on it to shuck it open and take the third and last pearl.

  • Back up.

Getting Out

  • Now all you have in your inventory are the three pearls.

  • Click on the dolphin figurine for a close up.

  • Look at the base, there are three round holes there.

  • Place the pearls in the holes in the base of the dolphin figurine.

  • When all three are placed a hidden compartment opens up, revealing a pearl key. Take the key and back up.

  • Click on the door for a close up. Use the key on the door and you're out!

  • Enjoy the tropical scenery!

Reply
Anonymous June 15, 2011 6:55 AM

good game!
not too easy, not too hard.

Reply

Hmmm... I seriously think I should stop playing escape games on Tuesday... Third time in a row that I played Weekday Escape's game one day earlier :D

But at least I know you picked a good game again. I enjoyed it a lot.

bio

Reply

This was a good escape... maybe a little too easy, but nothing illogical. I particularly enjoyed the...

Misdirection with the shelves in the top right, making you focus on the pattern of balls in the jars instead of the shelves themselves.

Laughed out loud when I realized that after staring at it for a while.

Reply
Papachabre June 15, 2011 12:27 PM

Perfect! It was enjoyable, I didn't need any hints and I was done before my lunch break was over. Just how I like my weekday escapes.

Reply

I cannot get past the "slider" puzzle. It is a mermaid with a pearl in her hand and I KNOW I am getting it correct. But nothing happens and when you back away.... it RESETS!!! very frustrating. I was having a good time until that. :(

Reply

Ok. Thank you grinnyp for the screenshot. (sigh) Mermaids are ... under ... the water. I thought she was floating on the surface and the bottom of her tail made a nice bird in the sky.

Reply

That was beautiful. I wish the watercolor painting, that appeared after the game, had stayed displayed longer. 6 stars

Reply
wildflower12 June 16, 2011 2:07 AM

Thanks for the hint nerdypants about the bells. That is where I was stumped for a while.

Reply
hikari no sakura June 16, 2011 9:20 AM

Truly, TomaTea is the first non-Japanese room-escape-maker I really like. (not including PnCs)

Yay for telling the player he hasn't found the clues yet!

Reply

PIRANHA

That is all.

Reply

^ Scroll Up | Homepage >

Leave a comment [top of page]

Please consider creating a Casual Gameplay account if you're a regular visitor here, as it will allow us to create an even better experience for you. Sign-up here!
  • PLEASE UNDERSTAND SITE POLICIES BEFORE POSTING COMMENTS
  • You may use limited HTML tags for style:
    (a href, b, br/, strong, em, ul, ol, li, code, spoiler)
    HTML tags begin with a less-than sign: < and end with a greater-than sign: >. Always. No exceptions.
  • To post spoilers, please use spoiler tags: <spoiler> example </spoiler>
    If you need help understanding spoiler tags, read the spoiler help.
  • Please Preview your comment before posting, especially when using spoilers!
  • No link dropping, no domains as names; do not spam, and do not advertise! (rel="nofollow" in use)
chrpa Jayisgames needs your help to continue providing quality content. Click for details Welcome to the Roundup 66 - Retro with four games! After you find the ten monkeys in the chapter, look in the inventory. You will find a...  ...
chrpa Jayisgames needs your help to continue providing quality content. Click for details Welcome to the Roundup 65 with three games! As mentioned in the previous roundups, only odd-numbered episodes are featured since even-numbered are for Robin Vencel's patrons (the...  ...
chrpa Jayisgames needs your help to continue providing quality content. Click for details Hi! Weekday Escape and Weekday Puzzle are here! First we have two new cans from tomoLaSiDo and then two small rooms from isotronic. That's all for this...  ...
6,365 Views
0 Comments
chrpa Jayisgames needs your help to continue providing quality content. Click for details Welcome to Mobile Monday! We have another beautiful game from Nicolet and it's a winter game as it should be. Tasuku Yahiro have released another of their...  ...

HELP Jayisgames.com

Recent Comments


Display 5 more comments
Limit to the last 5 comments

Game of the week


Dark Romance: Vampire Origins Collector's Edition

Your Favorite Games edit

add
Save links to your favorite games here. Use the Favorites editor.

Monthly Archives