JayisGames.com is now available ad-free!
Jay is Games recommends Cheat Happens with 8,000+ games and 35,000+ trainers!

Monument Valley


  • Currently 4.4/5
  • 1
  • 2
  • 3
  • 4
  • 5
Rating: 4.4/5 (84 votes)
Comments (26) | Views (24,446)

Monument Valley

(Update: As of May 14, Monument Valley is available on Android!)

JohnB
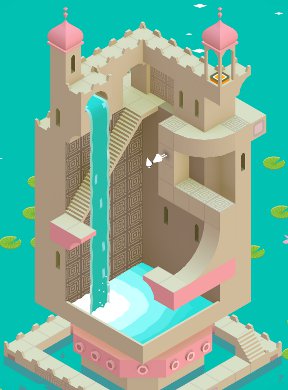
Monument Valley is a creative puzzle game that looks like something Wonderputt developer Reece Millidge would create and plays like Echochrome (or BOXGAME, if you like), even though it's made by ustwo, the developer of Whale Trail. Set in a surreal world of shapes and tricky perspectives, you control Ida as she ventures from level to level, walking on walls and twisting platforms as she tries to figure out where she's at and what the heck is going on in this dreamlike world.

Monument ValleyAll you have to do in Monument Valley is tap to send Ida walking along the path. Drag and twist blocks to move them around, altering the landscape so she can get from point A to point B. Here's the catch, though: Monument Valley isn't about realistic depth or direction, it's about perspective. If a block looks like it's touching another block, it is, even if the 3D logical side of your brain says it's above or in front. Sometimes you'll turn the same block a few times to move across an entire level, even though that "shouldn't" be possible!

Monument Valley more about the puzzles than the story, but it still feels like an adventure game. One that takes place in the most bizarre Arabian Nights tale you could imagine. There's a great sense of awe as you explore the stages, both in terms of the gameplay and the mysterious characters you'll encounter. Monument Valley is simple enough to immediately understand, but it provides enough wonder and amazement for hours on end.

Download on the AppstoreMonument Valley (iPhone, iPod Touch, iPad)

Google PlayMonument Valley (Android)

Walkthrough Guide


(Please allow page to fully load for spoiler tags to be functional.)

Monument Valley Walkthrough

Chapter 1: Introduction

-Rotate the handle 90 degrees clockwise.
-Move Ida to the finish.

Chapter 2: The Garden

-Rotate the handle 90 degrees anticlockwise.
-Move Ida to the button.
-Move Ida back to her starting position.
-Rotate the handle 90 degrees clockwise.
-Move Ida to the button.
-Rotate the handle 90 degrees clockwise.
-Move Ida to the finish.

Chapter 3: Hidden Temple

Scene 1: Outside

-Drag the nearest row of blocks all the way to the left.
-Move Ida so that she is on top of them.
-Drag the nearest row of blocks all the way to the right.
-Drag the second row of blocks all the way to the right.
-Move Ida to the second row of blocks.
-Drag the second row of blocks all the way to the left.
-Move Ida to the doorway.
-Drag the column of blocks down.
-Move Ida so that she is on top of them.
-Drag the column of blocks up.
-Move Ida to the switch.
-Move Ida to the doorway.

Scene 2: Inside

-Move Ida to the ghost.
-Progress through the dialogue.
-Move Ida down the stairs, then up three ladders. The ghost will disappear.
-Attempt to cross the bridge. It will collapse.
-Move Ida to the patterned section of floor.
-Drag the left column of blocks all the way down.
-Move Ida up two ladders.
-Drag the right column of blocks up all the way.
-Move Ida onto the new platform.
-Drag the right column of blocks down until both moving floors are level with each other.
-Move Ida onto the right side.
-Drag the right column of blocks all the way up.
-Move Ida to the button.
-Move Ida to the finish.

Chapter 4: Water Palace

Scene 1: The Pink Platform

-Rotate the handle 180 degrees.
-Move Ida up both flights of stairs.
-Rotate the pink platform 90 degrees clockwise.
-Move Ida onto the new path.
-Rotate the pink platform 180 degrees.
-Move Ida to the button.
-Move Ida back onto the path on the pink platform.
-Rotate the pink platform 90 degrees anticlockwise.
-Move Ida all the way along the path.
-Rotate the pink platform 180 degrees.
-Move Ida to the doorway.

Scene 2: The Waterfall Conundrum

-Move Ida to the button.
-Drag the wall of blocks (on the left) all the way to the front.
-Move Ida to the button.
-Rotate the pink base 180 degrees.
-Move Ida to the platform near the base of the waterfall.
-Rotate the pink base 90 degrees anticlockwise.
-Move Ida to the button.

Scene 3: Changing Directions

-Move Ida onto the pink platform.
-Rotate the pink platform 90 degrees anticlockwise.
-Move Ida up, off the platform.
-Rotate the pink platform 90 degrees (either direction).
-Move Ida onto the other rotating platform.
-Rotate the pink platform 90 degrees anticlockwise.
-Rotate the white cross 90 degrees anticlockwise.
-Move Ida to the doorway.
-Move Ida to the ghost, and progress through the dialogue.
-Move Ida to the doorway.
-Rotate the pink platform 90 degrees.
-Move Ida to the finish.

Chapter 5: The Spire

Scene 1: The Crows

-Move Ida to the button on the left, timing your movements to avoid the crows.
-Rotate the handle 180 degrees.
-Move Ida up the new staircase, timing your movements to avoid the crows.
-Rotate the handle 180 degrees.
-Move Ida to the button, timing your movements to avoid the crows.
-Move Ida to the doorway, timing your movements to avoid the crows.

Scene 2: The Rooftop Walkway

-Move Ida to the base of the stairs on the left.
-Rotate the handle 180 degrees.
-Move Ida to the button.
-Move Ida to the base of the stairs again (slightly to the left of her starting position)
-When the crow is on the colored section of floor, rotate the handle 180 degrees.
-Move Ida up to the walkway on the roof, causing the crow to start walking.
-Move Ida back a bit, onto the stairs.
-Wind the handle until the colored section is flat with the roof.
-When the crow is on the side close to the stairs, wind the handle again until a new section of floor appears.
-When the crow is on that section of colored floor, wind the handle again until the walkway is flat.
-Move Ida to the doorway.

Scene 3: The Orange Climb

-Move Ida to the doorway, timing your movements to avoid the crows.

Scene 4: Diversion

-Rotate the left handle 90 degrees.
-Wait until the crow has moved onto the other section of path (there will be a musical cue) and rotate the left handle 90 degrees.
-Move Ida to the doorway.
-When the crow is above the U-shaped pit, rotate the right handle 90 degrees anticlockwise.
-Wait until the crow has moved onto the other section of path (there will be a musical cue) and rotate the right handle 90 degrees clockwise.
-Move Ida to the doorway.

Scene 5: The Peak

-Move Ida one place to the left of the doorway.
-Rotate the base 180 degrees anticlockwise (note that the tower itself will only rotate 90 degrees).
-Move Ida as far to the front as possible.
-Rotate the base 180 degrees clockwise.
-Move Ida to the base of the stairs.
-Rotate the base 180 degrees clockwise (you will not be able to see Ida).
-Move Ida to the small tower on the far right. (Underneath the rightmost crow)
-Rotate the base 360 degrees.
-Move Ida onto the patterned square next to the central tower.
-Rotate the base 180 degrees clockwise.
-Move Ida one place to the front.
-Rotate the base 180 degrees anticlockwise.
-Move Ida to the base of the staircase.
-Rotate the base 360 degrees.
-Move Ida up both ladders.
-Rotate the base 180 degrees anticlockwise.
-Move Ida to the finish.

Chapter 6: The Labyrinth

Scene 1: Totem Poles

-Drag the column of blocks down.
-Move Ida as far forward as you can.
-Drag the column of blocks up.
-Move Ida up the stairs. Totem will rise up, and the totem poles will fall.
-Drag Totem to the button.

Scene 2: The Red Labyrinth

-Move Totem to the button.
-Move Totem next to the front-most button.
-Move Ida to the button.
-Move Ida back onto Totem.
-Move Totem all the way along the path.
-Move Ida down a set of stairs to the four-dot button.
-Note that button is only active when Ida is standing on it.
-Move Ida off the button.
-Move Totem as far to the front as possible.
-Move Ida onto the four-dot button.
-Move Totem next to the collapsed bridge at the right.
-Move Ida up two stairs and a ladder to get back onto Totem.
-Move Totem all the way along the path.
-Move Ida onto the four-dot button.
-Move Totem to the normal button, along the newly raised path.
-Move Totem as far back as possible
-Move Ida to the doorway.
-Move Totem to the revealed button.

Scene 3: The Tower and the Two Buttons

-Move Totem to the button at the front.
-Rotate the handle 180 degrees.
-Move Totem as far right as possible.
-Rotate the handle 180 degrees.
-Move Ida up the stairs.
-Rotate the handle 180 degrees.
-Move Ida onto Totem.
-Move Totem as far left as possible.
-Move Ida onto the button.
-Rotate the handle 180 degrees.
-Move Totem as far right as possible.
-Rotate the handle 180 degrees.
-Move Totem onto the button to the right.
-Move Ida onto the button to the left.

Scene 3: The Crossroads

-Move Totem so that he is above the handle.
-Rotate the handle 90 degrees.
-Move Totem as far left as possible.
-Rotate the handle 90 degrees.
-Move Ida onto Totem.
-Rotate the handle 90 degrees.
-Move Totem as far right as possible.
-Move Ida to the button.
-Move Totem so that he is directly above the handle.
-Rotate the handle 90 degrees.
-Move Ida onto Totem.
-Move Totem to the base of the tower with the doorway.
-Drag the column of blocks (to the right) down.
-Move Totem to the back.
-Move Ida to the doorway.

Scene 4: Outside the Labyrinth

-Move Ida to the finish.

Chapter 7: The Rookery

Scene 1: The Lost Crow

-Rotate the handle 90 degrees.
-When the crow is on the upper colored section, rotate the handle 90 degrees.
-Move Ida over the colored section.
-Rotate the handle 90 degrees.
-Move Ida to the doorway.

Scene 2: The Controller

-Drag the row of blocks to the right.
-After the crow hits the right button twice, drag the row of blocks to the left.
-After the crow hits the left button twice, drag the row of blocks into the center.
-Move Ida onto the first colored shape.
-Drag the row of blocks to the right.
-After the crow hits the right button twice, drag the row of blocks to the center.
-Move Ida as far left as possible.
-Drag the row of blocks to the left.
-After the crow hits the left button twice, drag the row of blocks to the center.
-Move Ida to the leftmost button.
-Move Ida onto the colored shape.
-Drag the row of blocks to the right.
-After the crow hits the right button three times, drag the row of blocks to the center.
-Move Ida to the doorway.

Scene 3: The Pulley

-Move Ida to the button.
-Move Ida to the doorway. Before the crow can reach his button, drag the column of blocks down.
-Move Ida to the next doorway.

Scene 4: A Third Encounter

-Talking to the ghost is optional.
-Move Ida to the doorway.

Scene 5: The Throne

-Move Ida up the stairs.
-Rotate the scene 180 degrees.
-Move Ida to the base of the now reachable staircase.
-Rotate the scene 90 degrees anticlockwise.
-Move Ida up the stairs.
-Rotate the scene 90 degrees anticlockwise. You will not be able to see Ida.
-Move Ida to the lower button.
-Move Ida to the highest patterned square.
-Rotate the scene 90 degrees anticlockwise.
-Move Ida to the base of the red staircase.
-Rotate the scene 90 degrees clockwise.
-Move Ida to the button.
-Move Ida to the finish.

Chapter 8: The Box

Part 1: The Four Colors

-Open the box by the lower right bumps.
-Raise the column of blocks one space.
-When the crow is on the left side, lower the column of blocks as far as you can.
-When the crow is on the right side, raise the column of blocks 3 spaces.
-When the crow presses the button, close the box.
-Open the box by the upper right bumps.
-Move Ida to the button.
-Move Ida to the upper doorway.
-Close the box.
-Open the box by the lower left bumps.
-Move Ida to the button, timing your movements to get on and off the rotating platform.
-Move Ida to the doorway, timing your movements to get on and off the rotating platform.
-Close the box.
-Open the box by the upper right bumps.
-Move Ida to the lower doorway.
-Close the box.
-Open the box by the upper left bumps.
-Move Ida to the lower right doorway.
-Move Ida to the button.

Part 2: Expanding the Box

-Rotate the handle 180 degrees.
-Drag the column of blocks (at the right edge of the box) up.
-Rotate the handle 180 degrees clockwise.
-Rotate the newly revealed handle 180 degrees.

Part 3: Exploring the Box

-Move Ida to the only reachable button.
-Move Ida to the doorway.
-Move Ida to the only reachable button.
-Move Ida to the doorway.
-Move Ida to the last button.
-Move Ida to the finish.

Chapter 9: The Descent

Scene 1: The Ocean

-Move Ida to the red flower, and she will pick it up.
-The sea level will now adjust to where you are.
-Move Ida down two staircases, a ladder, and then another staircase.
-Rotate the handle four full revolutions anticlockwise.
-Move Ida to the button.
-Move Ida down the ladder and up the stairs.
-Rotate the handle four full revolutions clockwise.
-Move Ida down the ladder.
-Rotate the handle four full revolutions anticlockwise.
-Move Ida as far left as possible.
-Rotate the handle two full revolutions clockwise.
-Move Ida down the ladder, then up the ladder at the right.
-Rotate the handle two full revolutions anticlockwise.
-Move Totem next to Ida.
-Move Totem as far right as possible.
-Move Ida to the doorway.

Scene 2: The Pit

-Pull the ring on the wall as far out as possible.
-Move Ida down a set of stairs.
-Drag the section of blocks at the left up one space.
-Move Ida down a set of stairs and then a ladder.
-Drag the section of blocks at the left down one space.
-Rotate the handle 90 degrees anticlockwise.
-Move Ida to the patterned square.
-Rotate the handle 90 degrees clockwise.
-Move Ida to the button.
-Move Ida to the patterned square.
-Rotate the handle 180 degrees.
-Drag the section of blocks at the left up one space.
-Move Ida down a set of stairs and then a ladder.
-Rotate the handle 180 degrees.
-Move Ida to the ladder at the very bottom.

Scene 3: The Final Descent

-Move Ida down three sets of stairs, and then press all three available buttons.
-Move Ida to the fourth button which was raised.
-Move Ida down three sets of stairs, but don't enter the lighter colored floor.
-Rotate the handle until the path ahead is clear.
-Move Ida to the lowermost position.
-Drag the large stone tablet down one space.
-Move Ida to and down the ladder.
-Talking to the ghost is optional.
-Move Ida to the lowermost position.
-Keep going down the stairs, and following the path.
-Move Ida to the coffin.

Chapter 10: Observatory

Hub

There are three doorways. One in the floor (DOOR 1), one in a normal orientation (DOOR 2), and one at the top of the cube (DOOR 3).

The bumps at the top of the cube change your view.
The bumps at the bottom spin the colored spinners.

Please note that these are not exact directions, but just a general idea of how to get to them.

Door 1 can be reached by getting yourself one the outer face of the crow side. It will be necessary to use the two vertical spinners which are near the crow.

Door 2 can be reached by getting yourself on the inside of the bottom surface of the cube, and walking around the three curves there. It will be necessary to use the two spinners on the bottom.

Door 3 can be reached by walking through a hollowed out corner at the top of the cube. It will be necessary to use the vertical blue spinner.

Door 1

-Rotate the column of blocks (to the right) 180 degrees.
-Move Ida to the top side of the white rectangle.
-Rotate the column of blocks 90 degrees clockwise.
-Move Ida to the lowest doorway.
-Rotate the column of blocks 90 degrees anticlockwise.
-Move Ida to the doorway.
-Rotate the column of blocks 90 degrees clockwise.
-Move Ida to the button.
-Move Ida to the doorway.

Door 2

-Move Ida as far right as possible.
-Rotate the structure 180 degrees.
-Move Ida to the lowest doorway.
-Rotate the structure 90 degrees clockwise.
-Move Ida as far left as possible.
-Rotate the structure 90 degrees clockwise.
-Move Ida to the doorway.
-Rotate the structure 90 degrees clockwise.
-Move Ida as far right as possible.
-Rotate the structure 180 degrees.
-Move Ida as far left as possible.
-Rotate the structure 90 degrees clockwise.
-Move Ida to the doorway.
-Rotate the structure 180 degrees.
-Move Ida as far left as possible.
-Rotate the structure 180 degrees.
-Move Ida to the button.
-Move Ida as far left as possible.
-Rotate the structure 180 degrees.
-Move Ida to the doorway.

Door 3

-Rotate the structure 180 degrees.
-Move Ida to the place on the left where the bumps are on the very outside.
-Rotate the structure 180 degrees.
-Move Ida to the curve at the bottom right.
-Rotate the structure 90 degrees anticlockwise.
-Move Ida down the stairs.
-Rotate the structure 90 degrees anticlockwise.
-Move Ida to the button.
-Rotate the structure 180 degrees.
-Move Ida to the doorway.

Final Hub

-Get Ida to the horizontal blue spinner at the bottom, standing in normal orientation.
-Spin the structure until the diagonally cut corner is closest to you.
-Move Ida to the finish.

26 Comments

ThemePark April 3, 2014 6:51 PM

As I don't have an iDevice I can't play this, but what's funny is that the second I saw the screenshot, I thought Wonderputt 2. And the description of the game certainly takes the mind to the first Echochrome game.

Reply
thegreatescaper April 4, 2014 4:36 AM

Achingly beautiful, but also achingly short, Monument Valley manages to retain its magic even on third playthrough, something many other atmospheric experiences have failed to achieve (Year Walk, Room 1&2).

Chapter 4 was when this game really hit home for me; after I completed it, I really knew I was going to love this game.

Chapter 8 was also a magical experience, but it was a bit too simple puzzle-wise.

My least favorite chapter was 7, as it was a bit repetitive and didn't really introduce anything new... or maybe I was just feeling a bit sad after

The Totem tried to come with Ida

A relaxing, and quiet game with surprising emotional strength, even with minimal story.

A must-play for all people who enjoyed The Room, Year Walk, or Kairo. 4.5/5

Reply
MtDewed April 4, 2014 2:35 PM

Developer say it is coming to android. They have a trailer to watch too. Looks pretty cool.

Reply

Fantastic game, I hope to see a walkthrough on JiG asap.

Reply
thegreatescaper April 5, 2014 9:30 AM

Yeah I'm working on a walkthrough... got first 5 chapters done.

I'll post the completed one probably tomorrow.

Reply

Thanks TheGreatEscaper :)

Reply

Level 10, the last gate help plz I'm going nuts lol!!!

Reply
thegreatescaper April 5, 2014 10:38 PM

Monument Valley Walkthrough

Chapter 1: Introduction

-Rotate the handle 90 degrees clockwise.
-Move Ida to the finish.

Chapter 2: The Garden

-Rotate the handle 90 degrees anticlockwise.
-Move Ida to the button.
-Move Ida back to her starting position.
-Rotate the handle 90 degrees clockwise.
-Move Ida to the button.
-Rotate the handle 90 degrees clockwise.
-Move Ida to the finish.

Chapter 3: Hidden Temple

Scene 1: Outside

-Drag the nearest row of blocks all the way to the left.
-Move Ida so that she is on top of them.
-Drag the nearest row of blocks all the way to the right.
-Drag the second row of blocks all the way to the right.
-Move Ida to the second row of blocks.
-Drag the second row of blocks all the way to the left.
-Move Ida to the doorway.
-Drag the column of blocks down.
-Move Ida so that she is on top of them.
-Drag the column of blocks up.
-Move Ida to the switch.
-Move Ida to the doorway.

Scene 2: Inside

-Move Ida to the ghost.
-Progress through the dialogue.
-Move Ida down the stairs, then up three ladders. The ghost will disappear.
-Attempt to cross the bridge. It will collapse.
-Move Ida to the patterned section of floor.
-Drag the left column of blocks all the way down.
-Move Ida up two ladders.
-Drag the right column of blocks up all the way.
-Move Ida onto the new platform.
-Drag the right column of blocks down until both moving floors are level with each other.
-Move Ida onto the right side.
-Drag the right column of blocks all the way up.
-Move Ida to the button.
-Move Ida to the finish.

Chapter 4: Water Palace

Scene 1: The Pink Platform

-Rotate the handle 180 degrees.
-Move Ida up both flights of stairs.
-Rotate the pink platform 90 degrees clockwise.
-Move Ida onto the new path.
-Rotate the pink platform 180 degrees.
-Move Ida to the button.
-Move Ida back onto the path on the pink platform.
-Rotate the pink platform 90 degrees anticlockwise.
-Move Ida all the way along the path.
-Rotate the pink platform 180 degrees.
-Move Ida to the doorway.

Scene 2: The Waterfall Conundrum

-Move Ida to the button.
-Drag the wall of blocks (on the left) all the way to the front.
-Move Ida to the button.
-Rotate the pink base 180 degrees.
-Move Ida to the platform near the base of the waterfall.
-Rotate the pink base 90 degrees anticlockwise.
-Move Ida to the button.

Scene 3: Changing Directions

-Move Ida onto the pink platform.
-Rotate the pink platform 90 degrees anticlockwise.
-Move Ida up, off the platform.
-Rotate the pink platform 90 degrees (either direction).
-Move Ida onto the other rotating platform.
-Rotate the pink platform 90 degrees anticlockwise.
-Rotate the white cross 90 degrees anticlockwise.
-Move Ida to the doorway.
-Move Ida to the ghost, and progress through the dialogue.
-Move Ida to the doorway.
-Rotate the pink platform 90 degrees.
-Move Ida to the finish.

Chapter 5: The Spire

Scene 1: The Crows

-Move Ida to the button on the left, timing your movements to avoid the crows.
-Rotate the handle 180 degrees.
-Move Ida up the new staircase, timing your movements to avoid the crows.
-Rotate the handle 180 degrees.
-Move Ida to the button, timing your movements to avoid the crows.
-Move Ida to the doorway, timing your movements to avoid the crows.

Scene 2: The Rooftop Walkway

-Move Ida to the base of the stairs on the left.
-Rotate the handle 180 degrees.
-Move Ida to the button.
-Move Ida to the base of the stairs again (slightly to the left of her starting position)
-When the crow is on the colored section of floor, rotate the handle 180 degrees.
-Move Ida up to the walkway on the roof, causing the crow to start walking.
-Move Ida back a bit, onto the stairs.
-Wind the handle until the colored section is flat with the roof.
-When the crow is on the side close to the stairs, wind the handle again until a new section of floor appears.
-When the crow is on that section of colored floor, wind the handle again until the walkway is flat.
-Move Ida to the doorway.

Scene 3: The Orange Climb

-Move Ida to the doorway, timing your movements to avoid the crows.

Scene 4: Diversion

-Rotate the left handle 90 degrees.
-Wait until the crow has moved onto the other section of path (there will be a musical cue) and rotate the left handle 90 degrees.
-Move Ida to the doorway.
-When the crow is above the U-shaped pit, rotate the right handle 90 degrees anticlockwise.
-Wait until the crow has moved onto the other section of path (there will be a musical cue) and rotate the right handle 90 degrees clockwise.
-Move Ida to the doorway.

Scene 5: The Peak

-Move Ida one place to the left of the doorway.
-Rotate the base 180 degrees anticlockwise (note that the tower itself will only rotate 90 degrees).
-Move Ida as far to the front as possible.
-Rotate the base 180 degrees clockwise.
-Move Ida to the base of the stairs.
-Rotate the base 180 degrees clockwise (you will not be able to see Ida).
-Move Ida to the small tower on the far right. (Underneath the rightmost crow)
-Rotate the base 360 degrees.
-Move Ida onto the patterned square next to the central tower.
-Rotate the base 180 degrees clockwise.
-Move Ida one place to the front.
-Rotate the base 180 degrees anticlockwise.
-Move Ida to the base of the staircase.
-Rotate the base 360 degrees.
-Move Ida up both ladders.
-Rotate the base 180 degrees anticlockwise.
-Move Ida to the finish.

Chapter 6: The Labyrinth

Scene 1: Totem Poles

-Drag the column of blocks down.
-Move Ida as far forward as you can.
-Drag the column of blocks up.
-Move Ida up the stairs. Totem will rise up, and the totem poles will fall.
-Drag Totem to the button.

Scene 2: The Red Labyrinth

-Move Totem to the button.
-Move Totem next to the front-most button.
-Move Ida to the button.
-Move Ida back onto Totem.
-Move Totem all the way along the path.
-Move Ida down a set of stairs to the four-dot button.
-Note that button is only active when Ida is standing on it.
-Move Ida off the button.
-Move Totem as far to the front as possible.
-Move Ida onto the four-dot button.
-Move Totem next to the collapsed bridge at the right.
-Move Ida up two stairs and a ladder to get back onto Totem.
-Move Totem all the way along the path.
-Move Ida onto the four-dot button.
-Move Totem to the normal button, along the newly raised path.
-Move Totem as far back as possible
-Move Ida to the doorway.
-Move Totem to the revealed button.

Scene 3: The Tower and the Two Buttons

-Move Totem to the button at the front.
-Rotate the handle 180 degrees.
-Move Totem as far right as possible.
-Rotate the handle 180 degrees.
-Move Ida up the stairs.
-Rotate the handle 180 degrees.
-Move Ida onto Totem.
-Move Totem as far left as possible.
-Move Ida onto the button.
-Rotate the handle 180 degrees.
-Move Totem as far right as possible.
-Rotate the handle 180 degrees.
-Move Totem onto the button to the right.
-Move Ida onto the button to the left.

Scene 3: The Crossroads

-Move Totem so that he is above the handle.
-Rotate the handle 90 degrees.
-Move Totem as far left as possible.
-Rotate the handle 90 degrees.
-Move Ida onto Totem.
-Rotate the handle 90 degrees.
-Move Totem as far right as possible.
-Move Ida to the button.
-Move Totem so that he is directly above the handle.
-Rotate the handle 90 degrees.
-Move Ida onto Totem.
-Move Totem to the base of the tower with the doorway.
-Drag the column of blocks (to the right) down.
-Move Totem to the back.
-Move Ida to the doorway.

Scene 4: Outside the Labyrinth

-Move Ida to the finish.

Chapter 7: The Rookery

Scene 1: The Lost Crow

-Rotate the handle 90 degrees.
-When the crow is on the upper colored section, rotate the handle 90 degrees.
-Move Ida over the colored section.
-Rotate the handle 90 degrees.
-Move Ida to the doorway.

Scene 2: The Controller

-Drag the row of blocks to the right.
-After the crow hits the right button twice, drag the row of blocks to the left.
-After the crow hits the left button twice, drag the row of blocks into the center.
-Move Ida onto the first colored shape.
-Drag the row of blocks to the right.
-After the crow hits the right button twice, drag the row of blocks to the center.
-Move Ida as far left as possible.
-Drag the row of blocks to the left.
-After the crow hits the left button twice, drag the row of blocks to the center.
-Move Ida to the leftmost button.
-Move Ida onto the colored shape.
-Drag the row of blocks to the right.
-After the crow hits the right button three times, drag the row of blocks to the center.
-Move Ida to the doorway.

Scene 3: The Pulley

-Move Ida to the button.
-Move Ida to the doorway. Before the crow can reach his button, drag the column of blocks down.
-Move Ida to the next doorway.

Scene 4: A Third Encounter

-Talking to the ghost is optional.
-Move Ida to the doorway.

Scene 5: The Throne

-Move Ida up the stairs.
-Rotate the scene 180 degrees.
-Move Ida to the base of the now reachable staircase.
-Rotate the scene 90 degrees anticlockwise.
-Move Ida up the stairs.
-Rotate the scene 90 degrees anticlockwise. You will not be able to see Ida.
-Move Ida to the lower button.
-Move Ida to the highest patterned square.
-Rotate the scene 90 degrees anticlockwise.
-Move Ida to the base of the red staircase.
-Rotate the scene 90 degrees clockwise.
-Move Ida to the button.
-Move Ida to the finish.

Chapter 8: The Box

Part 1: The Four Colors

-Open the box by the lower right bumps.
-Raise the column of blocks one space.
-When the crow is on the left side, lower the column of blocks as far as you can.
-When the crow is on the right side, raise the column of blocks 3 spaces.
-When the crow presses the button, close the box.
-Open the box by the upper right bumps.
-Move Ida to the button.
-Move Ida to the upper doorway.
-Close the box.
-Open the box by the lower left bumps.
-Move Ida to the button, timing your movements to get on and off the rotating platform.
-Move Ida to the doorway, timing your movements to get on and off the rotating platform.
-Close the box.
-Open the box by the upper right bumps.
-Move Ida to the lower doorway.
-Close the box.
-Open the box by the upper left bumps.
-Move Ida to the lower right doorway.
-Move Ida to the button.

Part 2: Expanding the Box

-Rotate the handle 180 degrees.
-Drag the column of blocks (at the right edge of the box) up.
-Rotate the handle 180 degrees clockwise.
-Rotate the newly revealed handle 180 degrees.

Part 3: Exploring the Box

-Move Ida to the only reachable button.
-Move Ida to the doorway.
-Move Ida to the only reachable button.
-Move Ida to the doorway.
-Move Ida to the last button.
-Move Ida to the finish.

Chapter 9: The Descent

Scene 1: The Ocean

-Move Ida to the red flower, and she will pick it up.
-The sea level will now adjust to where you are.
-Move Ida down two staircases, a ladder, and then another staircase.
-Rotate the handle four full revolutions anticlockwise.
-Move Ida to the button.
-Move Ida down the ladder and up the stairs.
-Rotate the handle four full revolutions clockwise.
-Move Ida down the ladder.
-Rotate the handle four full revolutions anticlockwise.
-Move Ida as far left as possible.
-Rotate the handle two full revolutions clockwise.
-Move Ida down the ladder, then up the ladder at the right.
-Rotate the handle two full revolutions anticlockwise.
-Move Totem next to Ida.
-Move Totem as far right as possible.
-Move Ida to the doorway.

Scene 2: The Pit

-Pull the ring on the wall as far out as possible.
-Move Ida down a set of stairs.
-Drag the section of blocks at the left up one space.
-Move Ida down a set of stairs and then a ladder.
-Drag the section of blocks at the left down one space.
-Rotate the handle 90 degrees anticlockwise.
-Move Ida to the patterned square.
-Rotate the handle 90 degrees clockwise.
-Move Ida to the button.
-Move Ida to the patterned square.
-Rotate the handle 180 degrees.
-Drag the section of blocks at the left up one space.
-Move Ida down a set of stairs and then a ladder.
-Rotate the handle 180 degrees.
-Move Ida to the ladder at the very bottom.

Scene 3: The Final Descent

-Move Ida down three sets of stairs, and then press all three available buttons.
-Move Ida to the fourth button which was raised.
-Move Ida down three sets of stairs, but don't enter the lighter colored floor.
-Rotate the handle until the path ahead is clear.
-Move Ida to the lowermost position.
-Drag the large stone tablet down one space.
-Move Ida to and down the ladder.
-Talking to the ghost is optional.
-Move Ida to the lowermost position.
-Keep going down the stairs, and following the path.
-Move Ida to the coffin.

Chapter 10: Observatory

Hub

There are three doorways. One in the floor (DOOR 1), one in a normal orientation (DOOR 2), and one at the top of the cube (DOOR 3).

The bumps at the top of the cube change your view.
The bumps at the bottom spin the colored spinners.

Please note that these are not exact directions, but just a general idea of how to get to them.

Door 1 can be reached by getting yourself one the outer face of the crow side. It will be necessary to use the two vertical spinners which are near the crow.

Door 2 can be reached by getting yourself on the inside of the bottom surface of the cube, and walking around the three curves there. It will be necessary to use the two spinners on the bottom.

Door 3 can be reached by walking through a hollowed out corner at the top of the cube. It will be necessary to use the vertical blue spinner.

Door 1

-Rotate the column of blocks (to the right) 180 degrees.
-Move Ida to the top side of the white rectangle.
-Rotate the column of blocks 90 degrees clockwise.
-Move Ida to the lowest doorway.
-Rotate the column of blocks 90 degrees anticlockwise.
-Move Ida to the doorway.
-Rotate the column of blocks 90 degrees clockwise.
-Move Ida to the button.
-Move Ida to the doorway.

Door 2

-Move Ida as far right as possible.
-Rotate the structure 180 degrees.
-Move Ida to the lowest doorway.
-Rotate the structure 90 degrees clockwise.
-Move Ida as far left as possible.
-Rotate the structure 90 degrees clockwise.
-Move Ida to the doorway.
-Rotate the structure 90 degrees clockwise.
-Move Ida as far right as possible.
-Rotate the structure 180 degrees.
-Move Ida as far left as possible.
-Rotate the structure 90 degrees clockwise.
-Move Ida to the doorway.
-Rotate the structure 180 degrees.
-Move Ida as far left as possible.
-Rotate the structure 180 degrees.
-Move Ida to the button.
-Move Ida as far left as possible.
-Rotate the structure 180 degrees.
-Move Ida to the doorway.

Door 3

-Rotate the structure 180 degrees.
-Move Ida to the place on the left where the bumps are on the very outside.
-Rotate the structure 180 degrees.
-Move Ida to the curve at the bottom right.
-Rotate the structure 90 degrees anticlockwise.
-Move Ida down the stairs.
-Rotate the structure 90 degrees anticlockwise.
-Move Ida to the button.
-Rotate the structure 180 degrees.
-Move Ida to the doorway.

Final Hub

-Get Ida to the horizontal blue spinner at the bottom, standing in normal orientation.
-Spin the structure until the diagonally cut corner is closest to you.
-Move Ida to the finish.

Reply
thegreatescaper April 5, 2014 10:41 PM

O_O just opened all spoilers in my walkthrough.

5 hours of my life are gone.

Reply

Thanks TheGreatEscaper!

Reply
Leopardmask April 7, 2014 7:47 PM

Kinda like Perspective. (Dunno if JayisGames has reviewed it) You're this strange blue crystal character and also the camera, and have to move around rooms to the exit. Where you can move is dictated by where the camera is.

Reply

Hello Leopardmask,
Perspective has been reviewed here:
https://jayisgames.com/archives/2012/07/perspective.php
and playable here:
https://jayisgames.com/games/perspective/

Reply
Patreon VIP abfdrumz April 14, 2014 7:16 PM

Wow, just wow. This is brilliant.

Reply
Patreon Crew SonicLover May 15, 2014 12:22 PM replied to Jeff

Jeff, what you linked to isn't the game that Leopardmask was talking about. It has the same name, but he was referring to a different game, one that was featured in Weekend Download long ago.

Reply

Just a suggestion, when you guys are writing these articles, it would be great if you could include weather or not the app costs money or is free. I know you can just click the link to the app store, but by the time I get to the bottom of the article, I already want the game, then I'm disappointed when I find it isn't free. Thanks!

Reply
BrittaBot May 15, 2014 11:21 PM

Damn it! My phone is too old, apparently... "This app requires a gyroscope."

Reply
thegreatescaper May 15, 2014 11:53 PM replied to BrittaBot

@BrittaBot:

Huh? I don't recall any levels which required a gyroscope. As far as I remember, they were all tappy/swipey levels.

Reply
BrittaBot May 16, 2014 10:43 PM replied to thegreatescaper

That's just the message that comes up when I go to download it. I have an iPhone 3GS, so even if it doesn't require a gyroscope, Apple's just trying to give me the hint that they'd like me to upgrade soon.

Reply
Patreon Crew Kimberly May 17, 2014 12:06 PM

Finally got around to trying this one. It's great!

Reply
thegreatescaper November 14, 2014 7:45 AM

Whoo, working on a walkthrough for new levels! May be a couple of days away though.

Reply

The new levels are every bit as terrific as I'd hoped...no, they're terrific-er.

Sadly, there'a a thing where some people are actually reducing their App Store ratings from 5 stars to 1 because the new levels aren't free. It's a $1.99 IAP for seven levels, vs $3.99 for the original ten.

Gotta admit, I kinda want to smack these people, or at least ask them what they were doing giving the game a 5-star review in the first place if they didn't think they'd gotten their price of a coffee's worth.

Reply
thegreatescaper November 14, 2014 8:37 AM

Yup, I loved the new levels too, with new twists (some literal) on the pre-existing game mechanics. Although, I do see a lot of missed potential with the possibility of much more complex puzzles.

Oh, and there's a very very very bad glitch about running water displaying properly on rotatable objects. UsTwoGames, if you're listening, please check this out!

And yeah, the hate for the IAP is really sad. Guys, these people have worked hard on making a beautiful and original game for you. People seem to have no trouble with getting a free app and spending >$15 on in-game currency and giving a glowing five star review for it's unoriginal IAP reliant gameplay. Why should $2 for something that is worth far more than that suddenly cause so much rage? Just think of how much effort has been put into this game. If you've never done programming or graphic design before, triple the effort that you estimated. Now think of how hard you worked for $2. Stop the hate, seriously.

Reply
Patreon VIP abfdrumz November 14, 2014 1:57 PM replied to thegreatescaper

Ha, you mean the glitch where it looks like the water is going partway through the waterwheel blades? I hadn't noticed that until you mentioned it, but now that I do, it's actually sort of hypnotic. 8)

Reply
thegreatescaper November 15, 2014 1:56 AM

Monument Valley: Forgotten Shores Walkthrough

Appendix i: The Chasm

Scene 1: The Pit

-Attempt to move Ida to the doorway. The path will collapse, with Ida still on it.
-Move Ida to the space to the right of the chain (the path will collapse).
-Drag the platform on the chain to the right.
-Move Ida onto the platform.
-Drag the platform on the chain to the left.
-Move Ida to the hanging part of the platform.
-Drag the platform on the chain to the right.
-Attempt to move Ida to the doorway. The path will collapse sideways with Ida still on.
-Move Ida up towards the curved arch. It will collapse sideways.
-Move Ida further down the path.
-Attempt to move Ida to the doorway.
-Watch the short cutscene. Totem!
-Move totem to the furthest right point on his path.
-Move Ida onto Totem. (more collapsing)
-Move Totem to the button.
-Watch the short cutscene.

Scene 2: An Old Friend

-Move Totem to the top-right a couple of spaces.
-Move Ida onto the bottom-most button (make sure you have Totem in a suitable position).
-Rotate the handle 90 degrees.
-Move Ida across the rotating path, down the ladder and to the end of the path.
-Rotate the handle 90 degrees.
-Move Ida to the uppermost button.
-Move Totem onto the dropped platform.
-Move Ida off the button.
-Move Totem onto the rotating path.
-Rotate the handle 180 degrees.
-Move Totem onto the rightmost button.
-Move Ida into the doorway.
-Move Totem onto the newly revealed button.

Scene 3: Stone Totems

-Rotate the entire totem platform 90 degrees clockwise.
-Move Totem to the bottom left.
-Rotate the entire platform 90 degrees clockwise.
-Move Totem to the bottom left.
-Rotate the platform 90 degrees clockwise.
-Move Totem to the bottom left.
-Rotate the platform 180 degrees.
-Move Totem onto the lower-most button.
-Move Ida to the upper-most button.
-Move Totem to the newly dropped platform.
-Move Ida onto Totem.
-Move Totem to the left-most button.

Scene 4: Winter Gate

-Move Ida to the finish.

Appendix ii: The Serpent Lake

Scene 1: The Twisting Pillar

-Move Ida to the left-most button.
-Move Ida back down to her starting position.
-Twist the bottom of the pillar 90 degrees clockwise.
-Move Ida to the rightmost button.
-Move Ida to the button at the top.

Scene 2: The Sky Maze

-NOTE: Please turn your device 180 degrees at this point. This is not required, but makes the layout of the level easier to comprehend. As of such, the following instructions are to be used with this 'upside-down' way of viewing the level.
-Move Ida to the upper-most point of the maze-cube.
-Rotate the handle 90 degrees clockwise.
-Move Ida to the bottom-left across the twisted path.
-Rotate the handle 180 degrees anticlockwise.
-Move Ida down across the twisted path.
-Rotate the handle 180 degrees clockwise.
-Move Ida to the button.
-Move Ida to the bottom-left.
-Rotate the handle 90 degrees clockwise.
-Move Ida to the bottom-right.
-Rotate the handle 180 degrees anticlockwise.
-Move Ida to the doorway.

Scene 3: Pink Pillars

-If you haven't already, return your device to it's normal orientation.
-Move Ida up to the top-right point of the structure.
-Rotate the upper section 90 degrees clockwise.
-Move Ida to the button at the bottom.
-Rotate the upper section 90 degrees anticlockwise.
-Move Ida to the upper button.
-Rotate the upper section 90 degrees anticlockwise.
-Move Ida to the side of the upper-right section of the structure (Ida must move down the central pillar then up the right-most pillar).
-Rotate the upper section 90 degrees clockwise.
-Move Ida to the doorway.
-Move Ida to the finish.

Appendix iii: The Thief

Scene 1: The Guard Tower

-Move Ida to the button.
-Attempt to move Ida to the doorway.

Scene 2: The Cloud Palace I (The Handle)

-Rotate the handle until the crow rises from the clouds on a red platform.
-When the crow is on the cream section of the platform, quickly rotate the handle so that the crow cannot return to the red section.
-Rotate the handle until the central red section is level with the crow's platform.
-When the crow is on this red central section, quickly rotate the handle so that the crow cannot return to the cream section.
-Rotate the handle until the crow is level with the green platform.
-Wait for the crow to hit the button.
-Rotate the handle until the central red section bridges the gap between the two staircases.
-Move Ida to the left-most button.
-Rotate the handle until the central red section is level with the green sections.
-Wait for the crow to press the button.
-When the crow is on the green section, quickly move Ida off her button.
-Move Ida to the doorway.

Scene 3: The Cloud Palace II (Green Column)

-Drag the central green section up.
-Move Ida onto the red section.
-Drag the central green section down.
-Move Ida onto the button.
-Drag the red section up.
-Drag the central green section up.
-When the crow is on the red section, quickly drag the red section down.
-When the crow has moved off the red section, drag the central green section down.
-Move Ida onto the red section.
-Drag the red section up.
-Drag the green section up.
-Move Ida to the uppermost position.
-When the crow is standing on the button, quickly drag the central green section down.
-Move Ida to the doorway.

Scene 3: The Cloud Palace III (The Red Staircase)

-Drag the red section up.
-Move Ida onto the red section.
-Drag the red section down.
-Move Ida to the button.
-Drag the red section up.
-When the crow is on the green section, quickly move Ida off the button and onto the red section.
-In order to avoid the crow making annoying complications, move Ida onto the red staircase.
-When the crow is on the red section, quickly drag it down.
-Once the crow has moved off the red section, quickly drag it back up.
-Quickly move Ida onto the left green section.
-Quickly move the red section down.
-If you have managed to perform the previous steps within the time it took the crow to reach the button, you should be able to move Ida to the doorway. If not, move Ida back onto the red staircase and repeat until successful.

Scene 4: The Cloud Palace IV (The Automaton)

-Time Ida's movements to get her onto the indigo section at the upper-left.
-Time Ida's movements to get her onto the cream section at the upper-left.
-Time Ida's movements to get her onto the rotating red section.
-Time Ida's movements to get her onto the sliding green section.
-Time Ida's movements to get her off the green section and onto the central small cream platform.
-Drag the gold column up.
-Move Ida onto the button on the gold column.
-When the crow with the hat moves onto the blue section at the top, quickly move Ida off the button.
-Time Ida's movements to get her onto the sliding green section.
-Time Ida's movements to get her off the green section and onto the upper-right cream section.
-Move Ida to the doorway.

Scene 5: Retrieving the Hat

-Move Ida to the finish.
-Drag the green section down.
-Wait for the crow to hit the button.
-When the crow is on the green section, quickly drag it up.
-When the crow moves off the green section, quickly drag it back down.
-Move Ida onto the right-most button.
-When the crow is on the red section, quickly turn the handle. Try to get the crow in the middle, directly on top of the large gold object.
-Move Ida onto the uppermost button.
-Quickly move Ida to the leftmost space that she can reach.
-If you get there in time, then the Ida will have her hat back. If you don't get there, then move Ida back to the uppermost button and try again.
-Move Ida to the finish.

Appendix iv: Halcyon Court

Scene 1: The Fountain

-Turn the handle 180 degrees.
-Move Ida to the right-most staircase.
-Turn the handle 90 degrees anticlockwise.
-Move Ida onto the dropped platform.
-Turn the handle 180 degrees.
-Move Ida to the doorway.

Scene 2: Flood Control

-Turn the structure 180 degrees.
-Move Ida to the button on the floating wooden crate.
-Drag the central column up.
-Move Ida to the button at the left.
-Rotate the handle 180 degrees.
-Move Ida back to the button on the crate.
-Drag any two of the columns down.
-Turn the structure 180 degrees.
-Move Ida to the button.
-Turn the structure 180 degrees.
-Move Ida back to the button on the floating crate.
-Drag the last column down.
-Turn the structure 180 degrees.
-Move Ida to the doorway.

Scene 3: A Chance Meeting

-Move Ida to the upper-right platform.
-Turn the structure 90 degrees clockwise.
-Talk to the ghost.
-Move Ida to the doorway.

Scene 4: The Water Wheel

-Move Ida onto the right-most button.
-Turn the handle 90 degrees anticlockwise.
-Move Ida onto the lowest button.
-Turn the handle 90 degrees anticlockwise.
-Move Ida back onto the right-most button.
-Turn the handle 90 degrees anticlockwise.
-Move Ida onto the uppermost button.
-Time Ida's movements to get her onto the rotating platform.
-Time Ida's movements to get her off the rotating platform on the other side, near the doorway.
-Move Ida to the doorway.
-Move Ida to the finish.

Appendix v: The Lost Falls

Scene 1: The Climb

-Move Ida onto the button.
-Move Totem onto the grey octagon.
-Rotate the handle 90 degrees anticlockwise.
-Move Ida onto the grassy section right next to the waterfall.
-Rotate the handle 180 degrees.
-Move Ida to the button.
-Rotate the handle 90 degrees anticlockwise.
-Move Totem to the button.
-Move Ida to the lowest button.
-Move Totem to the left-most button.
-Move Totem onto the grey section.
-Move Ida to the doorway.
-Move Ida to the doorway on the chained section.
-Move Totem to the upper-most button.
-Move Totem onto the left chained section.
-Move Ida onto the left chained section.
-Move Totem off the chained section.
-Move Totem to the lowest space he can go.
-Move Ida onto Totem.
-Move Totem to the highest space he can go.
-Move Ida onto the right chained section.
-Move Totem onto the left chained section.
-Move Ida to the doorway.
-Move Totem onto the button.
-Move Ida to the lowest button.
-Move Totem onto the bridge.
-Move Totem to the lowest point he can go.
-Move Ida onto Totem.
-Move Totem as far up as he can go.
-Move Ida to the upper button.
-Move Totem all the way to the left.
-Move Ida onto Totem.
-Move Totem all the way to the right.
-Move Ida to the doorway.
-Move Totem to the button.

Scene 2: The Caverns

-Move Totem to the button.
-Move Ida to the button.
-Move Totem underneath the raised section.
-Move Ida to the doorway (she will stop to grieve the loss of Totem).

Scene 3: The Top of the Fall

-Move Ida to the finish.

Appendix vi: The Citadel of Deceit

Scene 1: The Inverse Universe

-Drag the dark grey platform to the left.
-Move Ida onto the dark grey platform.
-Drag the dark grey platform to the right.
-Move Ida to the doorway.
-Rotate your device 180 degrees.
-Drag the platform to the right.
-Move Ida onto the platform.
-Drag the platform to the left.
-Move Ida to the button.
-Move Ida onto the platform.
-Drag the platform down.
-Move Ida to the doorway.

Scene 2: The Two Towers

-Return your device to its normal orientation.
-Rotate the handle 90 degrees.
-Move Ida across the rotating platform and down the ladder.
-Rotate the handle 90 degrees.
-Move Ida to the uppermost doorway.
-Turn your device 180 degrees.
-Move Ida to the button.
-Rotate the handle 90 degrees.
-Move Ida to the doorway.

Scene 3: Escher's Maze

-Return your device to its normal orientation.
-Move Ida to the middle-right doorway.
-Turn your device 60 degrees anticlockwise.
-Move Ida to the center-bottom doorway.
-Turn your device 120 degrees anticlockwise.
-Move Ida to the center doorway.

Scene 4: The Chain

-Return your device to its normal orientation.
-Move Ida onto the patterned floor.
-Drag the chain down.
-Quickly move Ida onto the upper-right platform.
-Move Ida to the doorway underneath and to the left of the button.
-Move Ida to the button.
-Move Ida to the upper-left doorway.
-Rotate your device 180 degrees.
-Move Ida to the patterned floor.
-Drag the chain up.
-Quickly move Ida to the upper-right patterned floor.
-Move Ida to the right doorway.
-Move Ida to the button.
-Move Ida to the finish.

Appendix vii: The Oubliette

Expanding the Oubliette

-Return your device to its normal orientation.
-Move Ida to the button.

Exploring the Oubliette (Orange View + Back of Orange View)

-Move Ida to the uppermost button.
-Turn the structure 180 degrees.
-Drag the light orange section up.
-Move Ida to the bottom-right section of this view.
-Drag the light orange section down.
-Turn the structure 180 degrees.
-Move Ida to the button at the right.

Exploring the Oubliette (Orange View + Purple View + Light Maroon View + Green View)

-Turn the structure 180 degrees.
-Move Ida to the right-most space she can go.
-Turn the column 540 degrees.
-Move Ida to the bottom-right doorway.
-Turn the structure 180 degrees.
-Move Ida to the button.
-Turn the structure 180 degrees anticlockwise.
-Pull both of the handles down.
-Move Ida to the doorway.
-Turn the structure 180 degrees anticlockwise.
-Turn the column 540 degrees.
-Move Ida to the right-most space she can go.
-Move Ida to the doorway.
-Turn the structure 360 degrees.
-Turn the light green section 90 degrees clockwise.
-Move Ida onto the light green section.
-Turn the light green section 90 degrees anticlockwise.
-Move Ida down the stairs.
-Turn the light green section 90 degrees clockwise.
-Move Ida onto the button.

Exploring the Oubliette (Flood Control Revisited and The Green Teleporter)

-Move Ida onto the dark green section.
-Turn the structure 360 degrees.
-Move Ida to the button.
-Turn the handle clockwise until the oubliette is (almost) completely drained of water.
-Move Ida back onto the dark green section.
-Turn the structure 180 degrees anticlockwise.
-Move Ida to the button.
-Move Ida back onto the dark green section.
-Turn the green section 180 degrees.
-Turn the structure 180 degrees anticlockwise.
-Move Ida to the doorway.
-Turn the structure 180 degrees anticlockwise.
-Move Ida to the upper doorway.
-Move Ida to the lower doorway.

The Bonsai Tree.

-Turn the structure 1800 degrees.
-Move Ida to the button.
-Watch the short cutscene.
-Drag the top of the structure all the way down.
-Move Ida to the finish.

Appendix viii: Nocturne:

Totem Piece 1

-Move Ida to the top-right pyramid.
-Move Ida to the button.
-Move Ida to the right button.
-Rotate the handle anticlockwise as much as you can.
-Move the Totem piece onto the blank floor.
-Move Ida to the left button.
-Move Totem to the lower button.
-Move Ida onto the Totem piece.
-Move the Totem piece off the button.
-Move the Totem piece back to the pyramid to return to the hub.

Totem Piece 2

-Move the Totem piece right next to the short staircase at the right.
-Move Ida off the Totem piece.
-Move the Totem piece down, out of the way.
-Move Ida to the button.
-Move the Totem piece over the risen platform and to the bottom-right pyramid.
-Move the Totem piece to the button.
-Move the sunken Totem piece to the left, onto the fallen platform.
-Move the above-water Totem piece off the button.
-Move the sunken Totem piece to the right.
-Move the above-water Totem piece onto the button.
-Move the sunken Totem piece to the left.
-Move the above-water Totem piece off the button.
-It's Totem's head! Move it as far up as it can go.
-Move the other Totem piece onto the Totem head.
-Move Totem's head as far left as it can go.
-Move the Totem piece onto the button.
-Move Totem's head back to the pyramid.
-Move Ida off the button.
-Move the Totem piece onto the fallen platform.
-Move Ida back onto the button.
-Move both Totem pieces back into the main hub.

Totem Piece 3

-Move both Totem pieces to the top-left.
-Move Ida to the top-left pyramid.
-Move Ida onto the button.
-Move a Totem piece onto the first button.
-Move the other Totem piece onto the next button.
-Move Ida to the last button.
-Move the new Totem piece as far right as possible.
-Move Ida back onto the lower button.
-Move the Totem pieces to the bottom-right. Start with the new Totem piece, then the furthest left Totem piece, and then the last one. Make sure they are all past the lighter floor.
-Move Ida back to the pyramid.

Totem Piece 4

-Move one of the Totem pieces next to the short stairs on the right.
-Move another Totem piece on top of it.
-Move the third Totem piece on top of that to create a stack of 3 Totem pieces.
-Move Ida down to the last pyramid, but don't move onto the circled floor yet.
-First, move the Totem stack all the way to the bottom-left.
-Now move Ida to the pyramid.
-Move Ida onto the button.
-Move the Totem piece on the top of the stack onto the cross shaped area.
-Rotate the handle 90 degrees clockwise.
-Move the Totem piece down into the water and onto the gear.
-Rotate the handle 90 degrees anticlockwise.
-Move the Totem piece as far left as possible.
-Rotate the handle 90 degrees.
-Move the Totem piece to the right.
-Rotate the handle 90 degrees.
-Move the Totem piece as far right as possible.
-Move the last Totem piece onto it.
-Reverse your path back to the Totem stack.
-Move Ida back to the pyramid.
-Move Ida to the button.
-Move the Totem stack to the spot by the stairs.
-Unstack each Totem piece and place each one on one of the corners of the cross at the top.
-Watch the cutscene.

Endgame

-Keep moving Ida up the stairs.
-When Totem arises, move him as far up as possible.

Reply

Ustwo has released an update. It is short, only one level, but it is free.

Reply

^ Scroll Up | Homepage >

Leave a comment [top of page]

Please consider creating a Casual Gameplay account if you're a regular visitor here, as it will allow us to create an even better experience for you. Sign-up here!
  • PLEASE UNDERSTAND SITE POLICIES BEFORE POSTING COMMENTS
  • You may use limited HTML tags for style:
    (a href, b, br/, strong, em, ul, ol, li, code, spoiler)
    HTML tags begin with a less-than sign: < and end with a greater-than sign: >. Always. No exceptions.
  • To post spoilers, please use spoiler tags: <spoiler> example </spoiler>
    If you need help understanding spoiler tags, read the spoiler help.
  • Please Preview your comment before posting, especially when using spoilers!
  • No link dropping, no domains as names; do not spam, and do not advertise! (rel="nofollow" in use)
chrpa Jayisgames needs your help to continue providing quality content. Click for details Hi! Weekday Escape and Weekday Puzzle are here! First we have two new cans from tomoLaSiDo and then two small rooms from isotronic. That's all for this...  ...
6,365 Views
0 Comments
chrpa Jayisgames needs your help to continue providing quality content. Click for details Welcome to Mobile Monday! We have another beautiful game from Nicolet and it's a winter game as it should be. Tasuku Yahiro have released another of their...  ...
6,161 Views
2 Comments
chrpa Jayisgames needs your help to continue providing quality content. Click for details We've got a new game from Rinnogogo's magical world and this time it really is magical.. Not only do you get to meet cute animals that express themselves...  ...
chrpa Jayisgames needs your help to continue providing quality content. Click for details After a few weeks of patient waiting, we have been rewarded - the new game from Ichima Coffeedo is here. We got a wonderful new game - it's...  ...

HELP Jayisgames.com

Recent Comments


Display 5 more comments
Limit to the last 5 comments

Game of the week


Dark Romance: Vampire Origins Collector's Edition

Your Favorite Games edit

add
Save links to your favorite games here. Use the Favorites editor.

Monthly Archives