

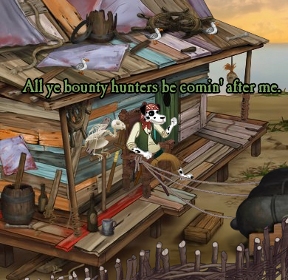
![]() Set sail for action! Adventure! Danger! Weiner dogs with poofy shirts and floppy arms! Jolly Rover, a point-and-click adventure from Brawsome, puts you into the paws of Gaius James Rover, tasked with delivering a shipment of rum for the governor, who suddenly finds himself and his cargo taken hostage by an unscrupulous lot of scurvy sea dogs... literally. Even when he escapes he finds out Lady Luck still isn't on his side, and he'll need to learn just what makes a pirate if he wants to get out of this with his reputation, and his hide, intact.
Set sail for action! Adventure! Danger! Weiner dogs with poofy shirts and floppy arms! Jolly Rover, a point-and-click adventure from Brawsome, puts you into the paws of Gaius James Rover, tasked with delivering a shipment of rum for the governor, who suddenly finds himself and his cargo taken hostage by an unscrupulous lot of scurvy sea dogs... literally. Even when he escapes he finds out Lady Luck still isn't on his side, and he'll need to learn just what makes a pirate if he wants to get out of this with his reputation, and his hide, intact.
 To play, just move your cursor around the screen; items or people you can interact with will have their names appear when you pass over them. A blue font means you haven't interacted with whatever it is yet (or there's more interaction if you click again), and grey font means you've already examined it. If you want to try an item, just move your mouse towards the bottom of the screen to make your inventory appear. From there, you can click an item to pick it up, and click again to put it down or use it on something else.
As with most point-and-click games, puzzle solving in Jolly Rover primarily involves amassing an inventory of apparently unrelated junk and figuring out where to use it. Luckily, before long you'll gain a fine feathered friend who can give you hints as to what you should be doing, and will flat-out tell you what to do if you have a precious cracker to hand over. Most puzzles can be solved by good ol' fashioned trial-and-error, however, and the environments are usually designed well enough so that shortly after finding an item, you'll find a place to use it.
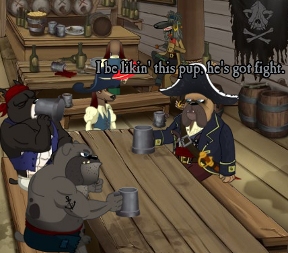 Analysis: "But why are they dogs?" Well, why not? After a while, you'll start to forget the characters are dogs; at one point, I came across a mound in the sand and expected to have to find a shovel when Rover himself promptly dropped to all fours and started digging. It was just one of many moments when this weird, off-beat little title made me grin. The humour in Jolly Rover can occasionally get a little risqué, if never outright crass, and that can be hit-and-miss depending on your tastes. But you'll find you'll get the best experience out of Jolly Rover if you just take your time and explore; there are so many little side jokes and details that you can only find if you spend some time poking your nose around your location.
Point-and-click veterans will feel right at home, and the whole thing feels like an homage to old Sierra adventure games. It's not just about combining items or figuring out where to use your oily rag, but about learning how to make the pirate's favourite dish, or figuring out a secret knock. You can expect to occasionally find yourself wondering what, exactly, you are supposed to do with a bunch of peppercorns and a dead fish, but the hint system is a great help. Certain comparisons are probably inevitable, but while Jolly Rover offers a lot of nods and winks towards classic games, it never feels like it's flooding you with inside jokes.
There are a few annoyances, of course. The sound effect that plays whenever you find an item gets old fast, and your parrot friend tends to interrupt you regularly to ask if you need a hint unless you tell him you don't want any. On the other side of the game design coin, the parrot can actually be fairly handy if you're genuinely stuck, and the idea to allow you to tell at a glance which items you hadn't interacted with eliminates a ton of pointless clicking. You can even alter our hero's walking speed under the options if you find he moves too slowly for you.
Although perhaps not destined to become a classic, Jolly Rover is a solidly enjoyable adventure with a lot of charm that can easily suck up an afternoon or two. It's silly, it's quirky, and it's carried along by some great design and, on the whole, some very good voice acting. Fans of the genre will find a lot to like and little to quibble over, making Jolly Rover a fun addition to your library of games.
![]() Windows:
Windows:
Download the demo
Get the full version
![]() Mac OS X:
Mac OS X:
Download the demo
Get the full version


Walkthrough Guide
(Please allow page to fully load for spoiler tags to be functional.)
Here's a walkthrough (includes all pickups):
Howell's Ship
1.
Say "I'll never join your crew!" to Captain Howell.
2.
After he leaves, click on the:
Lamp, the coin (treasure chest near top of screen), the flag (long tube near left side), in between the three barells just to the right of that, on the pile of barells just below where you found the flag, on the box just to the right, then the box just to the right of that one, then on the treasure chest, just to the right of that. From there, click in between the four boxes near the top of the screen, then on the door.
3.
After that, click on the painting to exit the brig.
4.
Select any two topics when you talk to Melvin. When he asks what the situation reminds him of, say "I have no idea!"
5.
Take the scarf, the keys (right to the left of Melvin), then take the crackers.
6.
Use the keys with the brig door.
7.
Enter the brig and take the lamp on top of the barrel.
8.
Return to the hold and combine the scarf with the whale oil lamp to make the oily scarf.
9.
Use the oily scarf with the rusty lock on the parrot cage.
10.
Use the keys with the oiled lock to recieve the parrot. He gives you hints when you need them, with more details for crackers.
11.
Talk to Melvin and select Port Sickle, 10 days, and swabbin' the decks in silk dresses as the answers to his questions.
12.
Walk upstairs to the lower deck and talk to Melvin about the hatch, then select any reason to see him knock on the hatch in a certain way.
13.
Select the hatch and knock in the same way Melvin did to talk to Bobby. Ask to come up and switch places, and Bobby will tell Rover to find Pete.
14.
Walk west to the galley, and take the fish, the peppercorns (just to the left of the fish), and the crackers (in the cabinet just above the peppercorns)
15.
Use the dry fish with the hook.
16.
Use the oily scarf on the window.
17.
Open the window and the chef will spill some rum on the floor.
18.
Use the peppercorns with the rum.
19.
Open the left window again and this thime the chef will drop his bottle of rum on the floor.
20.
Take the bottle of rum.
21.
Return to the lower deck and walk east to the sleeping quarters.
22.
Take the piece of eight from the boots.
23.
Select Pete and he will ask for Rum.
24.
Use the bottle of rum with Pete.
25.
Return to the lower deck and knock on the hatch in the same way you did earlier.
26.
Tell Bobby that Pete is drunk to go up on deck.
Groggy Island
1.
Walk west to the town street then continue west to the front of the Stumble Inn.
2.
Select the barrels on either side of the door for crackers and a piece of eight.
3.
Enter the Stumble Inn. Talk to Howell about joining his crew and then select any topic to learn that he wants Rover to make Salamagundi.
4.
Talk to the insane pirate and Puggy to recieve some crackers. Select the bucket for more crackers. Talk to Davey about the hat being a family heirloom, and then offer to buy him a new hat to recieve a piece of eight.
5.
Enter the kitchen and select the cook book to receive the Ron Copper quest.
6.
Take the crackers from the stove and the piece of eight from the bucket
7.
Exit the Stumble Inn and walk west to Turtle Beach.
8.
Walk up the path at the left side of the cliff to see the cliff shack.
Walk west and talk to Ron about the recipie for Salamagundi.
9.
Return to the beach and take the fishing net. Select the sand mound twice to recieve two eggs and a sand piece.
10.
Use the fishing net with the palm trees to create the hammock. Use the hammock to land next to Ron.
11.
Talk to Ron to receive the voodoo book and cheat sheet. Use the voodoo book on Rover to learn that food that the animal eats needs to be found before the spell can be performed.
12.
Select the cannons for a flag piece.
13.
Return to the beach and take a hammock. Select the palms trees on either side to recieve a piece of eight.
14.
Walk east to Town Street and ask Scruffy about what he is selling. Keep talking to him until he agrees to trade the fish for the net.
15.
Return to the cliff shack and use the voodoo book on Rover to see the spell for scaring beasts.
16.
Exit the view of the book and use the voodoo cheat sheet on Rover. Press the symbols in the following order:
(1,3)(1,1)(4,1)(3,2)
17.
While Rover is glowing red, use the pickled herring with one of the birds on the roof to scare them away.
18.
Talk to Ron about the spell to receive the Salamagundi recipe. Use the recipie with Rover to read it.
19.
Talk to Ron again and ask him about the spices to receive the bag of spices.
20.
Walk east to see a monkey performing a spell. Select the tree to knock on it three times.
21.
Use the voodoo cheat sheet on Rover and press the symbols in the following order:
(4,1)(3,3)(4,2)(4,1)
22.
Take the mango on the ground near the tree.
23.
Return to the kitchen in the Stumble Inn. Use the peppercorns with the mortar and pestle on the table to make the pepper.
24.
Use the pepper with the chef and he will drop the ham. Take it.
25.
Return to the fort and knock on the tree at the right side of the guard.
26.
Use the voodoo cheat sheet on rover and cast the drop fruit spell. Enter the fort.
27.
Select the candle to unlock the cabinet. Open the cabinet to find a flag piece and a piece of eight. Take a bottle of wine from the wine rack.
28.
Rover will hear someone approaching the room, so select the blue cupboard to hide. After the conversation, open the cubpoard to find a piece of eight.
29.
Return to the cliff shack and ust the wine bottle with the skull.
30.
Return to the kitchen in the Stumble Inn and use the turtle eggs eith the cauldron to boil them.
31.
Use the mango, boiled eggs, ham, pickled herring, uncorked wine , and spices with the mixing bowl on the table to make Salamagundi.
Cannibal Island
1.
Select the mound and the skeleton with the blue hat to find two pieces of eight and select the note to find crackers. Take the skull.
2.
Try to take the conch to get snapped at by the crab. Use the skull with the conch. Take the conch. Enter the jungle and take the crackers, mango and the barrel.
3.
Walk east to the next area of the jungle. Use the voodoo cheat sheet on Rover and press the symbols in the following order to cast the lure beasts spell:
(3,2)(4,1)(1,1)(1,3)
4.
While Rover is Glowing red, use the mango with the pig and it will fall into the trap. Walk west to the previous area of the jungle and take the barrel.
5.
Walk west to the previous area of the jungle and take the barrel.
6.
Walk west to the beach and take the sign.
7.
Walk east twice to the jungle and use the cannibal sign with the hole to create a bridge. Take the rum and the crackers (just below the rum).
8.
Walk east to the next area of the jungle. Use the voodoo cheat sheet on Rover and cast the scare beast spell, then use the mango with the pig to scare it away.
9.
Walk across the obvious trap and wait for tthe two dogs to leave. Take the flag from the trap and the crackers in front of the tree.
10.
Walk west three times to the beach. Select the jug for crackers.
11.
Walk east four times to the cannibal camp. Select the cauldron and the bars for crackers. Select the net twice for a piece of eight. Take the charcoal below the cauldron.
12.
Walk west to the waterfall. Take the dried corn on the bird feeder. Select the two plants at the left side of the area to find a piece of eight and a cauldron.
13.
Use the mango and the rum with the cauldron. Examine the cauldron to see four symbols. Exit the view of the cauldron.
14.
Use the voodoo cheat sheet with Rover and select the symbols in the following order to cast the heat iron spell:
(2,2)(3,1)(4,3)(1,1)
15.
Select the heated cauldron to take the mango jam. Use the mango jam with the bird feeder. Exit the area and then return to it to see feathers on the bird feeder to take the feathers.
16.
Return to the camp to see the two dogs knock on the door in a certain way. If you need to see the knock again, just exit the camp and return to it.
17.
Combine the charcoal with the barrel in the inventory. Combine the sticky feathers with the barrel to create the tribal mask. Use the tribal mask with rover.
18.
Select the door and copy the knock that was just heard. Answer "Julie Rover" when asked for a name, then mention the mask to enter the blockade.
19.
After the cutscene, keep walking through the exits until Rover leaves the cave. Select the sign twice for a piece of eight.
20.
Return to the camp to talk to Howell behind the bars. Keep talking to him to start the Free Captains quest.
21.
Use the dried corn with the cauldron, then use the voodoo cheat sheet on Rover and cast the heat iron spell.
22.
Exit the conversation with Rufus. Select the palm tree to knock on it, then use the voodoo cheat sheet on Rover to cast the drop fruit spell.
23.
Select Rufus to take the keys and free the captains from the jail. Select the bars to take a flag piece.
24.
Return to the beach and select the water for a flag piece.
25.
Return to the waterfall and select the dried corn for some crackers.
26.
Return to the caverns. Combine the rum with the conch in the inventory. Use the gunpowder and the conch with the stump.
27.
Use the voodoo cheat sheet on Rover and select the symbols in the following order to cast the voices of the dead spell:
(4,1)(2,2)(4,3)(2,1)
28.
Enter the caverns and use the magic conch on the correct exit to hear a voice repeat part of a song. Go through the exit and then use the magic conch on all of the exits until you hear a voice repeat a longer section of the song. Keep doing this in all of the rooms in the maze until the ship is reached.
The Red Herring
1.
Enter the cabin. Move the pillow on the bed to find a small key. Select the jar on the desk to find a piece of eight. Select the jar again to take it. Open the wardrobe to find crackers.
2.
Use the small key with the cupboard to take a piece of eight and a large key. Use the large key with the left chest to take a piece of eight and Silvereye's cutlass.
3.
Combine the large key with the small key in the inventory to make the super key (super!). Use the super key with the right chest to take compass 1 and an old book.
4.
Return to the cannibal camp and walk west to the waterfall. Use the empty jar with the cauldron to find a flag piece. Use the jar with the waterfall to fill it with water.
5.
Return to the Red Herring and use the jar with ingredients on Clara. Combine the gunpowder and the rum on the jar with ingredients in the inventory.
6.
Use the jar with ingredients on the hatch. Use the voodoo cheat sheet with Rover and select the following symbols to cast the raise dead spell:
(1,2)(4,3)(2,3)(3,1)
Shipwreck Island
1.
Take the crackers from the barrels. Take the block, rope, and crank.
2.
Walk west to the cove and east to the lookout point. take the crackers from the crate, the coin from the cannonballs, and the barrel from the tree.
3.
The barrel will not be removed from the tree but can still be selected from the inventory.
4.
Walk east to the forest. Use the cutlass with the vine at the left side of the tree. Take the two sets of crackers and the block.
5.
Combine one of the blocks with the rope in the inventory. Combine the block and rope with the remaining block to make the block and tackle.
6.
Use the block and tackle with the vines on the right branch. Use the barrel of gunpowder from the inventory with the block and tackle to roll it to the tree.
7.
Use the vine with the barrel to attach it to the block and tackle. Use the block and tackle to raise the barrel to the top of the cliff.
8.
Walk west to the lookout point and take the flag piece from the hole in the tree.
9.
Return to the top of the cliff in the forest and walk east to see Clara. Use the barrel of gunpowder with the blockage. Use the cutlass with the barrel.
10.
Use the voodoo cheat sheet on Rover and then cast the heat iron spell.
11.
Take the large jug next to the well.
12.
Use the crank with the well and then select the well to recieve compass 2. Select the well again to find a piece of eight.
13.
The aim now is to find three birthdays of the people mentioned on the back page of Silvereye's journal.
14.
Walk north to the grave and examine the gravestone to read that Mary was born in June (Month 6).
15.
Return to Clara and ask her about her birthday: May (Month 5).
16.
Read the journal to discover the month of Alexander's birth: August (Month 8)
17.
Select the wheel on the tree. Rotate the wheel clockwise five times, anticlockwise six times, and anticlockwise three times to enter the treehouse.
18.
Use the super key with the chest to take a piece of eight and a wooden banana. Open the wardrobe to take a piece of eight. Select the rug to take a flag piece. Take the small jug from the cabinet. Open the top drawer of the cabinet for a piece of eight and the bottom drawere of the cabinet twice for two sets of crackers. Use the wooden banana with the fruit bowl.
19.
Take compass 3 from the secret panel that opens. Exit the treehouse.
20.
Walk north to the grave and cast the Lower Dead spell on Silvereye to find a flag piece. Examine the right tree face for crackers.
21.
Walk east to the forest. The aim now is to use one or more of the compasses on the stumps and then rotate them to find the correct exit. The compasses to be used and the exits vary from game to game. Keep going through the correct exits to reach the totem pole. Use the three compasses on the slots.
22.
From top to bottom: Compass 3, Compass 2, and Compass 1.
23.
Take the ugly mug from the top of the totem pole. Take the four plates from the slots in the totem pole. Examine the second slot from the top to find a piece of eight. Select the arm of the carving and then select the mouth to take crackers. Examine the bag on the tree.
24.
The bag is attached to a nail. Cast the heat iron spell and the bag will drop to the floor. Select the bag to find the flag piece.
25.
Return to the forest. Use the compasses on the stumps again and keep walking through the correct exits to reach the cove. Select the hole in the crackers.
26.
Use the ugly mug with the capstan. Select the ugly mug to see a single drop of water.
27.
Use the small jug with the waterfall to fill it with three units of water. Combine the small jug with the large jug in the inventory to fill it with 3 units of water. FIll the small jug from the waterfall again and combine it with the large jug in the inventory to leave 1 unit of water in the small jug. Use the small jug with the ugly mug.
28.
Select the capstan to move the rock. Select the capstan again to take the piece of eight.
29.
Enter the cave. Select any topics when talking to DeSilver and after the cutscene Rover will wake up on Spit Island.
Spit Island
1.
Take the boot, the noose, and the crackers from the barrel.
2.
Use the voodoo cheat sheet with Rover and cast the lure beasts spell. While Rover is glowing red, use the old boot with the sea to lure a turtle to the island. Use the boot with Rover to find a piece of eight.
3.
Use the noose with the turtle. Use the voodoo cheat sheet with Rover again and this time cast the scare beasts spell. While Rover is glowing red, select the barrel to leave the island.
Groggy Island-Revisited
1.
Enter the Stumble Inn and select the bucket to find some crackers.
2.
Return to the fort. Cast the heat iron spell and Rufus will take the saucepan off his head. Select the palm tree and then cast the drop fruit spell.
3.
Enter the fort. Select the bowl of wooden fruit to reveal a hidden lever.
4.
Select the llever and then enter the secret passage. Use the wooden fruit with DeSilver and then say "Think fast!" Take the cutlass, the crackers from the cauldron and the bookshelf, the canvas, and the bag.
5.
Select the crane to move the basket over the ground. Use the canvas bag with the vent and it will float away. Use the sail canvas with the basket.
6.
Take a rock from the blocked entrance to the room and use it with the vent. Take the rock from the vent. Select the basket to jump in then use the cutlass with the basket to complete the game.
Posted by: carnax |
July 6, 2010 1:36 AM
|
July 6, 2010 1:36 AM