
![]() Even if you've tried only a handful, you know escape games come in a variety of wrappings and difficulty levels. Sometimes the best thing about a particular escape is the way it transports you to a scene of beauty and serenity, providing an affable assortment of tasks to amuse you while you soak in the surroundings. Other games are less about eye candy and more about putting your brain to work in one way or another. The main enjoyment in any Gatamari escape game comes from the pure logic of its puzzles. That's not to say that the art style, with static line drawings and a limited palate, is without its own charm. In fact, design and function line up perfectly here to become Gatamari's distinguishing characteristic which includes elements that will possibly remind you of Detarou. That is, minus the demented weirdness, and in a more abstract, less tangible sense; rather than an exact likeness, it's something about the way the puzzles are set up here. They'll keep you thinking, tease your brain in a good way, with some unexpected outcomes to amp up the fun factor. It's not the most difficult we've encountered by Gatamari, but it is sure to keep you busy for the next half hour or so...
Even if you've tried only a handful, you know escape games come in a variety of wrappings and difficulty levels. Sometimes the best thing about a particular escape is the way it transports you to a scene of beauty and serenity, providing an affable assortment of tasks to amuse you while you soak in the surroundings. Other games are less about eye candy and more about putting your brain to work in one way or another. The main enjoyment in any Gatamari escape game comes from the pure logic of its puzzles. That's not to say that the art style, with static line drawings and a limited palate, is without its own charm. In fact, design and function line up perfectly here to become Gatamari's distinguishing characteristic which includes elements that will possibly remind you of Detarou. That is, minus the demented weirdness, and in a more abstract, less tangible sense; rather than an exact likeness, it's something about the way the puzzles are set up here. They'll keep you thinking, tease your brain in a good way, with some unexpected outcomes to amp up the fun factor. It's not the most difficult we've encountered by Gatamari, but it is sure to keep you busy for the next half hour or so...
 When you first load the game's page, you'll be met with a screen of Japanese text. Read or "skip" past it and you'll find yourself in a room: it looks like a museum or art gallery in fact. Using the arrows on the edge of the stage, have a good look around. While there's no changing cursor, there's very little in the design that could distract you from your mission and nary a pixel hunt in sight (but do be sure to explore thoroughly and keep a sharp eye out for visual clues). Inspect the objects you see and you'll find that some will react to your prodding, given you figure out how to use them. Then, just as you think you've won your freedom, you'll discover there's more to this excursion than first anticipated. With a plethora of cleverly tricky puzzles, lots to see and do, plus a few red herrings for good measure, you'll want to approach this game when you can focus your time, attention and mental fortitude toward efficacious escaping. It's not perfect but, if you're looking for more than a light break, nothing too heavy, Gatamari Escape 23 has a nice amount of mental crunchiness to satisfy those cravings.


Walkthrough Guide
(Please allow page to fully load for spoiler tags to be functional.)
This is a very nice game and I agree with Shudog. Here is a full walkthrough, with several spoiler-levels so that the solutions to the puzzles are not immediately given away.
General note: safes don't open by themselves after entering a correct code. After entering a code, press the open button and if it opens you've entered the right code.
Starting room
1. Pick up the windup key from the floor (bottom left corner in the door-view)
2. Use the windup key on the car and read the code
3. Enter the code in the box, to get a black book
5963
4. Put the book (step 3) in the bookcase and observe the pattern by clicking the books
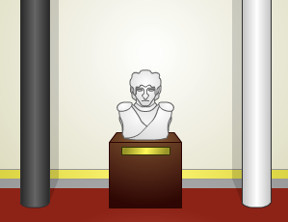
5. Turn the head of the busts according to the pattern
Take a look at the two pillars next to the bust
Black, black, white, white, white, black, white, white
Left, left, right, right, right, left, right, right
6. Grab the paper from the bust's mouth and ...
Purple safe
7. Turn right and have a look at the safes and the paintings above it.
8. The top right image contains the clue to open the purple safe.
There are a lot of number in this image
Look at the colour of each number and press the colours in the appropriate order
Black, white, red, black, red, red, white, white, black
9. Take the wrench from the purple safe
Green safe
10. Use the wrench on the copper plate opposite the safes
11. Activate the panel and pick up the coin (1/5)
12. Turn toward the opened doorway (with the laser above it) and examine the broken stone in the wall on the left
13. Get a coin (2/5) from behind the stone
14. Enter the next room (doorway underneath the laser)
15. Turn 180 degrees and examine the art to the right of the door
16. Retrieve the coin (3/5) from the art
Turn the frame alternatively clockwise and counter-clockwise, till the coin is out
17. Examine the chalk marks to the left of the doorway
18. Go back to the previous room and examine the picture above the green safe
19. Open the green safe according to the clues in step 17 and 18
The chalk marks represent the levers
Counting the levers from left to right, the code is:
2 down, 4 up, 3 down, 1 up, 3 up, 2 down, 4 up
20. Take the screwdriver
Laser panel
21. Use the screwdriver to retrieve the scope from the gun
22. Go to the wall with the portrait and examine the abstract art with the blue line
23. Remove the portrait
The blue line is the clue you need
Press the corners of the portrait as indicated by the blue-line art
Top right, bottom left, bottom right, top right, top left, bottom right, bottom left, top left, bottom right
24. Use the scope (step 21) to zoom in on the hallways that has become visible behind the portrait
25. You get a close up from some kind of code
26. Enter the code at the laser panel that is directly to the left of the portrait
The code from step 25 might be considered to be a digital negative
White is black and black is green (think of a digital alarm clock)
ICPO
27. Get the blue key that the laser shot down
28. Use the blue key to open the locked door and enter the hallway of black warriors
Wardrobe and warriors' safe
29. Go through the warriors hallway and observe their sharp swords
30. Take the rod that is to the left of the safe (at the end of the warriors hallway)
31. Go all the way back to the room with the wardrobe and use the rod to get the newspaper on top of it
32. Enter the code of the brown box that locks the wardrobe
The warriors' swords are the clue (step 29)
Replicate the pattern of the swords
Right, left, right, left, left, right, left, left, right
33. Take the handcuffs and a coin (4/5) from the coat
34. Turn 180 degrees and lower the rope
35. Attach the handcuffs (step 33), move the rope back up and take the red wheel
36. Go back to the room at the end of the warriors' hallway and observe the painting of the dog
37. Enter the safe code
The clues are the dog painting (step 36), the newspaper (step 31) and the paper from step 6
D=3, O=3, G=7 -> code=337
But that would be too simple, so re-examine the paper from step 6
If the number is before the letter, the number needs to be increased by 1
If the number is after the letter, the number needs to be decreased by 1
Code = 426
38. Use the red wheel (step 35) to open the safe and take the coin (5/5) and currency paper
Brown door and sliding puzzles
39. Enter your 5 coins (steps 11, 13, 16, 33, 38) in the panel to the left of the brown door
40. Observe the scene behind the brown door through the glass window
41. Enter the code in the panel to the left of the brown door
The clues are found in the currency paper (step 38) and the scene behind the door (step 40)
That staircase looks a lot like a dollar sign
Select the boxes that contain a dollar sign
- X -
X X -
X X -
42. Go up the staircase and examine the 4 sliding puzzles (no need to solve them)
43. Continue your path and go to the glass window (view of a clock tower) with the black grid below it
44. Use the information of the sliding puzzles to enter the correct code on the black grid
Each sliding puzzle has a red-framed corner
Behind the slides of the puzzles you can black and white backgrounds
Here is the correct grid (w = white, b = black):
b b b - b w b
b w b - b w b
b b b - w w b
b b b - b w b
w w b - w w b
b b b - b b b
The clock
45. Turn 90 degrees to the left and retrieve the pliers from the black safe (it is open, no need for a code)
46. Go downstairs and use the pliers (step 45) on the bars to the bottom right of the staircase
47. Take the ninja figure, move upstairs and place it with the other ninjas. Observe the pattern
48. Open the pink safe (to the left of the ninjas)
You need the pattern as indicated by the ninjas (step 47)
There is an arrow on the safe, pointing from top to bottom
Press the buttons, starting with the highest ninja first
Top middle, top left, top right, bottom right, bottom left, bottom middle
49. Take the flower with flags from the safe
50. Go downstairs to the middle, orange safe, and examine the picture above it.
51. Open the orange safe
Combine the clues of the flags (step 49) and the picture above the safe (step 50)
The buttons represent the flag patterns as indicated in the picture
Left, right, middle, middle, left, right, left
52. Take the ball from the orange safe.
53. Go upstairs, put the ball (step 52) in the hole to the top right of the yellow-framed windows
54. Take the red key and use it to open the other black safe (upstairs room, just before the clocktower)
55. Take the toy helicopter and use it to get the green coat (barred window, next to the ninjas)
56. Turn the green coat (step 55), turn it around and take a silver ring from the collar
57. Go to the clock control panel and take the gold ring (top right, yellow 'light')
58. Combine the silver (step 56) and gold (step 57) rings to obtain a clue
59. Detach the rings, place the gold ring back in the panel and enter the right code
There are only a few valid Roman numerals (step 58)
The numerals are: IX:III - IV:V - X:II
In common numbers that would be: 9:3 - 4:5 - 10:2
The numbers refer to the numbers at which the clock hands have to be positioned (first number is red, second number is blue)
Correct times: 9:15, 4:25, 10:10 (press the black diamond to switch between clocks and confirm your code at the end)
Escaping the clock tower
60. The view of the clock (to the right of the control panel) shows a doorway at the top right, and a flight of stairs at the bottom left
61. Insert the silver ring at the control panel to activate the bottom part of the panel
61. Enter the time at the control panel which we need in order to escape
Place the hands of the clock so they point at both the flight of stairs and the doorway
Correct time: 8:10
62. Go up the flight of stairs, across the clock face, into the final room
Save your game at this point. It allows you to first have a look at ending 1, then reload the game and continue from this point with ending 2. Do not select the restart-option you are shown at the end (it erases the saved game) but manually refresh the page in your browser.
End 1
63. Take the glider from the left corner
64. Move forward and use the glider to jump off the clock tower and escape
End 2
65. Take the black box from the right side of the room
66. Examine the cogwheels at the left side of the room with your scope (step 21)
67. Put the black box in the hole in the large clock face
68. Use the control panel to crush the black box
Those clock hands look rather strong
What would happen if we move both clock hands up?
Set the time to: 12:00
69. Take the green key from the crushed black box
70. Move downstairs to the bottom of the staircase
71. Have a look at the calendar on the wall
72. Go into the formerly barred hole from which you retrieved the ninja
73. Use the green key (step 69) to activate the control panel
74. Push the silver, bronze and gold buttons in the correct order
Use the clues from the cogwheels (step 66) and the calendar (step 71)
How many teeth do the cogwheels have?
How many days are there in a month?
Silver = 31, bronze = 30, gold = 28
Silver, gold, silver, bronze, silver, bronze, silver, silver, bronze, silver, bronze, silver
75. Enjoy the scenery!
Posted by: Crouch |
January 8, 2015 8:13 AM
|
January 8, 2015 8:13 AM
Gatamari Escape 23 Walkthrough
Note: Be aware that in almost every code puzzle, after you have entered the correct solution, nothing will happen until you push a separate button to finalize the entry.
First Room
Notice
You can turn the statue's head left and right. Also, the colors of the pillars on either side are different colors: white and black
On the shelf, the safe takes a four-digit code and the racecar has hole on top
By that fancy door, notice the rug turns up on the left.
The bookshelf is missing a book. One of the books says END on it.
Safe
Collect WINDUP KEY from under the rug by the door.
Use the key on the racecar. The car wrecks itself (weird!) Search the car.
Find safe code
The safe takes that four-digit code from the wreck.
5963. Collect START BOOK
The Statue
Place the START BOOK in the empty spot on the bookshelf.
Push it in, then push each book that pops up, notice the colors of the books and the black-white sequence they form when you push them. This is the black-white clue for the pillars by the statue. The START and END books count in the sequence.
Notice which sides of the statue the white pillar and black pillar are. Zoom in and use the white-black sequence you got from the books to turn the statue's head in a left and right sequence toward the correct pillars.
b b w w w b w w equals(your)L L R R R L R R
Collect 8A NOTE from statue's mouth.
Whoops you fell!
Safe Room
Notice (moving left around the room)
key on chain above grey door.
Picture of twisted pipes, a wobbly picture, and a bolted panel on the left.
Loose stone in the wall to the left of the laser door.
When you try to pass the door, you get shot. Laser is wired to the bolted panel on the previous wall.
Three safes on the fourth wall. Purple safe (has three colored buttons), Brown safe(has three white buttons), and Green safe(has four levers that you can move up or down). They each have a picture above them: a colored number collage, a black and white image that looks like a negative of three flags, and a right-bent arrow moving upwards.
Wobbly picture
Pipe picture gives the wobbly picture clue. Click the four corners of the portrait in the sequence indicated by the water flow in the pipes
Start in Upper R, Lower L, Lower R, Upper R, Upper L, Lower R, Lower L, Upper L, Lower R
Peek through the hole. It looks like a four-slot panel but it's too far away to see anything on it.
Purple safe
Clue is in the colored numbers above.
The safe has three colored buttons (red, white, black) and the picture has three colors of numbers: red white and black. Find the numbers 1 through 9 and note the color of each number. Click the safe buttons in the order indicated by the numbers. I.e., 1 is black, so the black button is first in the sequence, 2 is white so white is second, etc.
black, white, red, black, red, red, white, white, black
Get WRENCH
Laser panel
Use wrench to unscrew the bolts on the laser panel. Flip switch inside panel. The laser is now turned off, you are free to enter the previously blocked door.
Before leaving the room, note
The lights also come on for the code in the laser panel. There are 4 slots with 12 odd looking "digits" that you can cycle through. Actually they look kind of like letters.
Pulley Room
Note (moving left to right)
through the brown door you can see a spiral stairs. Note the coin slot by the door that takes 5 coins.
Note the trapdoor is to heavy for you to open by yourself. You can move the mechanism up and down via the control buttons, but the pulley still won't reach metal trapdoor
Note tally marks to left of entrance door. There is something different about them.
In each cluster, one of the four vertical tally marks is out-of-sync with the other three. Also, the clusters form a wave pattern that curves to the right.
To the right of the entrance door, you can tip the frame left and right to get the coin.
You need a screwdriver to get the telescope from the sniper rifle
There is something you can't reach atop wardrobe
wardrobe lock takes a left-right code on criss-cross buttons
Green Safe
The tally marks in the Pulley Room and the bent arrow picture above the green safe (in the safe room) are your clues to open the green safe.
The "out of sync" tally in each cluster tells you which lever to pull and whether it goes up or down. The bent arrow tells you to read the tallies from bottom to top.
If the levers were numbered, the sequence would be 2Down 4Up 3D 1U 3U 2D 4U
Open safe and take screwdriver
Laser Letters
Back in the pulley room, use screwdriver to get telescope from sniper rifle. Where would a telescope be handy?
Use telescope to view that distant panel behind wobbly picture in the Safe Room. Looks like our clue for the laser panel.
To read the clue, think opposites. Imagine a fully lit four-digit panel with all possible marks lit up in all four slots. (that would read 8888). Now imagine that the clue is telling you which parts of the panel to black out, rather than which parts to light up. e.g. a "1" would actually be an "E"
I C P O
Enter your code into the laser panel
Laser went berserk then imploded. Cool. Look around to see what damage happened. Oh, it shot down the key. Take key.
Key is probably for that grey door in front of you.
Warrior Hallway
Don't be scared, go right through. They are just statues.
Notice
As you pass, note the warriors are numbered in right-left pairs. Also note their swords.
Some pairs cross their swords with right in front, others the left sword is in front.
Note dog picture.
Note that safe needs a three digit code and a handle
Take
stick in left corner
Wardrobe
In the pulley room, use warrior sword-cross right-left code to unlock the wardrobe.
R L R L L R L L R
Unlock door and open wardrobe
Check the pockets in the coat.
Collect cuffs and coin.
Pulley
Make sure pulley is in the lowest position possible.
Use cuffs to attach it to trapdoor.
Raise trapdoor with pulley. Take wheel.
Dog Safe
Use stick to reach above wardrobe.
This is the clue, with the 8A ticket, for the safe.
Note the letters D, O and G with digits next to them.
Letters are variables. The number beside the letter indicates which number comes before or after the variable, per the 8A clue. I.e., in 8A, A would be 9, but in A8, A would be 7. Translate the letters D O G into digits for the safe code.
4 2 6
Return to the end of warrior hall, and use code and wheel handle on the safe. Collect currency guide.
Brown door
Use coins beside door.
In case you missed one of the coins, here are the locations again: loose brick in the wall of the laser room, inside the laser panel, dog safe, wobbly frame in the pulley room, coat pocket in the wardrobe
A red and black grid appears in the panel.
The currency guide gives you the pattern for the grid on the lock
The 5 currencies that use the $ sign are your pattern for the grid (The dollar sign is the only one that repeats)
Where O is red and x is black:
xox
oox
oox
Hit Enter
Staircase room
Note torn 1999 calendar and the notation beside it
Note that grate is wired shut
Blue Room
Notice (moving left around the room)
Note panels on either side of the door appear to be puzzles
The pieces are numbered, scrambled, and missing #16. The numbers of each panel are a different color. The panels each have one red corner on the frame. The pieces are slidable, revealing a grey-white design behind them on what appears to be a 3x3 grid.
Note three windows, with two holes in the wall, one near the ceiling and one near the floor. You can see odd bits of railing and what looks like a birdhouse with something stuck in the tube beneath it.
Note two more puzzle panels on either side of the door you came through. Also numbered and missing #16, also different colored numbers, also slidable tiles, and also with a red corner on each frame.
Note purple safe with six buttons and a down arrow
Look through window with telescope and note green coat on weather vane.
Note blue window with soldiers behind it and a slot below it
White room
Note that you can open the left wall cubby. Take cutters.
Note right wall cubby is locked
Note clock tower through window reads 6:30, and note the puzzle under the window.
Blue Soldiers
Return to the staircase and cut the wire on the grate. Collect the soldier with the Wolverine claw. There are steps descending below the floor but you can't access them at the moment.
Return to the Blue Room and place the soldier on the slot below the blue window. The soldiers will give you the code for the purple six-button safe on the same wall.
The six soldiers (representing the six buttons) will be arranged on platforms of varying height. Descending height order(remember the down arrow) indicates the order in which to push the six buttons on the purple safe.
If the buttons were numbered: 2 1 3 6 4 5
Pull flower and flag string out of pot.
Brown Safe
Return to the Safe room (laser room). Use the black and white picture above the brown safe combined with your flag string to open the safe.
The picture above the safe contains three flag designs: Left has three-stripes, Middle has a cross, Right has two stripes. Your flag string contains these three flag designs in a specific order
3-stripe 2-stripe, cross, cross, 3-stripe, 2-stripe, 3-stripe means the buttons 1 3 2 2 1 3 1
Collect the ball
Keys and Rings
Return to Blue Room. Use ball on higher hole in the wall. Collect key
Use key on the locked cubby in White Room. Collect copter and remote.
Use copter at the barred window to get the green coat from the weather vane
Search coat
Find silver ring under the back of the collar
Red Corners
Return to White Room. Note puzzle below window has four 3x3 block panels with one corner on each marked red. Look familiar?
Use clues from the four slider puzzles to input the correct grey-white pattern.
In the Blue room, examine each of the four slider puzzles and note the white-grey 3x3 patterns behind the 4x4 grids of colored slider pieces. (Yes, the slider puzzles, the colors, and the numbers are all red herrings.) Note which 3x3 pattern goes with which red corner. Input this pattern into the puzzle below the window in the White Room
The entire 6x6 grid should look like this ("O" is a white block):
xxx xox
xox xox
xxx oox
xxx xox
oox oox
xxx xxx
The floor shakes. Suddenly, you're a long hallway away from the Blue Room. And the White Room has a new door.
Clock tower
Notice
that if you click to the right, the full view of clock indicates a stairway near you and a small doorway on the other side of the clock
Examine clock panel
Collect gold ring from clock panel, to the right of the clock faces
Examine both rings
Note half of roman numerals on each ring.
Combine your rings. Read only the symbols that form actual roman numerals (don't accidentally overlook a I !)
You should get three sets of two numbers.
Set the clock.
Set the three clock faces according to those three sets of numbers on your rings. (red button for hour hand, blue button for minute hand, diamond button to switch between clock faces) The gold ring needs to be in the panel for you to set the clocks, so memorize or write down the numbers before pulling the rings apart.
IX:III, IV:V, X:II indicate 9:15, 4:25, 10:10
Hit the diamond button.
A second panel opens! Notice
This panel takes your silver ring, and it controls the hands of the actual clock.
Insert the silver ring into the second panel. Set clock so that the hands form a bridge from the stairs on your side of the clock to the door on the other side
(8:10)
Peek inside the square cubby in the middle of the clock as you cross over
Escape 1
Inside the clock tower, collect black box. Note that it doesn't appear to have an opening. Note hang glider. Note the bridge outside that is broken off.
You can collect hang glider and escape off the bridge. Or you can remain and find the actual exit.
Escape 2
Notice
Note that you can see clock gears through the window. Note colors and positions of gears, highest to lowest
Black Box
Place black box in cubby in center of clock
Set clock so that both hands break the black box
(12:00)
Collect green key
Calendars and Real Exits
Return to staircase room. Take another look at the calendar notation. Notice
Note the three black circles somehow connect to the 12 months
Check the grate
Notice the fog or whatever it was that was blocking your way down has been cleared.
Go down the open grate and to end of hallway.
Final code
Insert green key to open the panel
Remember the three dots on the calendar (positioned like the three clock gears) with 1-12 beside them. Remember that white was the "highest" positioned gear, and yellow was the "lowest" one. Click the colored buttons in order from January to December, white for months with 31 days, red for 30 days, and yellow for the month with 28 days.
white, yellow, white, red, white, red, white, white, red, white, red, white
You can now exit the real way, and wish that you knew Japanese so you could understand the interesting epilogue playing out in front of you
Posted by: JudyJetson |
January 8, 2015 3:15 PM
|
January 8, 2015 3:15 PM