JayisGames.com is now available ad-free!
Jay is Games recommends Cheat Happens with 8,000+ games and 35,000+ trainers!

Doooors


  • Currently 4/5
  • 1
  • 2
  • 3
  • 4
  • 5
Rating: 4/5 (91 votes)
Comments (43) | Views (5,506)

DoraDoooorsBouncing on buttons and flipping some switches, pressing reset when I'm stuck in some ditches, magical doors and some shiny blue bling, these are a few of my favourite things... Arvi Teikari (Hempuli) really knows the way to a girl's heart! Doooors is a puzzle/platformer where you play a rotund little fellow in a blue onesie trying to get a number of glowing blue crystals. Each stage has one, and while you don't have any enemies to fear, that doesn't mean nabbing it will be easy. Hope you ate some fish today, because you're going to need the brain food.

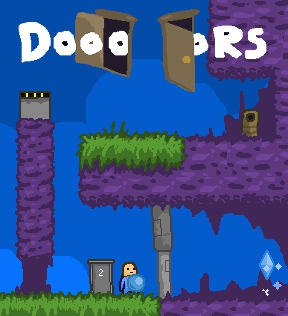
Move with the [arrow] keys, jump with [S], pick up objects with [D], then hit [D] again to throw them. (Or hold [down] while pressing [D] to set them down nicely.) What can you pick up? Lots of things. Experiment! Doors with identical numbers are connected to each other; walk in one and pop out another, along with whatever you were carrying. Of course, you can only pick up certain types of doors, and you can't carry a door through another one. Get stuck in a spot? Just press [R] to reset the level. There are no penalties, no lives, and no time limits. Just you, a series of deceptively simple obstacles, and your glowy crystal thingamajig, tantalisingly out of reach.

Doooors is one of those games that lends itself to long periods of staring at the screen with a furrowed brow. In fact, I'd find it a lot easier to be mad at if it weren't so darned cute; I mean, lookit that round widdle blue belly! It's not perfect; tossing things onto higher ground can often be annoyingly fiddly, and the controls occasionally feel a bit "slippery" when running or landing. It's also fairly simple, if not easy.

Which makes sense, since the game was intended to be challenging. All the levels are unlocked at the start, and you can actually play them in any order you like. Of course, if you're like me, and a chronic goody-two-shoes you'll feel guilty about skipping and spend long minutes staring forlornly at the screen instead until you puzzle it out. Some people will love it. Some people may not. But Hempuli's first flash game is a welcome treat for puzzle fans, and anyone else who likes that sensation you get when the light bulb goes off in the back of your head.

Play Doooors

Walkthrough Guide


(Please allow page to fully load for spoiler tags to be functional.)

For those who are stuck, here is a play by play to get to up to where I am on level 8.

Walkthrough for levels 1 through 7:

Level 1

  • Pick up the orb using [D]

  • Go through the door using [up] (while you are holding on to the orb) jump across and set it on the sensor using [down] + [D].

  • Then jump down and go through the door again

  • Jump on the button and run for the crystal

Level 2

  • Go through the door

  • Pick up the door you just went through (the one at the top of the screen)

  • Move to the sensor long enough so the little bad dude starts to fall, but move off of the sensor before he falls on the spikes.

  • Jump off the ledge (still holding the door) and move close to the lightning (don't touch it, it will kill you).

  • Throw the door using [D] and it will land on the other side of the lightning.

  • Enter through the door closest you (the one on the left) and move towards the crystal.

  • Now all you have to do is jump on the little dude to get to the crystal. (Don't worry if you miss since he won't hurt you, just try again.)

Level 3

  • Grab the door to your left and throw it on the ledge to your left.

  • Go down and through the door (1 or 2 it doesn't matter since they are in the same place).

  • Pick up the number 1 door and get a running start and jump, throwing the door while you are in the air. The door should land on the ledge on the right.

  • Go down and pick up the crystal ball and go through door 1.

  • Set the crystal ball on the sensor and jump down to beat the level.

Level 4

  • Ok, now this one is pretty tricky. Start by picking up one of the number 1 doors (doesn't matter which) jump and throw it over the ledge to your left.

  • Go through door 1 and pick up the same door you just threw up.

  • Throw this up on the ledge on the left and double back and go through the door 1 that you can reach (the one by the lightning).

  • Pick up the crystal ball and jump over to the wooden scaffolding on the right (by the top lightning) and throw the crystal ball through (make sure you set off the sensor).

  • Then go back through door number one, pick up the one you just came through (the one on the top left) and set it on the ledge just below it.

  • Pick up door number 2 and set it down with the door number 1 next to the lightning.

  • Go back through door 1 and pick up the door you just went through.

  • Jump down and throw the door across the lightning to get to the button.

  • Go through door 1 and pick up the button and head back through.

  • Go through door 2 and into the cave (still holding the button).

  • Drop the button in front of the sliding door and jump on it.

  • Head through and jump on the trampoline to beat the level.

Level 5

  • Grab the trampoline and set it next to the sensor so you can jump up to the door.

  • Go through the door (don't worry about the little dude, remember he can't hurt you).

  • Pick up the door you just went through, jump on the ledge and throw it onto the sensor on the other side of the lightning. You will notice that the little dude jumps down and starts moving back and forth across the sensor, we are going to use this.

  • Pick up the trampoline and jump into the spike pit just before the little guy trips the sensor, rush to the far right and set the trampoline there.

  • Jump on it to beat the level.

Level 6

  • First, position the door in the pit you are in to be as close to the crystal as possible.

  • Then grab the trampoline and go through the door. The bad little dude doesn't hurt you if you touch him, he just goes right through you.

  • Set up the trampoline against the wall to the far right, step on the bad little dude so he freezes and pick him up so he is facing towards the right (not extremely important but it means that when he starts moving that he goes in that direction so it will give you another chance at getting through to the crystal).

  • Jump on the trampoline and throw the bad little dude toward the sensor, then hurry up and get to the door and to the crystal.

  • You don't end up using the crystal ball at all.

Level 7

  • Jump on the button so the little dudes fall down to the level you are on.

  • Pick up the button and position yourself right in front of the spikes.

  • Wait for one of the little dudes to happen by and jump on his head (still holding the button) so you jump over the spikes.

  • Put down the button with [down] + [D] and jump on it.

  • Quickly pick it back up and jump on to the ledge on the right.

  • Wait for the doors to close (so you don't get squished) and jump on the button again once they do.

  • Jump through and complete the level.

For Level 8, I haven't gotten much, but here is what I have been able to figure out:

Jump on the button to the right and quickly pick it up when the door falls.

  • Go through the door and drop the button just before the doors on the right (the ones the button opens).

  • Jump on the button and head through trying to angle yourself through to the trampoline's ledge (This will probably take a few tries).

  • Pick up the trampoline and head over to the left. This is where things get a little tricky.

  • Throw the trampoline through the lightning (but keep a little distance from the lightning when you throw since the trampoline will slide a little.

  • Then go back up to the top of the screen to get the button that you left up there.

  • Jump on it and pick it up, heading through the doors to the right (or just go through the door).

  • Throw your button so it will bounce on the trampoline and land on the sensor (so far I have not been able to do this so I don't know if this is right or not) then proceed to the end of the level? Not quite sure this is right, but it is a thought.

Whew, that was quite the adventure. Hope this helps lessen the learning curve.

Finally finished all levels

Walkthrough for levels 8 through 18:

Level 8

  • Jump on the right button to drop the mobile Door 1. Carry the button into Door 1. Jump on the button to drop through the door and reach the ledge with the trampoline. Take the trampoline down.

  • Throw that same button originally on the right (not the trampoline nor the other button) to the left through the lightning from a bit far back, at about the start of the bridge. Then throw the Door 1 or trampoline from as close as you can get to the lightning. You should be moving when you hit the throw button to make sure you get distance. May take a couple tries to hit the sensor.

  • Jump on the button that was originally on the left to drop the static Door 1. Make sure the other Door 1 and trampoline are on the other side.

  • Put the trampoline on the sensor to keep it pressed, then throw the Door 1 up. Jump on the trampoline to follow it, and throw the Door 1 up again. Go through the Door 2 to get to the Door 1 and finish the level.

Level 9

  • Jump on the enemy facing right, then throw it over the electric barrier and hit the sensor. Tricky timing.

  • Enter the door that falls and bring the other door down. Make sure you don't get crushed on the way down.

  • Put something on the sensor (don't worry about the enemy anymore) and grab the button. Throw a door up on the bridge and bring the button and trampoline through the other door. Position the trampoline correctly and jump with the button over the electric barrier. Push the button and exit the level.

Level 10

  • This one has lots of tricky timing. Push the button, land and grab the mobile door, then throw it up so that you can get past the barrier. Enter the remaining door with the button, position all three doors in the middle of the barrier and hit the switch, bringing everything down.

  • Throw the button to the right so it hits the treadmill. Then throw one Door 1 and one Door 2 from about the edge of the static Door 2 so they hit the button and fall in the pit. Enter a door.

  • Throw the Door 1 just right so it hits the button in the pit. (You only have one shot at this.) Quickly take the Door 2 and go through the barrier, placing the Door 2 on the sensor so the spikes stay down. Before you go up, enter the Door 3 and throw the Door 1 back to the other side. Then go back through and enter the Door 2 to get back to the top.

  • Throw the button into the pit. Next, the trickiest part: carry the Door 1, jumping over the spikes, throwing the Door 1 up at just the right point. You have one shot at this so you will probably have to redo this level many times. You'll end up in the pit.

  • If you prepared correctly you should be in the pit with a Door 1 and a button. Go through the Door 1, placing the other right up against the barrier, then back through to the pit.

  • Throw the free button at the other, head through the Door 1 and to the end.

Level 11

  • You have to stack springs here. Just drop them on each other while not moving to keep them aligned. A perfect stack is one where the top spring hits the middle spring at the peak of the middle spring's ascent. To get full height, you also have to time your jump from the ground and get the phase right.

  • First, make a stack under the doors and ascend to the platform. Throw a door down and go through the other. Next, make a stack on the left side. Get to the top and put the door on the sensor. This will fill most of the ground with spikes.

  • Here's the hard part. In mid-air, grab a spring and throw it within jumping distance. Grab the other bouncing spring, bounce to the next spring and throw your held spring within jumping distance. Then bounce over to the safe area.

  • Walk through the spikes and gather the springs. Make a stack on the right edge of the safe area; this one has to be perfect. Time your jump and grab the exit.

Level 12

  • This one requires mad timing. The doors you use are interchangeable, so I'll just pick one.

  • Place the Door 2 on the sensor. Enter it and throw the other Door 2 up, then bring the trampoline through the Door 1.

  • Place the trampoline under the lightning, then throw a Door 1 and a Door 2 on it so they bounce up to the next floor. Get the trampoline and enter the Door 2. Separate the doors and enter Door 1 with the trampoline. From underground, throw the Door 1 upward then use the trampoline to follow it. Place that Door 1 as close as possible to the Door 2 but make sure you can enter both.

  • Enter a door and carry both over to the right side. You'll have to throw one down. Get lucky and miss the trampoline or it'll bounce to the treadmill and you'll have to start over.

  • Place Door 1 on the ground in front of you, then say a little prayer. Throw Door 2 at the treadmill from as far back as you can then grab the trampoline, enter the Door 1, switch to Door 2 and run right for your life. Running at full speed on the treadmill will keep you still.

  • Make your way as far right as you can on the treadmill, drop the trampoline, and bounce to victory. This part is also harder than it sounds.

Level 13

  • Jump on the button to the right and quickly throw it or bring it in (the bottom enemy is useless so don't worry about it). Then take the Door 2, jump up to the ledge and make a heroic leap across the chasm. You may need to practice it.

  • Drop the Door 2 and enter the Door 1. Let out the enemy without killing it, then go back through the Door 1 and grab the Door 2, jumping into the pit. Drop the Door 2 and enter it. Stun and grab the enemy, go back through the Door 2 and drop it. Go back, use the button, and bring it past the barrier.

  • Jump into the chasm again (with button), this time making sure to land on the enemy (I don't think it matters if it's at the spikes.) You'll end up at the right with two identical buttons. Bring one button to the other side (jumping on the enemy) and drop it underneath the hanging spikes. If you were to jump up, you'd hit them and die.

  • Bring the other button over and jump on the original button. Make sure you peak your jump to the left of the spikes and fall onto the button. Drop the carried button next to the barrier, use it and hit the exit.

Level 14

  • Grab the enemy facing left. Throw it over the electricity and past the treadmill. Easy to miss. The enemy will hit the sensor. Go through door 2 and grab the enemy again.

  • Enter Door 1, drop the enemy, and re-enter again. Grab the Door 1, drop it on the treadmill and quickly go in.

  • Be careful where you jump; you can get stuck. Drop down, stun the enemy and throw it normally (not up) at the green switch. This will drop the static Door 1. Grab the trampoline and go through Door 1. Trampoline to grab the jewel, go back through Door 1 and place it on the sensor. Go back through Door 1 and trampoline to victory.

Level 15

  • Stun the enemy and throw him up the step. Enter the door (yes, really). Land on the enemy while it's still up the step and bounce to the ledge with the jewel. Throw the jewel on the sensor. Go back through the door and throw the button on the other sensor. (The enemy can die.)

  • Throw the door next to the exit. Use the trampoline to get to the button. Grab it, place it on the ledge next to the spikes and use it, then go through the door.

Level 16

  • Place the spring under the left Door 1. Go through Door 2, and take the other Door 2 to the sensor. Go back through Door 2 and take the original, throwing it on the platform over the sensor.

  • Jump on the button, then take it back through Door 2 to Door 1. Put the sensor down on the right edge by the jewel. Go back through Door 1, grab the spring and back again. Place the spring flush to the right corner of the right trap door.

  • Grab the jewel, jump a millisecond before throwing it at the button and bouncing off the spring to the exit above.

Level 17

  • Spikes won't kill you if you don't jump on them.

  • Throw the trampoline and a Door 1 in the pit. Go through the other Door 1 and position the trampoline in the right spot, just under the edge of the green ledge.

  • Take the Door 1 from the pit, use the trampoline and place the Door 1 on sensor 1. Go through a door and place the Door 1 on sensor 3. Go through a door and throw Door 1 in the spikes. Go through Door 3 to Door 1, grab the Door 1 and throw it past the electricity. Trampoline to Door 3 to Door 1. Throw one of the Door 2s upward to the left against the sensor 2. Try to get it flush with the wall.

  • Throw the other Door 2 left past the electricity. Take Door 1 to Door 3 and here's the hard part. Jump down onto the trampoline and bounce to the right under the ledge and past the spikes. The trampoline has to be in the right place. Grab the Door 2 and bring it to the ledge. Drop the Door 2, and go through the Door 3.

  • Throw the Door 1 to the right past all the electricity so it hits the treadmill on the other side. You don't have to jump to make the throw. Go through Door 3 to Door 2 to Door 1 to the exit.

Level 18

  • Grab the trampoline and place it on the left side of the trap door, half on and half off the grass. Doesn't need to be perfect. Grab the enemy and throw it on the ledge. Just as the enemy wakes, jump on the trampoline, so you hit the enemy as it bounces off the trampoline. Easier than it sounds. You'll reach the high platform on the left.

  • Pull down the door and toss it up to the platform with the jewel. Also bring the enemy.

  • Toss the jewel to the sensor above. This is extremely tricky; you may want to practice.

  • Bring the enemy through the door and drop it. The barrier and trap door will now be whirling blades of death. Be careful. Bring the door to the left. Don't drop down. Instead throw the door up to the right-side sensor.

  • Go through the trap door. If you land on the trap door while it's closed and fall through, it is much less dangerous. Place one trampoline under the trap door and grab the other. Bounce through hoping not to die (basically down to luck). Throw one trampoline on the left ledge under the last sensor. Throw another at the first trampoline, bouncing it to the sensor.

  • Head to the exit through the trap door, which is now doubly dangerous since it has a trampoline under it.

43 Comments

Patreon Crew SonicLover September 2, 2010 3:56 PM

Level 6 has me absolutely stuck.

No matter what I do, I can't reach the upper ledges. I'm completely confined to the two pits. I can use the spring to throw things to the tops of the pits, but if I threw a door up there I wouldn't have any way to reach it. Anyone got any advice? I'm sure I'm overlooking something...

Reply

Looked like fun. But jeez ... I couldn't even do the 1st level lol

Reply

No mute?

What the heck game designers? EVERY game neesa a mute and a save option. EVERY game!

Reply

Can't get past level 2...the instructions indicate that there's a button in the pit but I don't see anything and I can't jump up to the ledge.

Reply

For level 2: Note that you can jump higher by jumping onto an enemy. Note also that you can enter doors by pressing UP, but also pick up and throw them.

As for level 6: You have to think a bit out-of-the-box: consider carefully what items allow you to get higher, and then combine them. This kind of thinking is essential for a lot of the game.

JIGuest: the game lets you play the levels in any order so saving would be a bit redundant.

Reply

How do you get past the electricity in 2? It says pick up the door. But then what?

Reply

Level 2, how do you even get past the zappy thing? I can pick up doors, great, and do what with them? I thought maybe I could make the bridge collapse or something, no dice.

Reply

Disregard my previous, I see now that just hitting the D key throws the door. I could have sworn that the directions told me that in order to drop something I had to use the down arrow key and then the D key, which puts the item down where you're standing.

Reply

I love the concept, and some of the puzzles were great, but the controls are killing me.. literally. Swimming-through-molasses controls are one thing in a pure puzzle game, but there are at least a few levels that take some timing, and frankly, fighting the controls is not my idea of a good time.

Reply

@Waturi

drop the little bad dude down into the pit but don't let him die on the spikes. You jump off of him, not a button.

Reply

@SonicLover:

I got stuck there too! I finally figured it out though - the game doesn't explicitly tell you this, but you can

pick up and throw the enemies when they're stunned.

Also, you might have noticed this, but it took me a few levels to realise: The enemies

don't actually hurt you if you touch them.

Reply

Username ... I was doing that too lol hit D and the down arrow at the same time

Reply

Also stuck at level 6. The rushing solution doesn't work (obviously blocked by the programmer), but I can't for the life of me figure the "logical" solution...

Reply
David Shute September 2, 2010 4:28 PM

@Waturi:

The picture in the pit isn't of a button - it just means you have to jump on something to reach the exit.

You can jump on the backs of the monsters!

Reply
Hassle Free September 2, 2010 4:33 PM

for level 6:

first position the door in the pit you are in to be as close to the crystal as possible. Then grab the trampoline and go through the door.

Keep in mind

that the bad little dude doesn't hurt you if you touch him, he just goes right through you.

Set up the trampoline against the wall to the far right, step on the bad little dude so he freezes and pick him up so he is facing towards the right (not extremely important but it means that when he starts moving that he goes in that direction so it will give you another chance at getting through to the crystal) jump on the trampoline and throw the bad little dude toward the sensor, then hurry up and get to the door and to the crystal.

You don't end up using the crystal ball at all and it works!

Hope that helps

Reply

The learning curve leaves a lot to be desired. I got through the first 3 fine and then am utterly clueless on 4, 5, and 6.

Reply

Okay, I had to stop trying to play this game. At first I thought this was a game play hurdle but now I suspect it's a glitch. On level 2, and again on level 4, when I went through a door I would be stuck coming out of the next one, can't move, jump, nothing. Couple that with how incredibly slow the game was playing on my PC and I just gave up.

Reply

GOOD GRIEF this is hard.

Reply

I hate being negative but
this game has given me the hump at level 3

I am miffed and going to bed

Reply

The annoying freezing bug mentioned above has now been fixed, along with the ability to mute the sound effects.

Reply
Hassle Free September 2, 2010 5:34 PM

For those who are stuck, here is a play by play to get to up to where I am on level 8.

Walkthrough for levels 1 through 7:

Level 1

  • Pick up the orb using [D]

  • Go through the door using [up] (while you are holding on to the orb) jump across and set it on the sensor using [down] + [D].

  • Then jump down and go through the door again

  • Jump on the button and run for the crystal

Level 2

  • Go through the door

  • Pick up the door you just went through (the one at the top of the screen)

  • Move to the sensor long enough so the little bad dude starts to fall, but move off of the sensor before he falls on the spikes.

  • Jump off the ledge (still holding the door) and move close to the lightning (don't touch it, it will kill you).

  • Throw the door using [D] and it will land on the other side of the lightning.

  • Enter through the door closest you (the one on the left) and move towards the crystal.

  • Now all you have to do is jump on the little dude to get to the crystal. (Don't worry if you miss since he won't hurt you, just try again.)

Level 3

  • Grab the door to your left and throw it on the ledge to your left.

  • Go down and through the door (1 or 2 it doesn't matter since they are in the same place).

  • Pick up the number 1 door and get a running start and jump, throwing the door while you are in the air. The door should land on the ledge on the right.

  • Go down and pick up the crystal ball and go through door 1.

  • Set the crystal ball on the sensor and jump down to beat the level.

Level 4

  • Ok, now this one is pretty tricky. Start by picking up one of the number 1 doors (doesn't matter which) jump and throw it over the ledge to your left.

  • Go through door 1 and pick up the same door you just threw up.

  • Throw this up on the ledge on the left and double back and go through the door 1 that you can reach (the one by the lightning).

  • Pick up the crystal ball and jump over to the wooden scaffolding on the right (by the top lightning) and throw the crystal ball through (make sure you set off the sensor).

  • Then go back through door number one, pick up the one you just came through (the one on the top left) and set it on the ledge just below it.

  • Pick up door number 2 and set it down with the door number 1 next to the lightning.

  • Go back through door 1 and pick up the door you just went through.

  • Jump down and throw the door across the lightning to get to the button.

  • Go through door 1 and pick up the button and head back through.

  • Go through door 2 and into the cave (still holding the button).

  • Drop the button in front of the sliding door and jump on it.

  • Head through and jump on the trampoline to beat the level.

Level 5

  • Grab the trampoline and set it next to the sensor so you can jump up to the door.

  • Go through the door (don't worry about the little dude, remember he can't hurt you).

  • Pick up the door you just went through, jump on the ledge and throw it onto the sensor on the other side of the lightning. You will notice that the little dude jumps down and starts moving back and forth across the sensor, we are going to use this.

  • Pick up the trampoline and jump into the spike pit just before the little guy trips the sensor, rush to the far right and set the trampoline there.

  • Jump on it to beat the level.

Level 6

  • First, position the door in the pit you are in to be as close to the crystal as possible.

  • Then grab the trampoline and go through the door. The bad little dude doesn't hurt you if you touch him, he just goes right through you.

  • Set up the trampoline against the wall to the far right, step on the bad little dude so he freezes and pick him up so he is facing towards the right (not extremely important but it means that when he starts moving that he goes in that direction so it will give you another chance at getting through to the crystal).

  • Jump on the trampoline and throw the bad little dude toward the sensor, then hurry up and get to the door and to the crystal.

  • You don't end up using the crystal ball at all.

Level 7

  • Jump on the button so the little dudes fall down to the level you are on.

  • Pick up the button and position yourself right in front of the spikes.

  • Wait for one of the little dudes to happen by and jump on his head (still holding the button) so you jump over the spikes.

  • Put down the button with [down] + [D] and jump on it.

  • Quickly pick it back up and jump on to the ledge on the right.

  • Wait for the doors to close (so you don't get squished) and jump on the button again once they do.

  • Jump through and complete the level.

For Level 8, I haven't gotten much, but here is what I have been able to figure out:

Jump on the button to the right and quickly pick it up when the door falls.

  • Go through the door and drop the button just before the doors on the right (the ones the button opens).

  • Jump on the button and head through trying to angle yourself through to the trampoline's ledge (This will probably take a few tries).

  • Pick up the trampoline and head over to the left. This is where things get a little tricky.

  • Throw the trampoline through the lightning (but keep a little distance from the lightning when you throw since the trampoline will slide a little.

  • Then go back up to the top of the screen to get the button that you left up there.

  • Jump on it and pick it up, heading through the doors to the right (or just go through the door).

  • Throw your button so it will bounce on the trampoline and land on the sensor (so far I have not been able to do this so I don't know if this is right or not) then proceed to the end of the level? Not quite sure this is right, but it is a thought.

Whew, that was quite the adventure. Hope this helps lessen the learning curve.

Reply

Glad to hear the freezing bug is fixed, it had just done it to me two more times on level 8 and I closed the game again. I'll try one more time but if it freezes again I'm done, man it moves slooooooooowwwww.

Unless, of course, there's a new game up on the home page.

Reply

Okay, freezing bug still exists. Level 8, I come out of stone door number one and I can't move.

Reply

@Hempuli

The annoying freezing bug mentioned above has now been fixed

Nope. Still broken on mozilla flash 10.1.82.76 linux plugin. Are you sure the fixed version is linked here?

[Yes, I am sure. I uploaded it the minute Hempuli sent it to me. -Jay]

Reply

Puzzles actually arent the difficult part its the pure ywitchyness of a .5 second win window that makes this game not fun. 2 out of 5 for good idea gone wrong through stupid twitchyness.

Reply

"In fact, I'd find it a lot easier to be mad at if it weren't so darned cute; I mean, lookit that round widdle blue belly!"

I guess you could say it's A-Doooor-able!

Reply
Josepg Carrington September 2, 2010 7:50 PM

For level seven, you can just toss the button on top of the spikes, then jump onto it and run right over to the crystal.

Reply
Joseph Carrington September 2, 2010 8:18 PM

Level 8:

  • jump on the right yellow button to drop the door down.

  • pick up the button and head through door 1.

  • put the button on the ledge so that you can jump on it

  • jump off the ledge onto the cliff edge with the trampoline. (It will most likely take a few tries to get this right.I found if you jump before the edge of the ledge it works easier)

  • drop the trampoline somewhere where you can get it later, and then go back up and pick up your button from the top

  • Here's the tricky part: you are going to throw both buttons through the electricity, causing one to bounce off the other and hit the sensor. I threw the first one from it's a standing position right next to the electricity, and the second one from a running position

  • Once you get that right, the sensor turns on and drops the immovable door 1, as well as lifts the wall to door 2

  • Now you need to go get one of your buttons back: throw the movable door 1 through the electricity

  • go through door 1, pick up a button, and head back through it.

  • bring your button through door 2 and drop it there

  • do the same with your trampoline

  • put the button all the way to the right, against the cliff

  • The aim here is to throw the trampoline straight up so that it bounces off the button straight up, and when the trampoline is at it's apex, jump on it to get the extra little bit of air you need to touch the crystal

Reply

Guide for 8-10. Currently have no idea how to approach 11.

Level 8

Jump on the right button to drop the mobile Door 1. Carry the button into Door 1. Jump on the button to drop through the door and reach the ledge with the trampoline. Take the trampoline down.

Throw that same button originally on the right (not the trampoline nor the other button) to the left through the lightning from a bit far back, at about the start of the bridge. Then throw the Door 1 or trampoline from as close as you can get to the lightning. You should be moving when you hit the throw button to make sure you get distance. May take a couple tries to hit the sensor.

Jump on the button that was originally on the left to drop the static Door 1. Make sure the other Door 1 and trampoline are on the other side.

Put the trampoline on the sensor to keep it pressed, then throw the Door 1 up. Jump on the trampoline to follow it, and throw the Door 1 up again. Go through the Door 2 to get to the Door 1 and finish the level.

Level 9

Jump on the enemy facing right, then throw it over the electric barrier and hit the sensor. Tricky timing.

Enter the door that falls and bring the other door down. Make sure you don't get crushed on the way down.

Put something on the sensor (don't worry about the enemy anymore) and grab the button. Throw a door up on the bridge and bring the button and trampoline through the other door. Position the trampoline correctly and jump with the button over the electric barrier. Push the button and exit the level.

Level 10

This one has lots of tricky timing. Push the button, land and grab the mobile door, then throw it up so that you can get past the barrier. Enter the remaining door with the button, position all three doors in the middle of the barrier and hit the switch, bringing everything down.

Throw the button to the right so it hits the treadmill. Then throw one Door 1 and one Door 2 from about the edge of the static Door 2 so they hit the button and fall in the pit. Enter a door.

Throw the Door 1 just right so it hits the button in the pit. (You only have one shot at this.) Quickly take the Door 2 and go through the barrier, placing the Door 2 on the sensor so the spikes stay down. Before you go up, enter the Door 3 and throw the Door 1 back to the other side. Then go back through and enter the Door 2 to get back to the top.

Throw the button into the pit. Next, the trickiest part: carry the Door 1, jumping over the spikes, throwing the Door 1 up at just the right point. You have one shot at this so you will probably have to redo this level many times. You'll end up in the pit.

If you prepared correctly you should be in the pit with a Door 1 and a button. Go through the Door 1, placing the other right up against the barrier, then back through to the pit.

Throw the free button at the other, head through the Door 1 and to the end.

Reply

Level 11 seems to have something to do with

throwing the buttons on top of each other then bouncing them off in mid air, but I can't get high enough

Reply

Ok for 11, ive got it started

You have to use down + d to drop the buttons on top of each other, by doing this, they will keep bouncing up and down straight and you can use that to get all the way to the top. I got up to the doors, threw one down, and then threw it over to the sensor on the top left. the only problem is when i did this, it brought spikes out of the ground across the bottom except for the spot where the bracket is.

Reply
Patreon VIP Chiktionary September 2, 2010 10:18 PM

Nice find Dora! :)
Really like the music and I know what you mean re the 'lightbulb' phenomena.
Hope to see more of Hempuli's work.

Reply

Finally finished all levels

Walkthrough for levels 8 through 18:

Level 8

  • Jump on the right button to drop the mobile Door 1. Carry the button into Door 1. Jump on the button to drop through the door and reach the ledge with the trampoline. Take the trampoline down.

  • Throw that same button originally on the right (not the trampoline nor the other button) to the left through the lightning from a bit far back, at about the start of the bridge. Then throw the Door 1 or trampoline from as close as you can get to the lightning. You should be moving when you hit the throw button to make sure you get distance. May take a couple tries to hit the sensor.

  • Jump on the button that was originally on the left to drop the static Door 1. Make sure the other Door 1 and trampoline are on the other side.

  • Put the trampoline on the sensor to keep it pressed, then throw the Door 1 up. Jump on the trampoline to follow it, and throw the Door 1 up again. Go through the Door 2 to get to the Door 1 and finish the level.

Level 9

  • Jump on the enemy facing right, then throw it over the electric barrier and hit the sensor. Tricky timing.

  • Enter the door that falls and bring the other door down. Make sure you don't get crushed on the way down.

  • Put something on the sensor (don't worry about the enemy anymore) and grab the button. Throw a door up on the bridge and bring the button and trampoline through the other door. Position the trampoline correctly and jump with the button over the electric barrier. Push the button and exit the level.

Level 10

  • This one has lots of tricky timing. Push the button, land and grab the mobile door, then throw it up so that you can get past the barrier. Enter the remaining door with the button, position all three doors in the middle of the barrier and hit the switch, bringing everything down.

  • Throw the button to the right so it hits the treadmill. Then throw one Door 1 and one Door 2 from about the edge of the static Door 2 so they hit the button and fall in the pit. Enter a door.

  • Throw the Door 1 just right so it hits the button in the pit. (You only have one shot at this.) Quickly take the Door 2 and go through the barrier, placing the Door 2 on the sensor so the spikes stay down. Before you go up, enter the Door 3 and throw the Door 1 back to the other side. Then go back through and enter the Door 2 to get back to the top.

  • Throw the button into the pit. Next, the trickiest part: carry the Door 1, jumping over the spikes, throwing the Door 1 up at just the right point. You have one shot at this so you will probably have to redo this level many times. You'll end up in the pit.

  • If you prepared correctly you should be in the pit with a Door 1 and a button. Go through the Door 1, placing the other right up against the barrier, then back through to the pit.

  • Throw the free button at the other, head through the Door 1 and to the end.

Level 11

  • You have to stack springs here. Just drop them on each other while not moving to keep them aligned. A perfect stack is one where the top spring hits the middle spring at the peak of the middle spring's ascent. To get full height, you also have to time your jump from the ground and get the phase right.

  • First, make a stack under the doors and ascend to the platform. Throw a door down and go through the other. Next, make a stack on the left side. Get to the top and put the door on the sensor. This will fill most of the ground with spikes.

  • Here's the hard part. In mid-air, grab a spring and throw it within jumping distance. Grab the other bouncing spring, bounce to the next spring and throw your held spring within jumping distance. Then bounce over to the safe area.

  • Walk through the spikes and gather the springs. Make a stack on the right edge of the safe area; this one has to be perfect. Time your jump and grab the exit.

Level 12

  • This one requires mad timing. The doors you use are interchangeable, so I'll just pick one.

  • Place the Door 2 on the sensor. Enter it and throw the other Door 2 up, then bring the trampoline through the Door 1.

  • Place the trampoline under the lightning, then throw a Door 1 and a Door 2 on it so they bounce up to the next floor. Get the trampoline and enter the Door 2. Separate the doors and enter Door 1 with the trampoline. From underground, throw the Door 1 upward then use the trampoline to follow it. Place that Door 1 as close as possible to the Door 2 but make sure you can enter both.

  • Enter a door and carry both over to the right side. You'll have to throw one down. Get lucky and miss the trampoline or it'll bounce to the treadmill and you'll have to start over.

  • Place Door 1 on the ground in front of you, then say a little prayer. Throw Door 2 at the treadmill from as far back as you can then grab the trampoline, enter the Door 1, switch to Door 2 and run right for your life. Running at full speed on the treadmill will keep you still.

  • Make your way as far right as you can on the treadmill, drop the trampoline, and bounce to victory. This part is also harder than it sounds.

Level 13

  • Jump on the button to the right and quickly throw it or bring it in (the bottom enemy is useless so don't worry about it). Then take the Door 2, jump up to the ledge and make a heroic leap across the chasm. You may need to practice it.

  • Drop the Door 2 and enter the Door 1. Let out the enemy without killing it, then go back through the Door 1 and grab the Door 2, jumping into the pit. Drop the Door 2 and enter it. Stun and grab the enemy, go back through the Door 2 and drop it. Go back, use the button, and bring it past the barrier.

  • Jump into the chasm again (with button), this time making sure to land on the enemy (I don't think it matters if it's at the spikes.) You'll end up at the right with two identical buttons. Bring one button to the other side (jumping on the enemy) and drop it underneath the hanging spikes. If you were to jump up, you'd hit them and die.

  • Bring the other button over and jump on the original button. Make sure you peak your jump to the left of the spikes and fall onto the button. Drop the carried button next to the barrier, use it and hit the exit.

Level 14

  • Grab the enemy facing left. Throw it over the electricity and past the treadmill. Easy to miss. The enemy will hit the sensor. Go through door 2 and grab the enemy again.

  • Enter Door 1, drop the enemy, and re-enter again. Grab the Door 1, drop it on the treadmill and quickly go in.

  • Be careful where you jump; you can get stuck. Drop down, stun the enemy and throw it normally (not up) at the green switch. This will drop the static Door 1. Grab the trampoline and go through Door 1. Trampoline to grab the jewel, go back through Door 1 and place it on the sensor. Go back through Door 1 and trampoline to victory.

Level 15

  • Stun the enemy and throw him up the step. Enter the door (yes, really). Land on the enemy while it's still up the step and bounce to the ledge with the jewel. Throw the jewel on the sensor. Go back through the door and throw the button on the other sensor. (The enemy can die.)

  • Throw the door next to the exit. Use the trampoline to get to the button. Grab it, place it on the ledge next to the spikes and use it, then go through the door.

Level 16

  • Place the spring under the left Door 1. Go through Door 2, and take the other Door 2 to the sensor. Go back through Door 2 and take the original, throwing it on the platform over the sensor.

  • Jump on the button, then take it back through Door 2 to Door 1. Put the sensor down on the right edge by the jewel. Go back through Door 1, grab the spring and back again. Place the spring flush to the right corner of the right trap door.

  • Grab the jewel, jump a millisecond before throwing it at the button and bouncing off the spring to the exit above.

Level 17

  • Spikes won't kill you if you don't jump on them.

  • Throw the trampoline and a Door 1 in the pit. Go through the other Door 1 and position the trampoline in the right spot, just under the edge of the green ledge.

  • Take the Door 1 from the pit, use the trampoline and place the Door 1 on sensor 1. Go through a door and place the Door 1 on sensor 3. Go through a door and throw Door 1 in the spikes. Go through Door 3 to Door 1, grab the Door 1 and throw it past the electricity. Trampoline to Door 3 to Door 1. Throw one of the Door 2s upward to the left against the sensor 2. Try to get it flush with the wall.

  • Throw the other Door 2 left past the electricity. Take Door 1 to Door 3 and here's the hard part. Jump down onto the trampoline and bounce to the right under the ledge and past the spikes. The trampoline has to be in the right place. Grab the Door 2 and bring it to the ledge. Drop the Door 2, and go through the Door 3.

  • Throw the Door 1 to the right past all the electricity so it hits the treadmill on the other side. You don't have to jump to make the throw. Go through Door 3 to Door 2 to Door 1 to the exit.

Level 18

  • Grab the trampoline and place it on the left side of the trap door, half on and half off the grass. Doesn't need to be perfect. Grab the enemy and throw it on the ledge. Just as the enemy wakes, jump on the trampoline, so you hit the enemy as it bounces off the trampoline. Easier than it sounds. You'll reach the high platform on the left.

  • Pull down the door and toss it up to the platform with the jewel. Also bring the enemy.

  • Toss the jewel to the sensor above. This is extremely tricky; you may want to practice.

  • Bring the enemy through the door and drop it. The barrier and trap door will now be whirling blades of death. Be careful. Bring the door to the left. Don't drop down. Instead throw the door up to the right-side sensor.

  • Go through the trap door. If you land on the trap door while it's closed and fall through, it is much less dangerous. Place one trampoline under the trap door and grab the other. Bounce through hoping not to die (basically down to luck). Throw one trampoline on the left ledge under the last sensor. Throw another at the first trampoline, bouncing it to the sensor.

  • Head to the exit through the trap door, which is now doubly dangerous since it has a trampoline under it.

Reply

Level 6: (An alternative to the posted solution)

Go through the door, bring the enemy back with you. Grab the door and start jumping on the spring, then release the door with down + D so that the door is bouncing on the spring.

Now, get off the spring, grab the enemy, and get back on the spring. Release the enemy with down + D just as you're coming up off of hitting the spring. Before the enemy unfreezes, hit D to grab the door that's bouncing past you. If everything went according to plan, you're now on the upper level with a door in your hand, and the rest of the level is easy to figure out.

Reply

Played to level 7. Then I got tired of waiting for the creatures make their way to me.

I'll join in on the controls being like molasses. If the game played faster, the controls responded faster (especially on release), and you control your jump more, I think I would have played further.

Other than that, nice concept and execution.

Reply

Hmm. This is really lagging from L3 on. Anyone else having this issue?

(win xp, ff 3.5.11, flash 10.1.82.76)

Reply

Moves a bit too slow to be fun for me. I have very little desire to go back through an entire level just to throw a button or time a jump just right at the end of it. Good concept, though.

Reply
DeliciousBrains September 3, 2010 11:56 AM

Another solution for level 11

Build the spring stack underneath the doors so that you don't land on top of the pass-through ledge. Instead, grab both doors and toss them aside. Put one on the safe area, build the spring stack and place the other door on the switch. Then pass through the door and simply walk past the spikes to collect your springs. No fancy jumping skills required!

Reply

I've only just finished level one, and in doing so, accidentally found out that you can...

... pick up the button and it will work wherever you put it! I didn't know it was a button, so picked it up and carried all over the level. Couldn't figure out where to put it, so I checked the walkthrough and found out I'm supposed to jump on it. So I put it down right in front of the door and it still worked!

Reply

Level 10. I've been following the walkthrough, but no luck.
Hitting the button, but can't throw the door high enough through the barrier!!! It's impossible. Please help!

Reply

More on Level 18...

Thank you Greg for your great walkthrough. Helped me complete level 18. Just a few comments on your instructions (level 18):

from Greg's 1st instructions:
"Grab the enemy and throw it on the ledge. Just as the enemy wakes, jump on the trampoline, so you hit the enemy as it bounces off the trampoline"

Forget throwing the enemy on the ledge. Instead, grab him, jump on the trampoline, and as you're bouncing let go of him (down + D). If you time it right, you'll bounce straight off him.

Greg's 3rd instruction:
"Toss the jewel to the sensor above. This is extremely tricky; you may want to practice."

Actually if you bounce off the enemy, it's a bit easier. Still tricky though! Bounce off him about when he's half way across, give yourself some horizontal momentum (rightways) and throw (up + D) at maximum height.

--------------------------------------------
Arvi Teikari, you've made a very addictive game!

Reply
Ladledarling September 8, 2010 2:55 AM

Same prob as Martin on level 10. Especially with my poor dexterity and the little fellow's dreamy moves. Any tips from those of you who succeeded? Danke sehr!!!

Reply

I've got a slightly different solution to level 8 that I think is easier than the ones already noted.

I throw the trampoline through the lightning, then the first button, then the second button. The second button bounces off the trampoline, then bounces off the first button, then lands on the sensor. The extra bounce lets it reach the sensor without a running start.

I use almost the same approach as Joseph Carrington for the last part, but I put the trampoline down and throw the button on it instead of the other way around. The button bounces on the trampoline indefinitely, but it's only available to be hit for a brief window every two bounces. I stand in the same space as the trampoline and jump slightly before the button reaches its apex. If I time it right, the button gives me an extra boost at the top.

Reply

^ Scroll Up | Homepage >

Leave a comment [top of page]

Please consider creating a Casual Gameplay account if you're a regular visitor here, as it will allow us to create an even better experience for you. Sign-up here!
  • PLEASE UNDERSTAND SITE POLICIES BEFORE POSTING COMMENTS
  • You may use limited HTML tags for style:
    (a href, b, br/, strong, em, ul, ol, li, code, spoiler)
    HTML tags begin with a less-than sign: < and end with a greater-than sign: >. Always. No exceptions.
  • To post spoilers, please use spoiler tags: <spoiler> example </spoiler>
    If you need help understanding spoiler tags, read the spoiler help.
  • Please Preview your comment before posting, especially when using spoilers!
  • No link dropping, no domains as names; do not spam, and do not advertise! (rel="nofollow" in use)
chrpa Jayisgames needs your help to continue providing quality content. Click for details Welcome to the Roundup 66 - Retro with four games! After you find the ten monkeys in the chapter, look in the inventory. You will find a...  ...
chrpa Jayisgames needs your help to continue providing quality content. Click for details Welcome to the Roundup 65 with three games! As mentioned in the previous roundups, only odd-numbered episodes are featured since even-numbered are for Robin Vencel's patrons (the...  ...
chrpa Jayisgames needs your help to continue providing quality content. Click for details Hi! Weekday Escape and Weekday Puzzle are here! First we have two new cans from tomoLaSiDo and then two small rooms from isotronic. That's all for this...  ...
6,365 Views
0 Comments
chrpa Jayisgames needs your help to continue providing quality content. Click for details Welcome to Mobile Monday! We have another beautiful game from Nicolet and it's a winter game as it should be. Tasuku Yahiro have released another of their...  ...

HELP Jayisgames.com

Recent Comments


Display 5 more comments
Limit to the last 5 comments

Game of the week


Dark Romance: Vampire Origins Collector's Edition

Your Favorite Games edit

add
Save links to your favorite games here. Use the Favorites editor.

Monthly Archives