
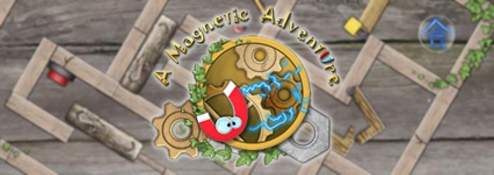
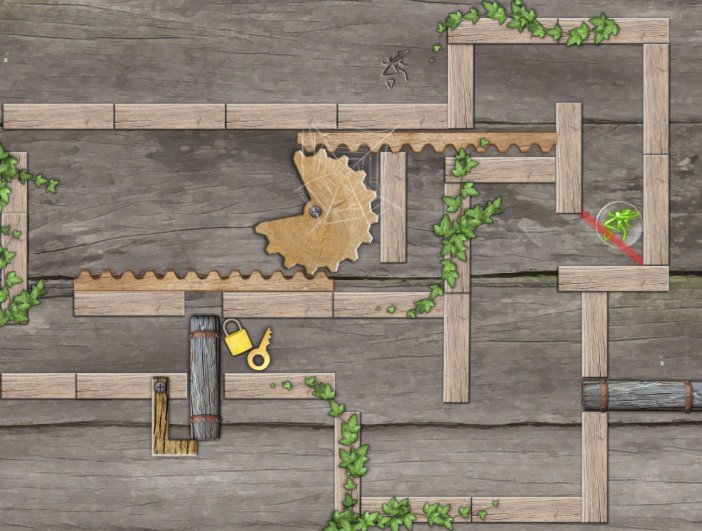
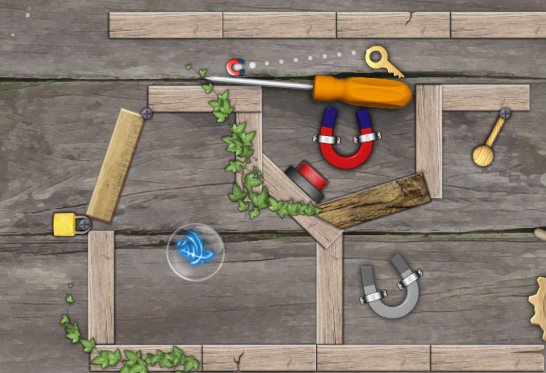
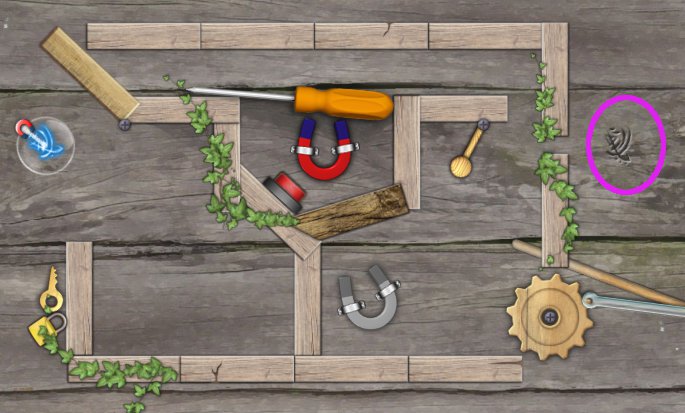
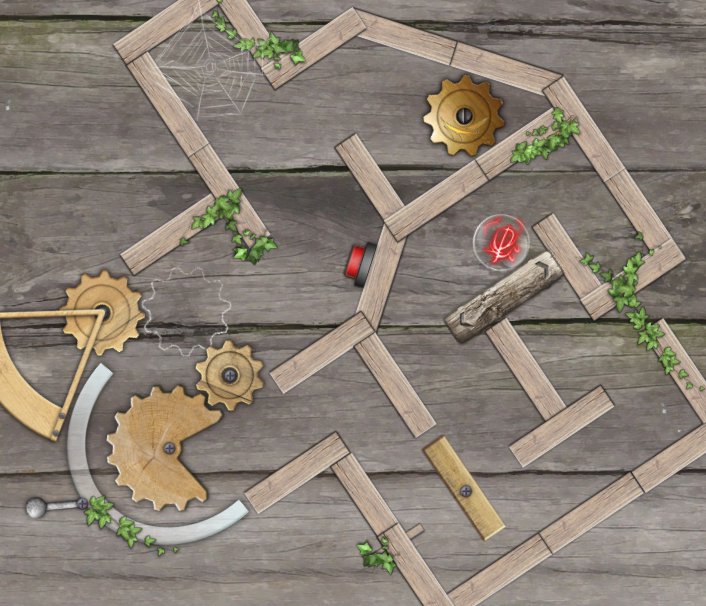
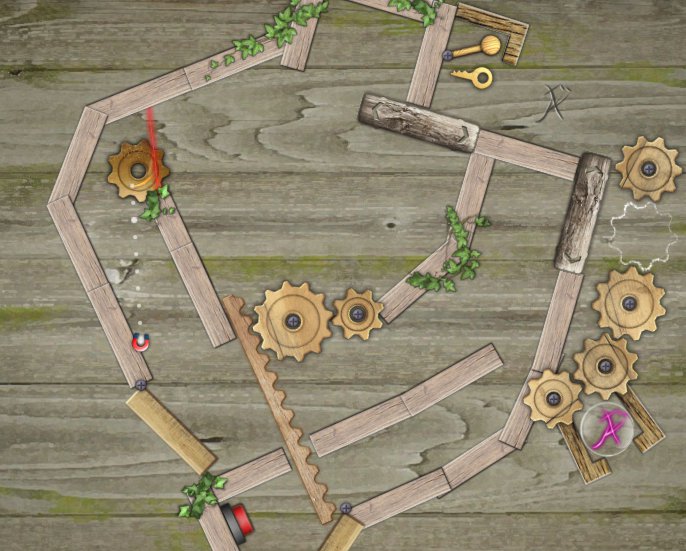
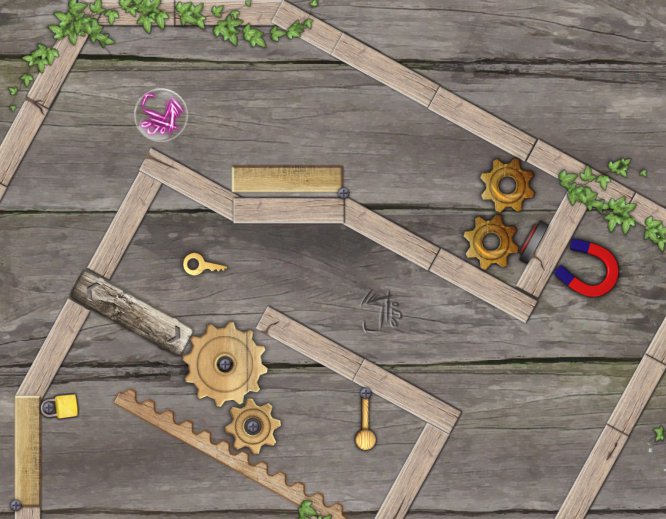
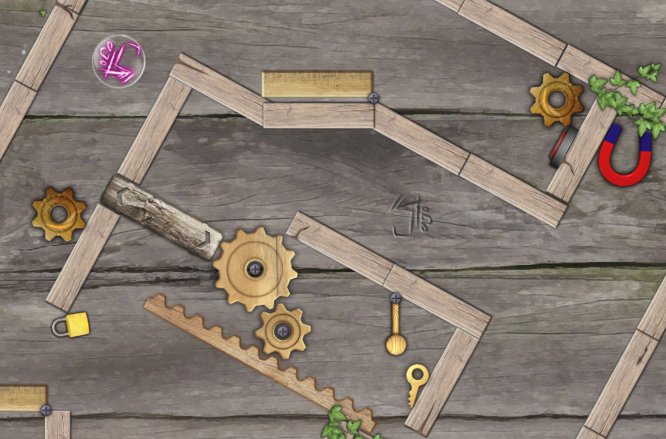
![]() Magnets, levers, buttons, switches, gears, springs, rope, blocks of wood... They all exist for one purpose: to create puzzles for us to solve! Or, at least they do in A Magnetic Adventure, a physics-based puzzle solving game from Alawar Games. Tied together with a loose story you'll forget the minute you learn it, A Magnetic Adventure is all about moving totems to special marks on certain parts of the stage. Getting there requires some creative puzzle solving of the "drag stuff around" nature.
Magnets, levers, buttons, switches, gears, springs, rope, blocks of wood... They all exist for one purpose: to create puzzles for us to solve! Or, at least they do in A Magnetic Adventure, a physics-based puzzle solving game from Alawar Games. Tied together with a loose story you'll forget the minute you learn it, A Magnetic Adventure is all about moving totems to special marks on certain parts of the stage. Getting there requires some creative puzzle solving of the "drag stuff around" nature.
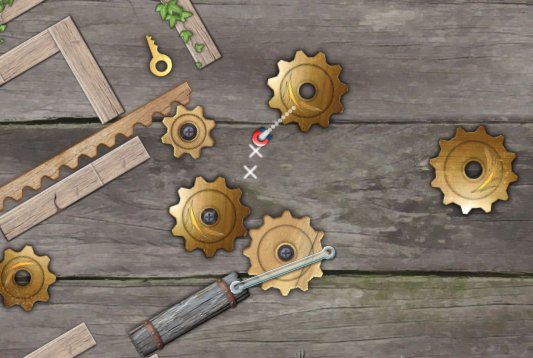
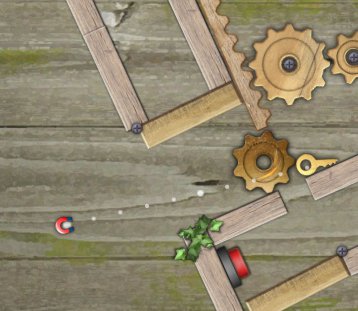
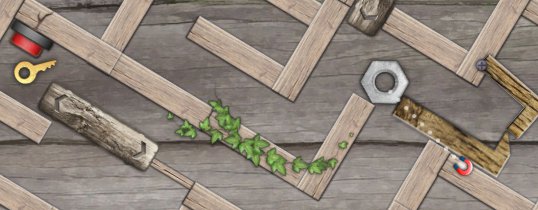
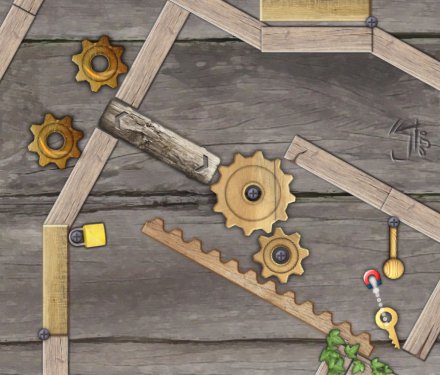
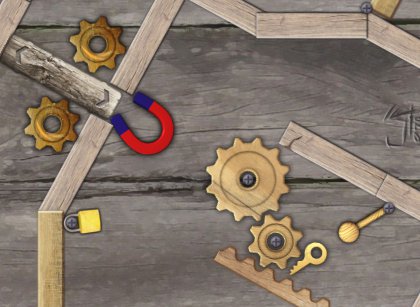
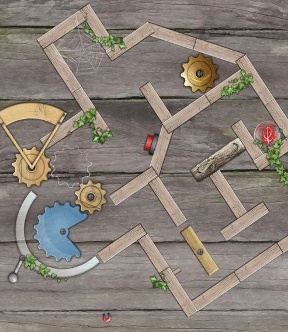 As you probably guessed, the central mechanic of A Magnetic Adventure is magnetics. You can click and drag loose metal objects in each level and use them to solve puzzles. Keys and locks, for example, are prime targets to be dragged around, and you can even turn wheels, gears, and switch levers that are made of metal. Anything blocked by another object, anything secured to the ground, or anything not made of metal (cursed wood! *shakes fist*) you can only affect indirectly, usually by moving something metal nearby and giving it a push.
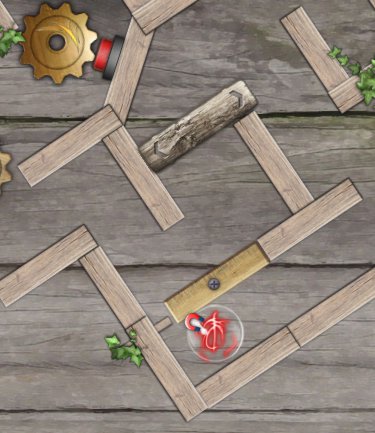
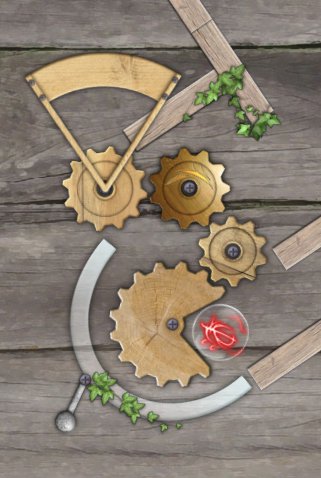
Levels are unlocked groups at a time, allowing you to hop between a set of stages in case you get stuck. At the end of each map you'll get to complete a special puzzle stage with a different gimmick, most of which are at interesting (and quirky) enough to break up the straight cerebral gameplay. Each contraption is fairly simple to figure out, though from time to time you'll need to use a trial and error to learn what to do. Solving puzzles is almost all brain power, so you won't need to worry about pulling off last-second maneuvers to get the totem to the goal.
Analysis: A Magnetic Adventure is one of those games that takes some time to get started. A lengthy tutorial probably wasn't the best thing to include in the beginning, as it really extinguishes the impact the game could have the first time you fire it up. When the game gets started, though, you'll find the puzzles are exactly what you were looking for, and the game plays smoothly and looks great, too.
Where A Magnetic Adventure falters is its uneven execution. Some of the puzzles are wickedly difficult, while the rest are mostly ho-hum easy. Solutions occasionally require you to think laterally, but not often enough so you expect to do so, leaving you stuck from time to time. And I feel compelled to mention the level that takes place in the dark. Note to game developers: it's never a good idea to force your players to solve puzzles with only a flashlight. Especially when moving said flashlight is a cumbersome and ugly process. K THX BAI.
Despite an uneven experience, you'll still get a kick out of A Magnetic Adventure from start to finish. There are enough levels to keep you busy for several hours, and the presentation and control are just right to let you hop in and have a good time.
![]() Windows:
Windows:
Download the demo
Get the full version
![]() Mac OS X:
Mac OS X:
Not available.
Try Boot Camp or Parallels or CrossOver Games.


Walkthrough Guide
(Please allow page to fully load for spoiler tags to be functional.)
A Magnetic Adventure Walkthrough
General Information
The Main Menu is comprised of:
Play
Profile:
Click 'Create'
Type in your username
Click 'Create'
Click 'Done'
Click 'Play'
Map: Displays the levels you have solved. Levels will unlock as you progress
Options:
Music volume
Sound volume
Fullscreen option
Help: Gives an overview of the mouse controls
Exit
Use only your mouse on metal objects: Left-click to select and Hold to drag. Release the left mouse button to deselect an object.
There are twelve tutorial levels to play through before getting to the main game.
There's a hint button at the bottom right of the screen that takes about 3 minutes to recharge.
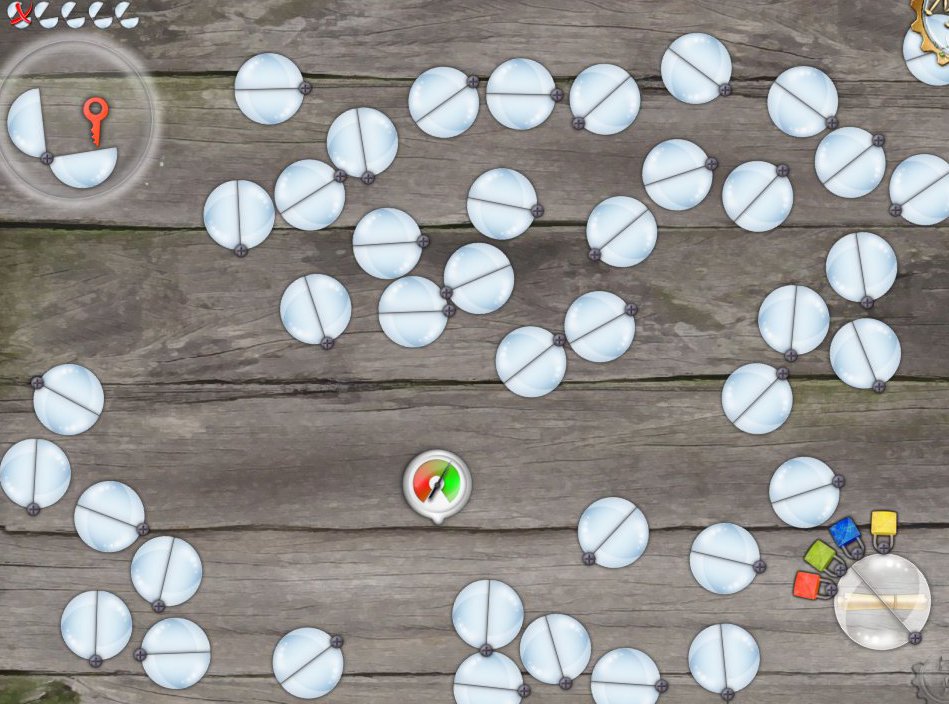
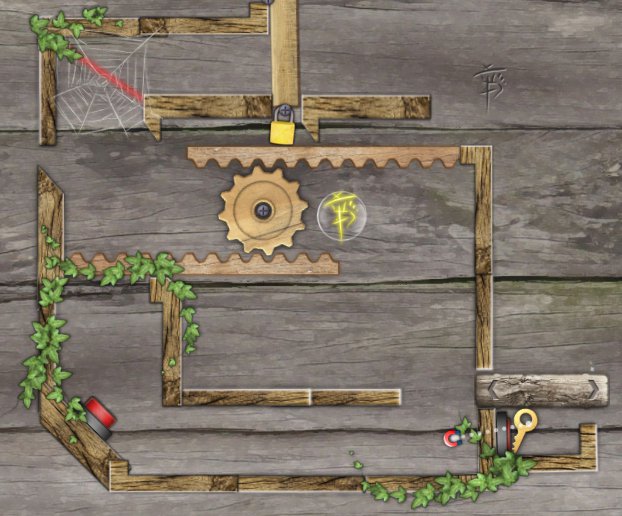
The main levels are comprised of five circles, each containing a map level and six totem levels.
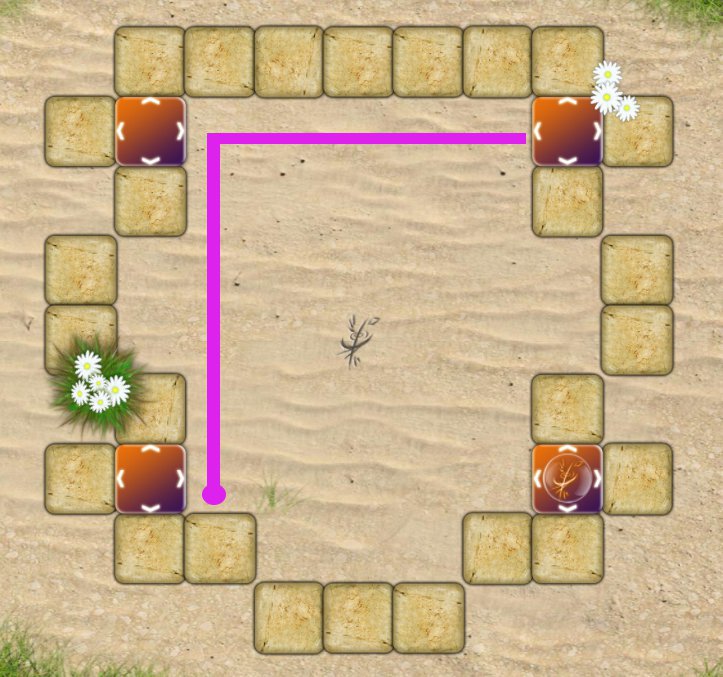
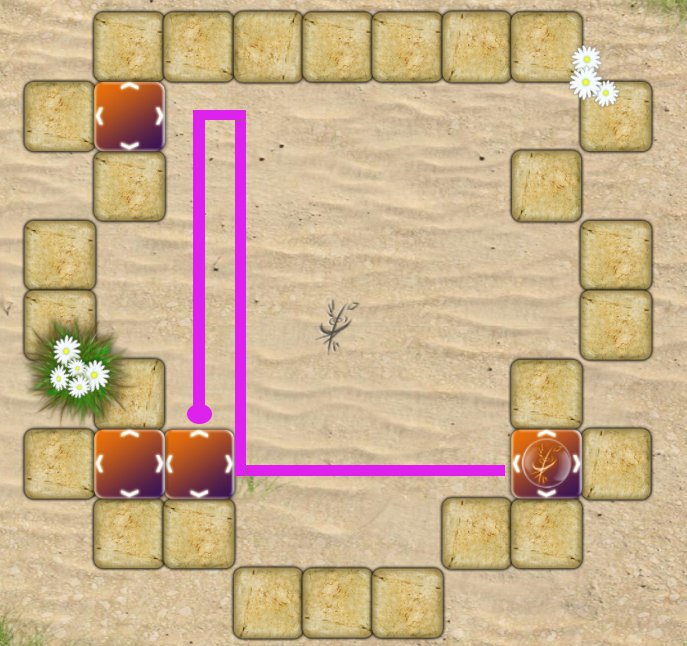
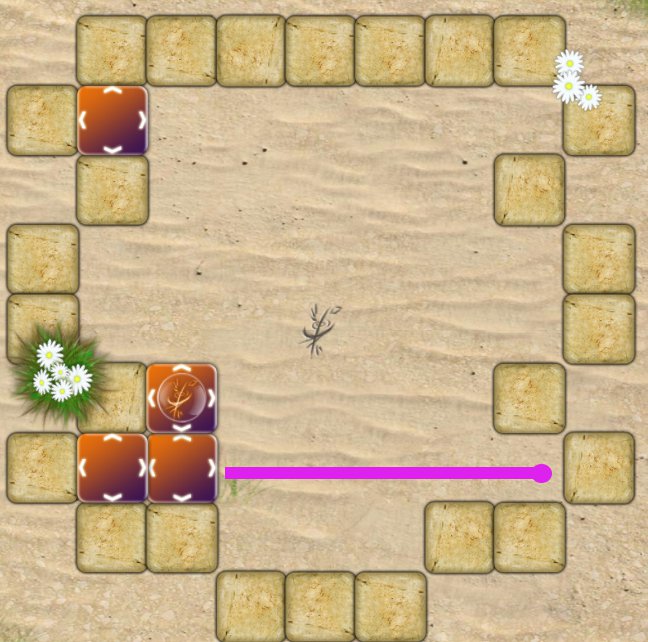
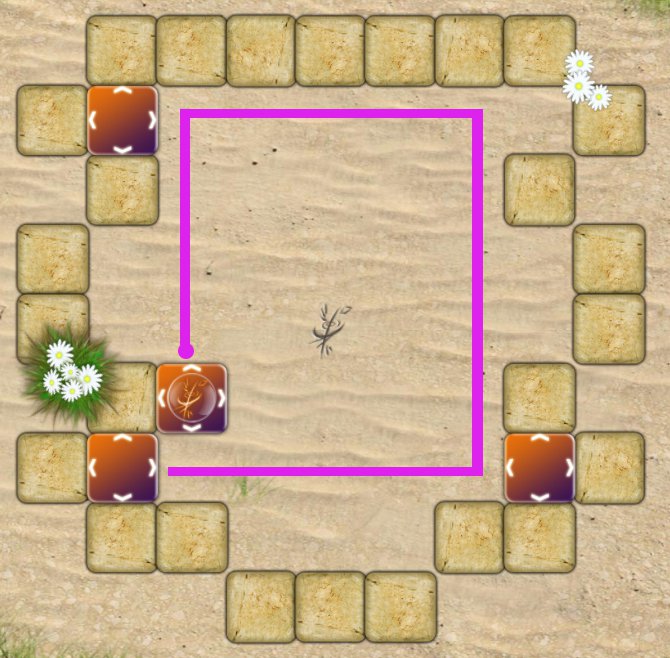
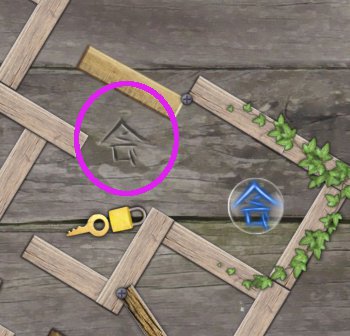
To solve each level, totems need to be dragged to their respective symbols which are carved into the wooden background.
Once you access a Circle's map you can access any of the six totem levels within it.
Tutorial Levels
Level 1 - Let's Get Acquainted
Drag the nut to the outlined space.
Drag the cog to the outlined space.
Screenshot
Level 2 - The Old Clock
Click and hold on any one of the cogs outside of the clock and move the mouse to turn it.
Another cog will appear, so drag it to the outline.
Click on the lever, hold and drag to operate.
Screenshot
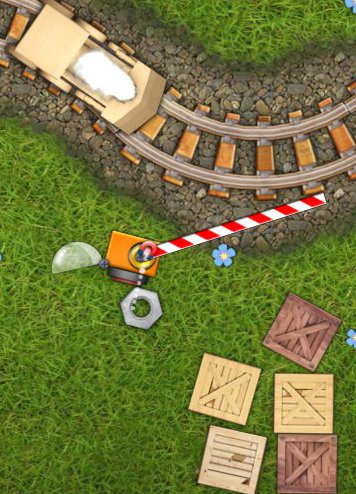
Level 3 - The Steam Engine
Click and drag the nut and use it to push the crates off of the railroad track.
Screenshot
Click and drag the nut. Use it to push the button, which will raise the barrier.
Screenshot
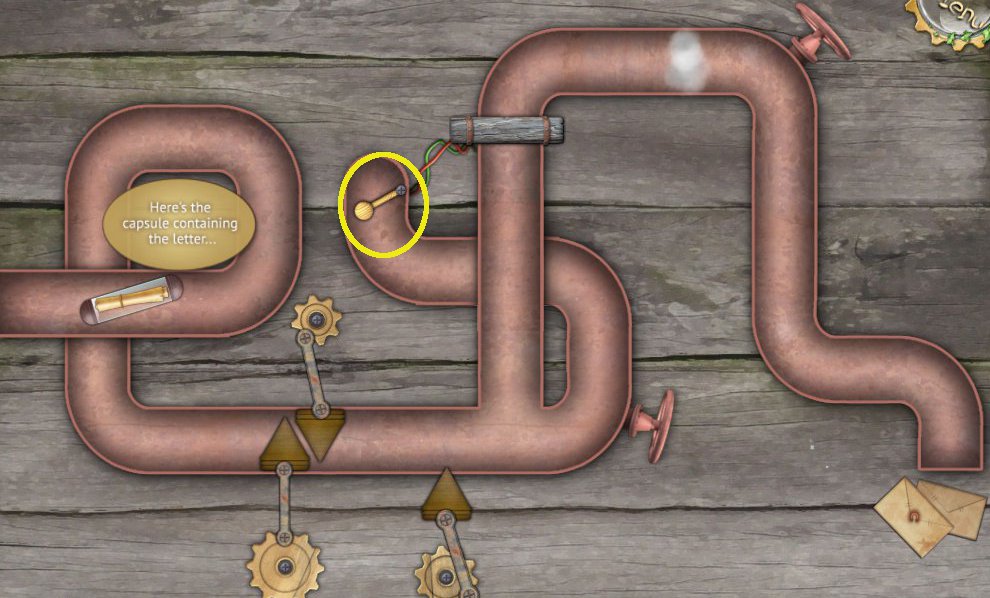
Level 4 - You've Got Mail!
Drag the tube containing the letter at the top left of the screen through the pipes and up to the lever.
Use the tube to push the lever up.
Drag the tube down and then right, up and over past the steam to the letters at the other end.
Screenshot
Level 5 - Burned Out
Drag the spare lightbulb onto the red button to turn off the power.
Pull the blown lightbulb out of its socket.
Drag the new bulb into the now empty socket.
Use the blown bulb to press the red button and switch the power back on.
Screenshot
Level 6 - The Gramophone
Click on the metal lever and drag it to the up position.
Click on the metal cog and use it to push the wooden cog into position.
Use the metal cog to push the left wooden lever into the up position.
Drag the metal cog to its outlined position on the right.
Screenshot
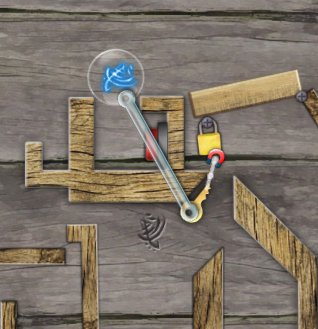
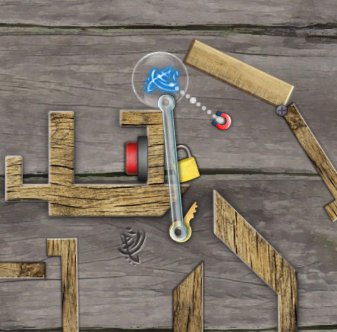
Level 7 - Say Uncle!
Drag the key down to the padlock.
Drag the metal rod up and slide it into the slot to mirror the position of the other metal rod.
Screenshot
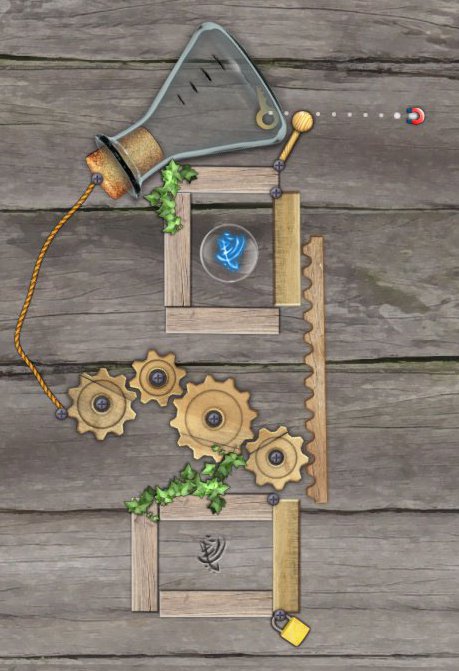
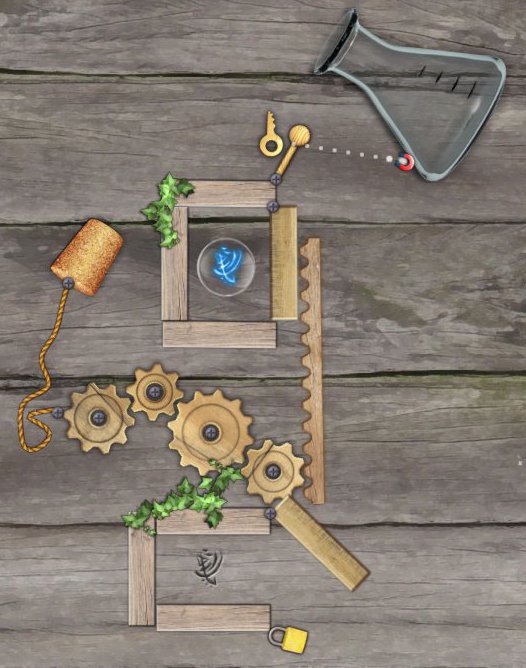
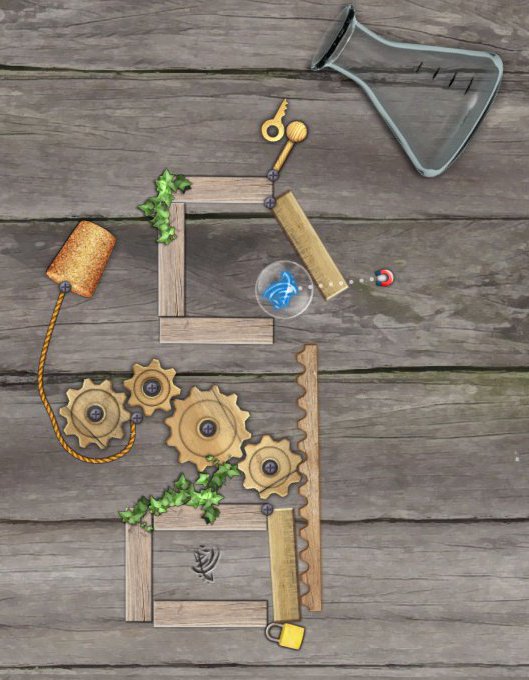
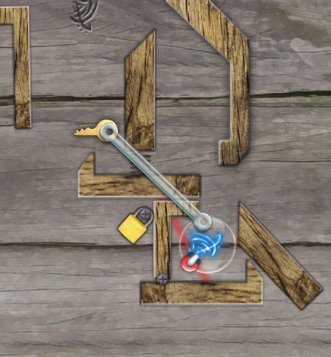
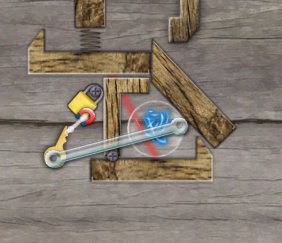
Level 8 - Hold Your Breath...
To free the way for the key and cork, pull on the L-shaped bar and hook it over the piece of fixed wood.
Drag the cork by clicking on the key. You can drag the key into the neck of the bubbling flask, and the cork will follow.
Screenshot
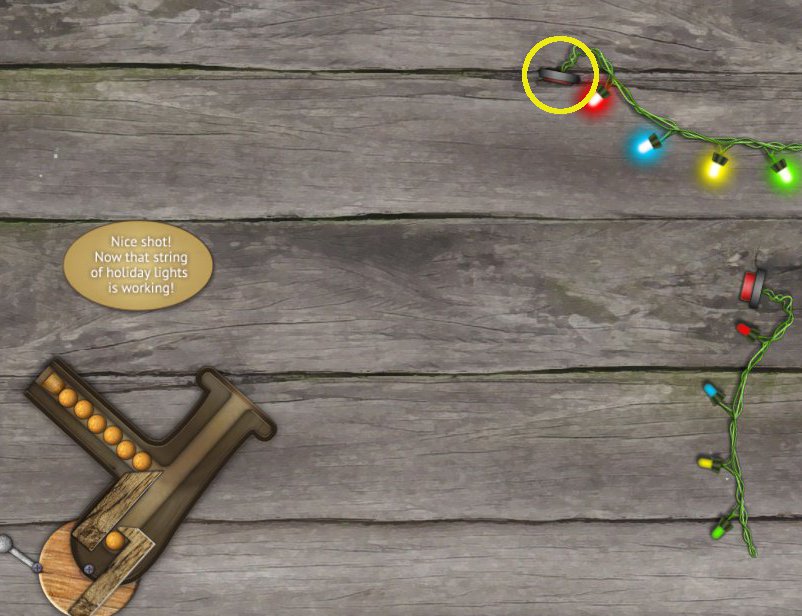
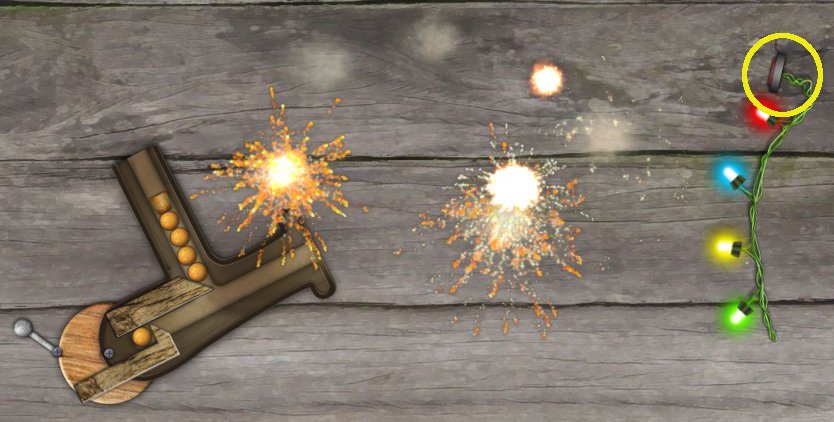
Level 9 - Good Shot!
The cannon is made of metal; click on it and drag to aim it at the red buttons.
The lever is also made of metal; click and drag it to fire the cannon.
Screenshot 1
Screenshot 2
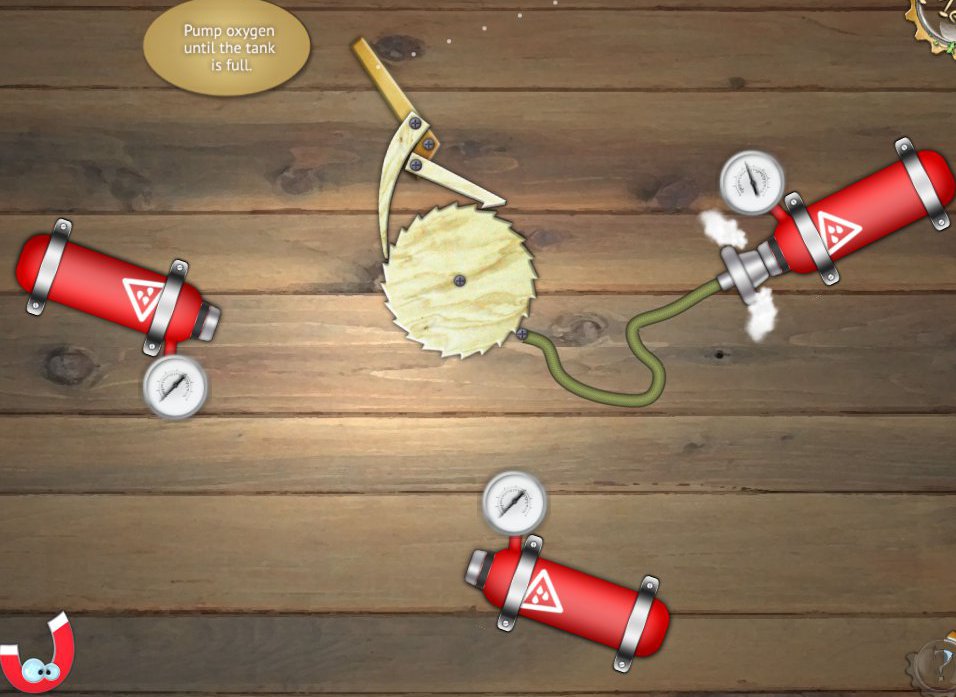
Level 10 - Fill 'Er Up!
Before you can go ahead, you need to test the pump.
Click and drag on the pump handle to test.
Now the nozzle of the pump can be connected to the oxygen tanks.
Use the pump to fill each tank.
Screenshot
Level 11 - A-maze-ing!
The ball will move to the left of the screen towards the magnet.
Click and drag on the wheel-maze to rotate it and move the ball from the center of the maze to the magnet.
Screenshot
Level 12 - Beam Me Up!
Lasers are introduced here.
Move the nut to the first laser and watch what happens.
Drag the nut to the red button.
Take the nut through the new gap to the second laser.
Using the nut, move the cog with the wooden tail attached to it so that the tail rests in the laser beam.
Drag the nut through this new gap to the third laser beam and leave it there.
Click and drag on the key and move it to the padlock.
Drag the nut to the outlined area.
Screenshot
Totem Levels
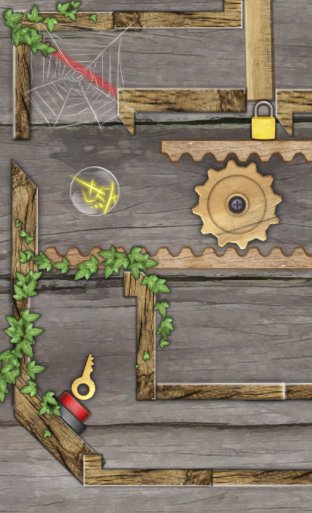
Circle 1
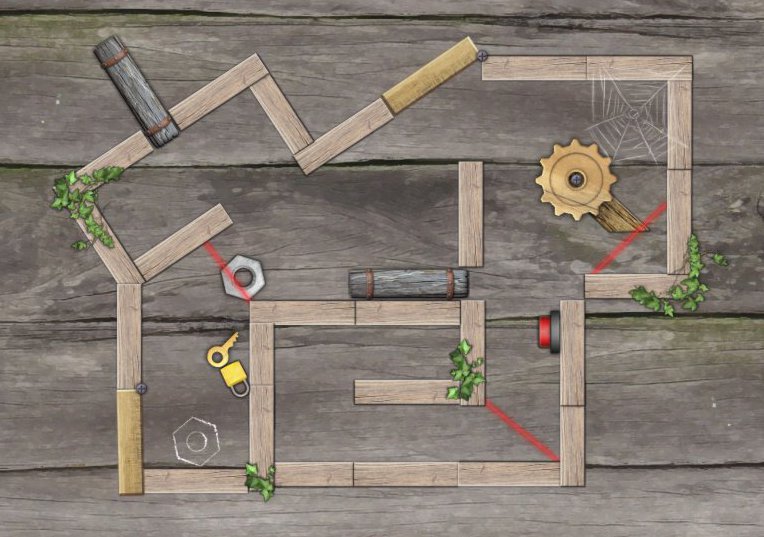
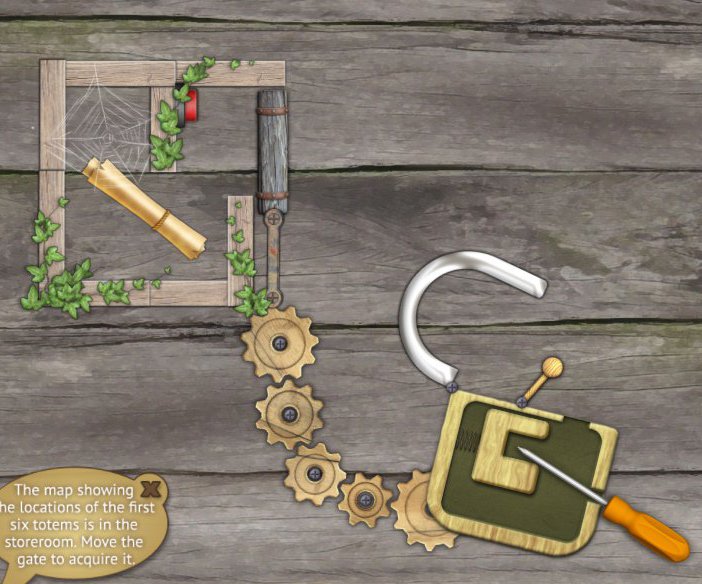
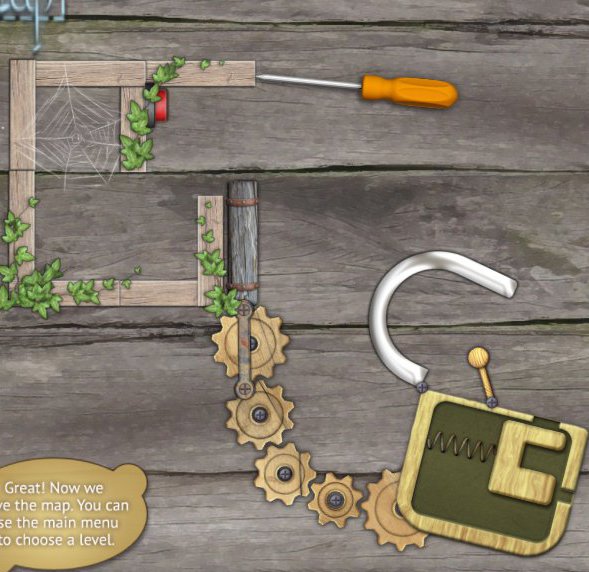
Get the Map
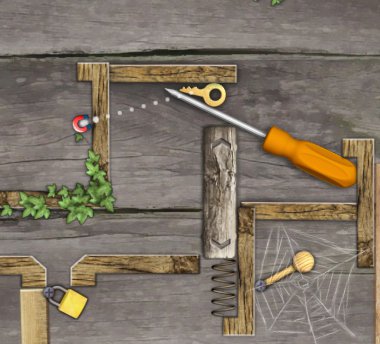
Drag the screwdriver. Use it to poke into the big padlock and push the spring back.
Still using the screwdriver, drag it to activate the lever.
Screenshot
Now drag the screwdriver to poke through the small gap and push the red button.
Screenshot
Pull the screwdriver back and the map will be released.
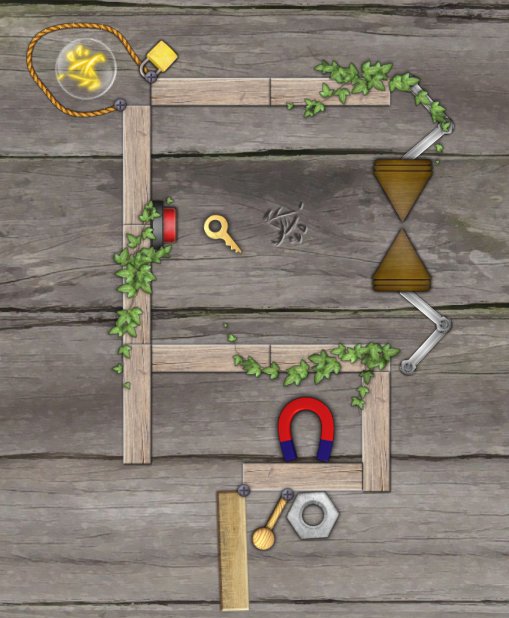
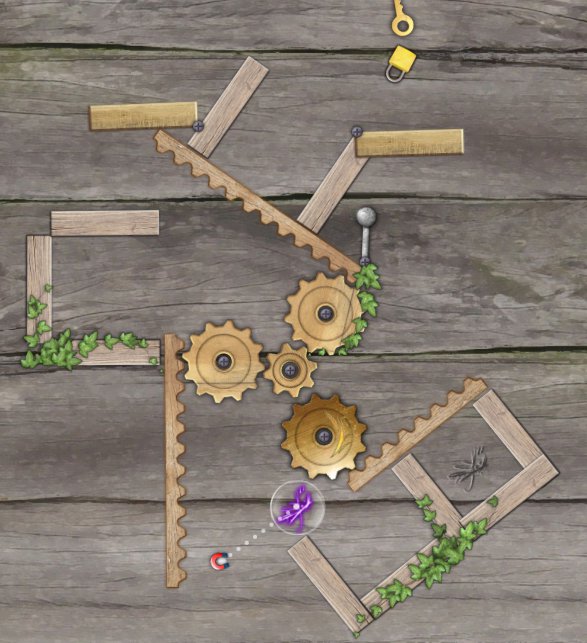
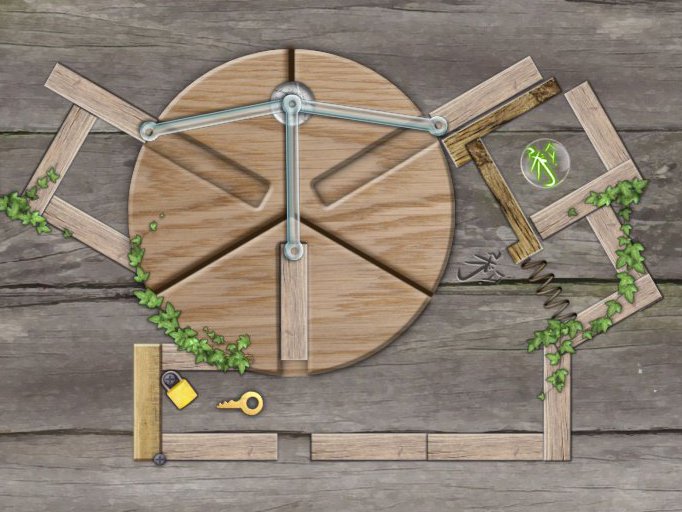
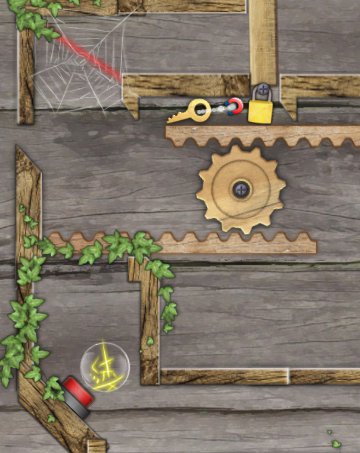
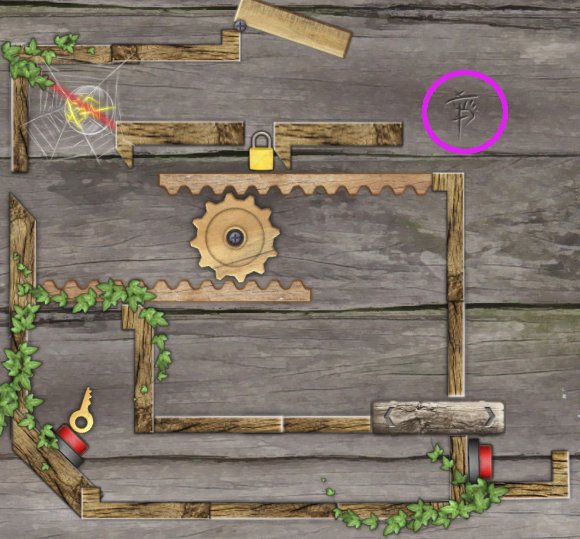
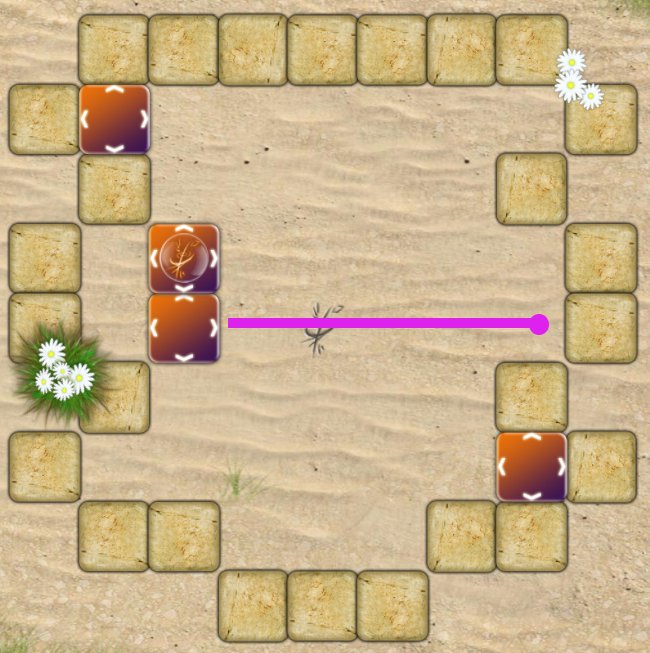
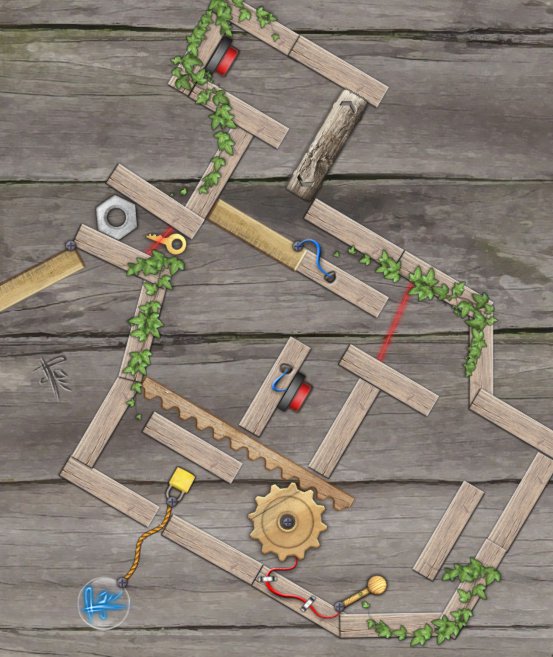
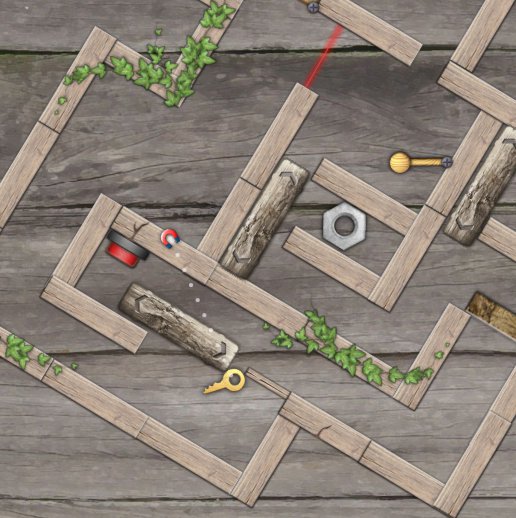
Red Totem: The First Totem
Pull on the metal lever to free the metal cog.
Drag the cog into position.
Drag the key through to the padlock.
Drag the totem to its matching symbol carved into the wood.
Screenshot
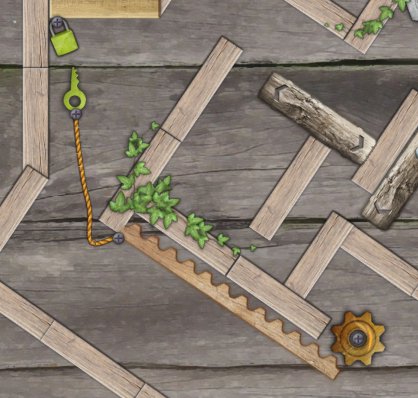
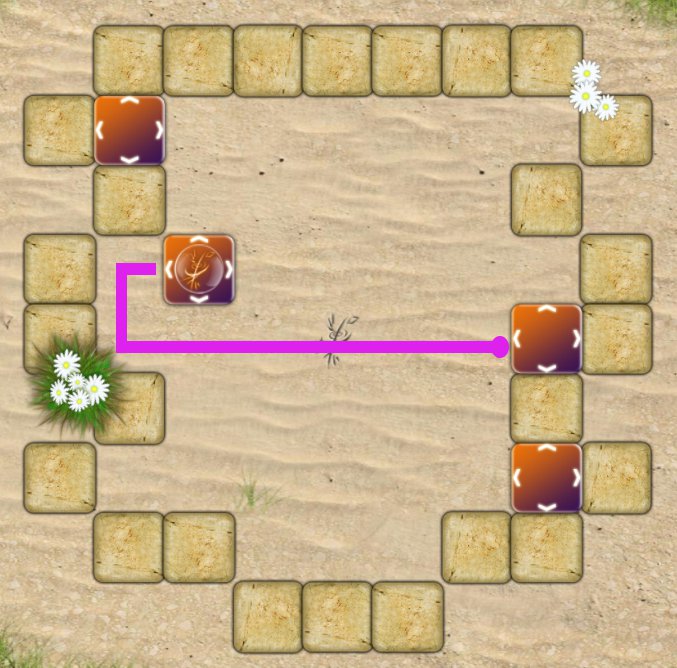
Green Totem: On a Leash
Use the key attached to the rope to push the wooden lever.
Screenshot
Drag the totem down to the laser and push the red button.
Screenshot
This will release the padlock.
Drag the key to the padlock.
Screenshot
Move the totem away from the laser beam
Use the key to push the lever again.
Screenshot
Drag the totem to the carving.
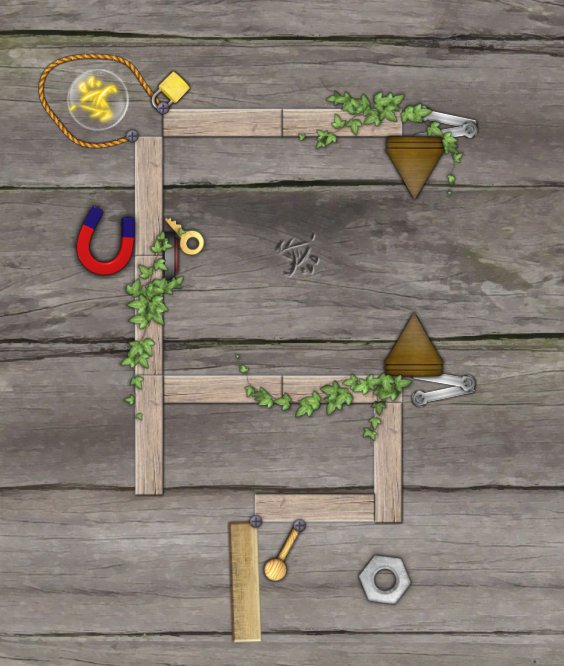
Blue Totem: All Bottled Up
Even though the key is inside a glass flask, you can still click on it. Click and drag it, and the flask will follow.
Use the key in the flask to knock the top lever to the right.
Screenshot
Drag the key out of the flask and down to the padlock.
Screenshot
Drag the blue totem out.
Drag the key back into the flask and use them to push the lever back to the left.
Screenshot
Use the key to move the lever back to the right.
Screenshot
Drag the totem to the carving.
Screenshot
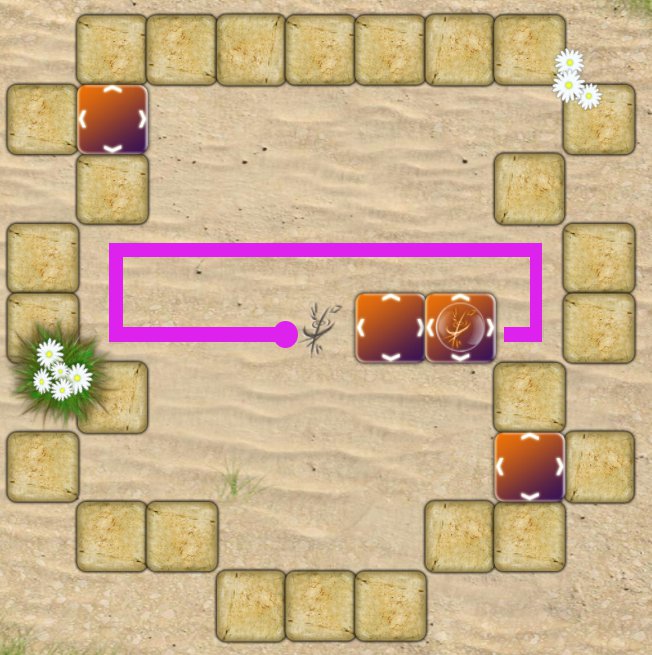
Orange Totem: The Square Box
Click on the metal handle and pull it down and back up to the left.
Screenshot
Pull the key to the padlock.
Pull the handle back down and to the right to release the orange totem.
Screenshot
Drag the totem to the carving.
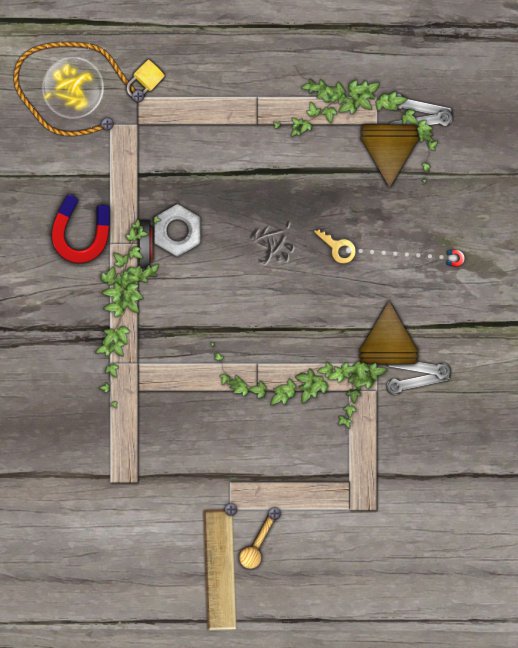
Yellow Totem: Magnetic Force
Drag the nut to push the lever at the bottom to the left.
Screenshot
Drag the magnet up to the other side of the wood where the red button is.
Drag the key onto the button to push it. The magnet should hold it there.
Screenshot
Drag the nut onto the button to keep it pressed down.
Take the key to the padlock.
Screenshot
Drag the yellow totem to the carving.
Screenshot
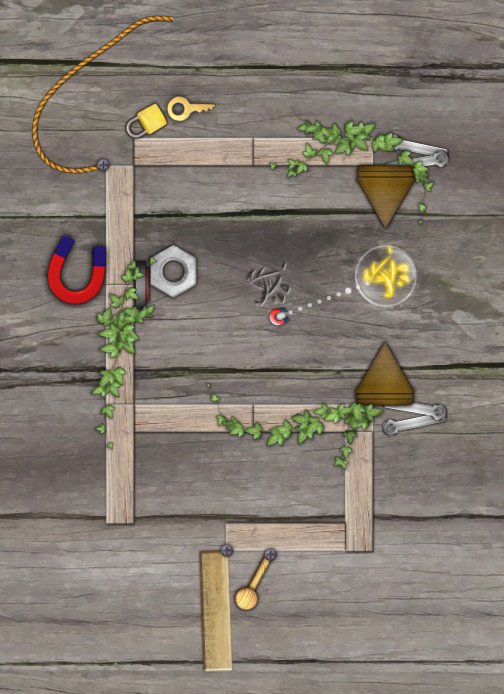
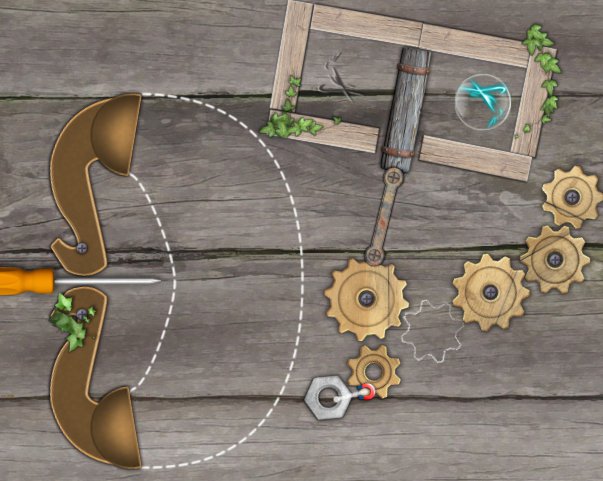
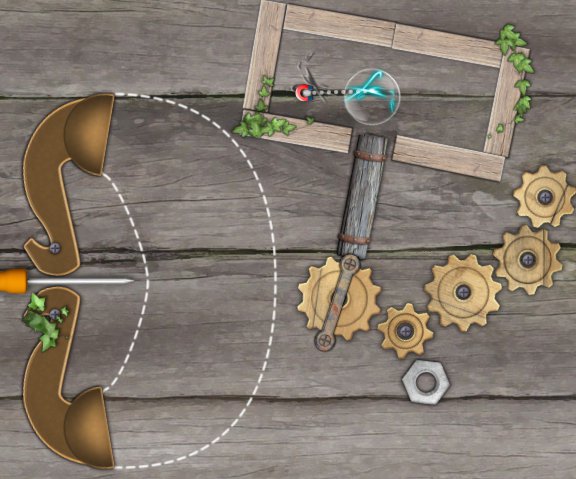
Cyan Totem: The Trap
Drag the screwdriver behind the two objects that look like an old telephone handset.
Push the screwdriver through the gap to prevent the two pieces from closing.
Screenshot
Use the nut to push the wooden cog out of the outlined area and into position.
Screenshot
Move the totem across to the carving.
Screenshot
Circle 2
Map: Gearing Up
There are 3 sizes of cogs; Small, Medium and Large. From left to right place the cogs in this order:
Large cog
Small cog
Large cog
Medium cog
Small cog
Medium cog
Screenshot
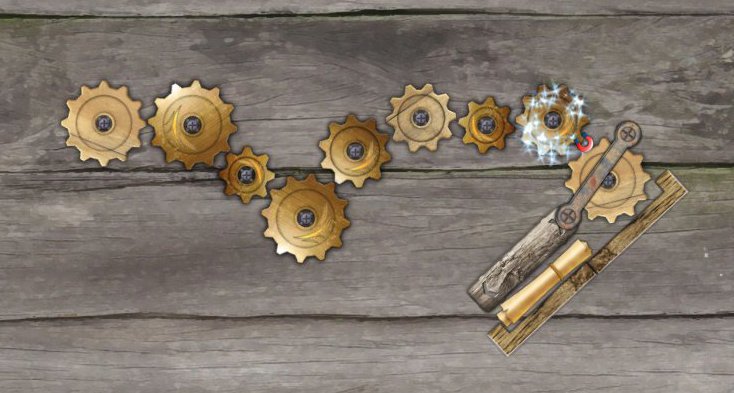
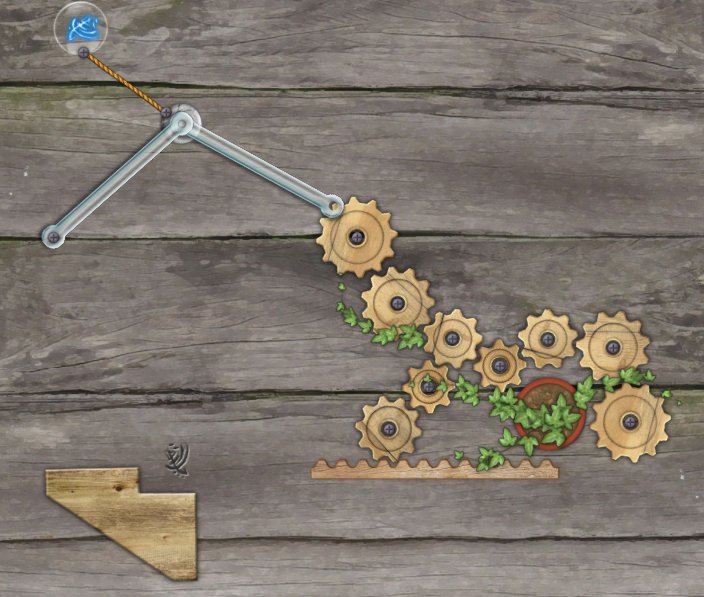
Purple Totem: A Missing Gear
Pull the metal lever to the left.
Drag the key around to the space between the cogs, just underneath the compartment with the padlock.
Screenshot
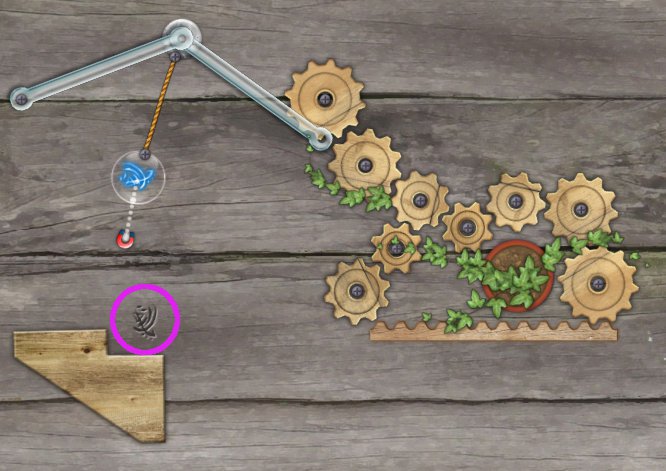
Pull the lever to the right.
Drag the key up to the padlock.
Screenshot
Pull the lever to the left.
Drag the metal cog to the right, next to the wooden cogs.
Screenshot
Pull the lever to the right.
Drag the cog up and out.
Pull the lever to the left.
Drag the cog into its position.
Screenshot
Pull the lever to the right.
Drag the totem out to the far left.
Screenshot
Pull the lever to the left.
Drag the totem up and over to the carved area.
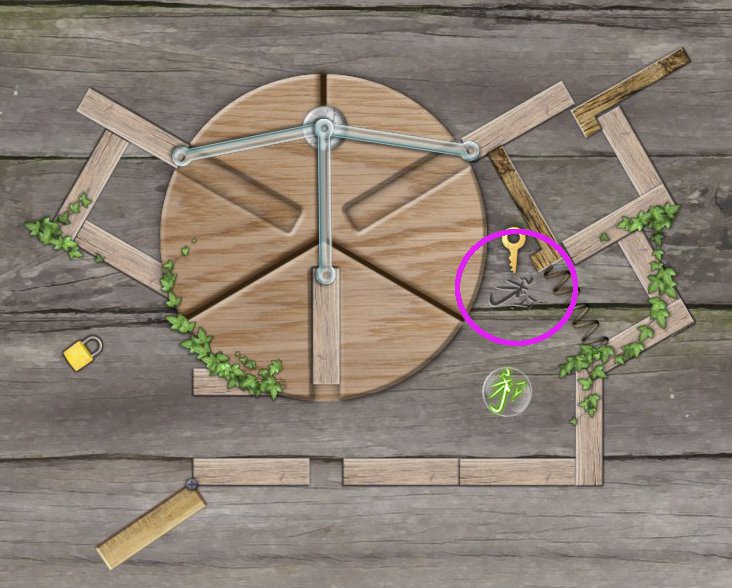
Yellow Totem: Be Careful!
Use the screwdriver to poke through the gap and press the red button.
Screenshot
Drag the totem to the laser beam and through to push the wooden lever left.
Screenshot
Drag the key to the padlock and pull both out of the area.
Screenshot
Use the totem to push the lever to the right.
Push the screwdriver onto the red button then pull it back.
Drag the totem through.
Screenshot
Use the totem to push on the wooden flap and into the area where the carved symbol is.
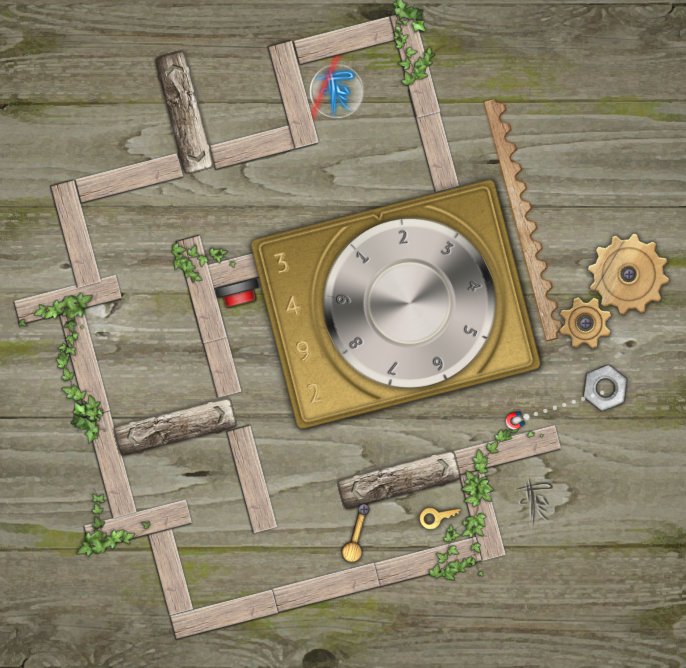
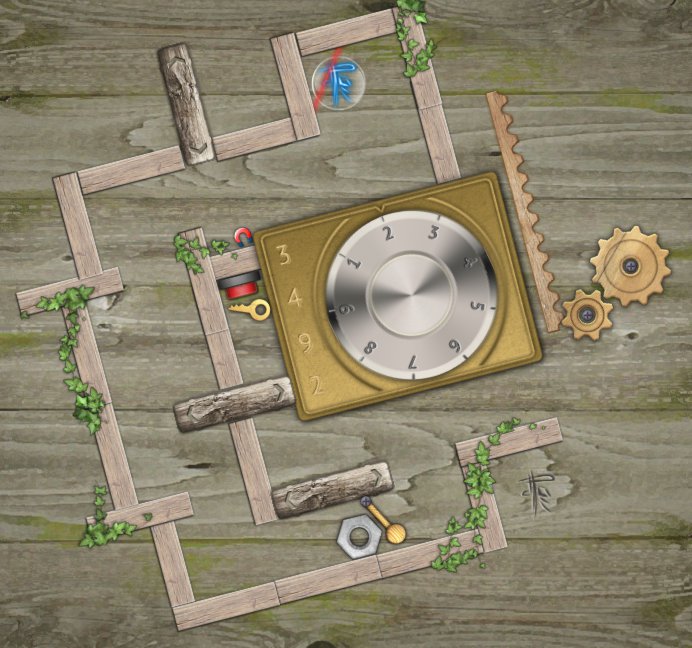
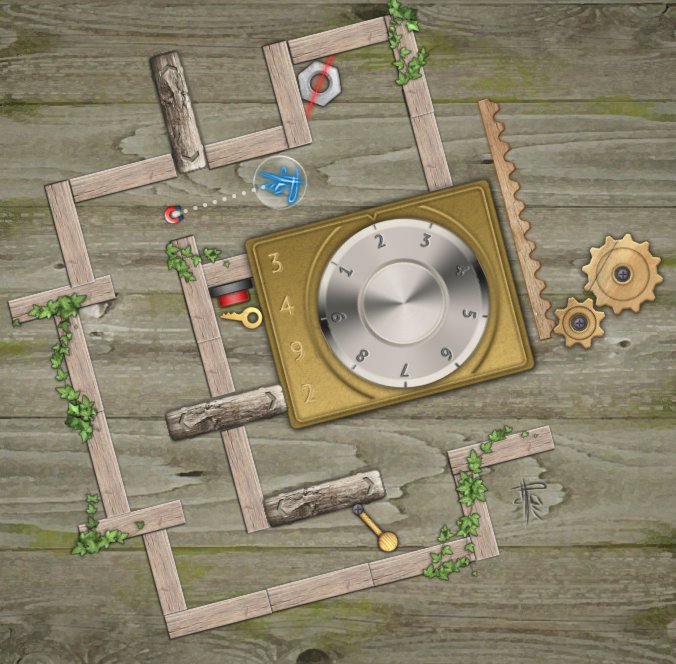
Blue Totem: Is It Safe?
Note the four numbers to the left of the combination lock.
3492
An arrow will circle each number in either a clockwise or counter-clockwise direction.
3=clockwise, 4=clockwise, 9=counter-clockwise, 2=clockwise
Spin the dial in the direction indicated to each number.
Drag the nut around to the wooden lever next to the key. Push the lever.
Screenshot
Drag the key to the red button and push.
Screenshot
Drag the nut to the totem and into the laser beam.
Drag the totem around to near the lever.
Screenshot
Use the key to push the red button again.
Drag the key back and push the lever left.
Pull the totem around to the outside where the carving is.
Screenshot
Green Totem: The Slipgate
Drag on the center-point of wheel down and to the right.
Screenshot
Move the key out.
Push the center-point back to the center and straight up.
Screenshot
Drag the key to the padlock.
Drag the padlock to the wooden area near the totem.
Use the padlock to push down on the wood attached to the spring.
Pull the center-point of the wheel back down to center and down to the left.
Screenshot
Drag the totem out of the boxed area.
Move the center-point of the wheel back up to the center. Move the straight back up to the top.
Drag the totem to the carving.
Screenshot
Light Blue Totem: Easy Breezy
Drag the blue totem up as far as possible so that the cogs move the wooden rod far to the right.
Screenshot
Drag the totem back down to the carving.
Screenshot
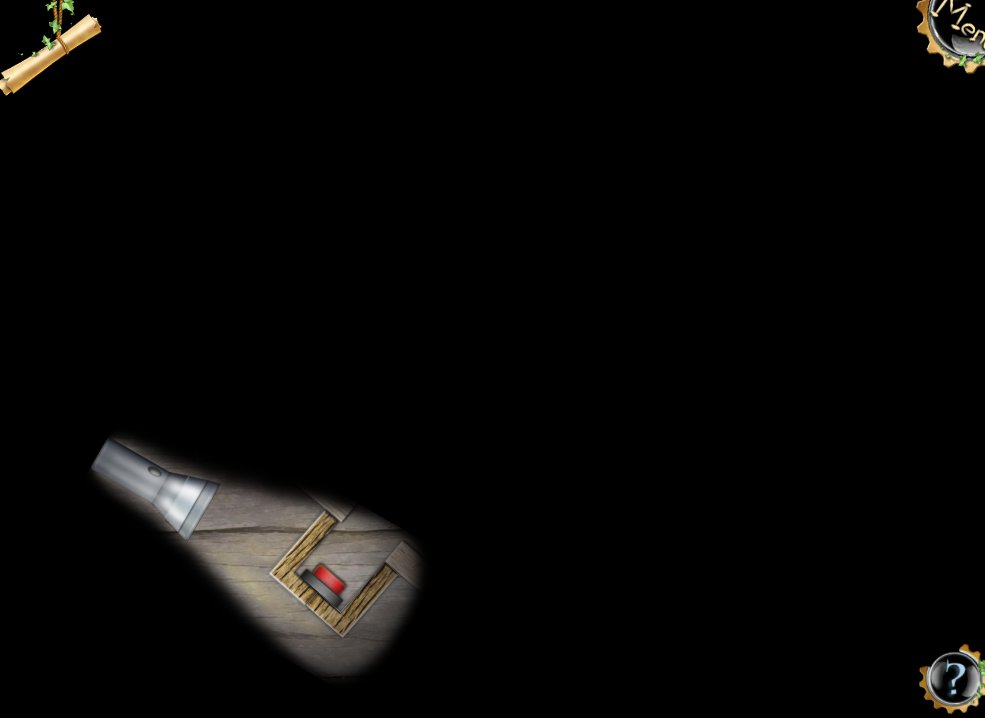
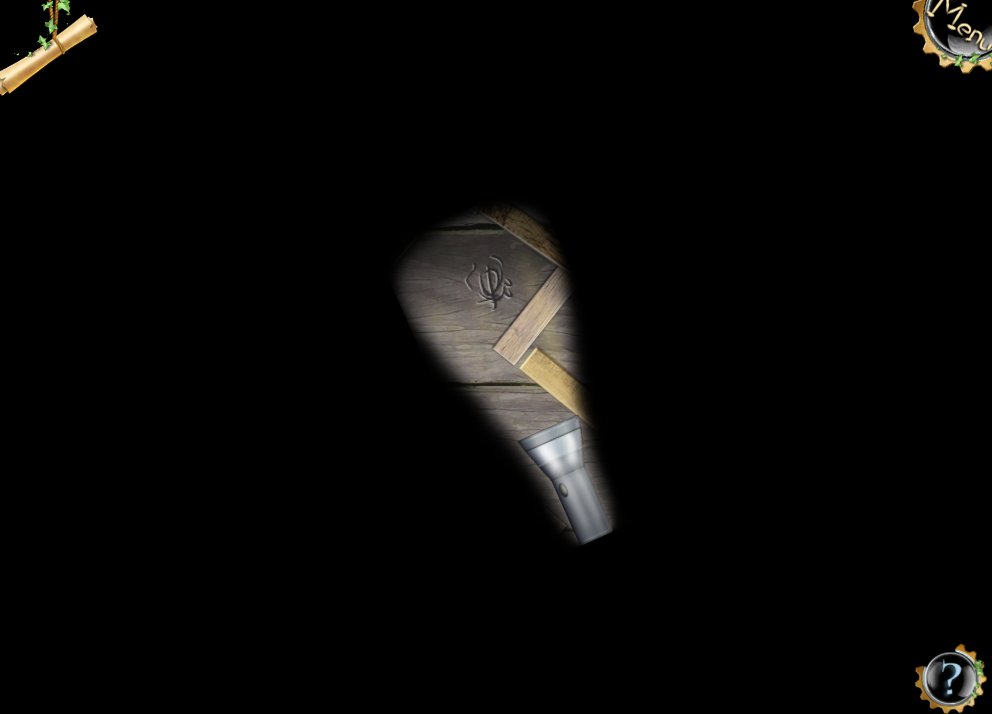
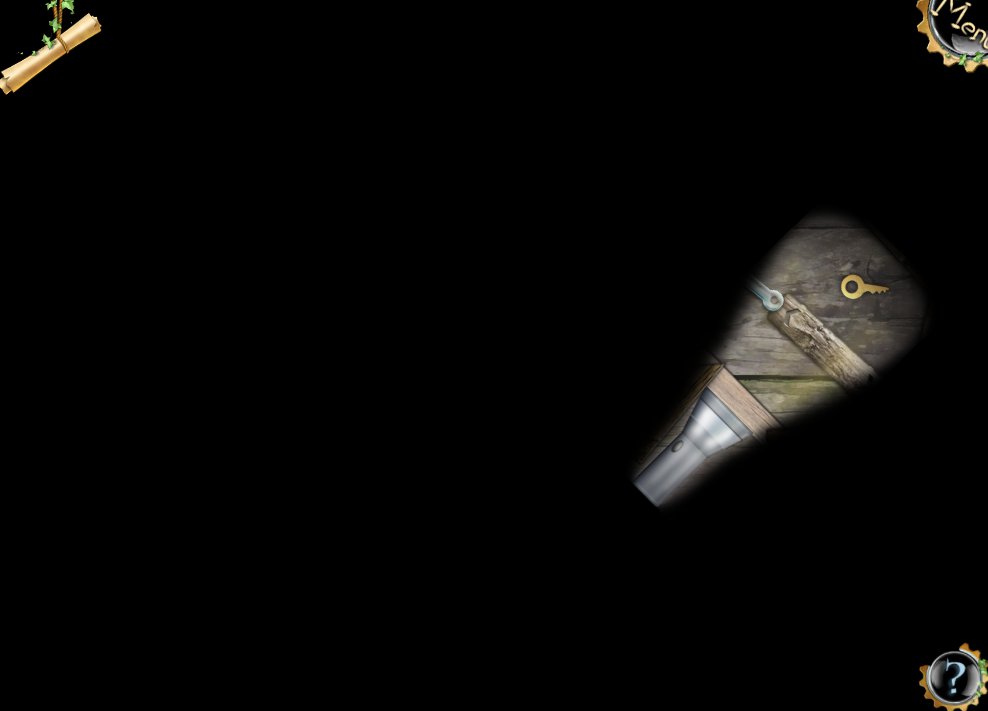
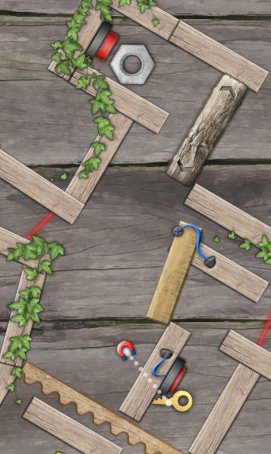
Red Totem: The Flashlight
Thank goodness this is the only level to be solved by torchlight!
Use the torch to locate items.
Screenshot 1
Screenshot 2
Screenshot 3
Screenshot 4
Screenshot 5
Screenshot 6
First move the key under the cog.
Use the torch by backing it onto the red button to push it.
Pull the key through to the padlock.
Locate the totem and drag it back to the carved symbol at the center of the screen.
Circle 3
Map: Looking For Keys
4 keys are hidden in shells.
Use the compass to locate the hidden keys. When the compass is next to a shell that's hiding a key, the compass arrow will move into the green area as far as it can.
Move the compass amongst the shells. When it hits extreme green and you're not sure which shell contains a key, move the shells away from the compass. When you move the right shell, the compass needle will move also.
Move the shell that you think has a key inside to the circular area at the top left of the screen.
The shell will open and reveal a coloured key.
Move the key to its corresponding coloured padlock.
You only have one chance to make a mistake.
Screenshot 1
Screenshot 2
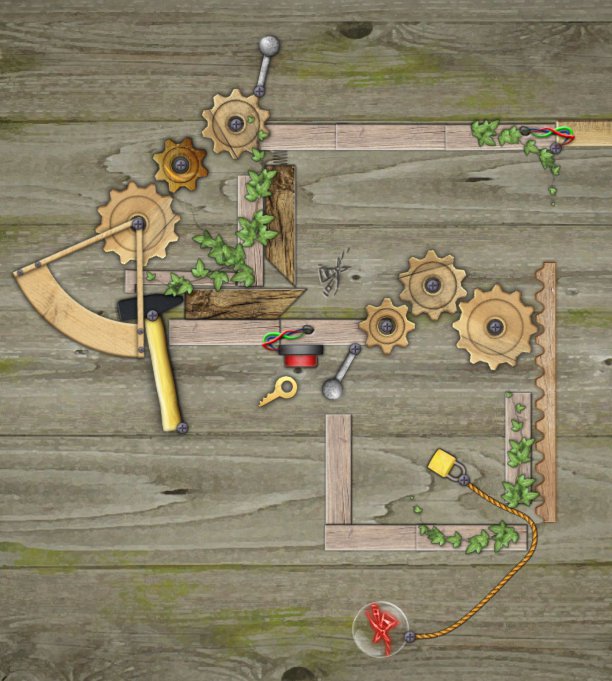
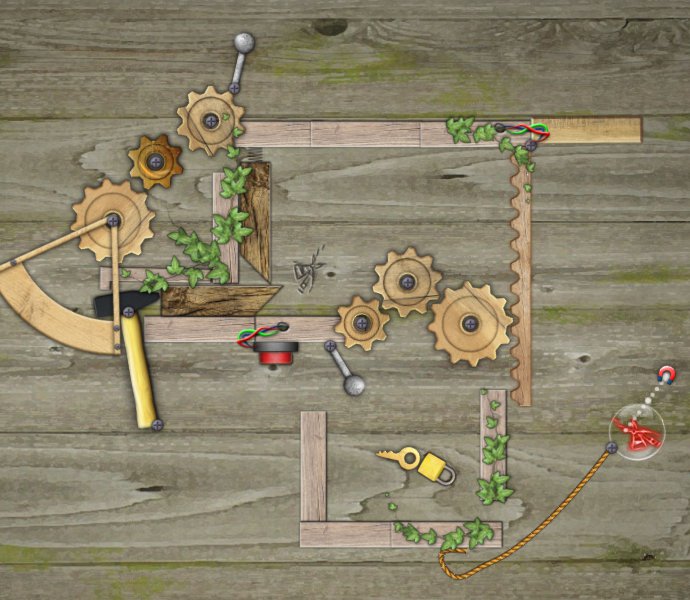
Red Totem: The Hammer
Drag the metal cog to the top left of the screen to its outline. The totem and rope will need to be moved out of the way first.
Pull the bottom metal lever to the right. The key will be pushed out.
Screenshot
Pull the top lever to the left.
Pull the bottom lever to the left.
Move the key near the red button, but don't push it.
Screenshot
Move the bottom lever to the right.
Drag the key to the lock.
Pull the totem free.
Screenshot
Move the bottom lever to the left.
Drag the totem to the carving.
Screenshot
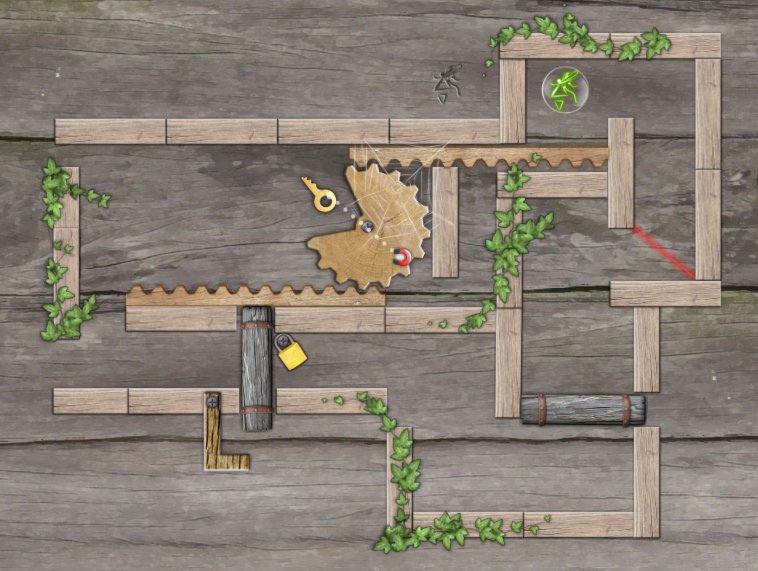
Green Totem: Just Get Through It
Drag the key to the left, up and under and into the section where the wheel is moving back and forth.
When the wheel is to the right, drag the key into the wheel's gap.
Screenshot
When the wheel turns again, it should flip the key to the right.
Drag the key up past the totem and down past the laser beam.
Drag the totem to the laser beam.
Move the key to the lock.
Screenshot
Drag the key back up past the laser beam and past the totem.
Drag the totem back to its original corner.
Move the key back to the wheel and place in the wheel's gap when the wheel is on the left, and move the key out while the wheel is to the right.
Next, drag the key down to the L-shaped piece of wood at the bottom, near the lock.
Use the key to push the L-shaped piece of wood to allow the gray piece of wood to drop.
Screenshot
Drag the key back up to the totem through the wheel area.
Drag the totem down past the laser beam.
Place the key on the laser beam.
Drag the totem down, left, out, up and over to the carving.
Screenshot
Yellow Totem: One More Totem
Use the key to push the red button on the right.
Screenshot
Drag the totem down and left.
Screenshot
Use the key to push the red button again and drag it up.
Drag the totem to the red button on the left and push it.
Drag the key up, left and into the boxed section, to the right of the wooden cog.
Use the totem on the left red button again.
Screenshot
Drag the key down.
Use the totem on the left red button yet again.
Drag the key through the small space partially hidden by vines.
Use the totem to press the red button.
Drag the key through the small space to the padlock.
Screenshot
Move key back left and down next to the wheel.
Use the totem on the red button.
Drag the key down to the red button. Move the totem up to the space next to the wheel.
Screenshot
Use the key on the left red button.
Drag the totem up through the cobwebs and right to the carving. It will touch the laser beam on the way and activate the flap to clear the way for the totem to get to the carving.
Screenshot
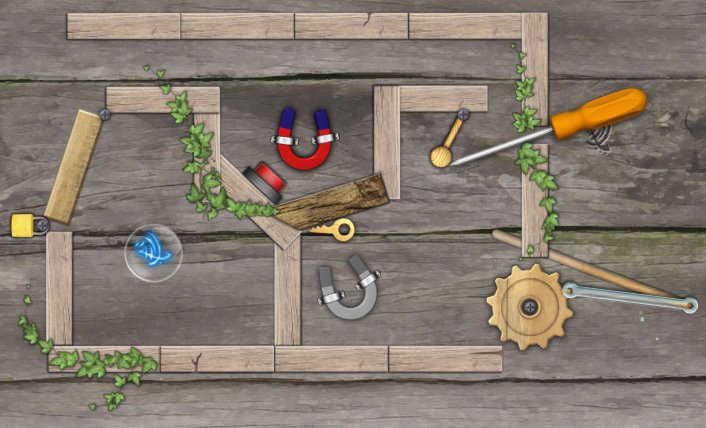
Blue Totem: Two Magnets
Drag the screwdriver up and to the right. Poke its blade through the small gap to push the lever.
Screenshot
Pull the screwdriver back out and drag it up and over than back in. Use the screwdriver to cover the live coloured magnet.
Screenshot
Drag the key to the right, up, left, and over the top of the screwdriver, and then down to the lock.
Screenshot
Drag the totem left, up, over, and down to the carving.
Screenshot
Dark Yellow Totem: The Keys
Drag the nut attached to the blue key to the blue lock.
Drag the blue padlock to the wheel and lever. Push the lever.
Screenshot
Drag the orange key around to the blue lock as far as it will go.
Use the blue lock on the lever again.
Drag the orange key to the orange lock.
Use the blue lock to push the lever back up.
Screenshot
Drag the cog around to its outlined position.
Screenshot
Drag the green key, still attached to the rope, to the green lock.
Screenshot
Drag the yellow key back through the maze, past the orange lock, up and out the opening, and down to the yellow lock.
Screenshot
You may have to move the green lock and key, and other things out of the way to move.
Drag the yellow totem down past the yellow lock to the carving.
Screenshot
Purple Totem: Two Directions
There are 3 different sizes of cogs to choose from - Small, Medium and Large.
Drag the large cog to the space between the wooden cogs and center it on the middle 'x'.
Screenshot
Drag the key up and over as far as it will go.
Replace the large cog with 2 medium cogs: One on the bottom 'x', and one on the top 'x'.
Screenshot
Drag the key past the red button and out, and down to the yellow padlock near the totem.
Screenshot
Drag the totem to the carving.
Screenshot
Circle 4
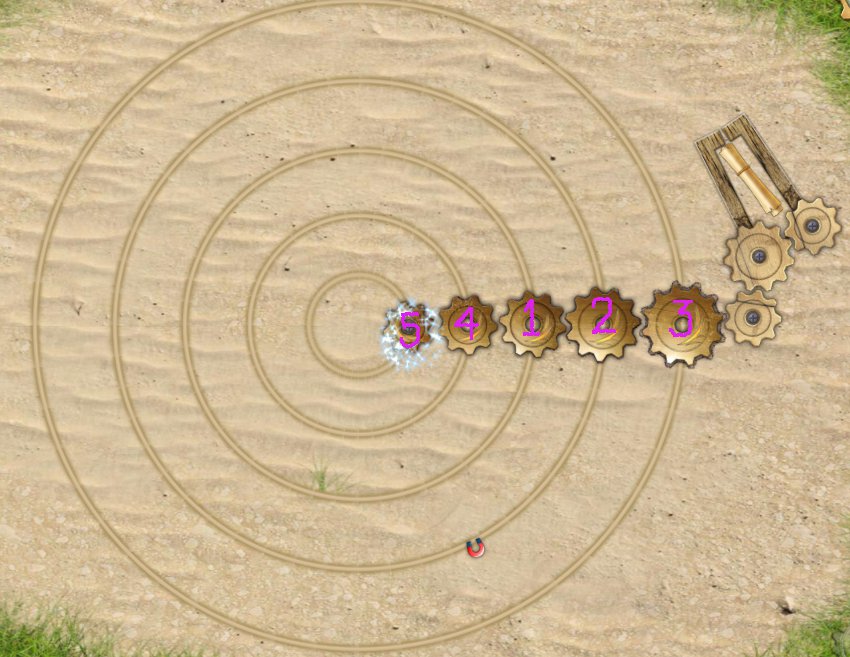
Map: Circles In The Sand
Screenshot
There are concentric circles, each with its own cog to be positioned.
Going from left to right, meaning inner circle to outer circle, where the cogs are numbered 1 through 5, position the cogs in the following order:
Cog 3
Cog 4
Cog 5
Cog 2
Cog 1
Orange Totem: The Stones
The aim is to move the stones around the board and end with the totem stone placed squarely on the totem symbol in the center.
Move the top right stone all the way to the left, then all the way down.
Screenshot
Move the bottom right totem stone all the way left, all the way up, left, and then down.
Screenshot
Move the bottom left stone all the way to the right.
Screenshot
Move the 2nd bottom left stone all the way to the right, all the way up, all the way left, and down onto the totem stone.
Screenshot
Move the totem stone all the way to the right, all the way up, all the way to the left, and down. The totem stone should now be resting on top of another stone on the left of the screen.
Screenshot
Move the stone directly under the totem stone all the way to the right.
Screenshot
Move the totem stone left, down, and all the way to the right.
Screenshot
Now move the stone to the right of the totem stone up, all the way to the left, down, and then right, to sit next to the totem stone.
Screenshot
Move the totem stone right, up, all the way to the left, down, and right, to where the symbol is.
Screenshot
Blue Totem: Partners
This level will involve some manipulation and contortion-like manouvres with the key being attached to the totem.
Move the key around to the red button. The lever will need to be pulled left by the key.
Screenshot
Then the key will need to be manipulated up and over. This will close the flap that just opened but will help to get to the red button.
Screenshot
Use the key to pull the lever to the right.
Move the key to the padlock at the top right.
Screenshot
The key will need to be pointing upwards to reach the lock.
Move the totem to the red laser beam.
Screenshot 1
Screenshot 2
Push the key through the spring to the lower lock.
Screenshot
Drag the totem to the carving.
Screenshot
Red Totem: Rotate It!
Pull the metal lever at the bottom to swing the curved wood to an upwards position.
Move the totem to the gray piece of wood with the arrows carved onto it.
Screenshot
Move the metal cog to push the red button.
Screenshot
Drag the totem down to the light-coloured piece of wood and use it to spin the wood 90 degrees.
Screenshot
Move the totem back up to the wood with the arrows on it.
Use the cog on the red button.
Move the totem down to the cog-wheel with the gap.
Screenshot
Move the cog to its outline. Ensure that the curved wood is up first, then add the cog.
Pull the lever.
Move the metal cog away.
Pull the lever again.
Replace the metal cog.
Pull the lever again.
Move the cog away.
Pull the lever once more.
Move the cog to the cobweb.
Move the totem to the carving.
Screenshot
Pink Totem: Just One Hit
Use the key to push the lever up at the top.
Move the cog past the red laser.
Screenshot
Use the key to push the red button.
Screenshot
Move the cog down to the small gap just above and to the right of the key.
Use the key on the red button.
Move the key to the cog on the right side of the key. Drag the key, which will push the cog to the left. It may slip a little bit, so just keep trying.
Screenshot
Move the cog to the outline.
Move the totem to the carving.
Screenshot
Green Totem: The Magnetic Field
To aim the cannon, drag the metal cannon ball to the back of the cannon. Click and hold on it move the cannon around.
Aim the cannon to shoot towards the top right corner of the screen.
Aim and release the mouse button to fire the cannon.
When the red button is pressed, the barrier between the totem and cannon will slide back.
Screenshot
Aim the cannon at the totem and fire to push the totem onto the carving.
Screenshot
Blue Totem: Not Too Easy
Use the key on the uppermost red button.
Drag the key down to where the nut is. Rest the key on the laser beam.
Screenshot
Move the nut out.
Move the key back to the topmost red button, past both the laser beams, and push the button.
Screenshot
Move the nut to the red button and push the button.
Move the key to the middle red button and push.
Move the key to the lever at the bottom and push the lever.
Use the nut on the top red button.
Use the key to push the lever to the right.
Use the key on the middle red button.
Move the key to the padlock.
Screenshot
Move the totem to the carving.
Screenshot
Circle 5
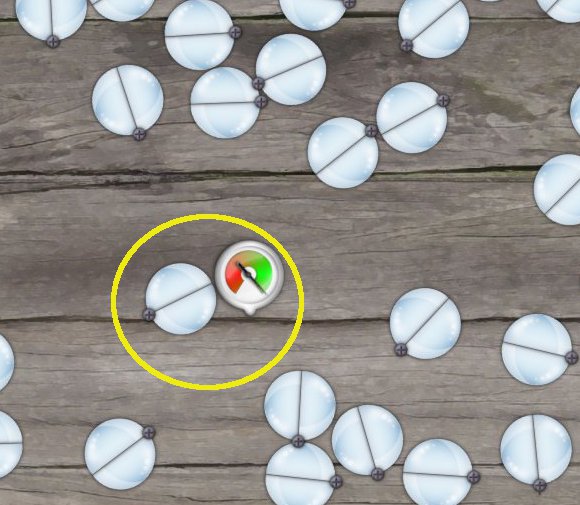
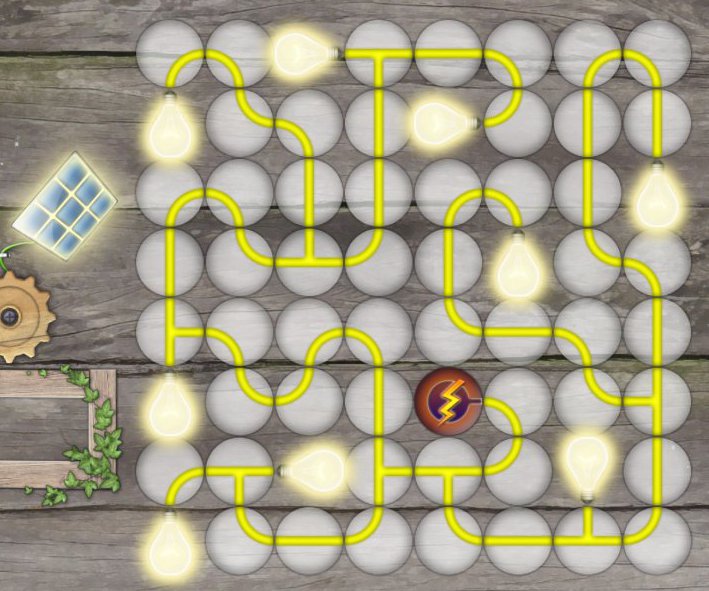
Map: The Electric Circuit
Click and drag on the spheres to turn them.
The lightbulbs can also be turned.
The aim is to connect all the circuits, leaving no spares, to each other and to all the lightbulbs to light them up.
The power source is in the lower right area of the grid.
Screenshot
Blue Totem: It's Complicated
Use the key on the lever to push it down.
Drag the key down to the very bottom piece of gray wood with arrows carved on it. Rest the key next to the side of the wood that shows a right arrow.
Drag the key back towards the red button to push the wood. The key will slip through a hidden door.
Screenshot
Use the key on the red button.
Drag the nut down to the brown L-shaped pieces of wood. Push the larger piece of wood to the right to move the nut through.
Screenshot
Drag the nut through the hidden door and up to the laser beam, but don't touch the laser beam yet.
Screenshot
Screenshot
Drag the key back through the hidden door to the inner compartment near the wooden door that's activated by the laser.
Move the nut onto the laser beam.
Move the key to the lever and use the key to pull the lever up.
Move the key to the left of the door activated by the laser beam.
Move the nut away from the laser beam.
Move the key back down through the hidden door and through the maze to the padlock. Try to just nudge the bottom of the lock: As what happened a few times to me, too much push and the key will block the wood flap from opening, and the level will have to be restarted.
Drag the totem to the carving.
Screenshot
Red Totem: The Maze
Screenshot
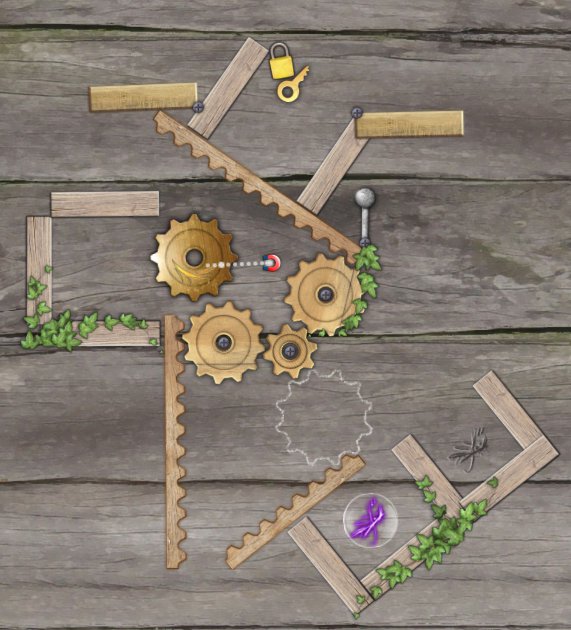
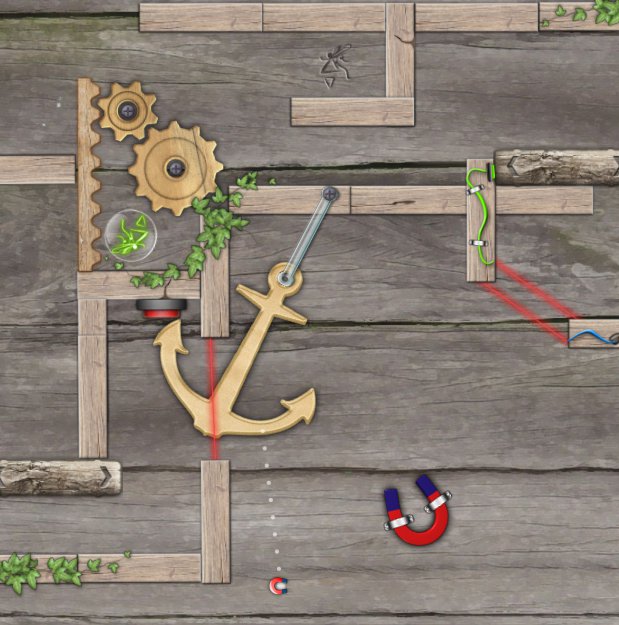
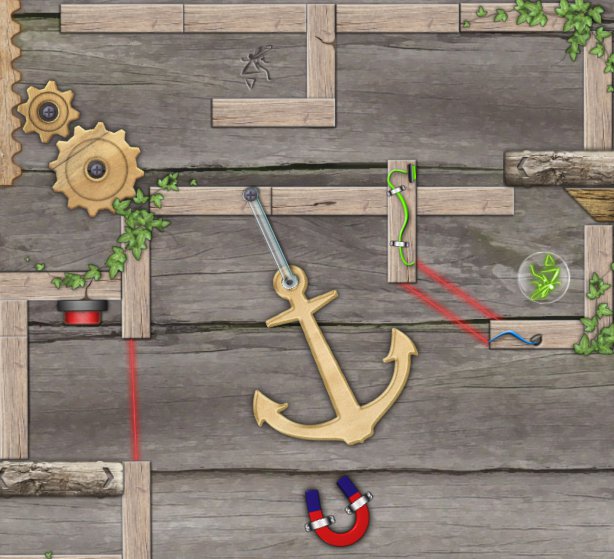
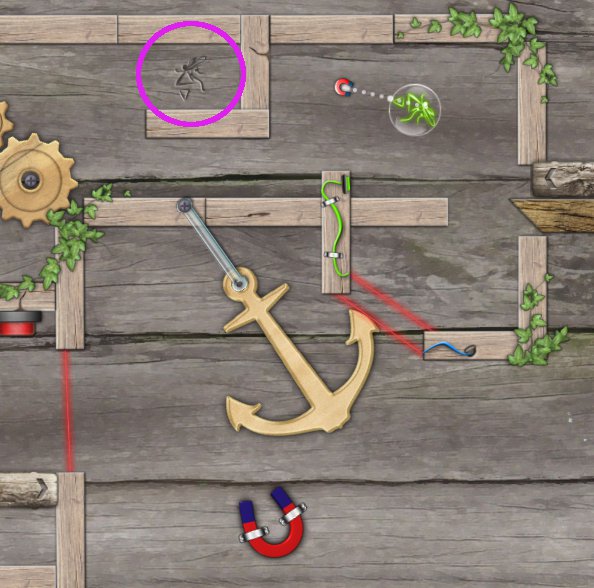
Green Totem: The Pendulum
The anchor will swing in increasing arcs from left to right and back.
Click and hold around the base of the anchor and swing your mouse left to right to swing the anchor.
Eventually the anchor's left prong will push the red button. This will move the totems' barrier.
Screenshot
Move the totem up to the small area behind the double red laser beam.
Screenshot
Click and hold around the base of the anchor again, only this time use opposing force. Swing your mouse in the opposite direction of the anchor. The aim is to have the anchor prong touching only one of the double laser beams.
When the anchor's right prong is only touching one laser beam, the totem can be moved to the carving.
Screenshot
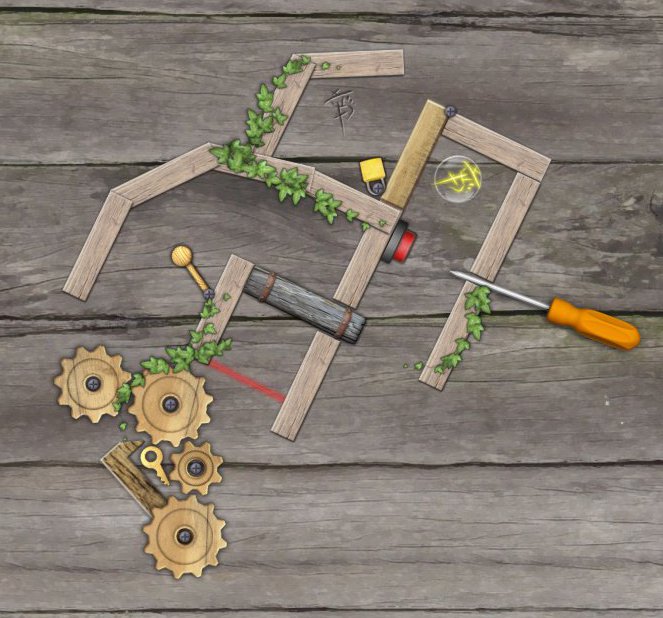
Orange Totem: The Golden Rule
Move the key up and use on the red button.
Move the screwdriver up and poke it through the gap to use on the red button.
Screenshot
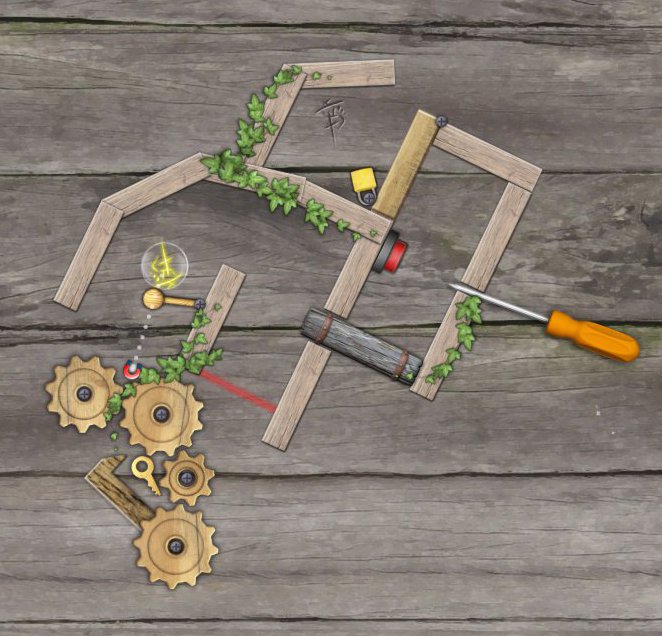
Move the key down.
Use the screwdriver on the red button again.
Move the key out.
Remove the screwdriver and move it down to the gray piece of wood craved with arrows which is on a spring.
Push the screwdriver through at the top of the wood.
Pull the screwdriver's handle down and wedge it to hole the gray piece of wood down.
Screenshot
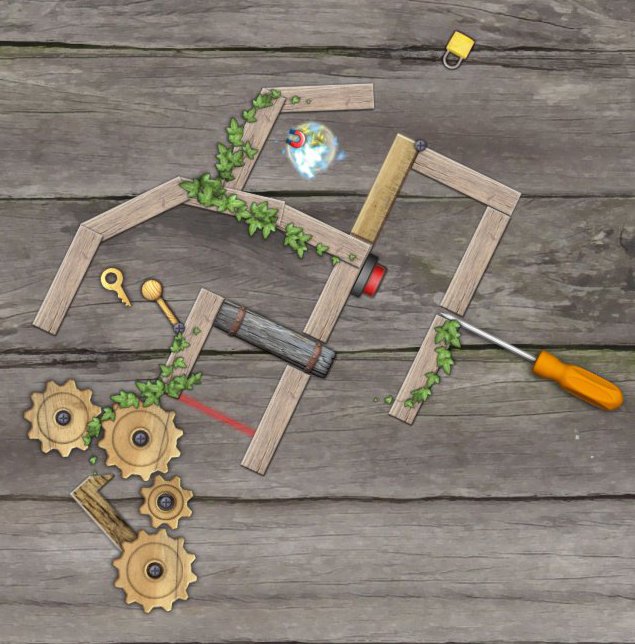
Push the key through, along the screwdriver's blade.
Screenshot
Keeping the screwdriver blade in the gap, move the screwdriver's handle up to release the gray piece of wood.
Move the key through the spring to the lock.
Screenshot
Move the key to the lever in the cobwebs and push the lever down.
Move the totem out and up.
Screenshot
Use the key to push the lever up.
Move the totem into the compartment underneath the compartment where the red button is.
Collect the screwdriver and use it on the red button.
Pull the screwdriver back out.
Move the totem to the carving.
Screenshot
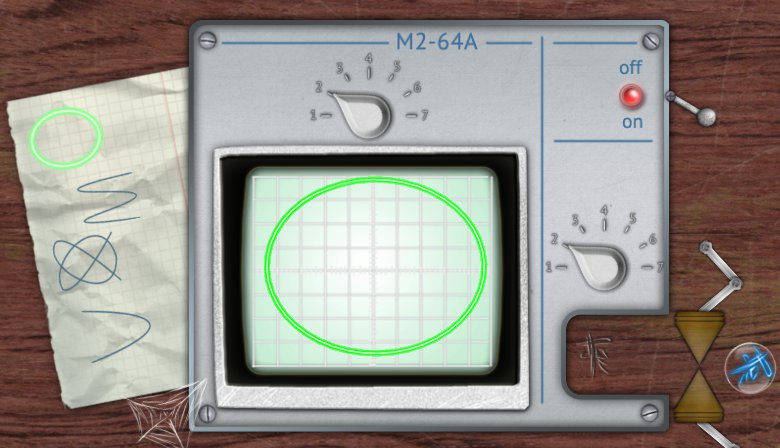
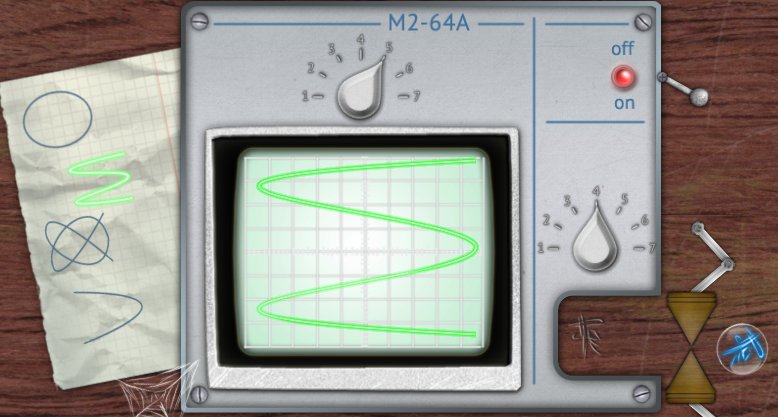
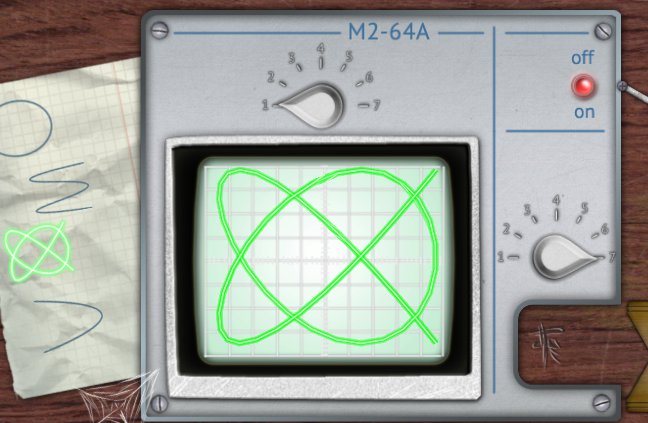
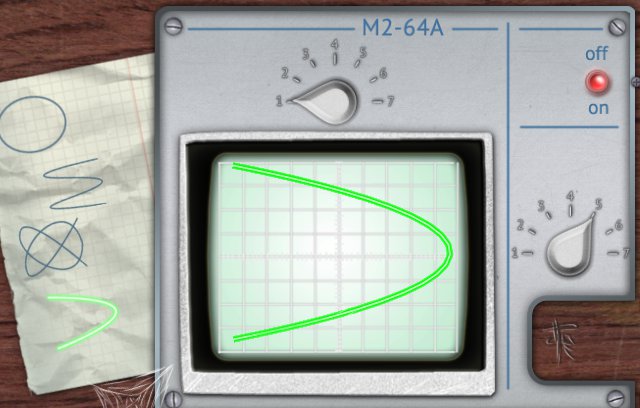
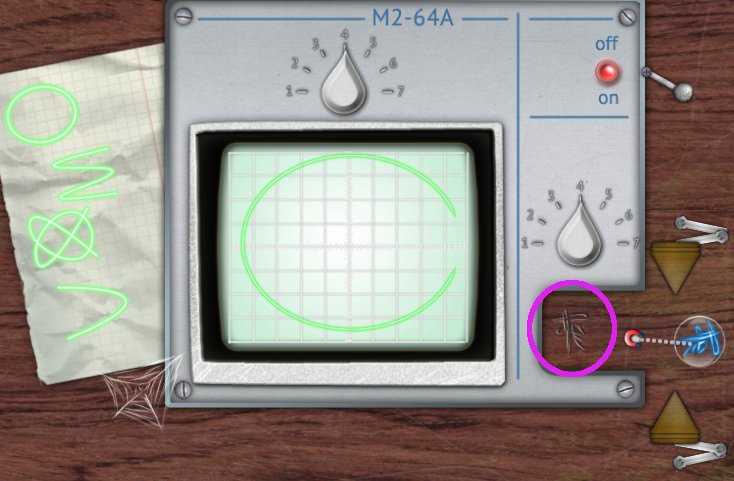
Blue Totem: Oscilloscope
Replicate the wave patterns to the left of the frequency machine.
Turn the machine on by pulling on the switch at the top right of the machine.
To recreate the circle, you can simply match the dial numbers. That is, if the left dial is on 1, the right dial should be one 1. If the left dial is on 2, the right dial should be on 2 and so on.
Screenshot
To recreate the symbol that looks like an E, turn the left dial to 5 and the right dial to 4.
Screenshot
To recreate the atomic looking symbol, turn the left dial to 1 and the right dial to 7.
Screenshot
To recreate the backwards looking C, turn the left dial to 1 and the right dial to 5.
Screenshot
Drag the totem to the carving.
Screenshot
Pink Totem: The Strong Magnet
Move the magnet up to the other side of the wood where the red button is.
Screenshot
Move one of the cogs left and down to the other side of the wood near the lock.
Move the totem into the red button area. Make sure that it's pushing the red button down.
Move the 2nd cog down to the 1st cog.
Screenshot
Move the key down through the gap into the compartment with the lever. Push the lever to the left.
Position the cogs so that they're both touching the wood but on either side of the where the gray wood panel just slid through. You can use the lever to open and close the panel. Move the cogs so that they're on either side of the gray panel.
Move the magnet to the other side of the gray wood. The magnetic force will attract the cogs to the magnet and hold it in place.
Screenshot
Use the key to push the lever to the right. The magnet and cogs combined will prevent the gray panel from sliding through.
Move the key out, up and over to the lock.
Move the key back and push the lever to the left.
Move the magnet back to the other side of the red button.
Move one of the cogs onto the red button to replace the totem.
Screenshot
Use the key to push the lever to the right.
Move the totem to where the lock and key are.
Use the key to push the lever to the left.
Move the totem to the carving.
Screenshot
Teleport Levels
Teleport 1: The Teleport
The aim is to spin the wheels and have each of the numbers written to the left
1,3,4
in order from left to right and in the highlighted triangles. The only magnetic wheel is the large white one to the left. Click and hold on it to spin it and the other wheels.
Pull the bottom lever.
Rotate the white wheel one full rotation.
Pull the top lever while the wheels are still just spinning.
Pull the bottom lever.
Rotate the white wheel one full rotation.
Pull the bottom lever.
Screenshot
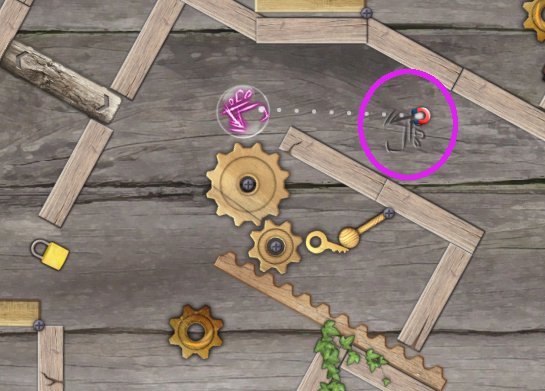
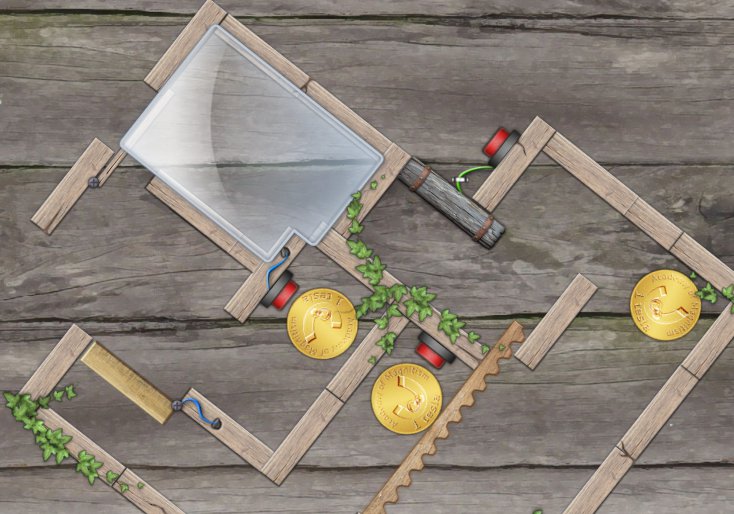
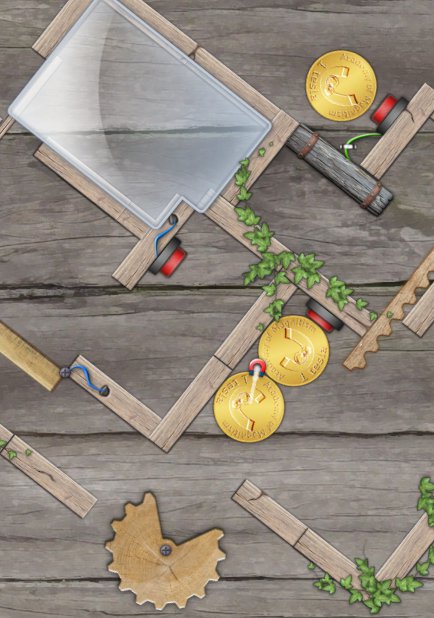
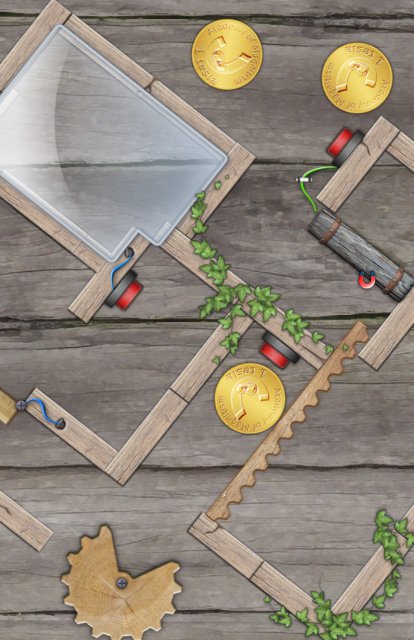
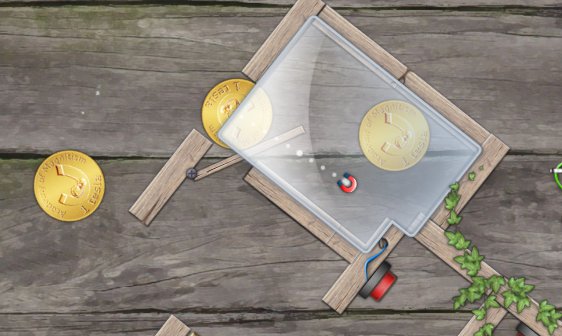
Teleport 2: Three Coins
Use the coin that's on its own on the red button that's next to it.
Move the bottom coin in the 2-coin compartment to push the lowest red button, near it.
Screenshot
Move the coin on the right to the space between the gray piece of wood and the ivy near the top red button.
Move the left coin left, out, up, and over to the top-most button, and push.
Screenshot
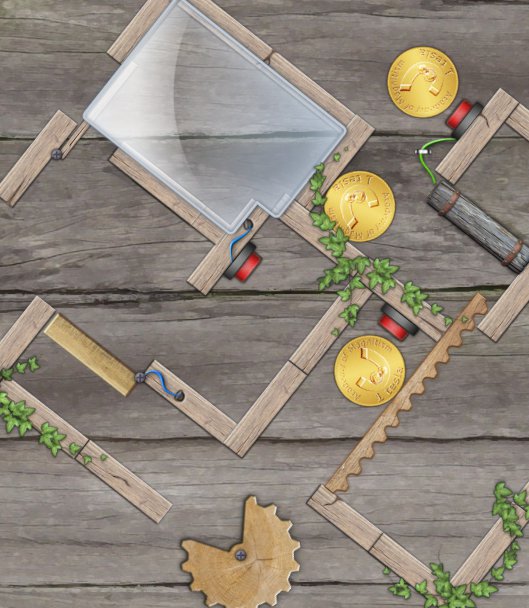
Move the middle coin up and out, over, left, down, and right, into the small compartment with the left-most red button, and push.
Move the coin at the top down to the cog with the gap. Drag the coin into the cog's gap and move to the right.
Screenshot
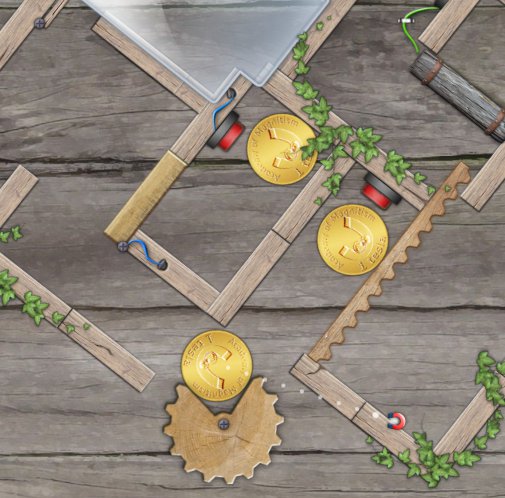
Use the coin now on the left to push the left red button. Then move the coin left, out, up, and to the top, and push the top-most red button.
Use the two coins at the bottom to push on the bottom red button.
Screenshot
Move the bottom of those coins right and up.
Use the bottom coin to push the bottom red button.
Move the coin that's at the right to the space between the gray wood and the ivy.
Use the coin now at the top on the top-most red button.
Move the middle coin up and out.
Screenshot
Move the bottom coin to the gap in the cog and move it to the left.
Move one of the top coins left, down, and right, into the left-most red button compartment. Push the red button.
Screenshot
Move the bottom coin up and out of the wood maze.
Use the coin at the left-most red button to push the button and move out of the maze and join the other coins at the top left.
Screenshot
Drag all three coins into the glassed area through the flap at the top left.
Congratulations! You're a "Real Magnet" now!
Thanks to Chiktionary for the walkthrough!
Posted by: Mike |
November 27, 2010 11:35 PM
|
November 27, 2010 11:35 PM