
The Freewill Cycle: Volume 1 (Redux Edition)
![]()
 You wake up on the floor, disoriented, and lean against a nearby table for balance as you stand. Perhaps a sign you enjoyed yourself a bit too much last night but, somehow, you don't think so. Something just doesn't feel right. First of all, where is everyone? What happened? Where are you? More importantly, who are you? Thus you commence your search for answers in The Freewill Cycle: Volume 1 (Redux Edition), a revised and refurbished point-and-click adventure created by William Buchanan and available exclusively here at Jay Is Games.
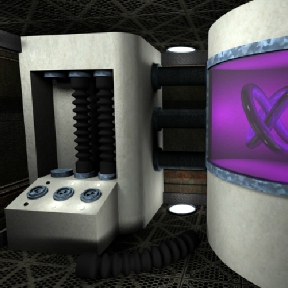
Just like in the original version, this revamped first installment of a two volume game series blends puzzles into narrative in a style that's clearly reminiscent of The Journeyman Project and Myst. Apparently alone on some sort of spacecraft, explore each room searching for clues on how to escape this unearthly and portentously empty metal edifice. Follow your cursor, which can usually be relied upon for help as it changes direction wherever you can turn or back up and morphs into a magnifying glass or closed fist (in most cases) when you can examine or interact with an object. Items you pick up are stored at the bottom of your screen; just click and drag an object from your inventory to where you want use it. As in real life, the areas of interactivity for these objects is limited by their function; a key will only fit precisely in a keyhole, for example, and a glass should be set squarely on a flat surface.
Although adhering to the same basic structure and gameplay as the previous edition of The Freewill Cycle: Volume 1, navigation, story and scenery have all been improved to render the game as, according to Buchanan, it "should have been." Old puzzles have been modified and new ones added. There are also additional user features such as "save" and "mute" buttons, as well as text labels of items and interactive areas, if you select "Casual Experience" mode before beginning the game. Even so, the "Director's intent" mode—played with lights out and headphones on—is recommended for maximal immersion! As many details have changed and the story has been expanded, those familiar with the initial release of volume 1 still have much to discover and enjoy here, including a new ending that better paves the way for volume 2.
 Analysis: While the scenario, setting and some of the puzzles are essentially the same as the original, a first effort by Buchanan—who was, at the time, a novice to game design—this "redux" edition of The Freewill Cycle: Volume 1 is very nicely transformed. It compares well, on a smaller scale, to those aforementioned classic adventures which inspired this creation. The original is categorized as an escape game yet this version, while in many respects not wrongly dubbed an escape, is more aptly described as a narrative adventure for how well it builds plot, utilizes characterization and integrates literary devices into the experience.
This is evinced by the need to consider and synthesize what you read as well as in the setting: inanimate and relatively sterile yet it's sullied by insinuation. A feeling of foreboding follows you every step you take and is imbued by the spacey-spooky soundtrack and hollow tone of your footfalls. Everything you read has subtle indicators and allusions, useful for problem solving your way out as well as making conjectures, mulling over possibilities and postulating theories—all while leaving you full of questions. It's short. You'll wish it was longer, but the next installment (which is on the near horizon) promises fulfillment.
While certainly improved from the first effort, this second version still contains some flaws. Navigation is somewhat cumbersome, especially at first before you're familiar with the surroundings. If you're not careful, it's easy to miss an integral item or area, leaving you wandering through rooms, wondering what you're missing or whether you're going crazy. That issue can be compounded by somewhat picky hotspots which, as mentioned above, require you to be precise in using an item lest you think it's unusable. Finally, while the excess of information in the notebooks and emails is great for fleshing out the story, it can be misleading, especially if you get caught up in details and miss a hint. Frustration over these parts has the potential to spoil the experience so, if you find yourself in that situation, it's a good idea to take a break then come back to play again. You should play twice, anyhow, to encounter both the "bad" and "good" endings. After walking away, you might realize you're thinking about it more than you expected.
The Freewill Cycle: Volume 1 (Redux Edition) has that sort of lingering aftereffect, a mark of a good gaming experience. It's not just the music that will be stuck in your head when you're done; the infinite abyss of space and time keeps many a poor soul awake a night in contemplation of the unthinkable.
Play The Freewill Cycle Vol.1 Redux
[Note: the game file is 14.4 MB; it may take several moments to load fully.]


Walkthrough Guide
(Please allow page to fully load for spoiler tags to be functional.)
Walkthrough—The Freewill Cycle Vol.1 Redux
Before You Start: General Info
Select your "Mode" of play:
"Director's Intent" (recommended) — no text directions, no opt out of the music or sounds, no quit, no save.
"Casual Experience" — text labels on items in game, the ability to mute the music and sound effects, and the option to save or quit at any time.
Game Screen:
You can zoom your browser if you'd like the game window to be larger, but be aware you lose some quality in the graphics the more you enlarge the game screen.
For the best experience, click the JIG "lights out" button just outside the top right corner of the game screen.
Playing in a darkened room with no other sounds or distractions going on is also recommended.
Navigation:
When you hover your cursor at the right or left edges of the game screen, it will turn to point right or left if you can turn that direction.
If you can inspect an object or area, your cursor turns into a magnifying glass symbol. Click in that area to examine it more closely.
To exit a close view:
Usually holding the cursor at the bottom of the screen will change it to a downwards pointing hand so you can click the bottom of the screen to back up.
At other times, you'll need to click the sides of the screen to move out of a close view.
If you can interact with an object or area, your pointer will change into a closed hand.
When an item can be picked up, it will automatically be added to your inventory when you click on it.
To use an inventory item, click on it, keeping your left mouse button depressed, drag it to the area on screen where you want to use it.
Some interactive areas require you be exact when using an item: use it precisely where it should go as if in real life, not just a general vicinity.
If you get stuck:
Read through all available information and re-check your steps, seeing if you overlooked an area.
As a last resort, refer to the walkthrough section for more direct help.
From the First Room to Ritner's Office
Zoom in on the countertop in front of you:
Click and drag the the papers to move them around.
There's a clue hidden underneath the papers:
orion314
Back out.
Examine on the computer moniter above the counter:
You know the password from looking at the papers on the counter.
Click in the password box to make sure the cursor is there then type in the password:
orion314
Note: the password is case sensitive; use all lowercase letters.
Click "OK" and click on the dot next to each of the email titles to read them:
Make notes of anything that seems clue-worthy but all information is relevant both in solving puzzles and in understanding the overall story.
Back up from the computer and turn left twice.Take a look at on the lockers:
Currently, only the last locker on the right is unlocked.
Open it and take the MULTITOOL.
Back out to close the locker then back up again.
Turn left twice and click the knob of the Beta Wing door to open it.
Go through the door into the hallway.
The "Experimental Plasmas" door will be to your left and "Scott Ritner's" office to your right.
Ritner's office is locked but, based on what you learned from the "Mayday" email, you know how to open it:
Move forward once more (past the two doors on either side of you).
Zoom in on the grate on the baseboard on the right.
Use your MULTITOOL by dragging it from your inventory onto the grate.
The grate will open and you can see something on the left side of the opening:
a KEYCARD. Take it.
Back up and turn right to face Scott Ritner's door.
Hold the KEYCARD over the doorknob and the door will open.
Move forward into Ritner's office.
Zoom into the computer moniter on the surface of Ritner's desk:
Based on the "Lunch?" email, you know the password. Type it in and click "Ok."
cherry
Again, read every email for important story information and clues.
Back up.
Examine the sculpture on Ritner's desk:
Use the clue from the "Memory alloys" email to unlock its secret:
"...metallic structure responds to small amounts of heat. With only the constant touch of a human hand..."
So rub the metal ball constantly by clicking on it and, keeping your left mouse button depressed, swirl around on the surface of the sculpture.*
*Repeatedly clicking on it should also work.
A code will appear on the surface of the ball:
Red 12 - Green 4 - Blue 9
Back up.
Turn right and examine the tree:
Click the top of the tree and something falls into its pot:
A simple KEY. Take it.
Turn right two more times to face the countertop:
Read the notebook on the counter; it provides important information.
"Protectium" will protect your cells.
It's made in three steps.
and a notation on how to get 27 Hz on the laser.
Turn left to close the notebook.
Click on the doorknob to open the door and step out into the hallway.
Plasmas Room and Reactor: First Visits to Each
After leaving Ritner's office, turn left and go forward.
Open the door to "Administration" (which is the first room you were in) and go through:
Now you have the key to the lockers (found in Ritner's office), so move in to examine them.
Use the KEY on the lock of the middle locker:
Take the HANDWHEEL.
Close the middle locker then unlock the left locker:
Get the BREAKER RESET KEY.
Back up twice and turn right twice.
Go through the door and back out into the hallway. Then, go forward twice and turn left to face the "Experimental Plasmas" door. Go inside.
Turn left to face the plasma synthesizer machine:
Open the yellow and black striped access panel on the plasma synthesizer device.
Place the HANDWHEEL on the pipe's notch.
You'll get audio confirmation "Coolant has been restored.
Back up.
Turn left twice so you're facing a counter with a glowing yellow gem on it:
Examine the base of the steel rod under the countertop.
Use the MULTITOOL to unscrew it from its base.
The STEEL ROD will be added to your inventory.
Back up and turn right.
Go back out into the hallway and turn left.
Continue forward to the end of the hallway until you're standing in front of the "Reactor Room" door. Go in.
Examine the computer terminal of the big machine in front of you:
Click on each of the four bars to get more information about each apparatus:
The "Reactor Status" is critical...it's putting out too much radioactivity.
The "Conductors" are misaligned:
One of the "phases" is open, causing an error read-out.
"Core Stability" is unbalanced:
Make note of the helicity's "x" "y" and "z" numbers...they can be changed.
The "Generator" is offline...because of the other errors.
Back up from the control screen and click on the paper next to it:
The "epsilon" configuration is needed to fix helicity.
Look for CB's log book for that.
Turn right to face the conductors (big black tubes next to the purple reactor):
The left tube has broken off the conductor.
Insert the STEEL ROD (from the Plasmas room) in its place.
Zoom in on the control panel below the tubes:
Use the BREAKER RESET key (found in the left locker) on the left dial to reset it.
A sound and white lights will indicate it's fixed.
Back up.
Zoom in on the purple "reactor containment structure" and listen:
It sounds radioactive. Good and useful, as per the notes in the Administration room.
Turn left and examine the computer terminal on the big machine again:
Select "Conductors" again.
With the steel rod in place, all the green bars are filled in.
Click "Align."
Return to the main screen to see the conductors are now aligned. Now only the core stability needs to be fixed and the generator turned on.
Back up, turn left, and exit this room.
Laser Lab (gathering info) and Powering Up the Reactor
As you exit the Reactor Room, turn right to face the "Laser Lab" door. Go inside.
Just inside the doorway, without moving further into the room, turn left:
You'll see a small black box on top of a curved pipe and, on the floor in the corner, a glass beaker.
Pick up the EMPTY GLASS.
Use the simple KEY to unlock and open the box:
Take the empty SYRINGE from the bottom shelf.
Now turn right twice to face the other corner:
You'll see a BLUE NOTEBOOK sitting on the pipe.
Click on the notebook to open it.
Continue clicking to read through the pages.Read through more story details and also look for two important clues.
The config profiles on the middle page gives you the epsilon configuration.
The last page explains the values of x, y and z so you can figure them into your computations.
Turn right again to face the door. Go out and turn left to face the "Reactor Room. Go inside.
Examine the computer terminal on the large machine in front of you:
Fix the "Core Stability"
Use the information from the blue notebook to solve this problem.
You need a helicity of "epsilon."
Remember to add the values to y and z.
When the numbers are correct, click "Lock"
ANSWER:
Helicity needs to total 24:
x = 10
y = 6
z = 2
Then, turn on the "Generator".
When the top three buttons are green, select "Generator", click "Parallel" and, voila!
Turn around and go through the door. Go forward twice and turn right again to face the "Experimental Plasmas" door.
Using Experimental Plasmas
Enter the Plasmas room.
Use the information you gathered from Scott Ritner's office to make some items with the plasmas:
Make the precursor solution of "Protectium"
The email "Test case 55" tells you which numbers to enter into each of the plasma tanks.
Click on each tank's control panel and then click the arrows to set the numbers:
RED = 3
GREEN = 9
BLUE = 6
After you've entered the correct numbers on each tank, turn left to face the plasma synthesizer device:
Put the EMPTY GLASS in the center of the dispenser.
Click the knob to produce protectium precursor solution.
Take the GLASS of GREEN LIQUID.
Make a
Turn right to the plasma tanks again.
Change the values in each tank as shown on Ritner's gold sculpture:
RED = 12
GREEN = 4
BLUE = 9
Turn back to the plasma synthesizer and, with nothing else under the dispenser, press the knob.
A LIGHT FILTERING CRYSTAL will be created. Take it.
Turn left and go through the door. Turn left, go forward twice and turn left to face the "Laser Lab" door.
The Infinite Abyss
AKA: How to walk safely through the hole in Zeta Wing
At this point, if you've followed all the necessary steps to prepare for exiting, you will all this in your inventory:
GLASS OF GREEN LIQUID (protectium precursor solution)
RED CYLINDER (light filtering crystal)
mulitool
breaker reset key
simple key
SYRINGE (empty)
key card
Enter the "Laser Lab". Walk forward once and turn left.
Click on the yellow and black access panel for the machine on the right side of the room:
Insert the LIGHT FILTERING CRYSTAL (red cylinder)
Back up and turn to the laser facility controls on the left side of the room:
Configure it as per the instructions in the folder in Ritner's office.
Set it to 31. With the -4Hz filter in place, that'll give you 27Hz as needed.
Turn around to face the laser firing machine...
Put the GLASS OF GREEN solution into the laser machine.
Press the knob to fire the laser; this will turn the solution purple.
Use the SYRINGE on the purple solution. It will automatically be injected into you.
Turn and exit this room.
Turn left. Go back to the Reactor Room. Now you must do one more thing before you're protected:
Turn right and go closer to the purple Reactor Containment Structure. Make sure you have fixed the reactor (it will be making a clicking noise if it works). Then...
Let those radioactive waves do their work on you just as they did with the lab rat.
Now you're able to leave through the zeta wing without being lost to the abyss.
Leave the Reactor Room and go all the way down the hall to "Administration."
Go through that room and turn left. Go through the door into the Zeta Wing.
Walk into the pretty glowing lights.
Posted by: elle |
July 10, 2012 7:40 PM
|
July 10, 2012 7:40 PM