JayisGames.com is now available ad-free!
Jay is Games recommends Cheat Happens with 8,000+ games and 35,000+ trainers!

Figurines Room Escape


  • Currently 4.2/5
  • 1
  • 2
  • 3
  • 4
  • 5
Rating: 4.2/5 (151 votes)
Comments (42) | Views (12,897)

Weekday Escape

GrinnypOne of the best ways to escape a humdrum day is to play an exotic room escape, especially one by Tomatea. For five to ten minutes, Tomatea (Summer Night Escape, Pearl Room Escape) can transport a player to another place and time, the perfect mini-vacation, and this week is no exception with Figurines Room Escape. Tomatea's room escapes are not the most difficult, and the puzzles in Figurines Room Escape are on the easy side even for this particular designer, but if you're looking to escape to another state of mind then this is the game for you.

Figurines Room Escape
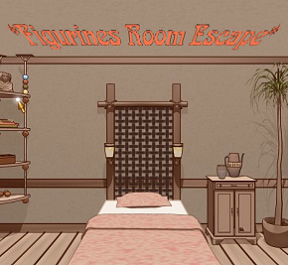
Bask in the soothing color scheme of this colonial-style room and the plaintive guitar music as you explore the space using the standard navigation bars on the sides of the screen. Wallow in the intuitive Inventory control and a lovely cursor that, rather than change shape to indicate clickable areas glows with a warm light, a pretty innovation that matches the mood of the game. Soak up the puzzles which, while on the simple side and including one color-based, are still fun and logical. Most of the fun of Figurines Room Escape is simply enjoying the ambiance as you work your way towards getting out of a place that pretty much anyone would probably love to visit once in their lifetime. Figurines Room Escape provides both time and a location to relax and enjoy a mini-vacation, the perfect mid-week break!

Figurines Room Escape

Walkthrough Guide


(Please allow page to fully load for spoiler tags to be functional.)

Figurines Room Escape Walkthrough

  1. Zoom in on the left lamp above the bed. Take the blacklight bulb.

  2. Zoom in on the nightstand. Solve the puzzle for the top drawer by following the arrows, starting on the bottom left. Each arrow indicates moving 1 space in that direction. (Don't forget to click the bottom left square first.) Take the clay shard (1/4).

  3. Note the pattern of diamonds on the water jug.

  4. Zoom in on the 3rd shelf from the top. Open the box using the sequence from the water jug. Take the glue.

    ULRDU

  5. Zoom in on the top shelf on the left. Note the colors of the 4 beads on either side.

    G B
    W R
    B G
    R W

  6. Turn around. Zoom in on the lamp, and take the bulb out. Replace it with your blacklight bulb.

  7. Zoom in on the desk. Turn on the lamp. Note both lines of the code written on the table.

    M8MV
    (1/2)

  8. Open the bottom right drawer and take the clay shard (2/4).

  9. Zoom in on the top left drawer. Use the code from the lamp: each symbol is a number reflecting its mirror image, hence the 1/2. So, vertically cut each number in half and use the right half.

    1317

    Take the compass and clay shard (3/4).

  10. Zoom in on the center bookshelf and look for a hotspot in the center. Click to open a book. Note the pattern from the only page with anything on it.

    Top left, 2nd right, 3rd left, bottom right.

  11. Zoom in on the top right drawer. Use the pattern from the book in conjunction with the beads from the top shelf near the bed.

    G R B W

    Take the clay shard (4/4).

  12. Zoom in on the desk. Add the clay shards to the broken statue. Use the glue to fix it. Take it.

  13. Turn around. Zoom in on the nightstand. Follow the compass needle as it points out the solution to this cabinet to open it.

    N E S W NW SE

    Take the crowbar.

  14. Place your lightbulb in the left lamp. Turn both lamps on. Note the pattern of numbers on the headboard and their locations.

    4 1

    62 35

  15. Turn left. Use the crowbar on a piece of the lower wall to the right. Take the note.

  16. Turn left. Use the crowbar on the crate on the right. Take the statue.

  17. Zoom in on the bottom left drawer. Follow the pattern on the note to open it. Take the screwdriver.

  18. Zoom in on the statue on the middle shelf and click just underneath it. Remove the screw and take the statue.

  19. Turn left. Zoom in on the right picture, and click the frame's corners in the order noted from the headboard.

    4 1

    62 35

    Take the key at the top right corner of the frame.

  20. Use the key on the small box left of the door. Place the 3 statues here, matching each shelf with the symbol on the bottom of each statue.

    Circle
    Square
    Star

    Take the key.

  21. Use the key on the door. Escape!

Here's a walkthrough!

You start by facing the headboard of the bed

  1. Zoom in to the hanging bookshelf on the left side.

  2. Note the colored beads on the top shelf, take note of the order.

  3. Note the box with the 4 buttons, up, down, left, right.

  4. Back up twice, then zoom in to the headboard.

  5. Click the left light, then take the black thing, it's a black-light bulb.

  6. Back up twice, zoom in to the bedside table and note the symbols on the water flask.

  7. Click the top drawer, you can solve the drawer puzzle right away, you don't need clues.

    You need to follow the arrows starting from the first dark one.

    Remember to click the first one, otherwise if you start from the 2nd one, it won't work.

    Start from the bottom left, click the button, then go up 1 and click it, go right 3 times and click it, down 1 and click it, and so on and so forth. You will end up at the middle star shaped symbol and the drawer will open.

    You will get a part of a figurine.

  8. Back up once, then turn right.

  9. Turn right twice (you don't have enough clues to solve anything on the door side yet), and click the desk to zoom in.

  10. Click the lamp to zoom in, and take the light bulb.

  11. Put the black-light bulb in it's place, then back up once.

  12. Click on the other object on the table to zoom in, you'll see a broken item with only the top and bottom, as well as a blur at the base of the lamp

  13. Click the button the the base of the lamp to turn it on and the words will show up.

  14. Make a note of the symbols as well as the (1/2) under it.

  15. Back up twice, then zoom in on the bookshelf.

  16. Click the middle shelf near the pink book, and a book will open up.

  17. Flip through the book, and note the diagram on the second page. The rest of the pages are blank, but feel free to flip it through.

  18. Also click on the figurine at the right of the middle shelf, and note that you can't do anything with it.

  19. Back up twice, then click on the drawers below the bookshelf.

  20. Open the bottom right drawer and get a piece of figurine. You'll have 2 out of 4 now.

  21. Click the top right drawer and note that there is 4 blank spots, cycle through it and you'll see it goes through 4 colors, red, green, blue, and yellow. (Also the sign doesn't pop up saying that you have no idea how to solve it, which means you've already seen the clues to help you solve it!)

    Where have you seen those colors before?

    The beads on the hanging bookshelf next to the bed has these colors.

    But there are 8 beads and slots? Does the shape resemble anything you've seen so far?

    The diagram in the book on the bookshelf above the drawers

    Oh my god... Are you sure?!

    Fine... it's Green, Red, Blue, Yellow...

    Obtain the figurine fragment, piece 3 of 4.

  22. Click the top left drawer and note that there is 4 number spots. (Also the sign doesn't pop up saying that you have no idea how to solve it, which means you've already got the clues.)

    It's the symbols under the desk lamp.

    It is not math and it is not Greek letters.

    The half means half of each symbol.

    Cover the left half of each symbol.

    Do I have to specify everything?

    It's 1317!

    Get the 3rd piece of figurine fragment as well as a compass

    Examine the compass in your inventory and notes all the directions it points to before returning the the top and stopping.

  23. You can't solve the bottom left drawer yet, so back up and turn right.

  24. Look at the hanging bookshelf again, you now have the clues to open the box on the third shelf, so click it to zoom in.

    The clue is on the bedside table.

    It's the water jug.

    Examine the symbols of the water jug.

    Ok, fine, it's up, left, right, down, up.

    You will get a tube of glue.

  25. Back up twice, then turn back to the headboard and click it to zoom in, then click the left light to zoom in again.

  26. Put the light bulb you got from the desk lamp in there, then back out once and click on both light pulls to turn both lights on.

  27. Make a note of the 6 numbers and it's position, then back up.

  28. Click the cabinet of the bedside table, you now have the clues to solve this.

    The clue is in the compass

    Remember the positions the compass points to?

    Click it in the same order as the compass points to.

    Are you that lazy?!

    It's North (up), East (right), South (down), West (left), North-West (top left) and South-East (bottom right)

    You'll get a crowbar. Back up and turn right.

  29. Zoom in on the two pictures, notice that you can bump the right one.

    Ok, so there's a puzzle here that you have the clues for.

    The clues are on the headboard.

    Follow the sequence of numbers and it's positions.

    Ok, I'll admit it's a little confusing, so I'll give you the answer without making fun of you this time.

    Bump the corners in this sequence: Top right, bottom left, bottom right, top left, bottom right, bottom left.

    Get the key that appears in the top right corner, then back up once.

  30. You wish this was the door key already, but it's only for the little cabinet right next to the door. Open the cabinet and note the shapes on each shelf.

  31. Back up, then turn right, then zoom in on the box on the right under the plant.

    You don't need me to spell this out for you, do you??

    *facepalm* Use your crowbar on the darn box!

    Obtain Figurine, then back out.

  32. Turn right, zoom in under the window.

  33. Note that one of the panels seem clickable.

    Are you sure you need this clue?! But you just used it!!

    *headdesk* Use your crowbar on this panel as well please....

    Pick up the little square to the wall, then examine it in your inventory.

  34. Turn left and zoom in to the drawers again, you now have the clue to open the bottom left drawer.

    Is this not obvious enough? You just got that clue!

    It's the little paper.

    Follow the directions starting from the lower left, don't forget to click it first.

    Why aren't you checking the note?!!

    Fine, it's lower right, upper left, upper right, lower left, top, and bottom!! Arghhhh!!

    You now have a screw driver.

  35. Zoom back out, then back in the bookshelf again. Remember the little figurine on the shelf you could do nothing with?

    Click under it, either in bookshelf view or figure in view.

    There is a screw there.

    Please. Use. Your. Screwdriver. On The. Screw.

    Obtain Figurine, then back out twice, and click on the desk twice to zoom in to the top and bottom of the broken figurine.

  36. You now have all 4 fragments of the figurine, so put it together.

    Click pieces, click table.

    Don't forget to glue it together.

    Click the figurine to grab it and back out twice. You now have 3 figurines.

  37. Where should the figurines go?

    There's only 1 place left in the room that's not solved.

    The cabinet by the door.

    Which figurine goes in which spot?

    Examine the figurines, please.

    Dear God... Am I a kindergarten teacher?

    Click the figurines twice to turn them over when examining them, and match up the symbol to the shapes on each shelf, first one on the top shelf, second one on the middle shelf, and the third one on the bottom shelf please!

    Out pops a tiny compartment with a key. Take it.

  38. What? You know what to do!!

  39. *Shrieks and pulls out hair* Use the ##@$* key on the #@)%@&%)(@$ door!!!!!

42 Comments

I have a love/hate relationship with these Tomatea games. They are unique, but not that great, but still oddly fun.

Now let me do this one.

Reply

got just about everything, I think. Stuck trying to figure out

how to open the glue to glue the piece on the desk together.

Reply
nerdypants October 5, 2011 12:53 AM

Stuck.

I have a screwdriver, and nothing to screw.

Also, oh god could this game use a save function. I accidentally closed the window and now I have to do it all over again. ;_;

Reply

Nevermind, I figured out what I was doing wrong. Out!

Reply
nerdypants October 5, 2011 12:55 AM

neo1973:

You don't need to open the glue. You just need all four pieces of the thing.

Reply

Nerdy
sometimes you just have to back up and re-examine things from a different angle. If thats not enough:

the figurine on the shelf can be unscrewed from the bottom

Reply
nerdypants October 5, 2011 1:00 AM

Thanks, neo1973! I'm out.

Reply

I'm perplexed by the clue under the lamp (clarified by the blacklight). I'm pretty sure I'm supposed to get a four digit number for a drawer out of it. Looking into the symbols, I'm left thinking that I should know vector calculus or something in order to derive said numbers, but that's a bit beyond me.

Reply

Out, pretty easy. Tenzhi, about the numbers

pay special attention to the 1/2

Reply

Ten,
There is a clue for figuring out the lamp puzzle right there below the cryptic symbol. For the solution:

the clue says 1/2. Take 1/2 of each symbol above (split vertically) and you should get 1317

Reply

I was assuming the 1/2 was a clue to the math. Overcomplicating things as usual.

Reply
ruffienne October 5, 2011 1:13 AM

Can't figure out how to get the stupid painting on the right off the wall. Help please?

Reply

For some reason, I'm stumped on the square with all the arrows. Any help?

Reply

@ruffienne:

The clue is in the latticework above the bed.

You will need to replace that pesky blacklight to reveal the whole clue.

Reply

@Schwat

have you found the compass yet?

Reply

@Schwat:

I was too for a minute.

The number of arrows in each square is important. And don't forget to click the starting arrow first.

Reply

@Schwat

Wrong puzzle, sry. Ten's got you covered.

Reply
ruffienne October 5, 2011 1:31 AM

Yeah, I got the numbers... I get lost where the grid turns into the corners of the frame? Thanks for your help!

Reply

@ruffienne:

The picture would go right in the middle of the six numbers. Such that 1 is the upper right corner.

Reply

Made it out, woo!

A good and decently challenging escape all around, but there are 2 things I would say about it:

1) A crucial hotspot on the shelf doesn't get the cursor-change when you move your cursor over it.

2) Tesshi-e already burned us out on the nonsensical "picture frame" puzzles, Tomatea. We don't need another one. :[

Reply

Yeah, the hotspots were a bit iffy for me all-around. Sometimes they would show up, sometimes they wouldn't, sometimes the cursor would get stuck with a light on the end of it for a bit just to confuse matters more.

Reply
ruffienne October 5, 2011 1:43 AM

Made it out, finally. And fully agreed with An Onyx Mouse. Thanks guys.

Reply

Screwdriver? There's a screwdriver?

Totally stuck.

Have three of the four drawers under the bookcase open. The remaining drawer (some sort of flower-like puzzle) tells me I'm missing a clue. I have a crowbar, which I've already used, but it's still in my inventory. I have two of the three figurines, and I can see where the third one is screwed to the shelf.

I've used every clue I can find, and I'm tired of hunting dead pixels. Help?

Reply
nerdypants October 5, 2011 2:12 AM

The hotspots were definitely an issue. It can be pretty frustrating to think you've explored the entire room, only to find you missed a hotspot because the cursor didn't change. I'd actually prefer no changing cursor at all to one that only changes half the time it's supposed to.

Otherwise, it was a nice game. I really liked the archaeological theme.

Reply

And POP:

Click under the windows, then find the place where the pointer lights up (towards the right) and click it with the crowbar. There's the missing clue, after which it's easy.

(I swear I had already tried this, but apparently I missed the exact spot.)

Reply
nerdypants October 5, 2011 2:18 AM

Reka, about the flower-shaped puzzle:

You can use the crowbar in more than one place. Have you checked

under the windows?

Reply

Figurines Room Escape Walkthrough

  1. Zoom in on the left lamp above the bed. Take the blacklight bulb.

  2. Zoom in on the nightstand. Solve the puzzle for the top drawer by following the arrows, starting on the bottom left. Each arrow indicates moving 1 space in that direction. (Don't forget to click the bottom left square first.) Take the clay shard (1/4).

  3. Note the pattern of diamonds on the water jug.

  4. Zoom in on the 3rd shelf from the top. Open the box using the sequence from the water jug. Take the glue.

    ULRDU

  5. Zoom in on the top shelf on the left. Note the colors of the 4 beads on either side.

    G B
    W R
    B G
    R W

  6. Turn around. Zoom in on the lamp, and take the bulb out. Replace it with your blacklight bulb.

  7. Zoom in on the desk. Turn on the lamp. Note both lines of the code written on the table.

    M8MV
    (1/2)

  8. Open the bottom right drawer and take the clay shard (2/4).

  9. Zoom in on the top left drawer. Use the code from the lamp: each symbol is a number reflecting its mirror image, hence the 1/2. So, vertically cut each number in half and use the right half.

    1317

    Take the compass and clay shard (3/4).

  10. Zoom in on the center bookshelf and look for a hotspot in the center. Click to open a book. Note the pattern from the only page with anything on it.

    Top left, 2nd right, 3rd left, bottom right.

  11. Zoom in on the top right drawer. Use the pattern from the book in conjunction with the beads from the top shelf near the bed.

    G R B W

    Take the clay shard (4/4).

  12. Zoom in on the desk. Add the clay shards to the broken statue. Use the glue to fix it. Take it.

  13. Turn around. Zoom in on the nightstand. Follow the compass needle as it points out the solution to this cabinet to open it.

    N E S W NW SE

    Take the crowbar.

  14. Place your lightbulb in the left lamp. Turn both lamps on. Note the pattern of numbers on the headboard and their locations.

    4 1

    62 35

  15. Turn left. Use the crowbar on a piece of the lower wall to the right. Take the note.

  16. Turn left. Use the crowbar on the crate on the right. Take the statue.

  17. Zoom in on the bottom left drawer. Follow the pattern on the note to open it. Take the screwdriver.

  18. Zoom in on the statue on the middle shelf and click just underneath it. Remove the screw and take the statue.

  19. Turn left. Zoom in on the right picture, and click the frame's corners in the order noted from the headboard.

    4 1

    62 35

    Take the key at the top right corner of the frame.

  20. Use the key on the small box left of the door. Place the 3 statues here, matching each shelf with the symbol on the bottom of each statue.

    Circle
    Square
    Star

    Take the key.

  21. Use the key on the door. Escape!

Reply

If someone could teach me how to do those neat screenshot links, I'd gladly include them.

[Thank you for the walkthrough, DAM! Feel free to zip up any screenshots you have and email them to our contact address and we'll upload them to the JIG server for you. Be sure to leave references (or better yet, actual links to the screenshots) in the walkthrough where you want the screenshots to appear. Also, you should use HTML list elements, especially the ordered list <ol>, to give numbered steps to your walkthrough. It makes it easier to follow, as well as come back and find your place. If you have any questions at all about any of this, send us an email to our contact address and we'll give you personalized help. Cheers! :) -Jay]

Reply

One thing I absolutely love about Tomatea games:

"I have no clue how to solve this!"

What a great way to know exactly where you should be, and what you shouldn't be wasting time with yet! Plus, it keeps people from brute-forcing puzzles.

I think it's a fantastic idea, and I wish more escape designers would do it. I hate having to circle around tesshi-e rooms looking for unsolved puzzles, trying to figure out which one of the 7 number codes I'm supposed to know already.

Reply
lavamuffin October 5, 2011 2:58 AM

Pretty good game. Interesting mix of Polynesian and South American artifacts. Thanks, TomaTea!

Reply

Yea, I'll agree that Tesshi-e has burned us out on the wobbly picture puzzle. This one really had me going in circles too. A word to the wise -

Don't try to overlay the two groups of numbers to get one sequence like you would in a Tesshi-e escaper. You need to think of the picture as if it was in the MIDDLE of the two groups of numbers.

Reply

Here's a walkthrough!

You start by facing the headboard of the bed

  1. Zoom in to the hanging bookshelf on the left side.

  2. Note the colored beads on the top shelf, take note of the order.

  3. Note the box with the 4 buttons, up, down, left, right.

  4. Back up twice, then zoom in to the headboard.

  5. Click the left light, then take the black thing, it's a black-light bulb.

  6. Back up twice, zoom in to the bedside table and note the symbols on the water flask.

  7. Click the top drawer, you can solve the drawer puzzle right away, you don't need clues.

    You need to follow the arrows starting from the first dark one.

    Remember to click the first one, otherwise if you start from the 2nd one, it won't work.

    Start from the bottom left, click the button, then go up 1 and click it, go right 3 times and click it, down 1 and click it, and so on and so forth. You will end up at the middle star shaped symbol and the drawer will open.

    You will get a part of a figurine.

  8. Back up once, then turn right.

  9. Turn right twice (you don't have enough clues to solve anything on the door side yet), and click the desk to zoom in.

  10. Click the lamp to zoom in, and take the light bulb.

  11. Put the black-light bulb in it's place, then back up once.

  12. Click on the other object on the table to zoom in, you'll see a broken item with only the top and bottom, as well as a blur at the base of the lamp

  13. Click the button the the base of the lamp to turn it on and the words will show up.

  14. Make a note of the symbols as well as the (1/2) under it.

  15. Back up twice, then zoom in on the bookshelf.

  16. Click the middle shelf near the pink book, and a book will open up.

  17. Flip through the book, and note the diagram on the second page. The rest of the pages are blank, but feel free to flip it through.

  18. Also click on the figurine at the right of the middle shelf, and note that you can't do anything with it.

  19. Back up twice, then click on the drawers below the bookshelf.

  20. Open the bottom right drawer and get a piece of figurine. You'll have 2 out of 4 now.

  21. Click the top right drawer and note that there is 4 blank spots, cycle through it and you'll see it goes through 4 colors, red, green, blue, and yellow. (Also the sign doesn't pop up saying that you have no idea how to solve it, which means you've already seen the clues to help you solve it!)

    Where have you seen those colors before?

    The beads on the hanging bookshelf next to the bed has these colors.

    But there are 8 beads and slots? Does the shape resemble anything you've seen so far?

    The diagram in the book on the bookshelf above the drawers

    Oh my god... Are you sure?!

    Fine... it's Green, Red, Blue, Yellow...

    Obtain the figurine fragment, piece 3 of 4.

  22. Click the top left drawer and note that there is 4 number spots. (Also the sign doesn't pop up saying that you have no idea how to solve it, which means you've already got the clues.)

    It's the symbols under the desk lamp.

    It is not math and it is not Greek letters.

    The half means half of each symbol.

    Cover the left half of each symbol.

    Do I have to specify everything?

    It's 1317!

    Get the 3rd piece of figurine fragment as well as a compass

    Examine the compass in your inventory and notes all the directions it points to before returning the the top and stopping.

  23. You can't solve the bottom left drawer yet, so back up and turn right.

  24. Look at the hanging bookshelf again, you now have the clues to open the box on the third shelf, so click it to zoom in.

    The clue is on the bedside table.

    It's the water jug.

    Examine the symbols of the water jug.

    Ok, fine, it's up, left, right, down, up.

    You will get a tube of glue.

  25. Back up twice, then turn back to the headboard and click it to zoom in, then click the left light to zoom in again.

  26. Put the light bulb you got from the desk lamp in there, then back out once and click on both light pulls to turn both lights on.

  27. Make a note of the 6 numbers and it's position, then back up.

  28. Click the cabinet of the bedside table, you now have the clues to solve this.

    The clue is in the compass

    Remember the positions the compass points to?

    Click it in the same order as the compass points to.

    Are you that lazy?!

    It's North (up), East (right), South (down), West (left), North-West (top left) and South-East (bottom right)

    You'll get a crowbar. Back up and turn right.

  29. Zoom in on the two pictures, notice that you can bump the right one.

    Ok, so there's a puzzle here that you have the clues for.

    The clues are on the headboard.

    Follow the sequence of numbers and it's positions.

    Ok, I'll admit it's a little confusing, so I'll give you the answer without making fun of you this time.

    Bump the corners in this sequence: Top right, bottom left, bottom right, top left, bottom right, bottom left.

    Get the key that appears in the top right corner, then back up once.

  30. You wish this was the door key already, but it's only for the little cabinet right next to the door. Open the cabinet and note the shapes on each shelf.

  31. Back up, then turn right, then zoom in on the box on the right under the plant.

    You don't need me to spell this out for you, do you??

    *facepalm* Use your crowbar on the darn box!

    Obtain Figurine, then back out.

  32. Turn right, zoom in under the window.

  33. Note that one of the panels seem clickable.

    Are you sure you need this clue?! But you just used it!!

    *headdesk* Use your crowbar on this panel as well please....

    Pick up the little square to the wall, then examine it in your inventory.

  34. Turn left and zoom in to the drawers again, you now have the clue to open the bottom left drawer.

    Is this not obvious enough? You just got that clue!

    It's the little paper.

    Follow the directions starting from the lower left, don't forget to click it first.

    Why aren't you checking the note?!!

    Fine, it's lower right, upper left, upper right, lower left, top, and bottom!! Arghhhh!!

    You now have a screw driver.

  35. Zoom back out, then back in the bookshelf again. Remember the little figurine on the shelf you could do nothing with?

    Click under it, either in bookshelf view or figure in view.

    There is a screw there.

    Please. Use. Your. Screwdriver. On The. Screw.

    Obtain Figurine, then back out twice, and click on the desk twice to zoom in to the top and bottom of the broken figurine.

  36. You now have all 4 fragments of the figurine, so put it together.

    Click pieces, click table.

    Don't forget to glue it together.

    Click the figurine to grab it and back out twice. You now have 3 figurines.

  37. Where should the figurines go?

    There's only 1 place left in the room that's not solved.

    The cabinet by the door.

    Which figurine goes in which spot?

    Examine the figurines, please.

    Dear God... Am I a kindergarten teacher?

    Click the figurines twice to turn them over when examining them, and match up the symbol to the shapes on each shelf, first one on the top shelf, second one on the middle shelf, and the third one on the bottom shelf please!

    Out pops a tiny compartment with a key. Take it.

  38. What? You know what to do!!

  39. *Shrieks and pulls out hair* Use the ##@$* key on the #@)%@&%)(@$ door!!!!!

Reply

Dave, about the picture frame puzzle, I made the same mistake. I had all the clues visible but thought that the positions in the lattice were the guide. That's the only bit I needed the walkthrough for.

Reply

i can't figure out the

nightstand arrow puzzle

DAM and Zedster, make walkthroughs with direct solutions. giving hints is ok too but direct solutions needs to be domne in case you still get stuck. If you can't do this, then stop making walkthroughs. I think GrinnyP needs to save us witrh a walkthrough. hers are da bomb!!

Reply
nerdypants October 5, 2011 1:08 PM

I actually don't like the "I have no clue how to solve this!" thing. Like I said earlier, I accidentally closed the window I was playing in, and had to do the game over. Meaning that I did know how to solve all the puzzles I was being told I didn't know how to solve. I had to do every. single. step. over again, instead of skipping ahead to get to where I was before.

I'd like it much better if they kept the message, but let you solve the puzzle anyway.

Reply
Lucky Guess October 5, 2011 7:19 PM

LOL, wow, I was just messing around with the box in the beginning, with the four buttons on top. And by random chance, I manage to get it right XD.

To be fair, I did look around for the clue

It's on the water pitcher on the nightstand :P

Reply
nerdypants October 5, 2011 7:56 PM

Paul, the nightstand puzzle:

Bring up the compass in your inventory. Watch where the needle stops. Then push the buttons on the nightstand according to where the needle stops, starting with the top (North) position and going form there.

Solution:

North
East
South
West
Northwest
Southeast

Reply

@Paul

Tell you what: why don't I make a youtube video of me completing the whole game, and that way you don't even have to click your mouse.

Sheesh. I make walkthroughs so people can get through parts where they're stuck. I do NOT make walkthroughs for people who don't want to be bothered with any effort whatsoever. That puzzle would have required a screenshot, which I didn't know how to do. And besides, if you can't complete that puzzle on your own, you should probably stop playing puzzle games. Go shoot zombies or something.

Reply
MirrorImage October 6, 2011 1:37 PM

Just in case someone else is making the same mistake I did with the moving picture:

you don't click the picture frame itself. Click the hotspots inside the frame on the actual picture.

Sigh. :o) Great game. I liked it lots. Especially the music. Haven't heard guitar music before.

Reply
VoxPopuli42 October 7, 2011 8:05 PM

@DAM
Wow. That was one of the rudest responses I have ever seen on JIG.
Yes, hint-throughs are great, but there are points when hints just aren't working and you need an obvious solution laid out. Otherwise the frustration builds and builds and the game is ruined. I understand your intent but honestly, if you don't want to help people who are stuck, don't feel like you have to make walkthroughs anymore.

Reply

@confusingstringofcharacters

I don't have to make walkthroughs, nor do I feel like I do. I want to make them because a) I enjoy doing it, and b) I know it's helpful when you're stuck. I try to explain how to figure out and solve a puzzle in the clearest, most straightforward language I can think of using. Of course, sometimes someone who thinks differently than I do will not understand my explanation. It happens, and I get it. In that case, people ask, and I or someone else will respond and help them through.

If you feel like my response was rude, well, you're probably right. I felt the initial comment was rude. Here I am trying to help people by writing a walkthrough, and then someone comes along and says "Yours is bad. I want this instead. Make walkthroughs this way, or else stop making them." If that isn't rude, then I don't know what is.

And not for nothing, but you should be able to solve that puzzle with the explanation I gave. Seriously, that one was not that hard.

Reply

Nice, quiet game. I sadly can almost never solve any of these without a walkthrough, and DAM's was quite thorough (even for the dense puzzle-impaired girl like me).

So long as the writing of walkthroughs is a volunteer effort, how they are written is at the discretion of the writer. Documents written to spec are usually commissioned in advance of their production.

- Des

Reply

^ Scroll Up | Homepage >

Leave a comment [top of page]

Please consider creating a Casual Gameplay account if you're a regular visitor here, as it will allow us to create an even better experience for you. Sign-up here!
  • PLEASE UNDERSTAND SITE POLICIES BEFORE POSTING COMMENTS
  • You may use limited HTML tags for style:
    (a href, b, br/, strong, em, ul, ol, li, code, spoiler)
    HTML tags begin with a less-than sign: < and end with a greater-than sign: >. Always. No exceptions.
  • To post spoilers, please use spoiler tags: <spoiler> example </spoiler>
    If you need help understanding spoiler tags, read the spoiler help.
  • Please Preview your comment before posting, especially when using spoilers!
  • No link dropping, no domains as names; do not spam, and do not advertise! (rel="nofollow" in use)
chrpa Jayisgames needs your help to continue providing quality content. Click for details Welcome to the Roundup 66 - Retro with four games! After you find the ten monkeys in the chapter, look in the inventory. You will find a...  ...
chrpa Jayisgames needs your help to continue providing quality content. Click for details Welcome to the Roundup 65 with three games! As mentioned in the previous roundups, only odd-numbered episodes are featured since even-numbered are for Robin Vencel's patrons (the...  ...
chrpa Jayisgames needs your help to continue providing quality content. Click for details Hi! Weekday Escape and Weekday Puzzle are here! First we have two new cans from tomoLaSiDo and then two small rooms from isotronic. That's all for this...  ...
6,365 Views
0 Comments
chrpa Jayisgames needs your help to continue providing quality content. Click for details Welcome to Mobile Monday! We have another beautiful game from Nicolet and it's a winter game as it should be. Tasuku Yahiro have released another of their...  ...

HELP Jayisgames.com

Recent Comments


Display 5 more comments
Limit to the last 5 comments

Game of the week


Dark Romance: Vampire Origins Collector's Edition

Your Favorite Games edit

add
Save links to your favorite games here. Use the Favorites editor.

Monthly Archives