JayisGames.com is now available ad-free!
Jay is Games recommends Cheat Happens with 8,000+ games and 35,000+ trainers!

Summer Night Escape


  • Currently 4.5/5
  • 1
  • 2
  • 3
  • 4
  • 5
Rating: 4.5/5 (282 votes)
Comments (23) | Views (9,041)

elleelle_summernightescape_title.png
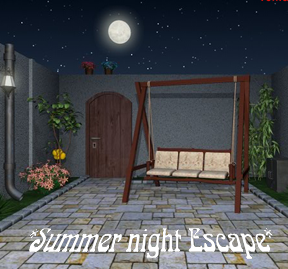
TomaTea understands what makes an escape-the-room enticing: it's not what you're escaping from but where you're escaping to because, when you begin a TomaTea escape, you are transported to a place you'd relish being trapped. In the case of Summer Night Escape, this is especially true: a warm, star-filled eventide when time pauses and all seems right with the world. Isn't that what escape games are for? An opportunity to forget everything else and to let go in surreal surroundings, where solving a few puzzles is all it takes to hear, "Congratulations! You've found success!"

Summer Night has smooth, intuitive navigation (click the sides of the screen to change direction) and exploration (a changing cursor indicates hot spots; click them for a closer look) with cohesive puzzles that rely in equal parts on your power of observation, your ability to make logical connections, and your ingenuity. The balmy August evening atmosphere is alluring and, as you search for clues in this three-room scene, cricket songs serenade you. Because Summer Night Escape is rather short in length, it is also not so long or involved that it becomes more work than play; experienced gamers are going to knock this out of the park in one swing, yet Summer Night Escape gives its players a bit of a challenge, a lot of fun, and a moment to gaze at a starry sky.

Play Summer Night Escape

Walkthrough Guide


(Please allow page to fully load for spoiler tags to be functional.)

Walkthrough

There are 6 puzzles to solve and they have to be solved in order.

#1 Top Right Drawer

First you must look in the wardrobe for the clue on how to solve. Next look at the pictures on the wall to see how the pattern evolves. Finally solve.

Top Left: Green
Bottom Left: Yellow
Top Right: Red
Bottom Right: Red

Pipe and key to bathroom found.

#2 Bottom Left Drawer

Grab the mug in the bathroom.

Fill it with water in the shower.

Use the water to fill the shell next to the fruit bowl.

Gain a dice. The dice is the clue to solve the drawer.

Each side has a number and a colour.

Use the numbers 1 to 4 on the drawer

Yellow Green Red Blue

Gain the key to the patio doors and a puzzle square.

#3 Bathroom Cupboard

Solve the puzzle square by moving the red dot from the small green dot to the large green dot.

Right, Down, Left, Up, Right, Down, Left, Up, Right, Down

Note the code number in top right hand corner. This is the clue (and answer) to the cupboard.

3231

Gain a pipe and a towel.

#4 Top Left Drawer

Damp the towel in the shower.

Use the key to open the patio doors and get outside.

Use the towel to clean the wall to the right of the broken pipe.

This is the clue to the puzzle.

Combine the puzzle with the symbols in the bathroom to get the answer

Red + combined with Yellow X gives Orange answer

Yellow triangle combined with Blue triangle gives Green answer

Blue Steering Wheel combined with Red Steering Wheel gives Purple answer

Orientation and exact shape matters. There are two green symbols which look very similar.

Open drawer to gain box.

#5 Bottom Right Drawer

Find ball on swing.

Put ball in broken pipe then look down.

Gain ball and alphabet block.

Open box

Place dice, puzzle square and ball in box.

Box opens to give you clue.
Dog - Owl - Owl - Rabbit

Compare this with alphabet block.

D - Yellow
O - Blue
O - Blue
R - Orange

Use this to open the drawer.

Gain pipe and a key.

#6 Pipes

You should now have three pipes. There are two more.

Pot plant to left of wardrobe.

Under bed, but you can't reach it.

Use the pole in the wardrobe to reach it.

Use the key to open the padlock on the box in the garden.

Place the pipes into the box and then rotate to solve.

All the pipes need to be joined up. The patterns on the pipes need to join up too.

It comes up with a solved message when complete.

Find a tap handle to the right of the flowers at the bottom of the broken pipe.

Place the tap handle on the spigot to the right of the pipe box.

Rotate tap.

Gain a key from the fish fountain.

Escape!

this is my first walkthrough, so forgive me if it's awful.

1.

Click on the flowers next to the cupboard, take the pipe, and exit the flowers.

2.

Click on the cupboard.

3.

Click on the bar at the top of the cupboard, and exit the cupboard.

4.

Click on the bed.

5.

Use the bar you got from the cupboard on the pipe, then exit the bed.

6.

Turn right.

7.

Click on the starfish frames, then exit.

8.

Turn left.

9.

Click on the four drawers, then click on the top right one.

10.

The code, clockwise from the top left is green, red, red, yellow.

11.

Take the pipe and key, then exit.

12.

Turn right.

13.

Use the key on the door, and enter the bathroom.

14.

Click on the cabinets.

15.

Take the cup, then exit the cabinets.

16.

Click on the shower.

17.

Turn the water on, use the cup on the water, then exit the shower.

18.

Exit the bathroom and turn left.

19.

Click on the table on the left with the fruit and shell.

20.

Click on the cup, then take the die and exit the table.

21.

Examine the die, click on the drawers, then click on the bottom left one.

22.

The code is yellow, green, red, blue.

23.

Take the key and the square, then exit the drawers.

24.

Examine the square.

25.

Click the arrows in the following order:
Right
Down
Left
Up
Right
Down
Left
Up
Right
Down

26.

Exit the square.

27.

Turn right, and enter the bathroom.

28.

Click on the cabinets, then click on the lock.

29.

The code is 3231.

30.

Take the rag and the pipe, then exit the cabinets.

31.

Click on the shower, use the rag on the water, then exit the shower.

32.

Exit the bathroom and turn right.

33.

Use the key on the door.

34.

Click on the swings, take the baseball, then exit the swings.

35.

Click near the light on the left.

36.

Use the wet rag on the black mark, use the baseball on the hole in the pipe, then exit the light.

37.

Click near the bottom of the pipe, take the baseball, die, and the handle to the right of the flowers, and exit the pipe.

38.

Examine the die.

39.

Exit the courtyard and return to the screen with the drawers.

40.

Click on the top left drawer, and click the screens the following amount of times.
Screen 1: 2
Screen 2: 5
Screen 3: 3

41.

Take the box.

42.

Examine the box, and put the first die you received in the small square spot, put the square in the large square spot, and put the baseball in the circular spot.

43.

Click on the bottom right drawer, and put in the code DOOR.

44.

Take the pipe and the key.

45.

Return to the courtyard, and click on the gray box in between the fish and the swings.

46.

Use the handle on the circle next to the box, and use the key on the lock.

47.

Use the pipes on the puzzle inside the box.

48.

Solve the puzzle so that all the pieces connect. The game will notify you if you've solved it.

49.

Close the box, click on the handle, then exit the box.

50.

Click on the fish, take the key, then exit the fish.

51.

Click on the door and use the key on it.

Congratulations!

Summer Night Escape Walkthrough

Bedroom - gathering clues & solution for top right nightstand door

  1. Open closet door, take note of the diagram taped to the back wall, and then click on the clothes rod to take it, back up.

  2. Look under bed, use rod to reach pipe (1/5) and back out again.

  3. Zoom in on flowers (left of the closet), and take pipe (2/5)

  4. Back away then turn left, zoom in on the table of fruit and shell; notice there is something deep inside the shell, but you cannot reach it that far down. Zoom out.

  5. Turn left twice, and take a closer look at the starfish display on the wall above the bed. Using the clue from inside the closet, take notice of how the color patterns change from frame to frame:

    • Left Frame: top left=yellow; top right=red; bottom left=red; bottom right=green.

    • Middle Frame: top left=red; top right=green; bottom left=red; bottom right=yellow.

    • Right Frame: top left=red; top right=yellow; bottom left=green; bottom right=red.

  6. Go back and left to focus in on the nightstand, top right door. Following the pattern provided from the three starfish displays, the next color pattern should be:

    top left=green (two clicks); bottom left=yellow (no clicks); top right=red (one click); bottom right=red (one click)

  7. After you enter the correct color pattern, click the button and the door will open. Take pipe (3/5) and key . Back out and turn right, toward the bathroom door.

Bathroom - Gathering Clues

  1. Use the key to open the bathroom door, and zoom in on the under-sink cupboard. Another code, this time a four digit number, that you don't have yet . . . so will come back later. Click on the cup sitting on the counter to take it. Back out again.

  2. Go to the shower, turn on the water, and fill the cup up.

  3. Before leaving, take a closer look at the two oblong pictures hanging above the sink . . .

    • Left picture (from top to bottom): red flower; yellow triangle; blue crossed-circle.

    • Right picture (from top to bottom): blue triangle; red crossed-circle; yellow flower.

    . . . The colors and shapes may be a clue for a later puzzle.

  4. Back out of the bathroom.

Back into the Bedroom and Open the Bottom Left Nightstand Door

  1. Return to the little table with fruit and pour the water from cup into the shell; a colored die will rise to the surface so take it. Examine it closely, noting the colors corresponding to each side:

    1=yellow; 2=green; 3=red; 4=blue; 5=orange; 6=purple.

  2. Using the clue from the die, now you can solve the color code for the bottom left door of the nightstand:

    first box on left=yellow (no click); second box from left=green (two clicks); third box from left=red (one click); last box=blue (three clicks).

  3. Open the door and take a handheld game and another key .

  4. Play the handheld game by using the arrows to turn slant the surface and make the ball roll in that direction. The goal is the get the ball into the green circle without it rolling off the screen. When you finish the game successfully . . .

    Right-Down-Left-Up-Right-Down-Left-Up--Right-Down.


    . . . you'll be given a 4-digit code:

    3231 (note: you must play the game correctly before you can use the code)

Return to the Bathroom, Open the Sink Cupboard

  1. Enter the code from the handheld game to open the under the sink cupboard.

  2. Get a towel and another pipe (4/5)

  3. Wet the towel in the shower, then head back out.

The Patio - Gathering Clues

  1. Use the square key to unlock and open the sliding glass door.

  2. Go closer to the swing and grab the baseball .

  3. Back up then click on the drainpipe on the left wall. Use the wet towel on the black smudge to reveal a clue (another color pattern) . . .
    (from left to right)

    • red + yellow = orange

    • yellow + blue = green

    • blue + red = purple

    . . . Combine this information and hint from the bathroom pictures to create new shapes and colors:

    orange flower (overlap the two flowers); green star (overlap the two triangles); purple +-circle (overlap the two crossed circles).

  4. Before backing away from the drainpipe, put the baseball in the hole. Back up then focus on the ground under the pipe to get the baseball back and another colored die with pictures .

  5. While there, grab the spigot hidden on the right side of the flowers. Back up and head back inside.

Bedroom, Top Left Nightstand Door

  1. Using the code you created by putting together the clues from wall by the drainpipe and the pictures in the bathroom . . .

    The shapes you get from overlapping the pictures in the bathroom, plus use the color combinations from the drainpipe clue.
    (from left to right)

    • orange flower (two clicks)

    • green star, with points at odd angles (five clicks)

    • purple + in circle (three clicks)

    . . . Open the top left nightstand door, get the jewelry box .

  2. Inside the box is a place for three things . . .

    the numbered die, the handheld game, and the baseball.

    . . . when you put them in, it'll reveal another clue.

Bottom Right Door of Nightstand

  1. Using the hints from the box and the colored picture die, come up with the four letters you'll need, in order of the colors on the four digit code:

    D-O-O-R

  2. Take the key and the last pipe (5/5) and go back outside.

Patio - Pipe Puzzle and Exiting

  1. Back outside, go up to the locked metal box on the right wall. Use the key to unlock it and open it.

  2. Take your pipe pieces from your inventory and place them inside; it will turn into a puzzle. You need to rotate the pipes until they are correctly connected (the shading on the pipes helps to orientate them properly).

  3. When the pipes are all connected, look to the right side of the pipe box. Replace the spigot on the valve and turn it on.

  4. Back up and focus in on the dolphin fountain. There you'll find a gold star-shaped key .

  5. Back out and then go to the wooden patio door. Use the key and you're out!

23 Comments

I'm doing surprisingly well on this one, but I can't

get the tube-thing from under the bed

any suggestions?

Reply

Thank you elle, that was driving me nuts.
now i can solve what i assume is the final puzzle.

Reply

Color Guide so far

Starfish

(left to right)
First picture: top - yellow, red; bottom - red, green
Second pic: top - red, green; bottom - red, yellow
Third pic: top - red, yellow; bottom - green, red


Dice

1: yellow
2: green
3: red
4: blue
5: orange
6: pink

Bathroom pictures

top to bottom

left: red flower like +, yellow triangle pointing right →, blue circle with vertical slash |
right: blue triangle pointing left ←, red circle with horizontal slash -, yellow flower like X

Of course this doesn't help with entering the solutions, but I hope that'll help someone.

Reply

I'm not sure what to do with the

wet rag. I have a baseball, 3 fuses, a game with code, a die, and a wet rag.

A little help?

Reply

Ah...nevermind. I didn't click EVERYWHERE.

Reply
serenhybrid September 5, 2011 2:12 PM

Hah! Out without a walkthrough for the first time ever! One small comment:

the pipe game at the end was made far too easy by telltale clues like the red lines on the far right pipes, and the squares only lining up when the pipes were in the right alignment!

Still rather enjoyable though. I do like TomaTea games; the logic always seems to follow.

Reply

Walkthrough

There are 6 puzzles to solve and they have to be solved in order.

#1 Top Right Drawer

First you must look in the wardrobe for the clue on how to solve. Next look at the pictures on the wall to see how the pattern evolves. Finally solve.

Top Left: Green
Bottom Left: Yellow
Top Right: Red
Bottom Right: Red

Pipe and key to bathroom found.

#2 Bottom Left Drawer

Grab the mug in the bathroom.

Fill it with water in the shower.

Use the water to fill the shell next to the fruit bowl.

Gain a dice. The dice is the clue to solve the drawer.

Each side has a number and a colour.

Use the numbers 1 to 4 on the drawer

Yellow Green Red Blue

Gain the key to the patio doors and a puzzle square.

#3 Bathroom Cupboard

Solve the puzzle square by moving the red dot from the small green dot to the large green dot.

Right, Down, Left, Up, Right, Down, Left, Up, Right, Down

Note the code number in top right hand corner. This is the clue (and answer) to the cupboard.

3231

Gain a pipe and a towel.

#4 Top Left Drawer

Damp the towel in the shower.

Use the key to open the patio doors and get outside.

Use the towel to clean the wall to the right of the broken pipe.

This is the clue to the puzzle.

Combine the puzzle with the symbols in the bathroom to get the answer

Red + combined with Yellow X gives Orange answer

Yellow triangle combined with Blue triangle gives Green answer

Blue Steering Wheel combined with Red Steering Wheel gives Purple answer

Orientation and exact shape matters. There are two green symbols which look very similar.

Open drawer to gain box.

#5 Bottom Right Drawer

Find ball on swing.

Put ball in broken pipe then look down.

Gain ball and alphabet block.

Open box

Place dice, puzzle square and ball in box.

Box opens to give you clue.
Dog - Owl - Owl - Rabbit

Compare this with alphabet block.

D - Yellow
O - Blue
O - Blue
R - Orange

Use this to open the drawer.

Gain pipe and a key.

#6 Pipes

You should now have three pipes. There are two more.

Pot plant to left of wardrobe.

Under bed, but you can't reach it.

Use the pole in the wardrobe to reach it.

Use the key to open the padlock on the box in the garden.

Place the pipes into the box and then rotate to solve.

All the pipes need to be joined up. The patterns on the pipes need to join up too.

It comes up with a solved message when complete.

Find a tap handle to the right of the flowers at the bottom of the broken pipe.

Place the tap handle on the spigot to the right of the pipe box.

Rotate tap.

Gain a key from the fish fountain.

Escape!

Reply

And exactly how are you supposed to figure out the solution to the dice puzzle?

I have found nowhere in the game where it says that the combination is 1234 and it's not obvious at all. Since I did not have that information, I thought it had to do with the bathroom pictures, and not being able to see the connection I had to resort to a walkthrough.

That ruined the game for me. Not having to resort to a walkthrough, but not giving a proper hint for that puzzle.

Reply

Somehow I'm stuck on the first puzzle.

I can't find any sort of pattern on the starfish puzzle. Looking at each square separately, I see: top left- yellow, red, red; top right- red, green, yellow; bottom left- red, red, green; bottom right- green, yellow, red. Using the patterns there, I'd think that it would be (in the same order) yellow, red, green, green, but that doesn't work.

I know the walkthrough gives a solution, but that isn't helpful for those of us who like to see what leap of logic was made to reach that solution.

Reply

this is my first walkthrough, so forgive me if it's awful.

1.

Click on the flowers next to the cupboard, take the pipe, and exit the flowers.

2.

Click on the cupboard.

3.

Click on the bar at the top of the cupboard, and exit the cupboard.

4.

Click on the bed.

5.

Use the bar you got from the cupboard on the pipe, then exit the bed.

6.

Turn right.

7.

Click on the starfish frames, then exit.

8.

Turn left.

9.

Click on the four drawers, then click on the top right one.

10.

The code, clockwise from the top left is green, red, red, yellow.

11.

Take the pipe and key, then exit.

12.

Turn right.

13.

Use the key on the door, and enter the bathroom.

14.

Click on the cabinets.

15.

Take the cup, then exit the cabinets.

16.

Click on the shower.

17.

Turn the water on, use the cup on the water, then exit the shower.

18.

Exit the bathroom and turn left.

19.

Click on the table on the left with the fruit and shell.

20.

Click on the cup, then take the die and exit the table.

21.

Examine the die, click on the drawers, then click on the bottom left one.

22.

The code is yellow, green, red, blue.

23.

Take the key and the square, then exit the drawers.

24.

Examine the square.

25.

Click the arrows in the following order:
Right
Down
Left
Up
Right
Down
Left
Up
Right
Down

26.

Exit the square.

27.

Turn right, and enter the bathroom.

28.

Click on the cabinets, then click on the lock.

29.

The code is 3231.

30.

Take the rag and the pipe, then exit the cabinets.

31.

Click on the shower, use the rag on the water, then exit the shower.

32.

Exit the bathroom and turn right.

33.

Use the key on the door.

34.

Click on the swings, take the baseball, then exit the swings.

35.

Click near the light on the left.

36.

Use the wet rag on the black mark, use the baseball on the hole in the pipe, then exit the light.

37.

Click near the bottom of the pipe, take the baseball, die, and the handle to the right of the flowers, and exit the pipe.

38.

Examine the die.

39.

Exit the courtyard and return to the screen with the drawers.

40.

Click on the top left drawer, and click the screens the following amount of times.
Screen 1: 2
Screen 2: 5
Screen 3: 3

41.

Take the box.

42.

Examine the box, and put the first die you received in the small square spot, put the square in the large square spot, and put the baseball in the circular spot.

43.

Click on the bottom right drawer, and put in the code DOOR.

44.

Take the pipe and the key.

45.

Return to the courtyard, and click on the gray box in between the fish and the swings.

46.

Use the handle on the circle next to the box, and use the key on the lock.

47.

Use the pipes on the puzzle inside the box.

48.

Solve the puzzle so that all the pieces connect. The game will notify you if you've solved it.

49.

Close the box, click on the handle, then exit the box.

50.

Click on the fish, take the key, then exit the fish.

51.

Click on the door and use the key on it.

Congratulations!

Reply

man, i just spent (apparently) over half an hour making a walkthrough, just to see that someone else already made one. dang.

[Thomas - Thank you for posting it, anyway...everyone has a different style of walkthrough that they prefer to use. :) ~elle]

Reply

I guess we have no lack of walkthroughs for this one!

Thanks to everyone who posted one! :)

Reply

@Callidy:

The logic to solving that puzzle is in noticing that each starfish can only be found once in a given location. Thus when you look at for instance the green starfish, you will see it in 3 of the 4 smaller squares, so for the drawer puzzle, it needs to be placed in the 4th small square that has not yet had a green starfish. The same goes for the other starfish.

Reply

Callidy

I think you may be overthinking, as was I...

I assumed there was some sort of series, but couldn't find it. Rather, I think you just need to put the green and yellow stars in the spots they have not occupied in the three wall hangings.

Reply
nerdypants September 5, 2011 6:14 PM

That was a nice little distraction. It's fun watching TomaTea's games steadily improve with time. One complaint, though:

It took me a really long time to realize I could grab that rod in the cabinet, and likewise the towel in the bathroom cabinet. The fact that whenever I clicked anywhere (except on the rod and towel) inside the cabinets, the cabinets closed, led me to believe that there was nothing else to be had in there.

It would be much better if the cabinets only closed when you clicked the doors, rather than the interior of the cabinets.

Reply

@themepark:

1234 is not "the combination", but the colors were. You're supposed to realize that you can enter colors in the box, and then look for something that could give you a sequence. The die provides that. If it were asking for numbers I could understand your confusion, but it was asking for colors, so I think the rest of us followed the logic that the designer meant for the puzzle.

Reply

I used a little different approach on the starfish.

The paper in the wardrobe suggests a pattern progressing from the left to the right. So to get the middle pattern from the left one, you slide the bottom-right starfish up to top-right, the top-right to bottom-left, the bottom-left to top-left, and the top-left to bottom-right. Repeating that shift operation on the middle pattern yields the right one. Thus it stood to reason that the solution was to shift the right pattern the same way to get the code.

Reply

On logic

@DAM It is not logical to assume ordinals from integers, especially when there are prominent color/number combinations all over the room. Even if you deduce that that's the correct clue, it's fundamentally misleading, and there were additional numbers involved as well. The only help you get is out of the keypad range, and that's still this side of brute force.

@Stephen I agree. This was a classic IQ test sort of puzzle. Kind of surprising that it's near the beginning of the game. Another one of this sort is one of the drawer puzzles in Loom Blend. https://jayisgames.com/archives/2009/04/loom_blend.php

Reply

the starfish puzzle is not too difficult if you:

make 2 moves. First switch the top two starfish Then flip the whole puzzle so the top two go to the bottom. This pattern goes to throughout

Reply
Uncle Swayshawn September 6, 2011 3:46 PM

ROFL this game had it all, with the puzzles on it and everything. I'm going to you like i saw it

that puzzle with the part on it where you had to do the grab reach job up to get that tube; the tube that was itself caught up under that bed, it was hard to find that pole rod up in that closet! I clicked myself around that room all the day trying to find a pole rod to scrape out that tube with and it was in that closet the whole time!!! This game had it all it was too FUNNY!!!

Reply

I solved the starfish puzzle yet another way.

The top row forms a pattern, and the hint in the wardrobe suggest completing the pattern for the middle box in the row below. So that's what I did, and it worked! It's interesting that this puzzle can be solved in so many different ways.

Reply

^ Scroll Up | Homepage >

Leave a comment [top of page]

Please consider creating a Casual Gameplay account if you're a regular visitor here, as it will allow us to create an even better experience for you. Sign-up here!
  • PLEASE UNDERSTAND SITE POLICIES BEFORE POSTING COMMENTS
  • You may use limited HTML tags for style:
    (a href, b, br/, strong, em, ul, ol, li, code, spoiler)
    HTML tags begin with a less-than sign: < and end with a greater-than sign: >. Always. No exceptions.
  • To post spoilers, please use spoiler tags: <spoiler> example </spoiler>
    If you need help understanding spoiler tags, read the spoiler help.
  • Please Preview your comment before posting, especially when using spoilers!
  • No link dropping, no domains as names; do not spam, and do not advertise! (rel="nofollow" in use)
chrpa Jayisgames needs your help to continue providing quality content. Click for details Welcome to the Roundup 66 - Retro with four games! After you find the ten monkeys in the chapter, look in the inventory. You will find a...  ...
chrpa Jayisgames needs your help to continue providing quality content. Click for details Welcome to the Roundup 65 with three games! As mentioned in the previous roundups, only odd-numbered episodes are featured since even-numbered are for Robin Vencel's patrons (the...  ...
chrpa Jayisgames needs your help to continue providing quality content. Click for details Hi! Weekday Escape and Weekday Puzzle are here! First we have two new cans from tomoLaSiDo and then two small rooms from isotronic. That's all for this...  ...
6,365 Views
0 Comments
chrpa Jayisgames needs your help to continue providing quality content. Click for details Welcome to Mobile Monday! We have another beautiful game from Nicolet and it's a winter game as it should be. Tasuku Yahiro have released another of their...  ...

HELP Jayisgames.com

Recent Comments


Display 5 more comments
Limit to the last 5 comments

Game of the week


Dark Romance: Vampire Origins Collector's Edition

Your Favorite Games edit

add
Save links to your favorite games here. Use the Favorites editor.

Monthly Archives