
![]() Despite sounding like something a poltergeist uses for yoga, Phantasmat by Codeminion is a fantastic hidden-object adventure game with a new twist. When your car veers off the road one rainy night as you travel down an unfamiliar highway, you have no choice but to seek help at the comfortingly named Drowned Dead Inn, even though the hotel "assistant" pleads for you to leave while you still can. HEY I KNOW WHAT WE SHOULD DO! LET'S CHECK RIGHT IN! Sounds like a smart decision to me!
Despite sounding like something a poltergeist uses for yoga, Phantasmat by Codeminion is a fantastic hidden-object adventure game with a new twist. When your car veers off the road one rainy night as you travel down an unfamiliar highway, you have no choice but to seek help at the comfortingly named Drowned Dead Inn, even though the hotel "assistant" pleads for you to leave while you still can. HEY I KNOW WHAT WE SHOULD DO! LET'S CHECK RIGHT IN! Sounds like a smart decision to me!
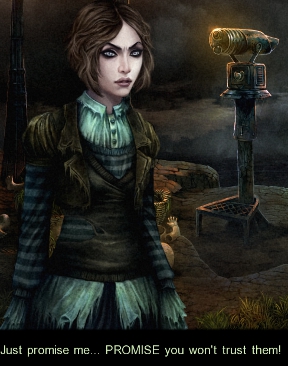
 The nearby town, you'll discover, has been abandoned ever since the dam broke and flooded the majority of it, merely damaging some parts while submerging the rest. It seems like the hotel manager, his assistant, and one very eccentric hotel resident are the only ones who have stuck around... and now you, of course. Although, you don't intend to stick around for long. Of course not. After all, it's not like the very forest itself seems to turn against you if you try to leave, right? Ha! Haha! Hahahaha... heh... oh. Hm. Well, that's a problem, isn't it?
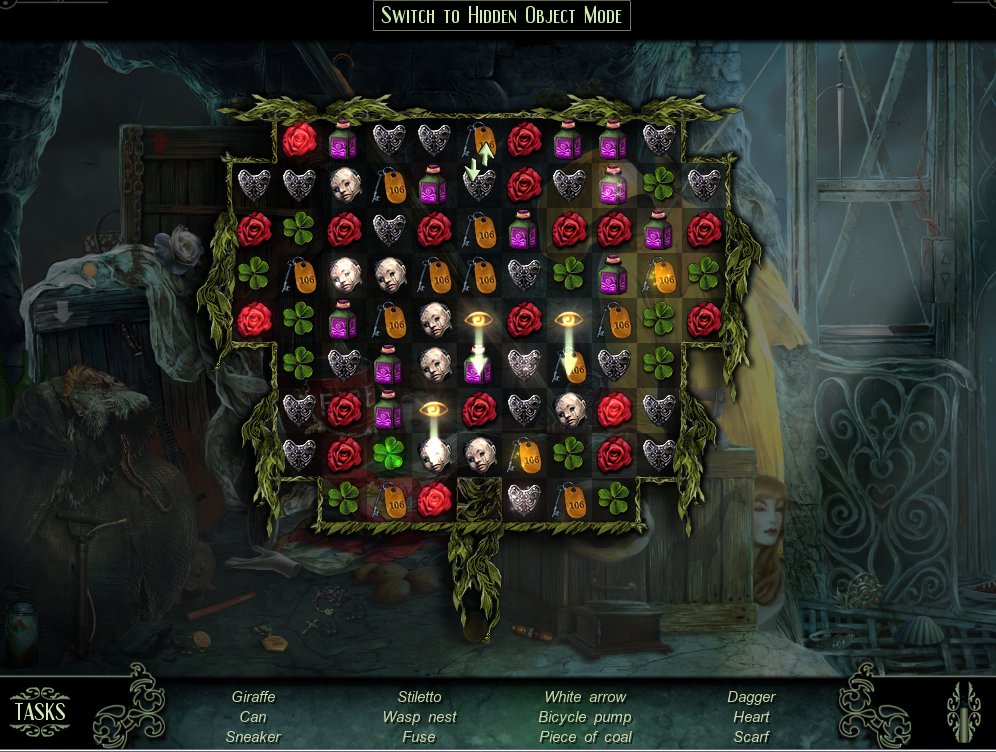
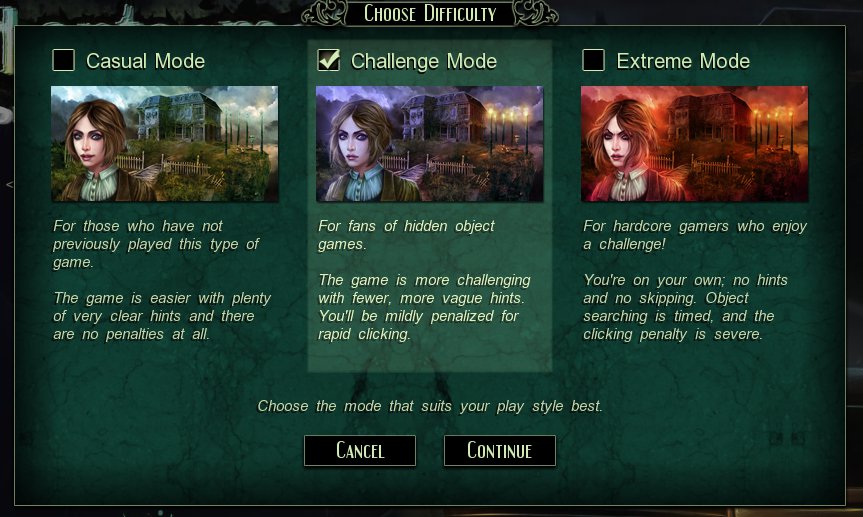
If you've played a hidden-object adventure game before, you know the drill by now. Play the game with your mouse, exploring the environments for items you need, and solve puzzles and hidden-object scenes to unlock new items or areas to progress. The game offers three difficulty modes; easy is what it sounds like, the middle-tier offers hints and skip buttons with a moderate timer, and hard difficulty not only penalizes you for mis-clicks for does not allow hints or skipping. If you find yourself stuck, try clicking on the "tasks" button, which will give you an idea of what you should be doing.
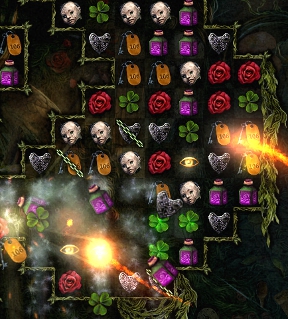
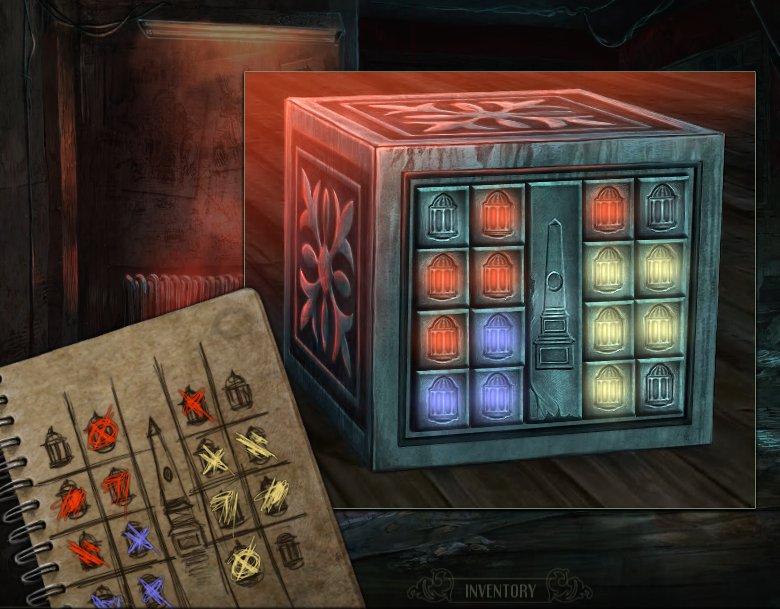
 The most interesting addition is the ability to switch instantly and at any time during a hidden-object scene to match-3 mode. Similar in execution to Bejeweled, you swap different items on a grid within the playfield; a match of three or more makes the items vanish, and more fall from the top. The goal is to get the glowing golden eyes to fall all the way to the bottom of the screen, which nets you one of the objects from your list. In match-3 mode, "hint" becomes "power", which, when full, will destroy several tiles on the board near any eyes in play. Your hint and power meters are interchangeable, so if you use a hint, your power will need to recharge, and, as Mr Bunker would say, vice-y verse-y.
Analysis: I'm pretty good at complaining. Ask anyone. But I have very few real complaints about the time I spent with this unexpected gem. The presentation is simply outstanding, with a few caveats. The "animation" used to make the otherwise static drawings of people speak looks a bit strange, and parts of the soundtrack are a little... excitable. Still, in a game as well put together as this, that's sort of like complaining that you don't like the colour of the frosting on your slice of cake. (It's blue! BLUE! Why is it so hard to remember?!) Environments are beautifully detailed, audio from both a musical and ambient point is top notch, and the story is very closely intertwined in the gameplay so that you feel like an active participant.
The only real issues with the gameplay itself are minor ones. Because you spend so much time moving from place to place, and some transitions take a few seconds longer, navigation can get a little tedious. My soul hungers for a map!... well, also for roast beef admittedly, but mostly a map, preferably like the one implemented in Hound of the Baskervilles. A wider range of objects to search for would have also been nice, since the same items crop up over and over in different scenes. But as it stands, Phantasmat delivers a very solid chunk of gameplay. Item uses are clear and logical, puzzles are varied and straightforward, and I never felt myself lost as to how to proceed.
 One of the most frustrating things about a game can be a tendency to do everything for you, especially if the difficulty just isn't much to speak of already. Thankfully, Phantasmat presents a nice, comfortable difficulty curve that, while never particularly brain-bending, still keeps you from feeling like you're coasting downhill towards the finish line in a shopping cart. (Everyone knows that feeling, right?) The inclusion of the match-3 game is a welcome little treat, even if it is fairly simple; using your own eyes will probably be quicker than tile-swapping in most cases, but if you're truly stymied playing a little minigame while you wait for the hint timer to refill is a lot more palatable than staring at the screen for minutes on end like a lump.
While I had figured out the big reveal long before it happened, and most players will probably do the same, Phantasmat still kept me engrossed to the very end with its otherworldly environments, smart storytelling, and clean gameplay. The latter half of the game feels like it moves a lot more quickly than the first, but the conclusion is very well executed, and the bonus epilogue in the Collector's Edition provides an interesting perspective on familiar territory as well as some more story. Altogether, I spent upwards of five-six hours playing in "challenge" mode, not counting the bonus content, and of course your mileage may vary. (Especially if you take the different difficulties into consideration.) Phantasmat is simply a stellar adventure. Of course I always recommend you try the demo before you buy anything, but Phantasmat comes out swinging to hook you until the very end. Highly recommended.
A Collector's Edition is also available. It contains a bonus epilogue chapter to play, wallpapers, an integrated strategy guide, and more. Remember that Big Fish Game Club Members pay only $13.99 for Collector's Editions (or 2 club credits), and collector's editions count 3 card punches of 6 total needed for a free game.
![]() Windows:
Windows:
Download the demo
Get the full version
Also available: Collector's Edition
![]() Mac OS X:
Mac OS X:
Download the demo
Get the full version
Also available: Collector's Edition


Walkthrough Guide
(Please allow page to fully load for spoiler tags to be functional.)
Phantasmat Collector's Edition Walkthrough
General Information
Basic Gameplay
The game is divided into two sections:
The main game and story.
The Epilogue, which can be accessed on completion of the main game.
Your cursor will change over various hotspots.
A question-mark indicates an area that can be looked at.
A magnifying glass indicates an area that will provide a close-up for further investigation.
Arrows signify directions to move in.
A hand cursor indicates when something can be interacted with, as an object to be picked-up, a puzzle to solve, or to click through dialogue.
The eye icon shows up in areas where a hidden object game is to be completed.
When finding objects, you can switch between Hidden-Object and Match-3 modes at any time. This can be helpful if an object is particularly difficult to locate.
Hidden-objects game vary each time you play, as do some of the mini-games.
In Match-3 games, the goal is to get the Golden Eyes to fall from the bottom of the gameboard by removing groups of 3 or more items from the board.
Each Golden Eye that falls will solve one hidden object, so if you only have one hidden object left to locate, only one eye will be needed.
Screenshot
In Extreme mode, the match-3 games are timed.
Using the Power button is really helpful and is available in all three difficulty levels.
Navigation
The cursor will change into an arrow indicating an area you can move to.
The game requires that you explore the hotel, the town and the cemetery.
The arrows are generally left, right, forwards and back.
Hints and Tips
There are 3 difficulty levels:
Casual
Clear hints throughout the game.
There are tool-tips, in the form of information that appears when the cursor changes.
Puzzles and mini-games can be skipped.
Task bar
There are no penalties.
The hint meter recharges faster as you find hidden objects.
Challenge
There are accessible hints, although they are slightly more vague.
There are tool-tips which can be disabled in the options menu.
There is some skipping available.
Task bar.
Mild penalties for clicking, such as slowing the hint recharge.
The hint meter recharges faster as you find objects.
Extreme
No hints.
The cursor changes, but without the accompanying information in the Casual and Challenge modes.
No skipping.
No task bar.
Hidden object games are timed.
Severe clicking penalty.
There's a Tasks menu in the bottom left of the screen to help guide you in what to do next.
In Casual and Challenge modes, the Hint meter is at the bottom right of the screen, which also serves as a Skip button.
Screenshot
Trophies
There are several trophies that can be achieved throughout the game. These will display on the main screen of each profile.
Screenshot
Walkthrough
Starting Out
The game starts in the car. Click the maps twice to get started and watch the cut scene of the car crashing over a cliff.
After the crash, pick up the TORCH.
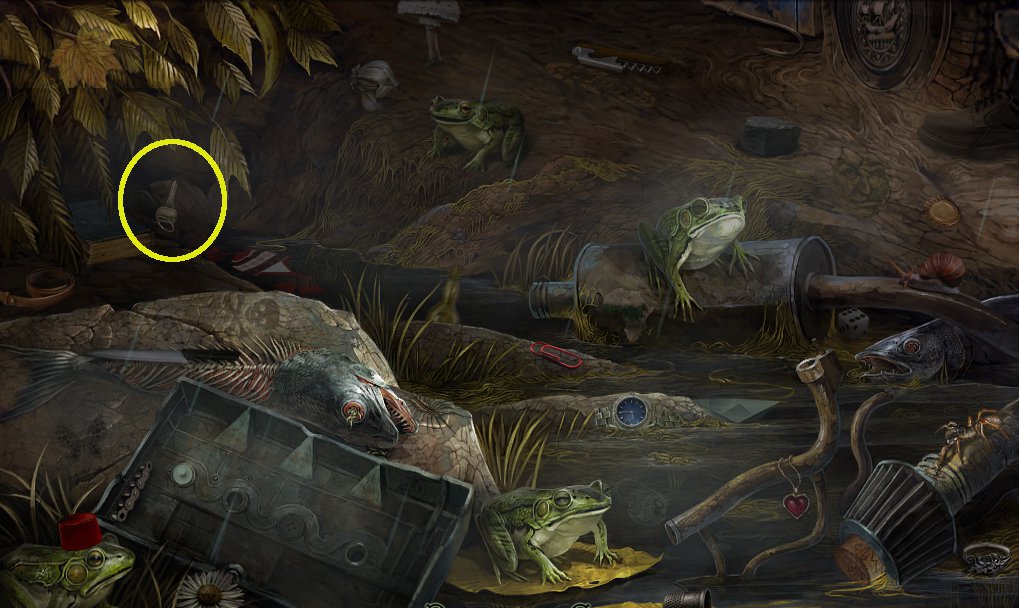
Click on the boot of the car. Sparkles will appear to indicate a hidden object game.
Complete the hidden object game to find the CAR KEY.
Screenshot
Use the car key on the boot of the car to get the WRENCH.
Click on the electrical box to the right of the screen and use the wrench on all four bolts.
Each circuit needs to be interrupted to stop the electrical currents.
Screenshot
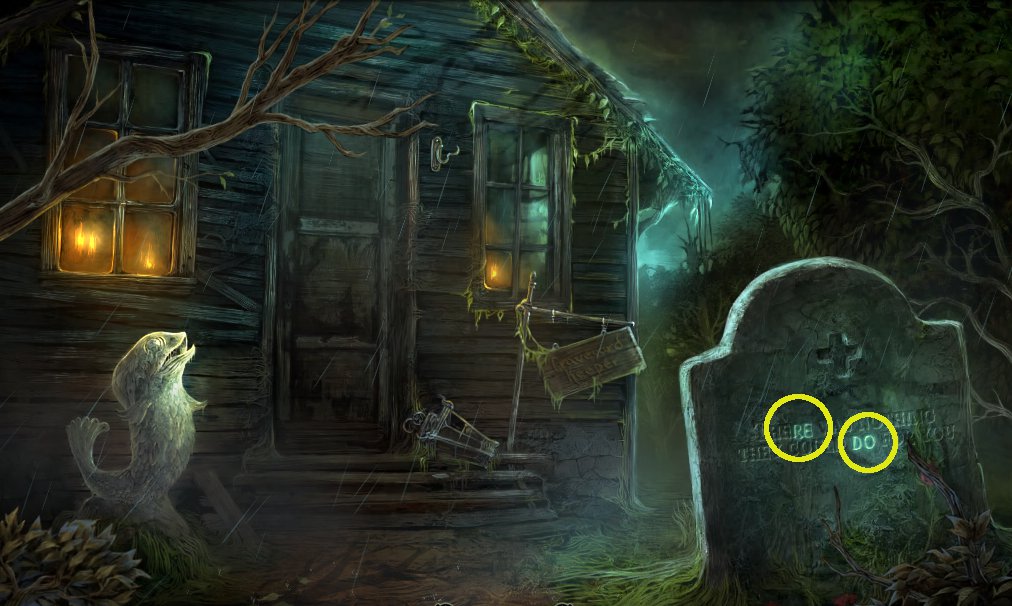
Move forward to the old shack.
The Old Shack
You'll meet the Young Woman who'll warn you not to stay, and give you directions through the forest to the Hotel.
Use the TORCH to go through the forest, according to the directions given.
Right, Right, Left, Right.
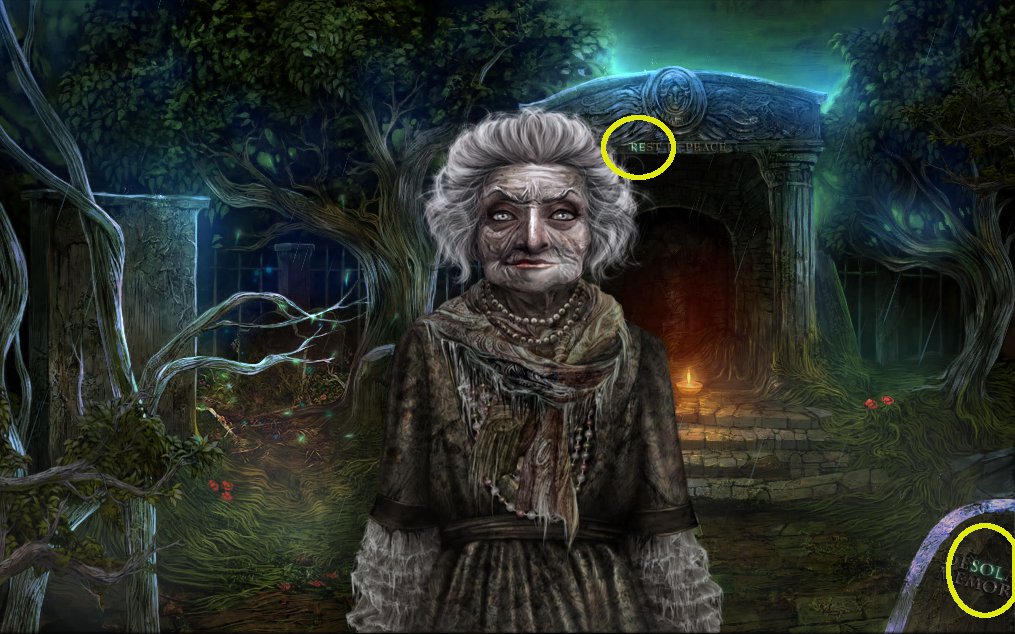
Hotel Panorama
Optional: You can click on the bird and reveal the name of the Hotel.
Optional: You can look at the submerged church tower.
Move forward to the Hotel Gate.
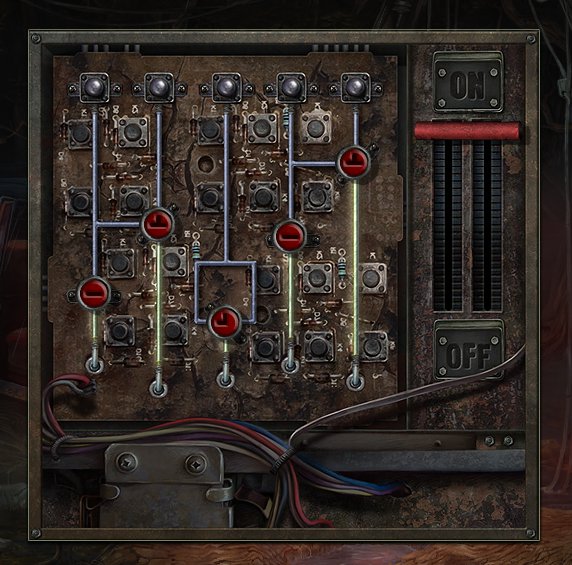
Hotel Gate
Search the poster on the gate to get the NOTEBOOK.
Screenshot
Note that there is an area to the right, the Cliff Viewpoint, which you can investigate.
Looking through the binoculars will give you a view of the Town Cemetery. Note the monument in the centre.
From the Hotel Gate, move forward to the Hotel Entrance.
Hotel Entrance
Inspect the front door to find the doorbell is broken and no-one answers knocking.
Note the broken chain above the door.
Back out and search the front porch for a BOAT HOOK.
Screenshot
Use the boat hook on the broken chain above the door, and then enter once the door has been answered.
The Hotel
The Hotel Owner tells you that the electricity is out, and to use the phone the generator needs to be fixed.
Optional: click on the phone to find out there's no dial tone.
Head to the basement.
In the corridor, note the door with seven locks and the newspaper clippings.
Go through the door with the eerie light behind it.
The Basement
In the basement, you'll encounter the Young Woman who will accept that the generator needs to be fixed.
Search the hidden-object game to get the FUSE.
Screenshot
Go to the generator room and flip the switch to blow the fuse.
Replace it with the new fuse.
Click around the screen to find out you need duct-tape, which can be found back at the car, and some items to balance the scales.
Head to the Cliff Viewpoint.
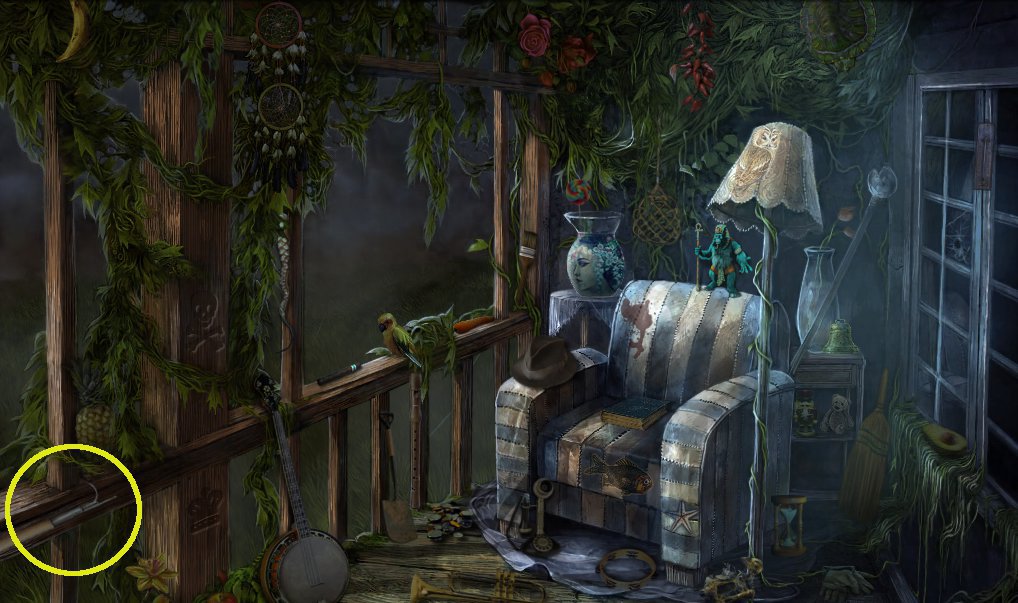
The Cliff Viewpoint
Access the viewpoint from the Hotel Gate scene.
Search the hidden objects to take the WATER CONTAINER.
Screenshot
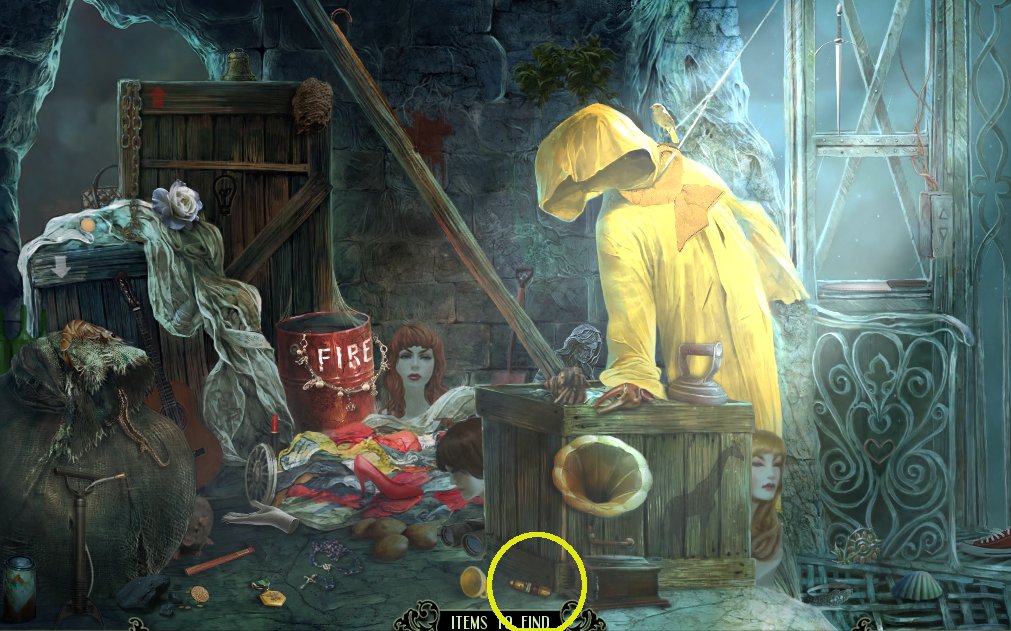
Head back to the Old Shack.
The Old Shack
Search inside the old shack to find the TWIN BOTTLES.
Screenshot
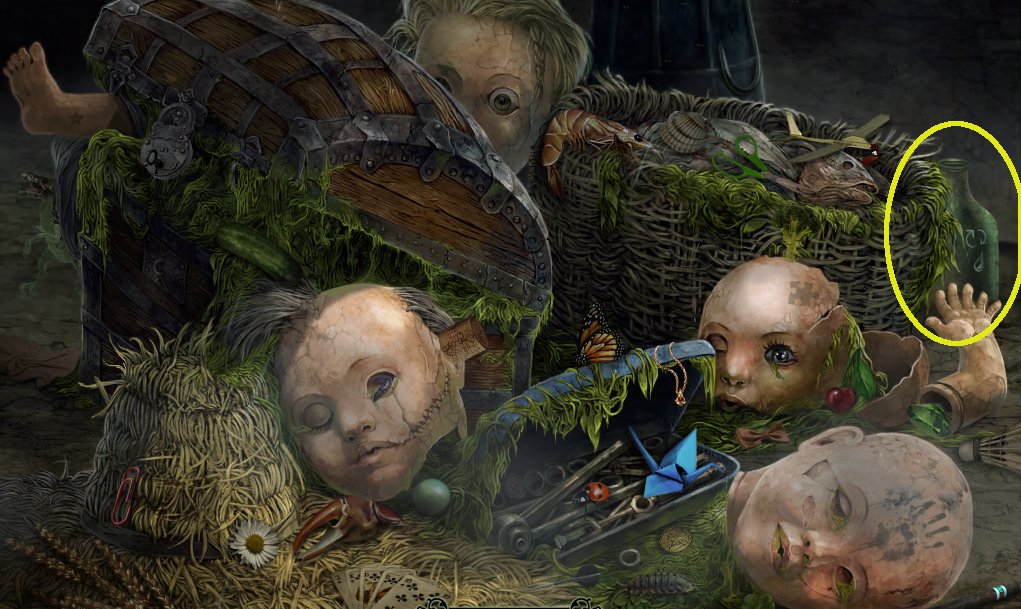
Head back to the Car.
The Car
Search the hidden objects to get the DUCT-TAPE.
Screenshot
Head back to the generator room in the Hotel Basement.
Generator Room
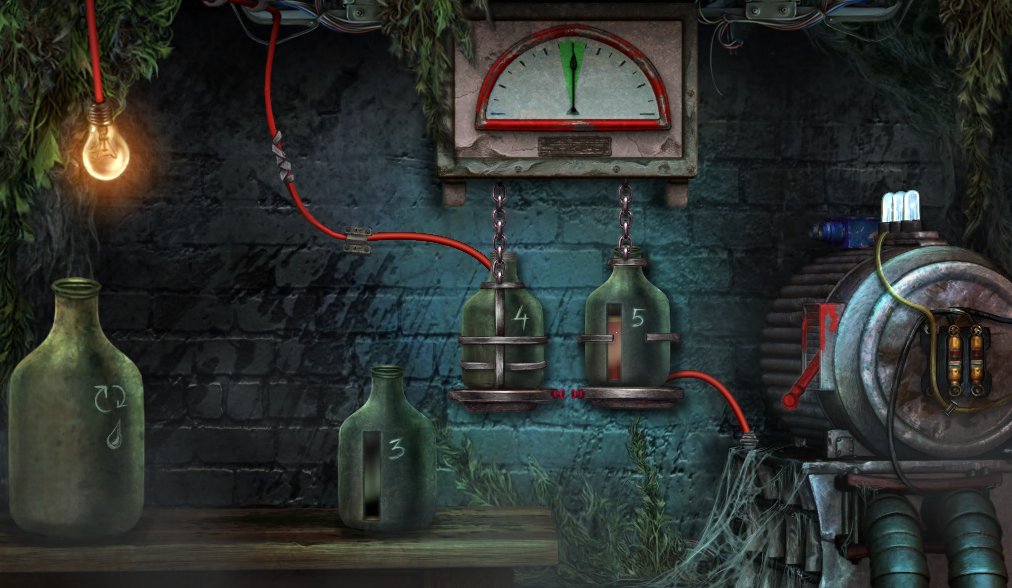
Repairing the generator
The goal is to find a balance for the 4 bottle.
Repair the broken wires with the duct-tape.
Place the bottles and water container on the benchtop.
From the water container, fill the 3 bottle.
Pour the contents of the 3 bottle into the 5 bottle.
Fill the 3 bottle from the water container again.
Pour the contents of the 3 bottle into the 5 bottle.
Pour the contents of the 5 bottle into the water container.
You should now have 1 measurement of water in the 3 bottle. Pour it into the 5 bottle.
Now fill the 3 bottle from the water container, then pour the contents of the 3 bottle into the 5 bottle.
Place the 5 bottle on the scales. They should now balance and a spark of electricity will show underneath them.
Flip the switch.
Screenshot
Head back into the main basement area, listen to the Young Woman's dialogue, then head back to the Hotel Lobby.
The Lobby
The Hotel Manager will speak to you again, basically saying Thank you, you can use the phone now.
Click on the phone and watch the cut scene for a spooky message.
The Hotel Manager will offer some symapthy and give you a key to Room 106.
Head upstairs.
Room 106
Use the key to enter Room 106.
Click on some of the items around the room, and there will be a knock on the door.
The Old Lady will enter and suggest you drop by her room for a cup of tea.
After she leaves there will be a cut scene, followed by the room changing from cosy to decayed.
A note will appear on your bed, asking you to meet someone at the Cliff Viewpoint.
Try to leave the room and find that you've been locked in.
Search the bathroom for the SCREWDRIVER.
Screenshot
Back in the room, check the bedside drawers for a HAIRPIN.
Use the screwdriver and hairpin on the doorhandle, then leave the room and go out of the Hotel.
Hotel Entrance
A hidden object game will appear at the entrance.
Complete it to obtain PIANO KEY #1
Screenshot
Head to the Cliff Veiwpoint.
Cliff Viewpoint
The Young Woman will appear and tell you she needs to show you something on the way to the Town Ruins, and that the Old Lady knows the way.
She will leave and the Hotel Manager will appear to tell you to disregard anything the Young Woman says as she has not been herself since the tragedy.
Head back to the Old Lady's Room.
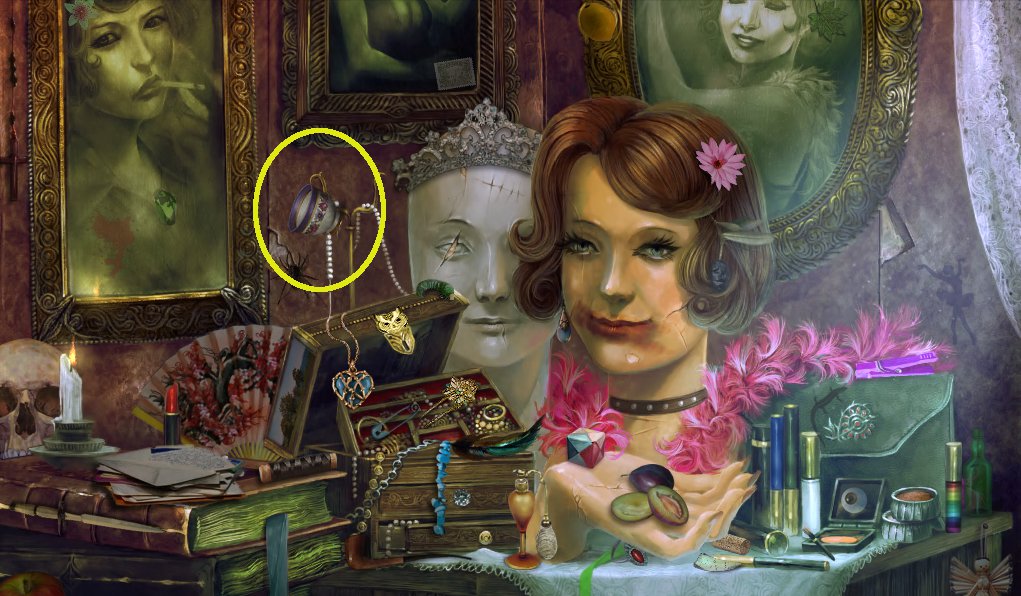
The Old Lady's Room
Enter the Old Lady's room and she will appear and ask you to bring a teacup and teapot.
A hidden object game will start in her room. Search it for the TEACUP.
Screenshot
Place the teacup on the table and the Old Lady will ask you to fetch the teapot from the Kitchen.
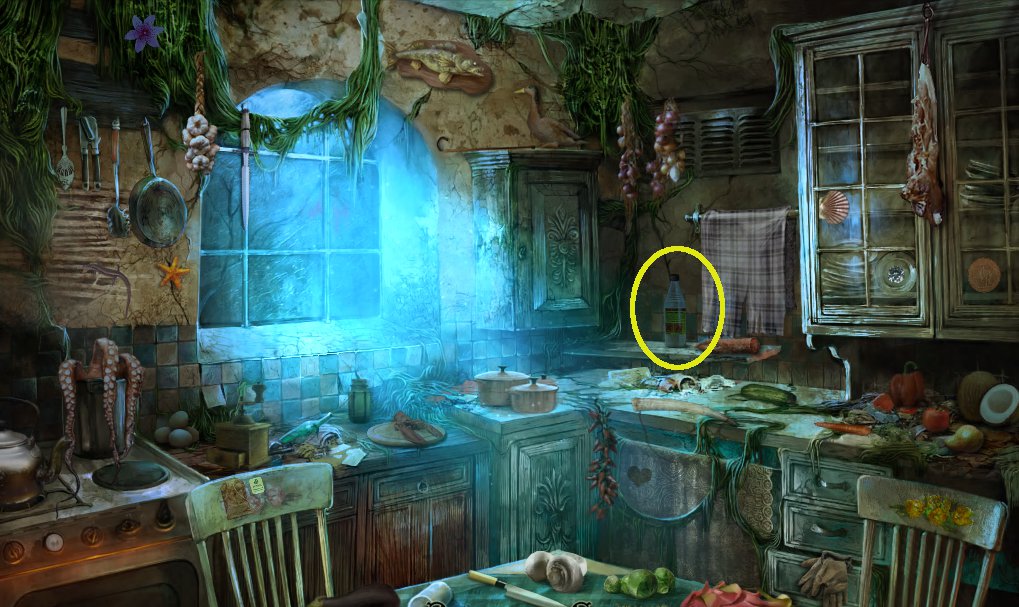
The Kitchen
Search the hidden object game to retrieve the TEAPOT.
Screenshot
Head back to the Old Lady's room.
The Old Lady's Room
Place the teapot on the table and the Old Lady will ask to tell your fortune.
The scene will change to the teacup and some cards with symbols.
When a symbol appears in the teacup, pick the card that matches.
The order of symbols changes each time you play.
The Old Lady will then tell you that you are trapped in the past and you no longer have a future.
Once you click again, she will give you directions through the forest to the Town Ruins.
Left, Right, Left, Left, Right.
Head out of her room and watch a cut-scene, showing some clues to her story.
Before you leave the Hotel, head to the Kitchen for a hidden object game.
Find the RUST REMOVER.
Screenshot
Head back to Room 106 and complete the hidden object game to obtain the MATCHES.
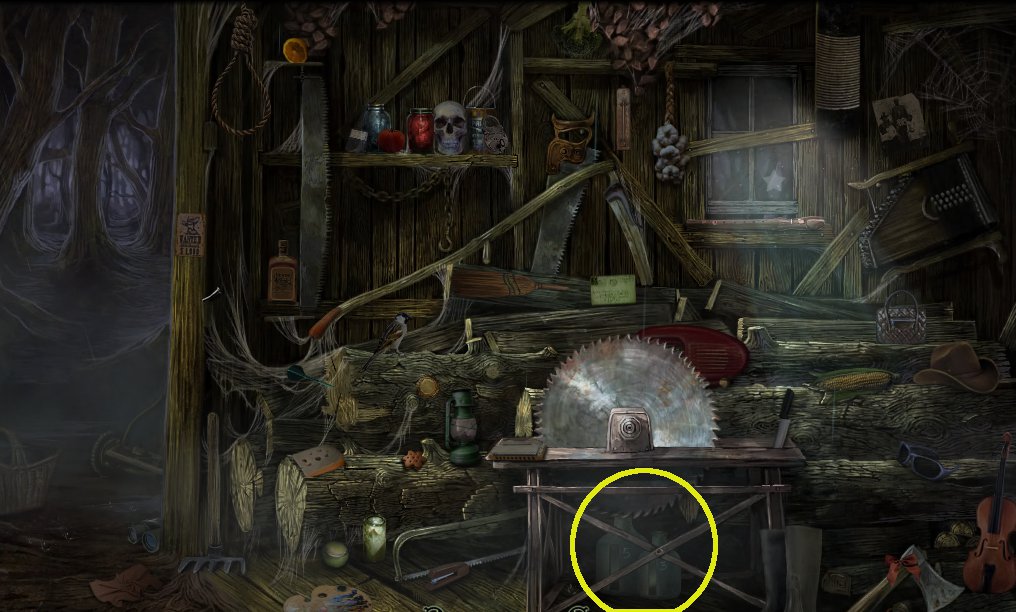
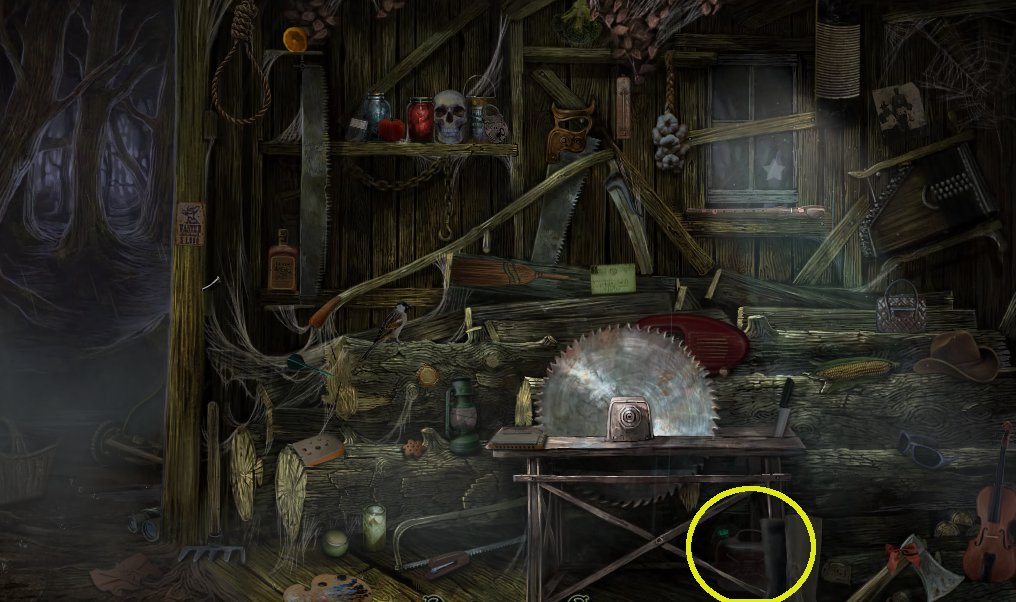
Head back to the Old Shack.
Old Shack
A hidden object game can be completed here to obtain the FUEL CANISTER.
Screenshot
Outside of the Old Shack go to the left, to the road to the Town Ruins.
Road to the Town Ruins
The Young Woman will appear and tell you that you're trapped, then urge you to take the road to the left.
Go to the left, click anywhere and watch the cut-scene.
Find yourself back in Room 106 at the Hotel.
Back at the Hotel
Leave Room 106 and find the corridor changes to a state of decay.
Head forward to the Kitchen.
The framed picture on the wall will display a brightly lit line down the center of it. Click on it for a close-up.
A spot-the-difference game will start.
Screenshot
Once completed, the picture will burn away and reveal MYSTERIOUS KEY #1.
Go back to the Old Lady's room.
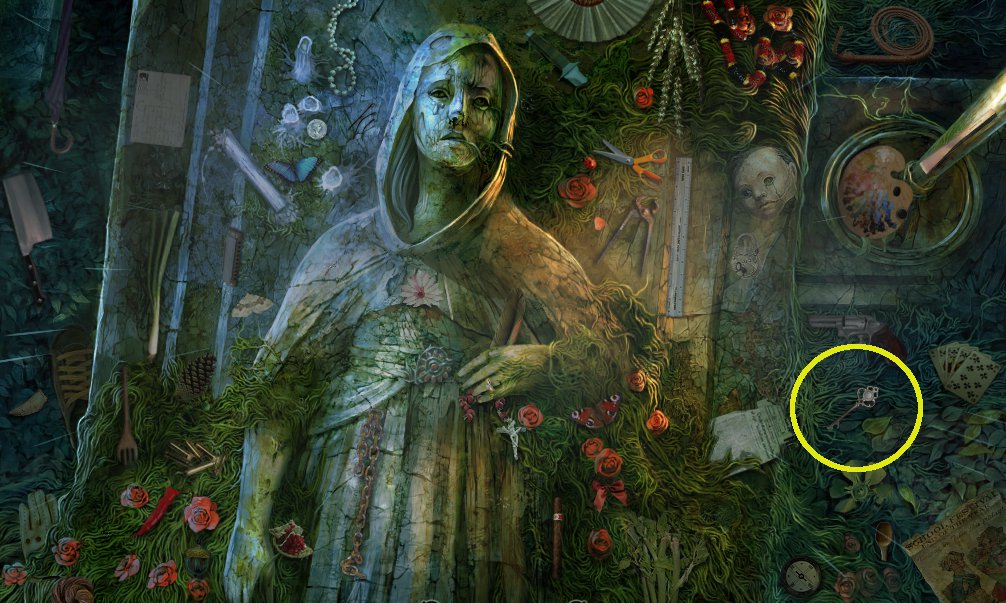
Old Lady's Room
Back in the Old Lady's room, the scene will change to show the room in a state of decay.
A hidden object game will start. Click and search to locate PIANO KEY #2.
Screenshot
Head back to the Hotel Lobby and meet the Young Woman who will tell you to meet her on the road to the Town Ruins.
Head out of the Hotel.
Hotel Gate
A hidden object game will appear as you leave the Hotel grounds.
Search for PIANO KEY #3.
Screenshot
Head back to the Old Shack and go left from there.
The Town Ruins
On the road to the Town Ruins, the Young Woman will appear and tell you that a stranger is wandering around and that you should find him.
Head right and go into the town.
Click on the phonebox for a close up of the telephone.
Note the picture of the fortune teller and the rust concealing some information.
Use the rust remover on the rust to reveal a clue.
If you want to learn a SECRET the answer is hidden in numbers.
Click back out of the phone box, and go left to the Pet Shop.
Click for a close-up and note the combination lock, and the fortune teller's image. Click back out and go to Sally's Bar.
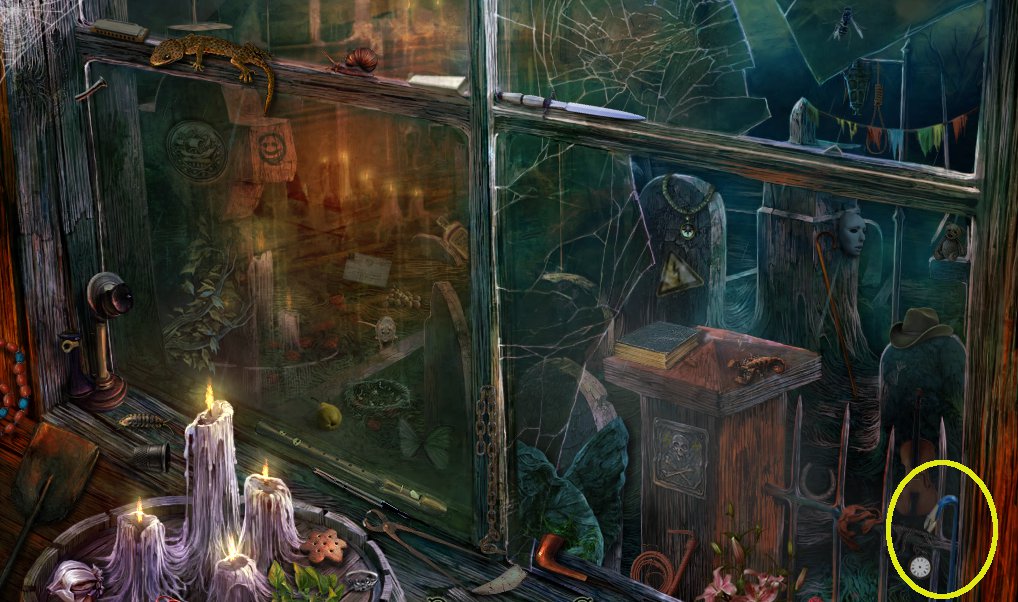
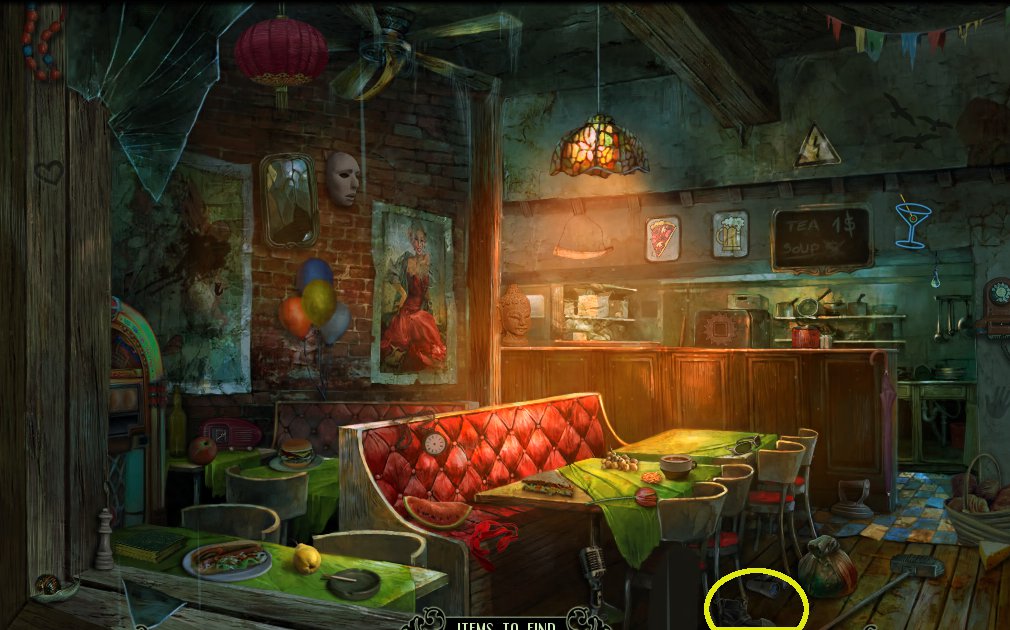
Sally's Bar
Click on the window to start a hidden object game.
Find GEAR #1.
Screenshot
Click the door to the right of Sally's Bar to enter the Ruined House.
The Ruined House
The Young Woman will call out from the basement. Click to enter.
She will be there to tell you about the diving suit and wonder if you can get it to work.
Note the red levers on the left. The goal is to remember the order that the levers are to be pulled to get the diving suit to the platform. This varies each time you play.
When the diving suit is on the platform, click on it to find out that there are several parts missing - gauntlet, faceplate, searchlight and boot.
Nothing more to do here for now, so click back out of the basement and head upstairs to the ruined room.
There are a few things to look at in this room. On the mattress to the left is a tape recorder. Click to listen to the ramblings of a madman.
Next to the mattress is box puzzle, requiring some sort of code. We'll come back to this later.
Click on the body at the desk to start a hidden object game, and locate GEAR #2.
Screenshot
You can also look at the noticeboard and note the stranger's research methods.
Leave the ruined house and encounter the Hotel Owner who'll warn you to watch your step, and that some things are better left alone.
Click again to watch the cutscene, then click back to the phone booth, and then right to go to the school.
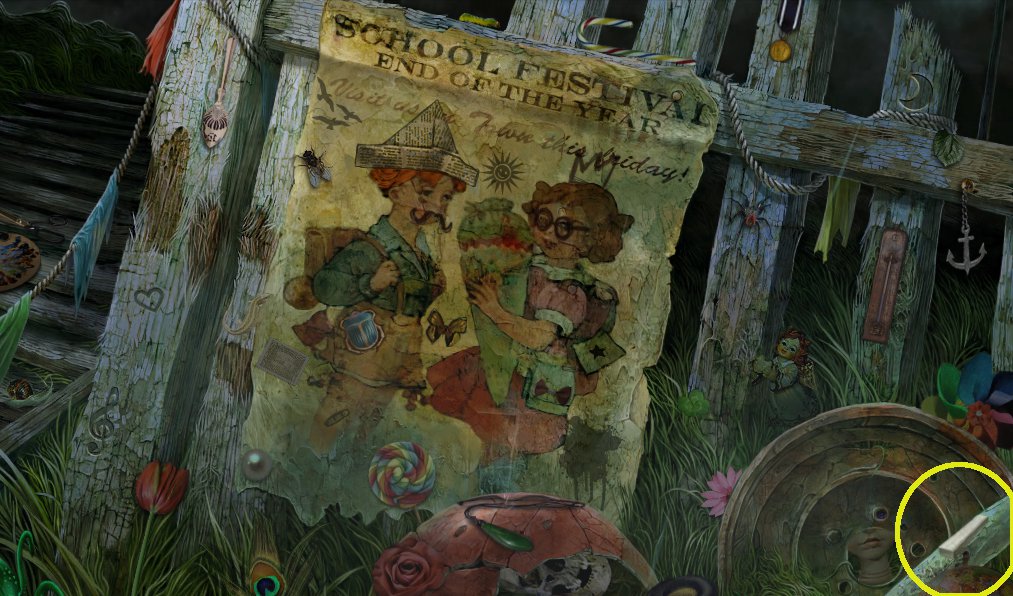
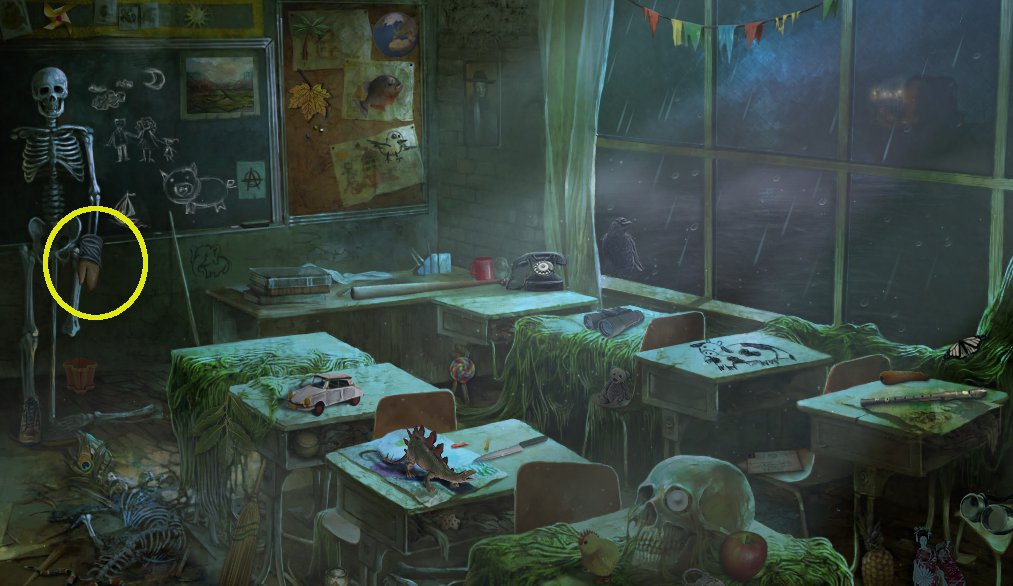
The School
Click to the right where the sparkles indicate a hidden object game, and find the OLD COIN.
Screenshot
After finding the coin, click to go into the School Corridor. Note the vines blocking the way.
Click to go back to the phone booth.
The Phone Booth
Click on the phone booth for a close-up and use the coin.
Note the numbers on the dial also have letters.
Take note of the fortune teller clue and dial the numbers that spell out the word SECRET.
732738
You will be given a 5 digit number. This varies each time you play. The number will be listed in the Tasks section, so click there if you need a reminder.
Click back out and go to the Pet Shop.
The Pet Shop
Firstly, note the locked sliding door at the back of the shop.
Complete the hidden object game to retrieve a set of SHEARS.
Screenshot
Click back out and go back to the school corridor.
The School
Use the shears on the vines and play the hidden object game.
Find GEAR #3.
Screenshot
Click back out and head back to the Hotel
The Hotel
Hotel Basement
On the way, the Young Woman will meet you and ask about the stranger. She will then tell you to meet her in the Hotel Basement.
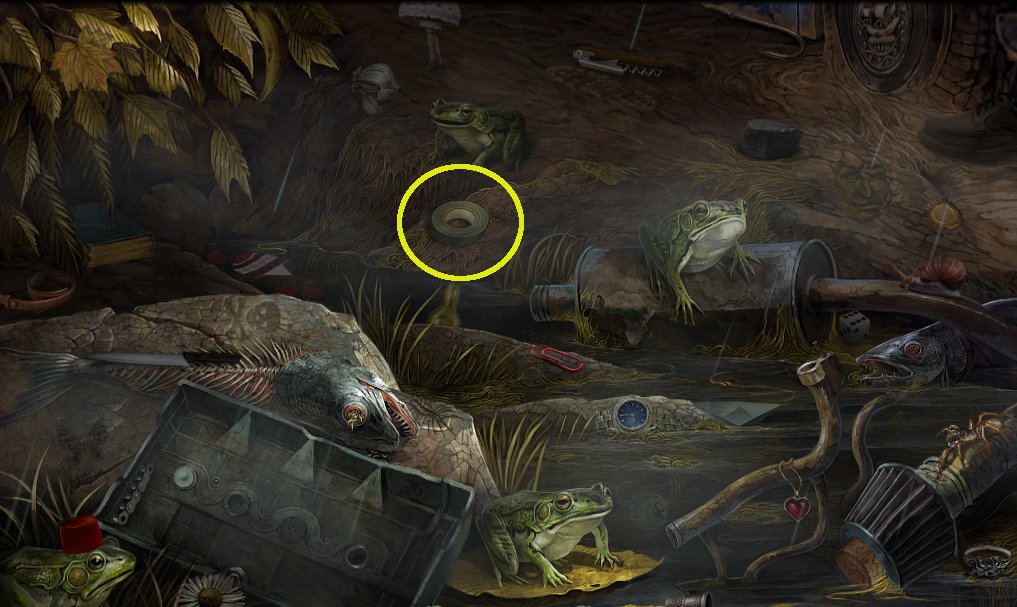
Stop by the Cliff Viewpoint for a hidden-object search, and find the HATCHET.
Screenshot
Head to the Basement where the Young Woman will give you some inside information on the Hotel Owner and the Old Lady.
Search the hidden objects to find a HOOK NECKLACE.
Screenshot
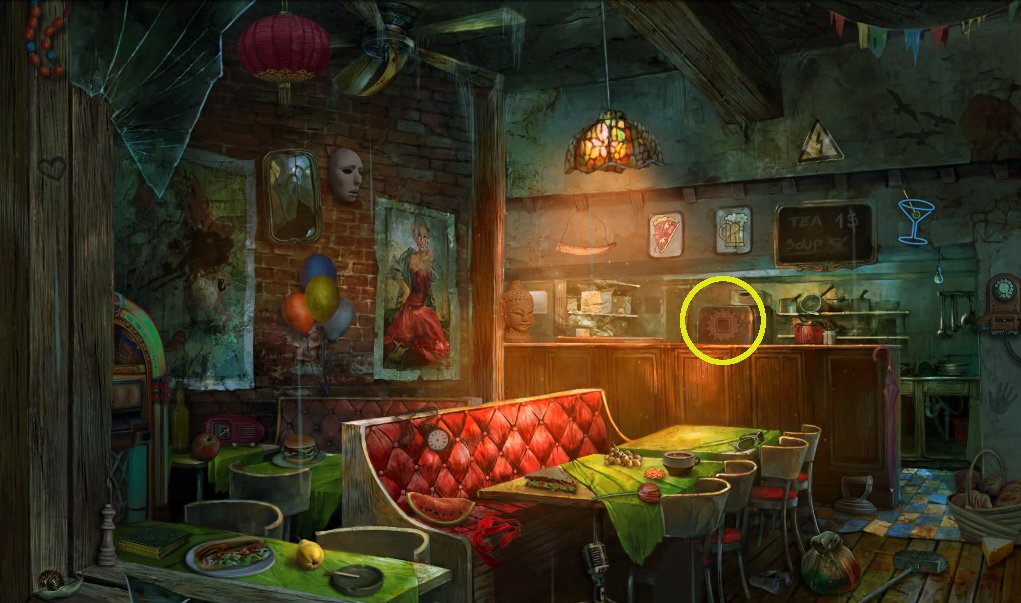
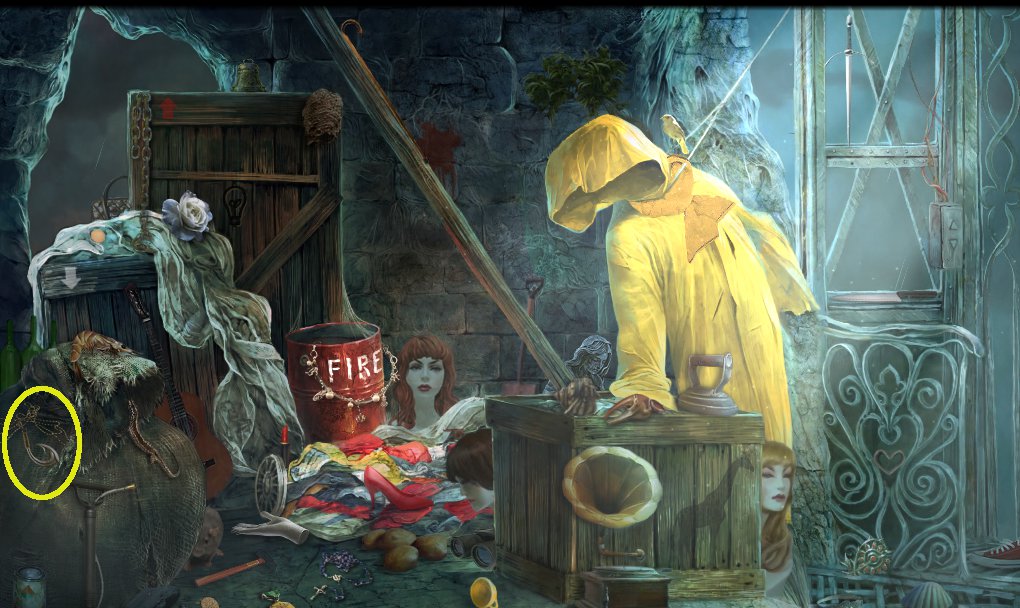
Click to go to the Elevator.
Before you can use the Elevator it needs repairs. Click on the metal box with the gear on it, to the right of the screen.
Use the 3 gears in the inventory to get all the cogs turning.
Screenshot
Hit the Down arrow on the elevator controls to get to the Pier.
The Pier
The boat is tied to a stump, and you can't simply untie it.
Use the hatchet on the rope to untie the boat.
Once in the boat, click on the white cloth to reveal some numbers that look suspiciously like times scratched into the side of the boat.
12:00, 4:00, 10:00, 5:00
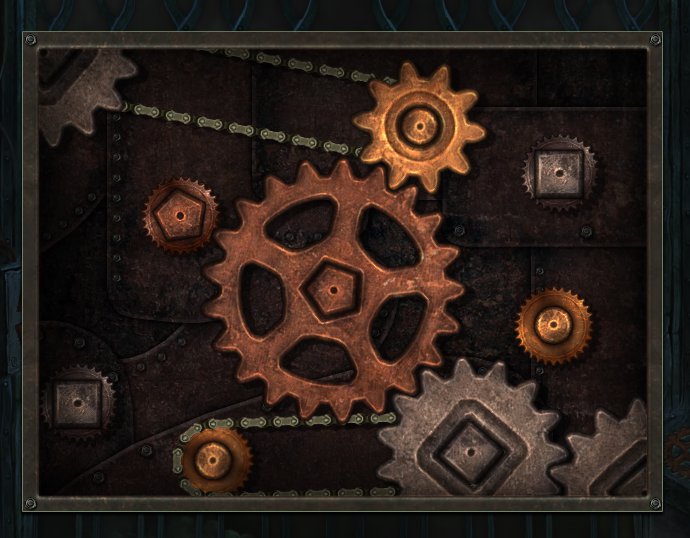
Click to the left of the boat for a close-up of the fuel tank.
Open the fuel tank and use the fuel canister on it.
Click the area where the white arrow is drawn to reveal a set of dials.
Turn the dials to match the numbers you found under the cloth.
Screenshot
Click to go right towards the Church Tower.
Each time you pass the Church Tower in the boat, it will stop. For now there is nothing to see or do, so click to go right again to the Cemetery.
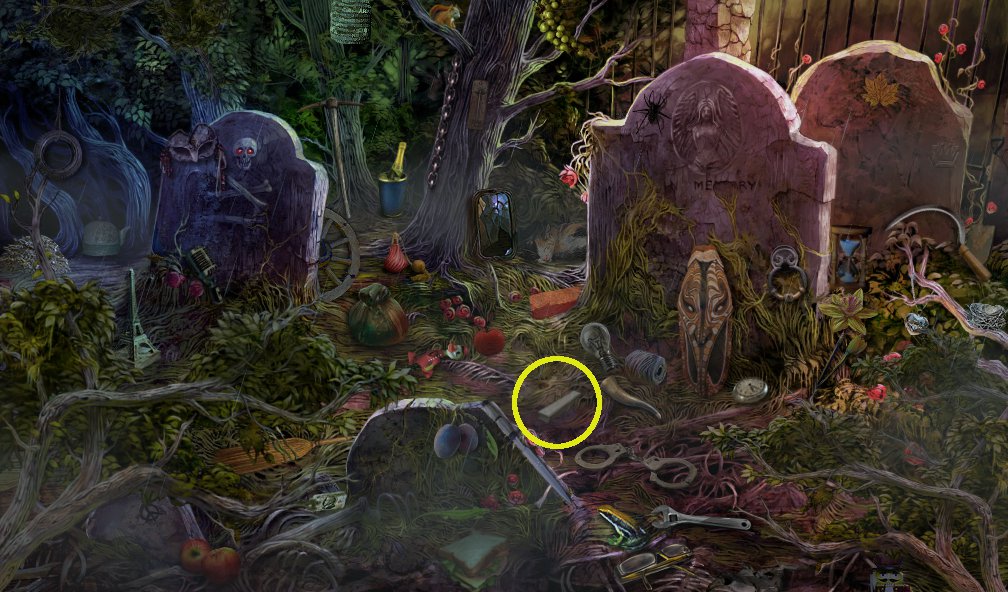
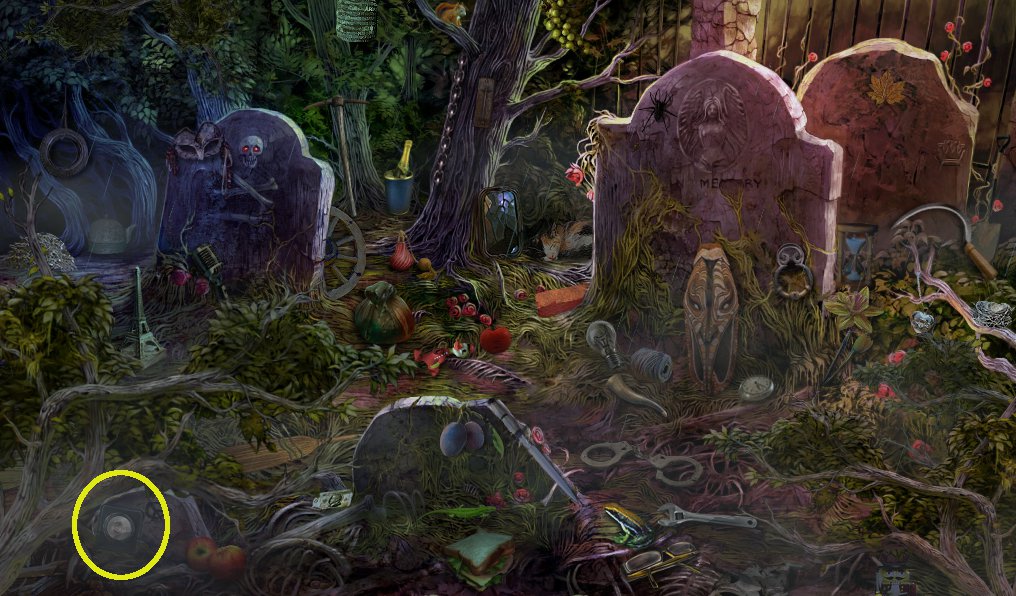
The Cemetery
The Graves
Move forward into the Cemetery, and click on the sparkles that appear on the grave for a hidden object game.
Find the CHISEL.
Screenshot
Move right to the Mayor's Grave and meet the Old Lady.
Complete the hidden object game to the left, to get PIANO KEY #4.
Screenshot
The Old Lady will tell you something about a stranger.
Click back out and watch the cutscene.
Click left to go to the Monument.
Click on the cross to find that there's a golden ball missing.
Click on the monument, to the right, for a closer look.
Use the matches to light the candle.
Click back out and head left towards the Lodge.
Inspect the fish statue, and use the chisel to get the GOLDEN BALL.
Take the ball back to the cross and place it. The skull will fall away revealing a small STONE CROSS.
Take the stone cross back to the Lodge entrance and use it on the gravestone on the right.
The Lodge door will open.
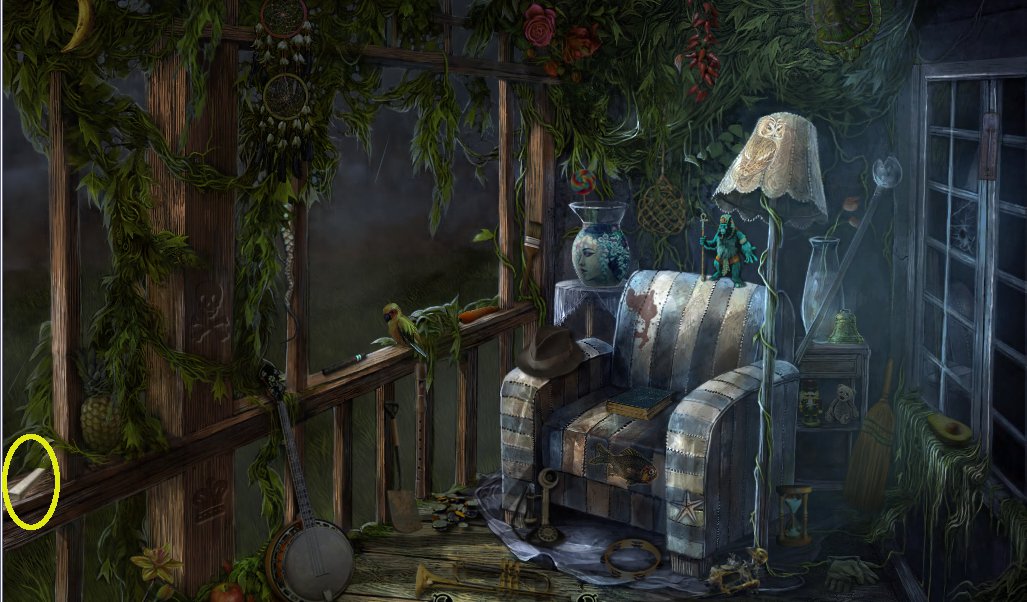
The Lodge
A hidden object game will appear on the left. Complete it to find PIANO KEY #5.
Screenshot
Click back out and click on the Piano for a close-up.
Place the piano keys from the inventory.
The metal plate above the keys shows some music without the notes. Two letters are lit-up, and when you click on them they form a musical note.
Where else have you seen similarly glowing letters?
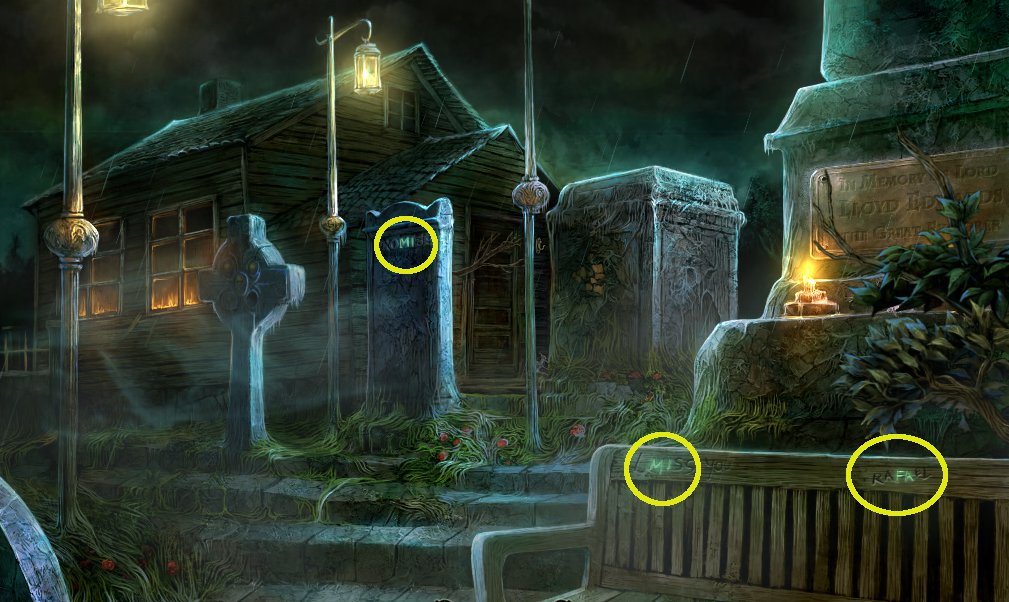
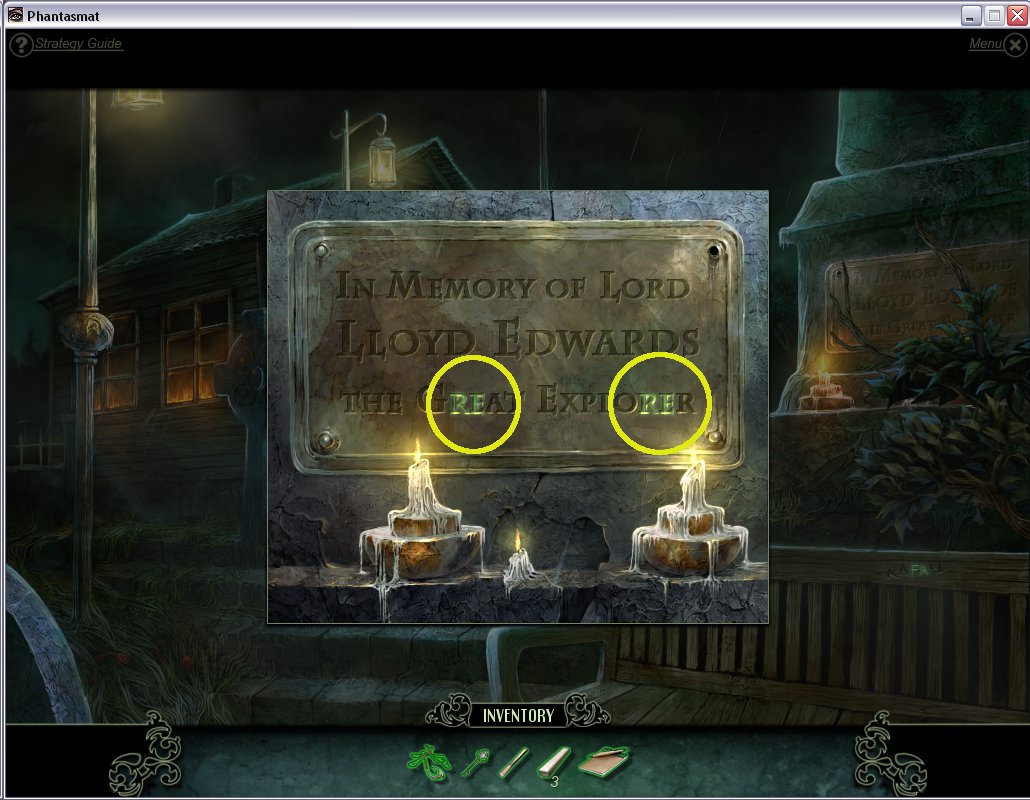
The musical notes are hidden around the cemetery.
Some of the headstones and tombs that have inscriptions show some letters glowing an eerie green.
These need to be clicked on, and they will become musical notes for the piano.
They are located in every screen of the cemetery.
Screenshot 1
Screenshot 2
Screenshot 3
Screenshot 4
Screenshot 5
Play the music according to the notes, and a crypt entrance will appear to the right.
Enter the crypt. You can listen to another of the stranger's tape-recorded messages, indicating his increasing madness.
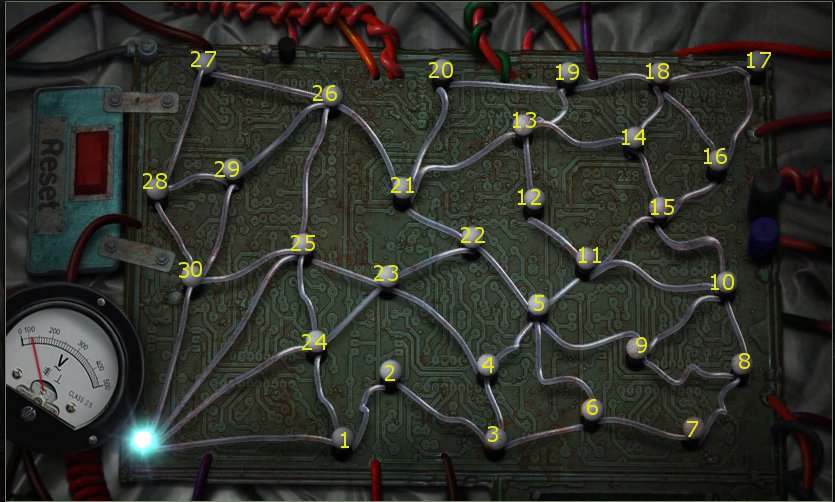
Click on the coffin and click again to open it, to reveal a mini-game.
The goal is to connect all the lights in one line, like finding your way through a maze. There's no doubling back.
Screenshot
The lights will change to coloured lights.
Click back out, and go back to the Piano room.
Another hidden object game will start. Complete it to find the CROWBAR.
Screenshot
Head back to the cemetery.
The Graves
The lights will switch off, and then re-light as coloured lights.
Head back to the Mayor's Grave for a hidden object game where you can find the SEARCHLIGHT.
Screenshot
Back at the entrance to the cemetery, another hidden object game will sparkle, hiding MYSTERIOUS KEY #2.
Screenshot
Time to go back to the Hotel.
The Hotel
On the way back to the Hotel, the boat will stop at the Church Tower for a cutscene.
At the pier, the Young Woman will appear and suggest using the Diving Suit.
In the Hotel Lobby, the Hotel Owner will stop you and talk some more about bitter secrets, followed by a cutscene.
While in the Lobby, click on the fishtank and use the Hook Necklace to retrieve MYSTERIOUS KEY #3.
Screenshot
Optional: You can stop by the Old Lady's room to find out she can't remember when the flood was.
Before heading back to the Town Ruins, stop at the Cliff Viewpoint.
Look through the telescope for a clue to the box puzzle in the Ruined House. The solution, which varies each time you play, will be recorded in the notebook.
Head back to the Town Ruins.
The Town Ruins.
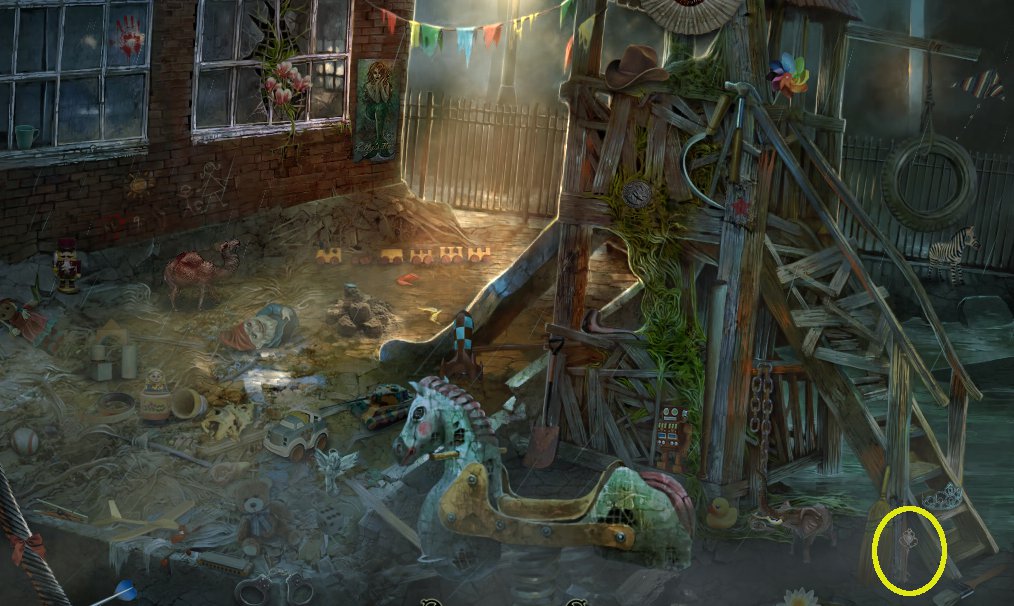
The School
Complete the hidden object game at the school gate to get MYSTERIOUS KEY #4.
Screenshot
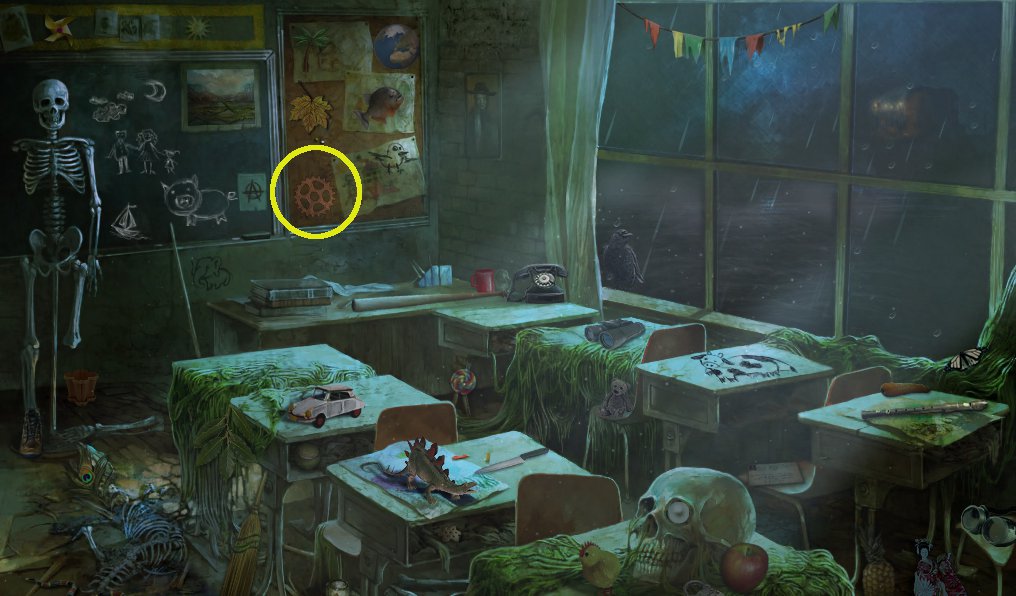
Inside the school, complete the hidden object game to retrieve the GAUNTLET.
Screenshot
Go to the Pet Shop.
The Pet Shop
Complete the hidden object game to get the diving FACEPLATE.
Screenshot
Use the crowbar on the sliding cupboard door at the back of the shop to get MYSTERIOUS KEY #5.
Screenshot
Head to Sally's Bar.
Sally's Bar
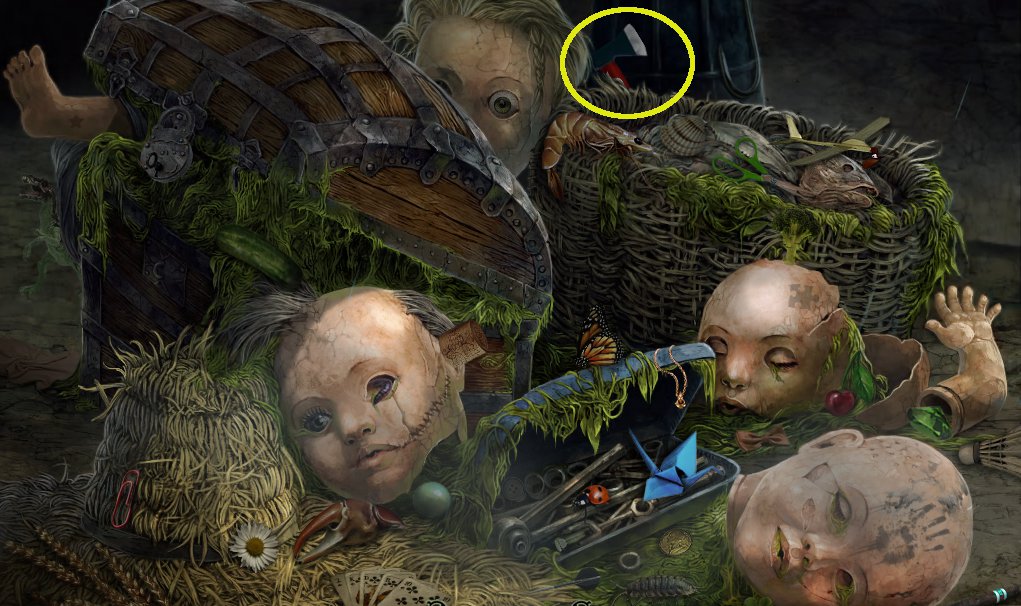
Complete the hidden object game to get the diving BOOT.
Screenshot
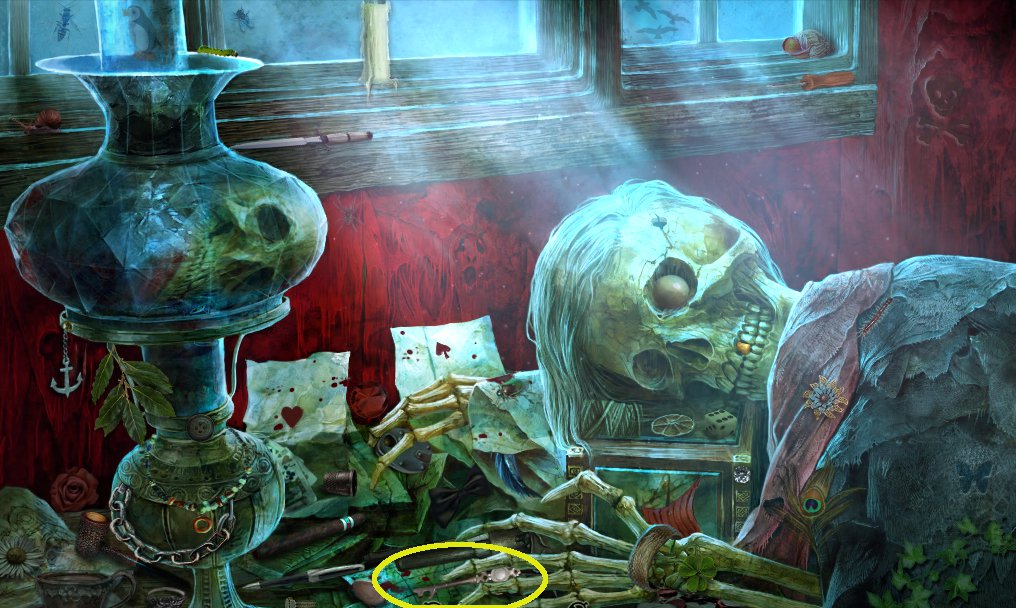
Head to the Ruined House, and to the Stranger's Room.
The Ruined House
Go first to the Stranger's Room and complete the hidden object game to get MYSTERIOUS KEY #6.
Screenshot
Click on the box puzzle, and use the code in the notebook. The solution varies each time you play.
Click once for yellow, twice for red, and three times for blue.
Screenshot
Take the VALVE, and go down to the basement area where the diving suit is.
Place all the diving items on the suit, then use the valve on the equipment that appears to the right.
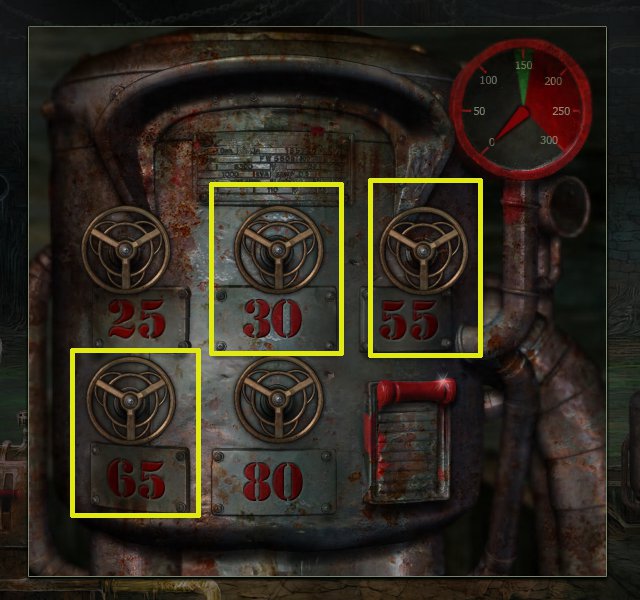
The goal is to get the air pressure to 150 by clicking on the valves.
Click on the valves marked with 65, 55 and 30. Screenshot. Then click on the red lever.
Time to move into the Submerged Town, so click forward to go into the sewers.
The Submerged Town
There are three number pads to find clues for, in mini-games that are similar to Mastermind.
Enter any numbers into the numberpads, and lights will shine beneath each number.
A green light means you've found the correct number and it's in the correct position.
A yellow light indicates that you've found the correct number but an incorrect position.
A red light signifies that the number is not present in the code at all.
The solutions vary each time you play.
Find the code for each number pad and make your way to the ladder, and up into the submerged town.
On the first underwater screen, locate 4 photo pieces.
Screenshot
Click on the bridal car to the right for a hidden object game and get the WHITE QUEEN chess piece.
Screenshot
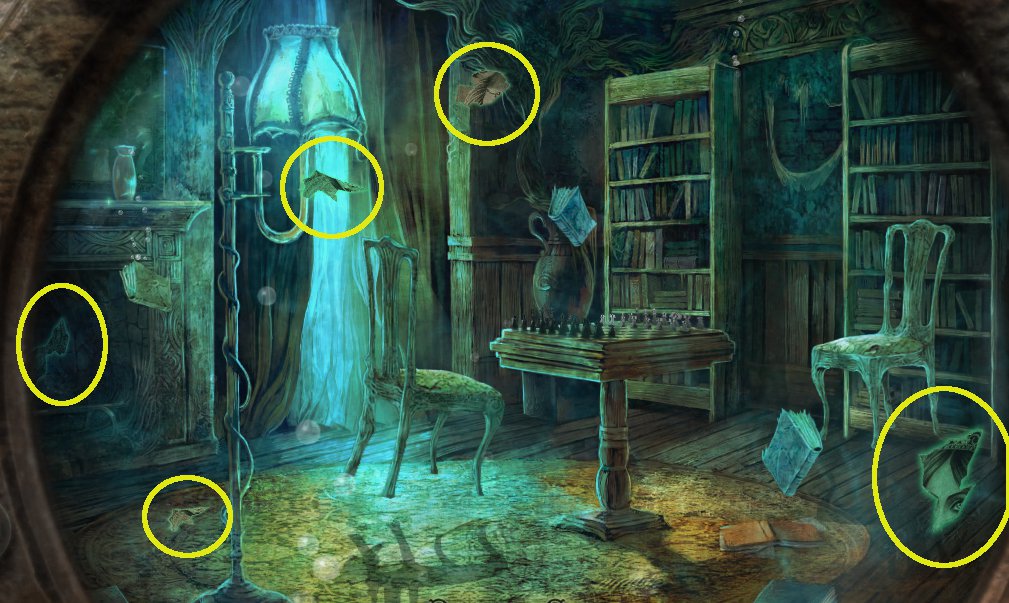
Enter the sunken residence and locate 5 photo pieces floating around.
Screenshot
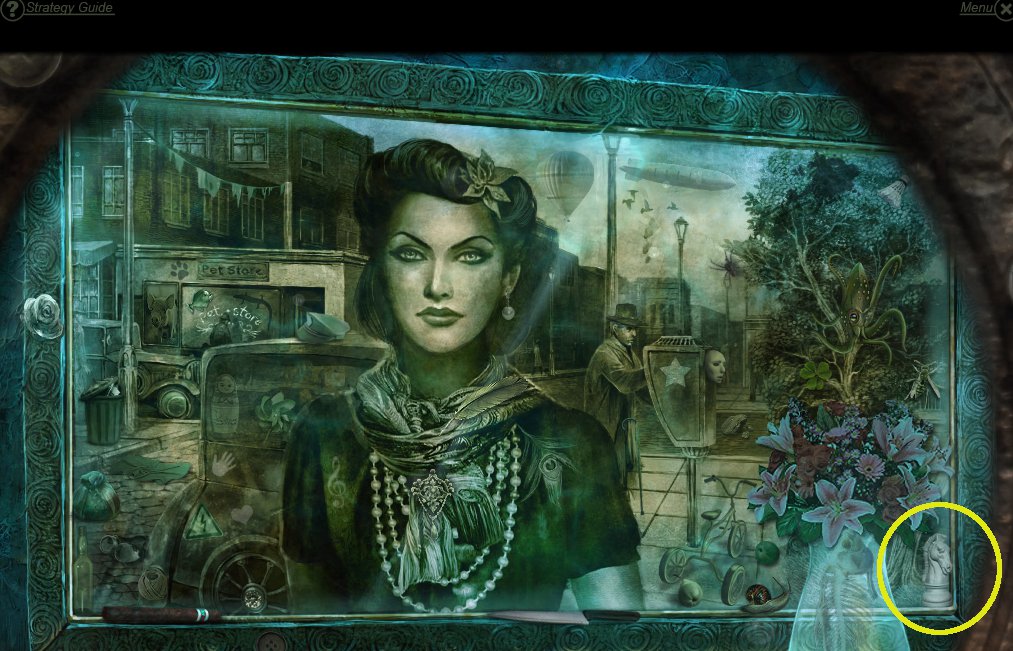
Click on the framed picture above the mantlepiece to locate the WHITE KNIGHT chess piece.
Screenshot
Click on the chess board, take the BLACK TOWER and then place all three chess pieces in their respective positions.
A memory game will follow. Locate and match up the paired symbols.
The chess board will open revealing a red button. Press it to access a secret room.
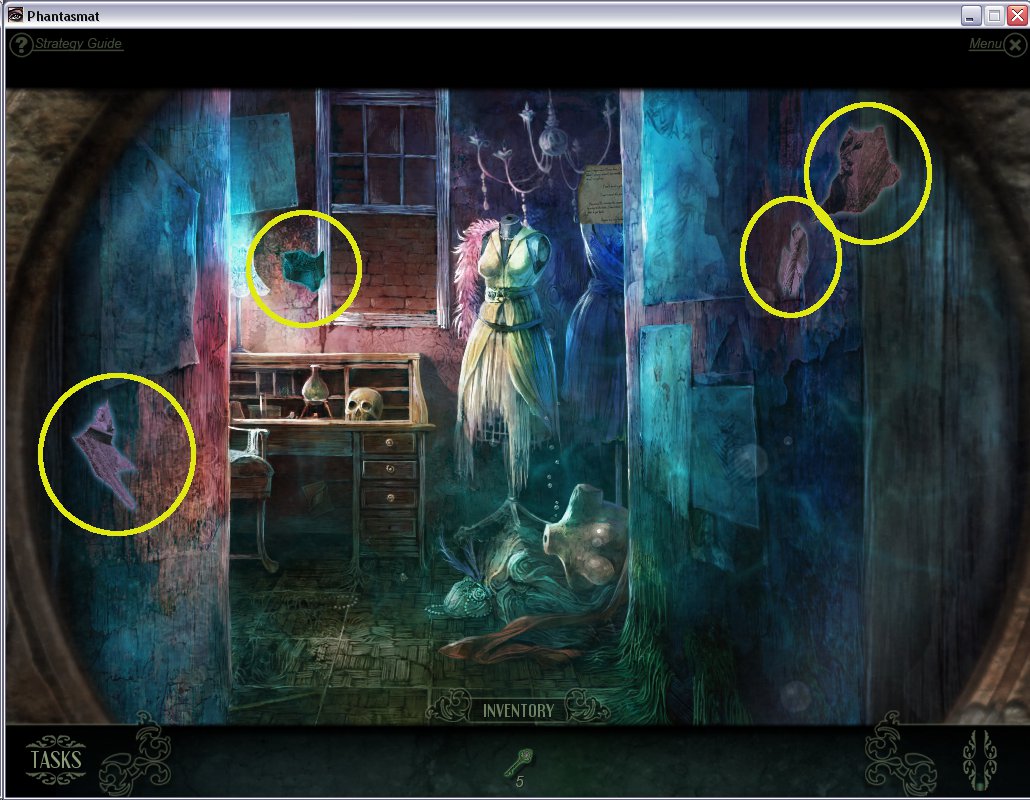
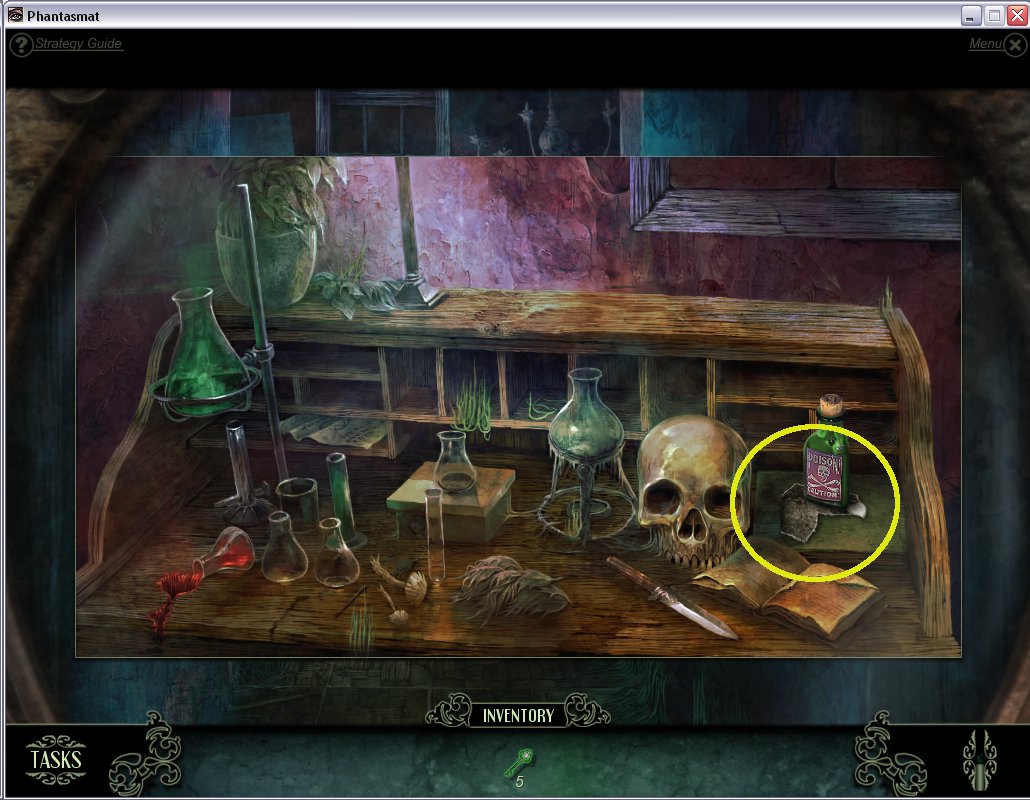
Locate 4 more floating photo pieces, then click on the desk.
Screenshot
Take the POISON on the desk, and one more photo piece will float up, so take that too.
Screenshot
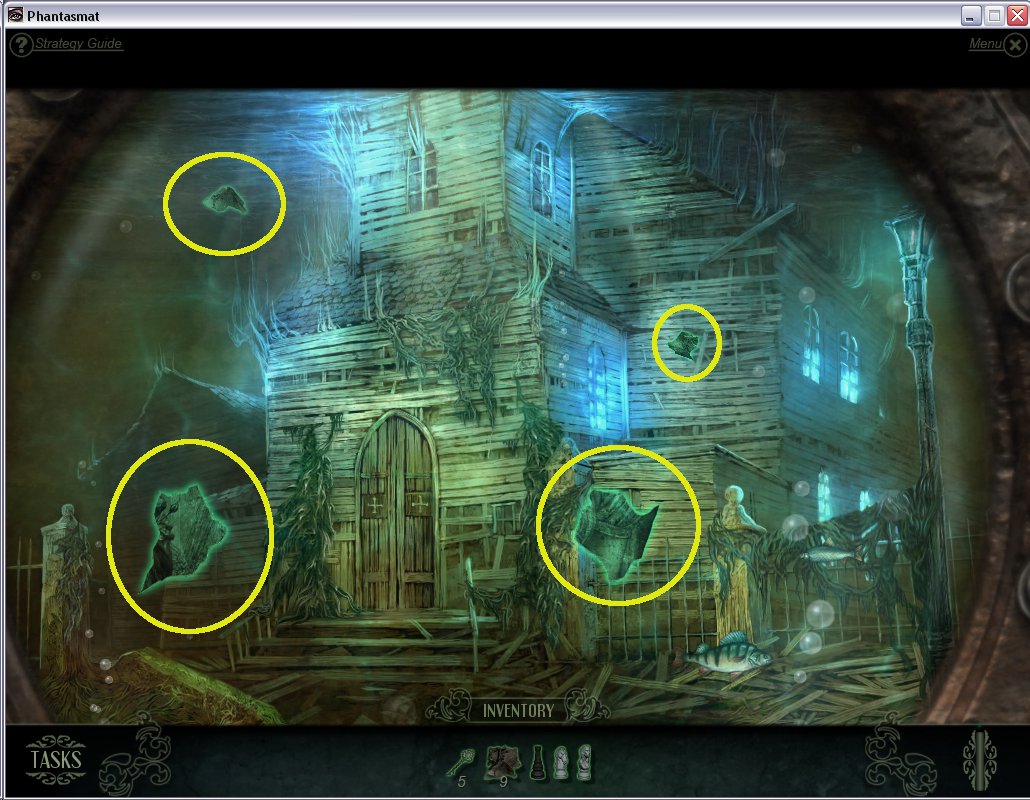
Go back out of the house and up to the Church.
Take the last 4 floating photo pieces.
Screenshot
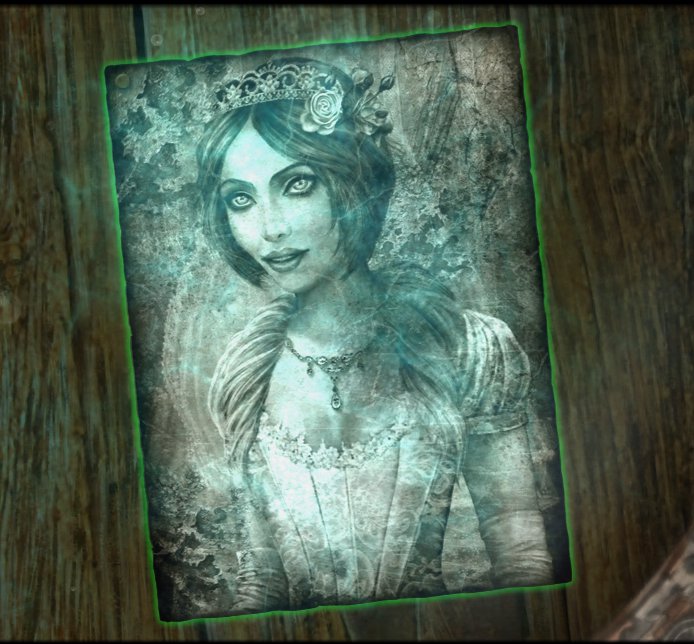
Click on the church door and assemble the photo pieces.
Screenshot
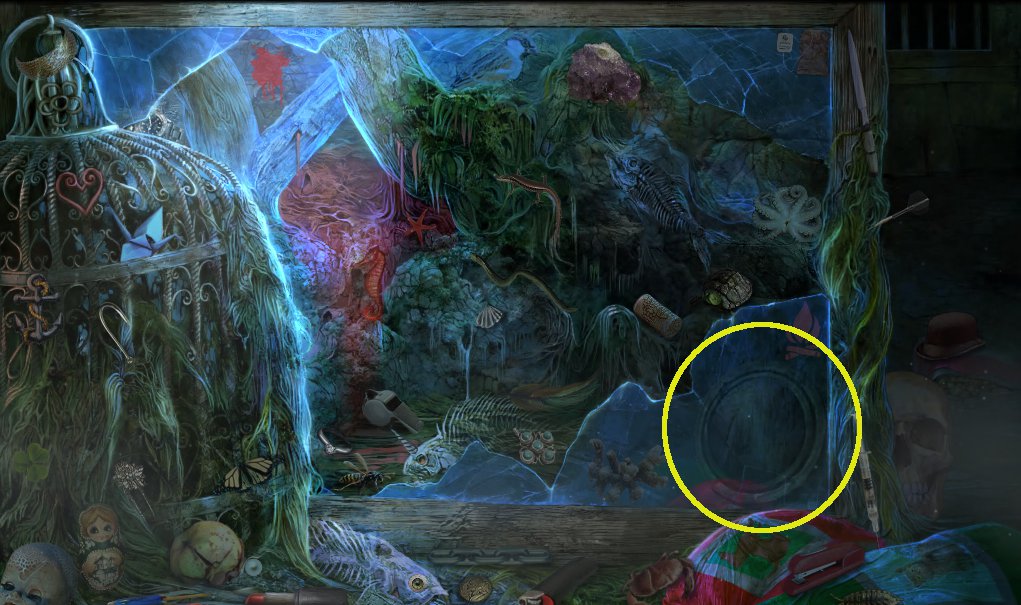
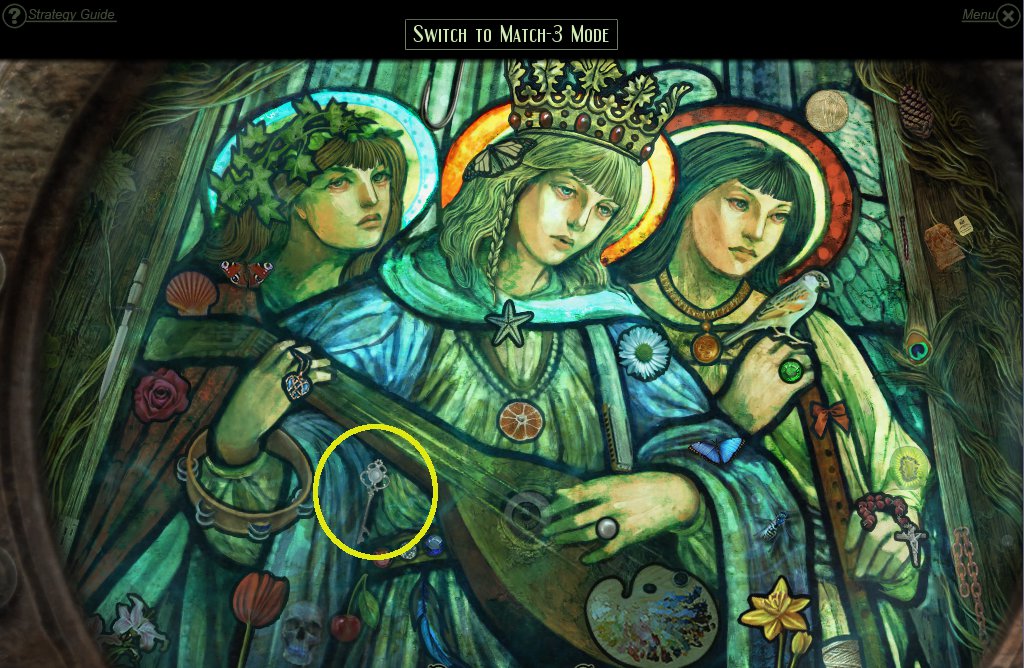
Enter the Church and click on the stained glass window for a hidden object game.
Take MYSTERIOUS KEY #7.
Screenshot
The church will start crumbling, and the oxygen tank is low, so time to go back to the Hotel.
The Hotel
Go straight to the Basement Corridor and click on the door with 7 locks.
Use the 7 mysterious keys on the locks.
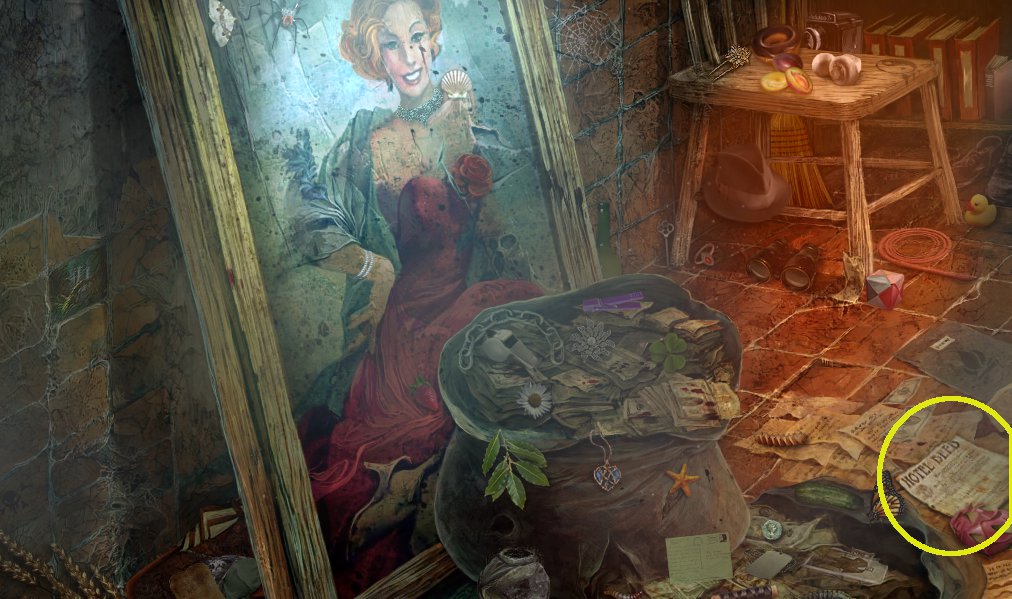
Enter the secret hideout, and click on the painting to play a hidden object game and get the HOTEL DEED
Screenshot
The Hotel Owner will appear all green, glowing and covered in creepy vines. He will deny that he is dead, but give him the hotel deed, and watch the cutscene that shows him murdering the former hotel owner.
He will then appear as a peaceful and grateful ghost, before disappearing.
He will leave half of a HEART KEY.
Head to the Cemetery.
The Cemetery
On the way to the cemetery, the boat will stop at the Church Tower and you can click to note the glowing padlock shaped like a heart.
At the Cemetery, head to the Mayor's Grave.
The Old Lady will appear, like the Hotel Owner, all green and covered with slithering vines, and she too will protest her innocence.
Give her the poison and she will ask you to help her remember. Watch the cutscene showing how she killed her husband.
The Old Lady will then appear as a peaceful and grateful ghost and disappear, leaving you the other half of the HEART KEY.
Head back to the Church Tower.
The Church Tower
Use the heart key halves on the padlock and enter the church tower.
The Young Woman will appear, just as the Hotel Owner and the Old Lady had done before.
She will block the exit from the Tower.
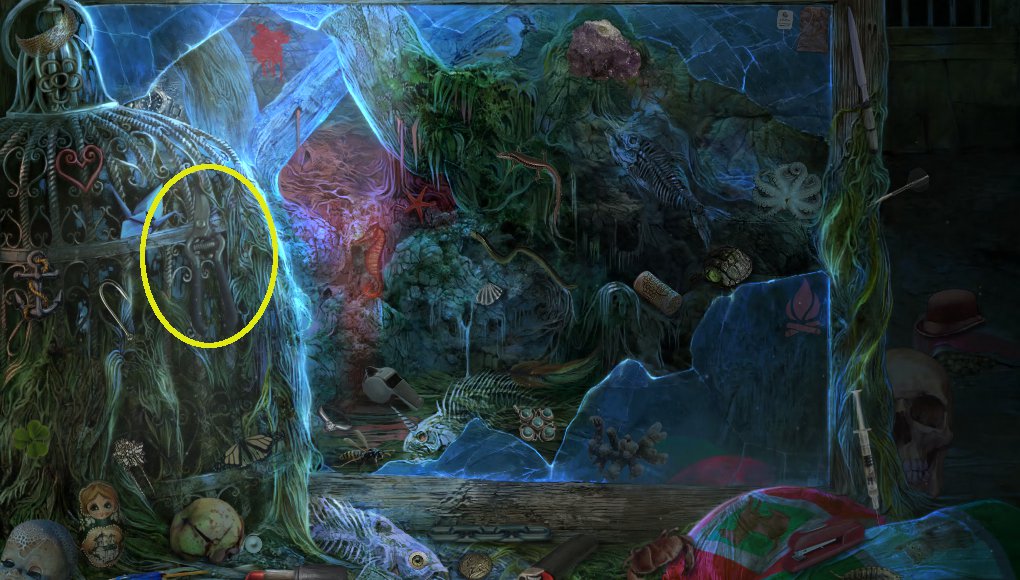
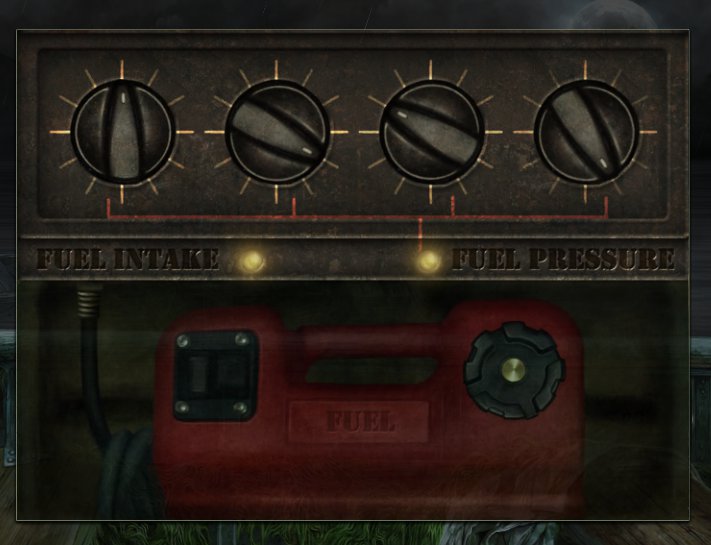
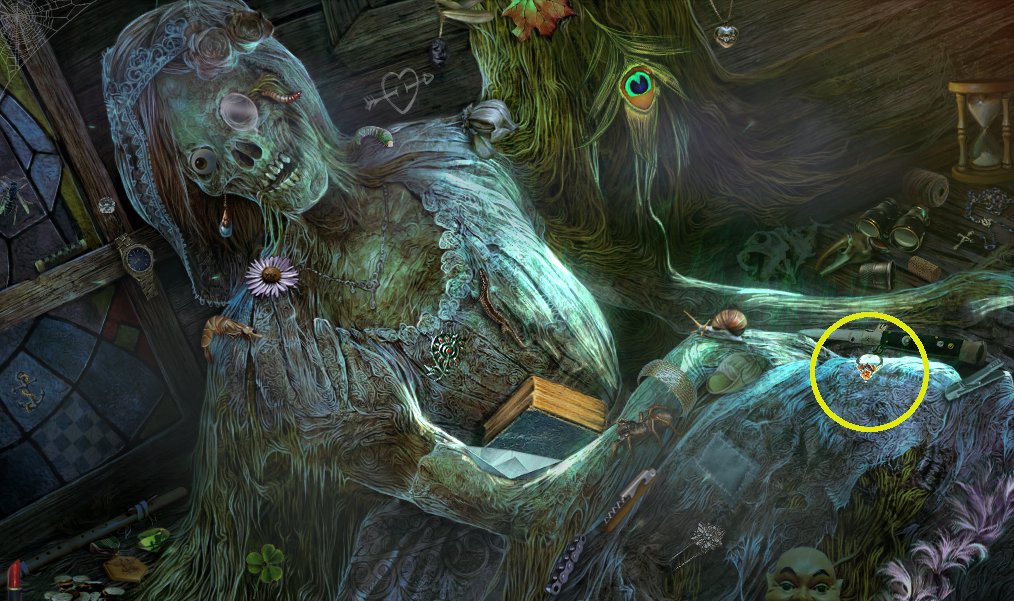
Click on her skeleton for a hiddden object game and find the ENGAGEMENT RING.
Screenshot
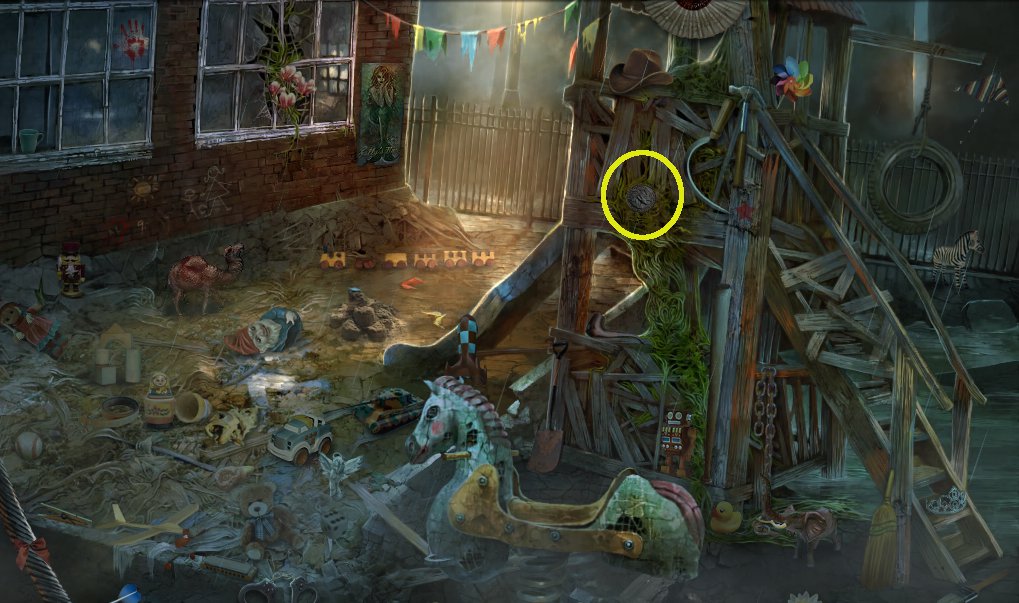
You won't be able to give her the ring just yet, so pull on the bell cord to ring the church bell.
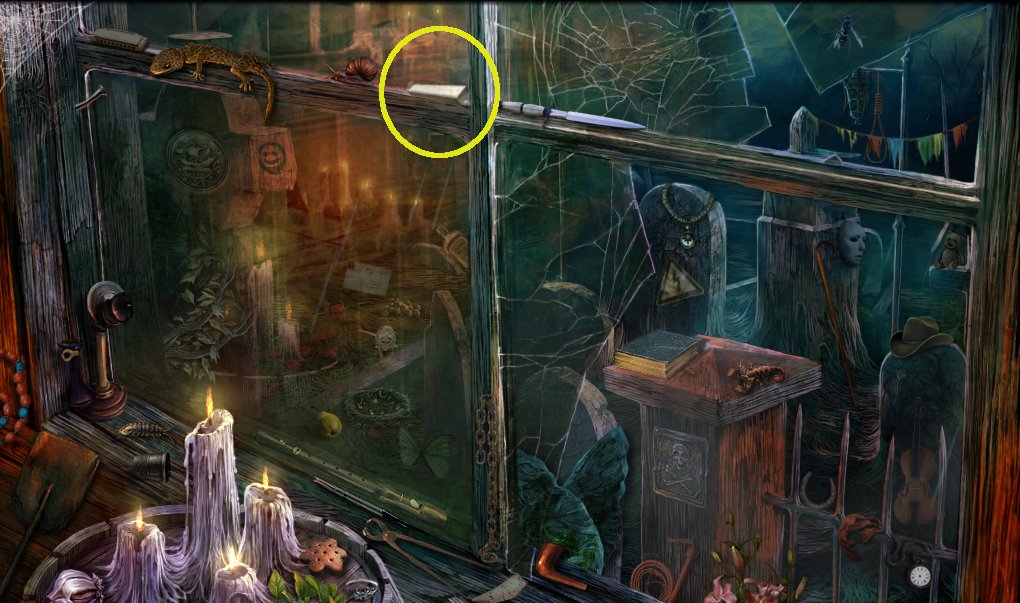
The vibration will make a nest fall to the ground. Inspect the nest to get a LIGHTER and a NAIL FILE.
Use the lighter on the candelabra, and a cupboard will be lit up in the background.
Use the nail file on the cupboard doors.
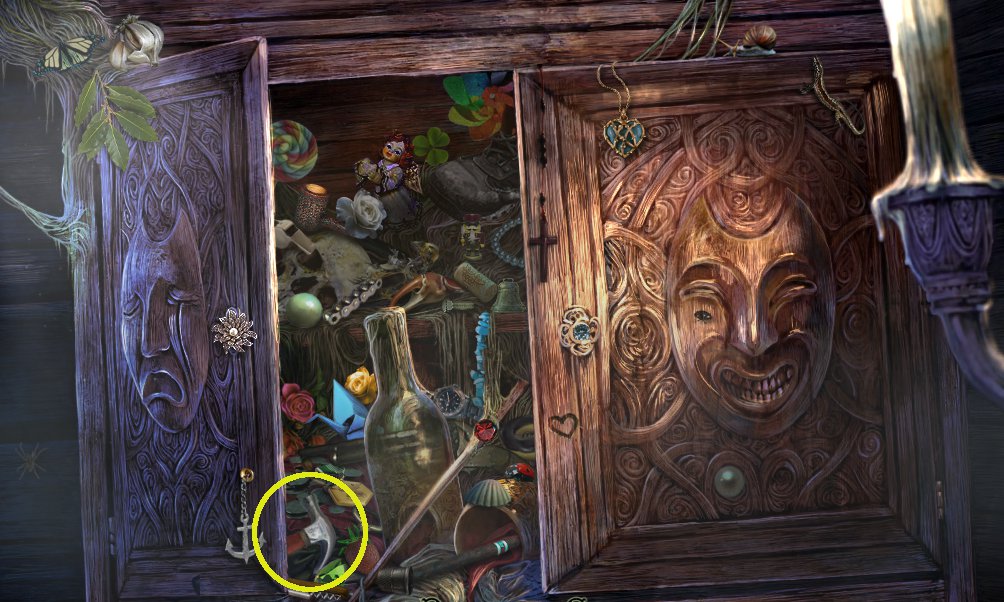
Click on the cupboard for one last hidden object game and take the HAMMER.
Screenshot
Use the hammer on the stained glass window, and take the GLASS SHARD.
Use the shard on the vines around the window.
Give the engagement eing to the Young Woman's ghost.
Watch the cutscene showing how she was abandoned on her wedding day by the groom, and left to drown in the church.
She will reappear, thank you for setting her free and disappear.
The next scene is at the Road near the forest, with the sun shining.
Click on the path to the road at the left. Miraculously, a car will appear, stop and give you a lift.
Congratulations! You've completed the Main Game.
Posted by: Chiktionary |
January 20, 2011 5:25 PM
|
January 20, 2011 5:25 PM
Phantasmat Epilogue Walkthrough
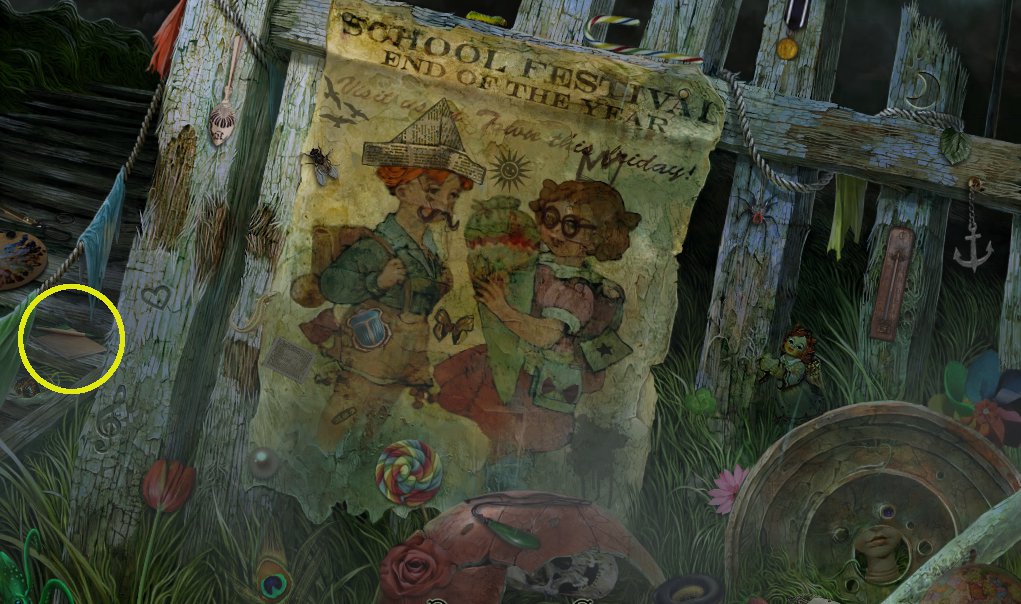
The Town
Town Main
Click Play in the main menu to begin playing the Epilogue.
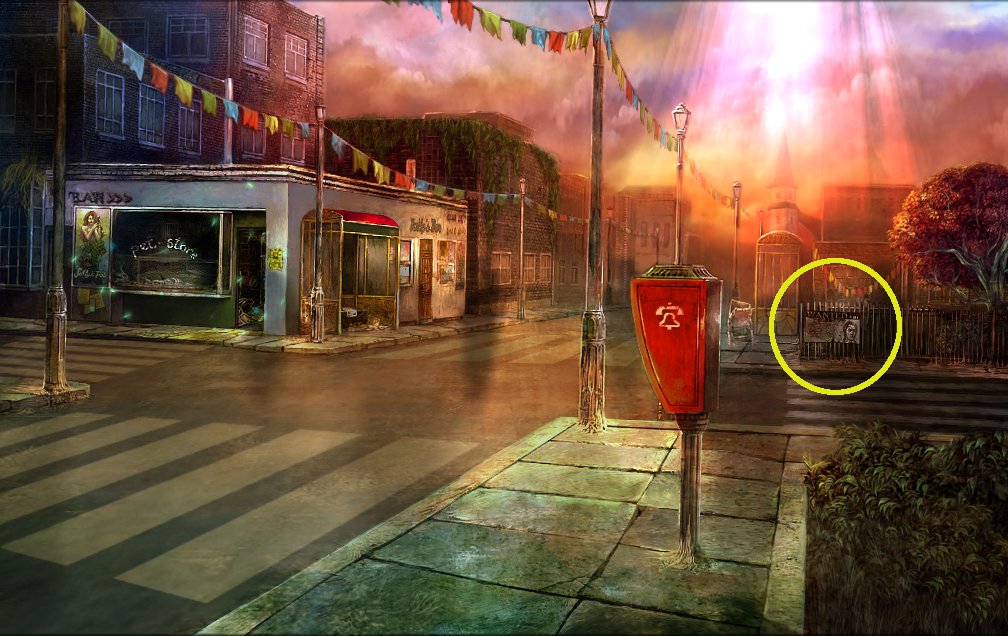
The phone will ring. Answer it to hear from the Hotel Owner.
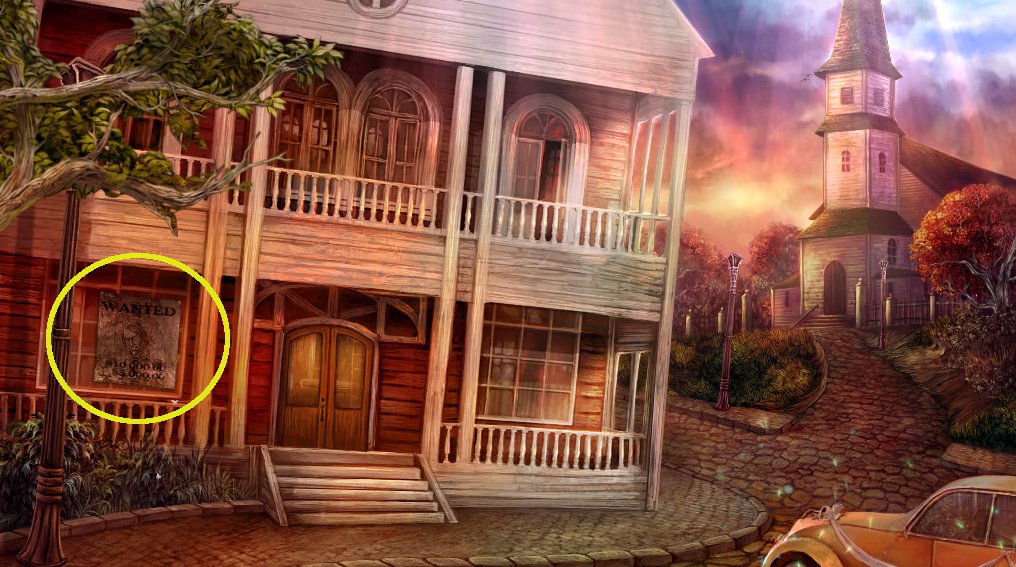
He will ask you to find and collect 5 Wanted posters that have his face on them.
They can be found in a few locations around the town.
Screenshot 1
Screenshot 2
Screenshot 3
Screenshot 4
When you've collected all the Wanted posters, the phone will ring next time you're near the phone-booth. The hotel Owner will tahnk you and tell you to meet him at the bar.
But first head to the Pet Shop.
Pet Shop
Play the hidden object game to get the FUSE.
Screenshot
Head to Sally's Bar.
Sally's Bar
The Hotel Owner will appear and tell you that they're all trapped in the Young Woman's memory of the town.
He will give you a key to the Old Lady's residence, because she will have an answer.
Click on the arcade machine to the left.
A panel will appear. Click on it and place the fuse.
Click on the machine to play a game.
The aim of the game is to find the opposite picture of each one that appears.
Do this 10 times to win $1000.
You can't collect the winnings just yet, so head to the Old Lady's house.
Old Lady's Residence
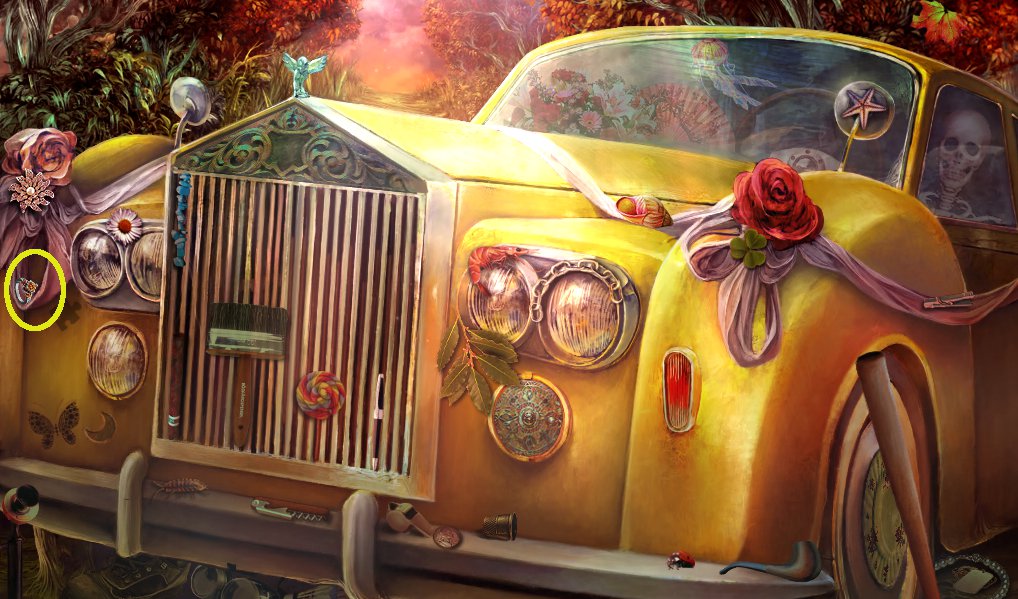
A hidden object game will appear on the bridal car. Play it to get the ENGAGEMENT RING.
Screenshot
Use the key on the front door of the house.
The Old Lady will ask you to help her find the hidden door.
In the main game, the way into the secret room was...
...in the chessboard. Play the memory game again to access the red button.
Once you've opened the secret door, the Old Lady will ask you to find pieces of a photograph, and to help her become rich again.
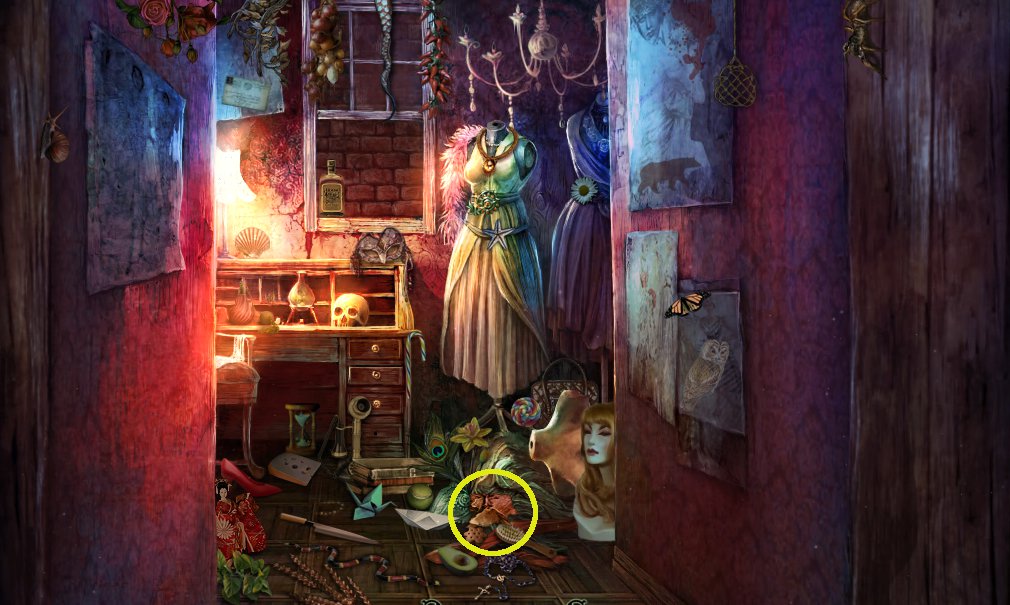
Play the hidden object game in the secret room to get the BAG.
Screenshot
Play another hidden object game in the same room to get the first lot of PHOTO PIECES.
Screenshot
Go back to the front of the house and click on the bridal car for a hidden object that hides the second lot of PHOTO PIECES.
Screenshot
Go back to the Pet Shop to find the last lot of PHOTO PIECES.
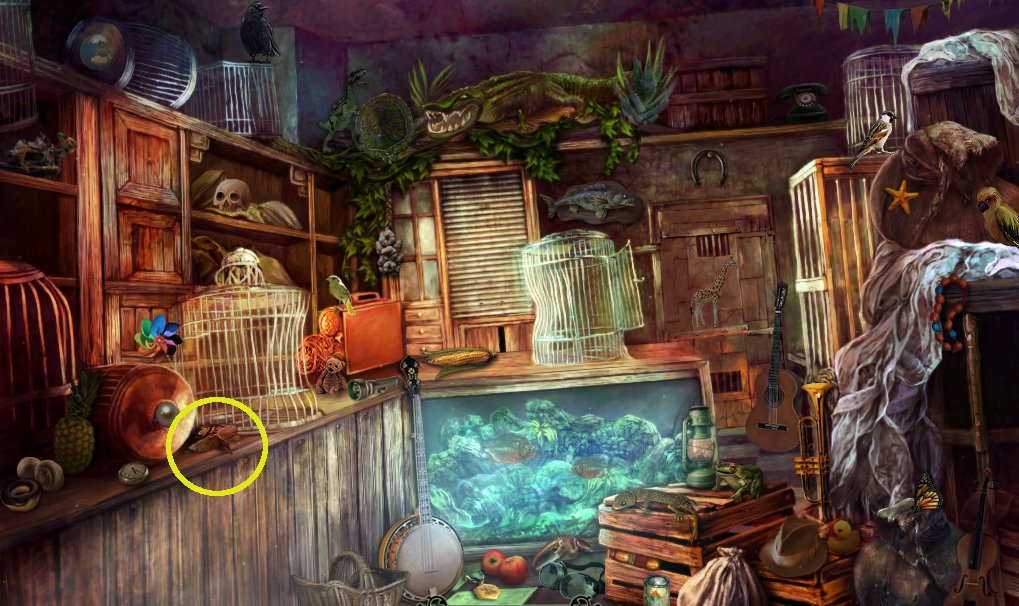
Pet Shop
Search the hidden object game for the last lot of PHOTO PIECES.
Screenshot
Head to Sally's Bar.
Sally's Bar
Use the bag to collect the coins from the arcade machine.
Head to the Old Lady's house.
Old Lady's Residence
Click on the frame above the mantlepiece.
Add the photo pieces and put them together.
Screenshot
The Old Lady will be grateful. Give her the bag of coins.
She will tell you that the Young Woman's groom-to-be had a very bad reputation, and that proof can be found in a journal in the sewers. She will give you a key.
Head to the building with the door to the right of Sally's Bar
Not-So-Ruined-Residence
Use the key that the Old Lady gave you on the door to enter the building.
Click to go down to the basement.
Play the red levers game again to get the correct sequence and open the sewer gates.
Go forward into the sewer.
The Sewer
Play the mastermind games with each number pad again.
At the end, instead of a ladder, is a puzzle.
Note the primary colours at the top and the value of each:
Red=1
Blue=2
Yellow=3
Note the mix of primary and secondary colours below.
Using the primary colours, work out the value of the colours below by figuring which primary colours are used to make them.
Blue: Blue alone = 2
Purple: Blue + Red = 3
Green: Blue + Yellow = 5
Orange: Red + Yellow = 4
Red: Red alone = 1
Enter 23451 into the number lock.
The panel will open to reveal the JOURNAL the Old Lady mentioned.
Head back out of the Sewer and up to the Church.
The Church
The Young Woman won't recognise you.
You can give her either the journal or the ring.
She won't believe you, so give her the second item in the inventory.
She will finally see the light, and disappear.
Congratulations! You've completed the entire game of Phantasmat!
Posted by: Chiktionary |
January 20, 2011 5:26 PM
|
January 20, 2011 5:26 PM