
 Hi! It's time for relax, it's the new Weekday Escape!
You start in rather untypical room (for Amajeto) where are, as usual, hidden twelve tiles for the final puzzle. Then you arrive into leaking Shigeyuki Kagamura's house just after you thought you've escaped downpour - and have to solve several puzzles to leave the house again and get a nice plastic raincoat. No1game takes you to the Summer Festival and seems that the main attraction, the big firework, was cancelled - however, the cancellation isn't irreversible and depends on you and your abilities whether the firework will take place. The last game by Suzunari is retro game, good looking, clever and satisfying.
Have a good time and enjoy!
Yes it's Amajeto's game, even though the graphics seems like Robamimi's work at the first sight. Amajeto doesn't stagnate. There are still tiles to collect, left-right puzzle, four colors/letters codes etc., but this room's interior is very different from their previous rooms and the way of finding out correct solutions differs too. Can you escape?
The cursor isn't changing, no save button, one ending.
Shigeyuki Kagamura's kindly made possible for us PC users to enjoy his more than one year old game developed exclusively for iOS. It's perfectly done and very cute again - and not supereasy, you need to use thinking and combination skills. You may even get stuck! If so, this house is quite a good place for staying longer than expected - pleasant music, quality puzzles, cute creatures everywhere. And most of all, it's not you who's getting wetter and wetter!
The cursor isn't changing, autosave, one ending. To find the game, scroll down the page. Forgot to mention last time, sorry.
The game is available for iOS too.

It's summer time and you're a kid really looking forward to the Summer Festival firework. In vain. After you arrive to the festival the first thing you see is an announcement that the big firework was cancelled due to unexplained dissappearance of firework balls. Oh well. You decide to enjoy the feast anyway and who knows, maybe it's you who will find the ten missing balls - I won't tell more but remember, you're in No1game's and that means ten pesky green guys, right? Ha! Any ideas?
The cursor isn't changing, no save button, one ending.
P.S.: Here is Find the Escape-Men 60: In the Summer Festival.
While we are talking about summer festivals I would like to introduce one excellent retro game dealing with the same theme by Suzunari. This WE isn't Retro but the game fits and I don't know how long it will be available as Suzunari's blog is closed almost for a year. Only few of their beautiful creations can be still played and probably not for long so let's play while we can!
After skippable intro you find yourself in a room, surprisingly unlocked, but you don't want to leave it without little something for your friend...so it's not a key from exit door you're looking for. It's a present!
The cursor isn't changing, save button, one ending. Notice, that you don't need to undestand Japanese to get through.
We love escape games, and our readers love talking about them and sharing hints! How about you? Let us know what you think, ask for clues, or help out other players in the comments below.


hope walkthroughs wil be available soon.
I'm using kktkkr's absence to post my very first walkthrough. I hope it's easy to follow and I've made no mistakes. ;-)
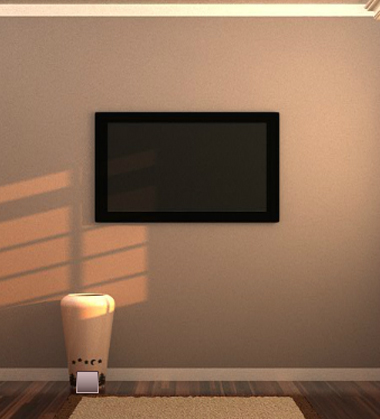
Almost Empty Room
EXPLORATION
Scene 1 (TV):
click on bottom vase
get tile. Note: scenic image
click on top of vase
get tile and tape from inside
turn right
Scene 2 (window):
get tile in window
click on boxes and get tile
note colour of boxes' labels
turn right
Scene 3 (door):
click on 3 pictures:
note the symbols in each picture
check out the middle one: it's wobbly
click on top of chest of drawers and get tile
note cube colours of wooden ornament next to flower
close this view
now let's check out the chest's drawers:
top left: symbols for 2x2 grid needed
middle left: order of colours needed
bottom left: 4 letter word needed
top right: pattern needed for 6x6 grid
middle right: left/right sequence needed
turn right
Scene 4 (tile puzzle):
note tile puzzle (you need all 12 tiles to solve)
get tile on the right side of skirting board
click on left corner of carpet and note colouring of square pattern
SOLVING PUZZLES
Top left drawer - Upside Down
Where else have you seen these symbols?
Remember the pictures? Let's have a closer look at them.
From left to right: Is there a pattern to where the symbols are placed in the pictures?
Think clockwise. And now go back to the top left drawer.
Solution:
Each symbol gradually circles clockwise through the 3 pictures (starting left over middle to right). The positions for the drawer would be the fourth position (if there were a 4th picture):
moon – heart
flower - star
Get tile and remote control
Wobbly Picture – Moonlight Shadow
Have you seen some of the symbols somewhere else?
Apart from the top left drawer – we've just solved that, dah.
Remember the vase? Let's check out that scenic image again.
Nice stars and moon above the woods.
Read left to right. And now go back to the wobbly picture.
Solution:
Click the star (S) and moon (M) corner in this sequence: S S S M S
Get tile.
Note: pattern with numbers in 3x3 grid.
Bottom left drawer – Words
Where have you seen letters?
Correct: the boxes under the window. But which letters do we need?
Remember the pattern behind the wobbly picture? Let's check that again.
Hm, the pattern contains numbers 1-4 in a 3x3 grid.. The boxes with letters also form a 3x3 grid (sort of, the top left corner's missing). Coincidence?
Spell the word from 1 to 4. And now go back to the bottom left drawer.
Solution:
1st letter = centre box, 2nd letter =top middle box, 3rd letter = top right box, 4th = top left box (top bc there only two boxes in this column):
T E M P
Get tile.
Middle left drawer – True Colors
No colours in sight so far. Have we missed something?
Hey, didn't we have a remote control? Let''s check out the TV.
Use remote on TV: Nice, some squares in colour. Oh, and all squares with dots – dots, hm …
Read colour from left to right. And now go back to the middle left drawer.
Solution:
red – yellow – green - blue
Get tile and stencil.
Middle right drawer – Do The Right Thing
We need some directions … but where could they be …?
… Woah, it dots an me! Back to the TV.
Use remote on TV: Is there a pattern to the dots?
They seem to jump from left to right.
Read from left to right. And now go back to the middle right drawer.
Solution:
The dots' position within the each square is: L R R L R L
Get tile.
Top right drawer – Fade To Grey
Some squares need to be greyed in. Have we seen something that could help us?
Remember the boxes, the squary wooden ornament and the carpet?
They all form 3x3 grids with some coloured squares. And one corner square missing. Seems they're three-fourths of the drawer's 6x6 pattern. But where's the fourth?
What haven't we used yet? Look in your inventory.
Use tape on stencil.
But where to put it?
Go to window and pin stencil on middle on.
Nothing seems to have happened. Or maybe something has changed in the room. Let's check it out.
Turn left twice to the opposite wall.
Woah, a shadow on the wall. Click on the stencil's shadow.
At last, we've found the fourth 3x3 grid. But how do we combine the four grids?
Not the position of the missing corners and the position of the coloured squares. And now go back to the top right drawer.
Solution:
The missing corners correlate to the fixed grey parts in the drawer's pattern: the grid from the shadow fits in the upper left; the carpet's grid in the upper right; the ornament's grid in the lower left, and the boxes's grid in the lower right.
Hence the following squares need to be grey: 1st in line 1; 5th in line 2; 2nd/5th in line 5; 1st/6th in line 6. It looks like this:
GWWWWW
WWWWGW
WWGGWW
WWGGWW
WGWWGW
GWWWWG
Get tile.
Tile puzzle – You Spin Me Round (Like A Record)
We now have all 12 tiles. Go to tile puzzle and use the tiles on puzzle.
Rotate each square until they align and form a picture of a dandelion.
Get golden key from now open compartment.
Use key to open door and your out.
TILES (places)
Scene 1: bottom of vase
Scene 1: inside the vase
Scene 2: middle window
Scene 2: top of left coloumn of boxes
Scene 3: top of chest of drawers
Scene 4: right side of skirting board
Scene 2: top left drawer
Scene 2: behind wobbly picture
Scene 2: bottom left drawer
Scene 2: middle left drawer
Scene 2: middle right drawer
Scene 2: top right drawer
milkyjoe. thanks for the walkthrough. I hope you are working on the others.
My second walkthrough. Again, I hope it's w/o mistakes and everything's self-explanatory. Unfortunately, I probably won't have time to do the other two walkthroughs this week. Maybe someone else can step in.
Escape from a Leaking House
EXPLORATION 1
Scene 1 (exit door):
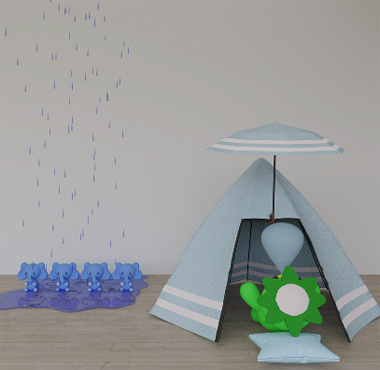
From left to right: there's a dredger, a water fountain in front of the exit door, and four blue figures under the leaking ceiling nnext to a tent.
Click on the dredger and click on operater station: you need a key. Zoom out.
Click on dredger's swing: you need something to connect hook and manhole cover. Zoom out twice.
Click on the water fountain: it's spurting from the floor. You probably need the manhole cover. Zoom out.
Click on figures/tent and click on figures: there are four blue elephants soaking wet from the leaking ceiling. Nothing can be done yet. Zoom out.
Click on the tent: there's a green bird fast asleep and a balloon floating above it. You probably need something to wake it up. Zoom out twice and turn right.
Scene 2 (window):
From left to right: there's a stand with figures in front it next to a tv, a sofa in front of the window, and a fridge next to a cupboard.
Click on the stand/tv and click on wooden stand: there are six tiles (sunny or rainy). Memorise the pattern. Zoom out.
Click on the left figure: it's a sumo wrestler who's quite exhausted. You need find something to energise him. Zoom out.
Click on the right figure: it's a robot. Click again on it: there's a compartment on its back. You need a screwdriver. Zoom out.
Click on the tv: some numbers are needed (Sxx and xx/xx). Zoom out twice.
Click twice on the sofa: there are three old men sitting between the cushions. If you click on them, you can se numbers in their mugs. There's a blue box in front if need, which requires a 3 digit number. Zoom out.
Click on the window: there's a flower box with four seedlings. We probably need some water or fertilizer. Zoom out twice.
Click on the fridge/cupboard and on the fridge: the code reuqires a sequence of balls. Zoom out.
Click on the cupboard and again on the doors: some colourful frogs need a sequence of colours. Zoom out.
Click on the cooker: the four knobs can be adjusted. You need some clue. Zoom out.
Click on the chopping board: get the coin in the lower left. There are some instructions: We need to find a cucumber, chop it up and feed it to a turtle. Zoom out four times and turn right.
Scene 3 (turtles):
From left to right: there are some turtles, a water puddle, and a machine next to a door.
Click on the turtles: they're green, blue, red, yellow. Nothing to be done yet. Zoom out.
Click twice on the water puddle: there are some cute little colourful frogs in raingear. Memorise which frog waers which colour. Zoom out.
Note the sign next to puddle with a watering can on it. Zoom out.
Click on machine/door and click on machine: it's an arcade machine to place rock-paper-scissors. Click on the screen: You need a 100 coin to play. Zoom out.
Click on the machine's bottom: there's a compartment. Either something gets in, or something gets out. Zoom out twice.
Click twice on the door: you need a keycard. Zoom out three times and tunr right.
Scene 4 (dressing table):
From left to right: there are some pipes next to a suitcase, a blue two-winged door, and dressing table surrounded by various things.
Click on pipes/suitcase and click on the vertical pipe: you need a valve. Zoom out.
Click on the colourful cloths: there blue, green, red yellow (from left to right) and are hiding something). Zoom out.
Click on the suitcase: there are six buttons, which you can change to sun or rain. Zoom out twice.
Click twice on the blue door: you need a key. Zoom out twice.
Click three times on the dressing table: something is hidden under a cloth. The vacuum cleaner nozzle can be seen on the right side of it. Something needs to be blown up. Zoom out.
Click on the vacuum cleaner: a plug's missing befor we can turn it on. Zoom out.
Click on the box under the dressing table: we need a leafy clue. Zoom out twice.
Click on the ladybird device: a 3 digit code is needed. Zoom out.
Click on the big green frog: it looks quite angry and is blocking the little blue cupboard. There's a hole in the wall next to little cupboard. Zoom out twice.
SOLVING PUZZLES 1
Suitcase
You need the tile pattern from the wooden stand of Scene 2.
Solution:
rain / sun / rain
sun / rain / sun
Get batteries.
Cupboard next to fridge
Remember the cute little frogs in raingear? Their coats are the answer.
Solution:
Blue frog wears red, green frog wears yellow, red frog wears green, yellow frog wears blue:
red – yellow – green – blue
Get four umbrellas.
Four blue elephants
Give your umbrellas to the four blue elephants and let's have a look at the opened umbrellas. Memorise the pattern.
Cooker
Remember the elephants' umbrellas? Their black-white pattern is the solution.
Solution:
up – left – right – down
The cooker turns on and there's a yummy soup in the pot. But we don't have a bowl.
Blue box
There's an arithmetic operation at work on the sofa… check out the mugs and the pillows.
Combine the numbers in the mugs with the symbol on pillows, which then reads:
50 + 20 + 70 =
Solution:
140
Get a screwdriver.
Robot
Use the screwdriver on the robot's back to open a battery compartment. Insert batteries from inventory. The now energised robot pulls the box forward. Get a bowl.
Sumo wrestler
The wrestler is quite hungry. Maybe he needs some soup…
Go to the cooker, use the bowl on the soup pot and fill it with soup. Feed the soup to the wrestler. With new strength he can pull the box forward. Get a watering can.
Flower box
The seedlings need some water. Let's get it…
Go to the water puddle (with the frogs in raingear), use the watering can on the puddle and fill it with water. Now water the four seedlings in the flower box. They grow, but some are more leafy than others. Count the leaves.
Box under dressing table
Remember the blossomed seedlings? The number of leaves is the solution.
Solution:
Read the number of leaves of each seedling from left to right:
3 4 2 1
Get a keycard and a gold coin.
EXPLORATION 2
Keycard door
Use keycard on blue door next to rock-paper-scissor machine and open the door.
There's a bear in an armchair inside, holding a carton of milk in the hand. There's a blue panel below the chair with shapes and some ants.
Click on on the left side of the armchair. There's a slot for a 500 coin. Insert your gold coin in the slot.
The bear gets shaken up and spills some milk into the blue panel. Suddenly the ants are quite interested in the now mlky shapes. Memorise this and zoom out.
SOLVING PUZZLES 2
Ladybird
Remember the ants and how they loved the milky shapes? They're the solution.
Solution:
Count the numbers of ant at each of the shapes: triangle 3 / square 4 / circle 2
The ladybird device turns on and sends the ladybird off to the hole in the wall. The huge green frog follows and finally clears the way to the little blue cupboard. Open the it and get a valve and two prongs.
Fridge
Have you seen the colours on the fridge somewhere else? Let's check out the pipes again.
Use the valve on the pipe. You've turned on the water now displaying balls dancing on water. For each colurful pipe, identify the sport each ball is used in
Solution:
blue = football (soccor)
green = basketball
red = tennis
yellow = golf
Get a telescope.
Vacuum cleaner
The vacuum cleaner i needs some electricty. So let's fix the plug…
Go to the vacuum cleaner and use the prongs on the plug. It will now plug into the wall and suck in the cloth on the dressing table. This reveals some snails. Look at them closely and don't forget the mirror.
Arcade machine rock-paper-scissors
Use your silver coin (100) in the arcade machine's slot. The screen shows S.Y – K.T – R.A – D.S. Let's play rock (closed hand), paper (flat hand), scissors (V sign).
Where have we seen these letter combinations before. Think snail, think mirror.
Solution:
S.Y = rock
K.T = paper
R.A = scissors
D.S = rock
Get an ornamental key from the compartent at the machine's bottom.
EXPLORATION 3
2-winged door
Use the ornamental key to open the 2-winged door. In this new room there are two boxes, a frame and a trophy on the left side of the window and a tripod for a telescope on the right side.
Put the telescope on the tripod and click on it. You can see a frog next to a chart. Click on the chart and read it (number of drops per column). Zoom out three times.
Click on the box/frame/trophy side and click on the box on the floor: when you click on the turtle shells, their heads will pop up. You don't have the right order yet. Zoom out.
Click on frame/trophy: you can see numbers on the frame and the trophy tag. Write them down. Zoom out
Click on the wooden box on the window sill: with each click gets more and more black. Zoom out twice.
SOLVING PUZZLES 3
Wooden box
Remember the frog's chart from the telescope? That's the solution
Solution:
Use the frog's chart as the template. Mimic the number of drops on the buttons of the wooden box:
3 1 4 2
Get a wooden needle.
Sleeping birdy
Use the wooden needle on the white ballon above the sleeping bird's head. Get cucumber.
Turtle box
Finally, it's time to feed the turtles. Chop chop!
Solution:
Chop up the cucumber on th chopping board and get slices. Feed them to the turtles next to the water puddle. The order they eat in ist the turtle box' solution:
red – yellow – green – blue
Get a silver key:
Dredger
Use the silver key on the lock in the dredger's operation station. This will operate the swing and you can put the manhole cover back on the hole in the floor. You have finally access to the exit door, but you need a 4 button code (mood related to weather condition).
TV
Remember the numbers on the frame and trophy? That's the solution.
Solution:
S53
06/28
The screen displays moody weather images. Memorise.
Exit
Remember the weather report from the TV? That's the solution.
Solution:
Combine the facial expressions with the weather condition there in.
sun – sun – thunderstorm – rain
Exit through door.
ITEMS (places)
Silver coin (100): from chopping board in Scene 2
Batteries: from suitcase in Scene 4
Umbrellas: from cupboard in Scene 2
Screwdriver: from blue box in Scene 2
Bowl: from robot in Scene 2
Watering can: from the sum wrestler in Scene 2
Gold coin (100): from box under dressing table in Scene 4
Keycard: from box under dressing table in Scene 4
Valve: from little blue cupboard in Scene 4
Prongs: from little blue cupboard in Scene 4
Telescope: from fridge in Scene 2
Ornamental key: from arcade machine in Scene 3
Wooden needle: from wooden box on window sill
Cucumber: from sleeping bird
Silver key: from turtle box
Thanks again milkyjoe. If you cant get around to the other 2 that;s fine but if anyone is reading this, please help donate a walkthrough if you can. Thanks.
Yuko's Summer Festival
Explore and get a few things
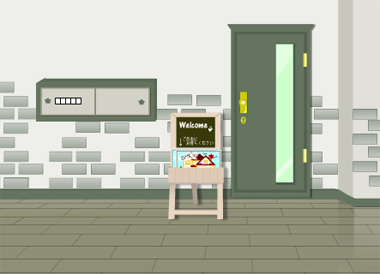
The first room has a shelf with two cabinets. The left one needs 5 numbers, but it looks like we can't solve it yet. The right one has a red bag with a yellow handle.
In the middle, there's an easel with a welcome sign pointing to a picture with lots of clues ... most of them in Japanese, which I can't read. There's a telephone number 000-0000, a 1, and a 3 in a red 6-pointed start. Hmm.
Turning right, there's a TV and a plant.
Turning right again, there's a fishbowl? with some pigs. The left pig hides some clippers. The right pig has the word SUWEMOSATU on it.
Behind the couch on the left, there's something that we can't get yet.
Use the clippers on the bag to get a 100-something coin.
There's a teapot that can be opened. A battery falls out.
Turning right again, there's a private room that we can't get into yet.
Behind the green cushion we can get a remote control. It's missing a battery that we have. Go left two rooms and turn on the TV with the remote control. There's a picture with coloured mushrooms.
Below the TV is a DVD player.
Book clue
Go back to the room with the private door (two rooms to the right). There's a book with two telephone numbers. 5733-2557 is below a blue 6-pointed star. 5257-33577 is below a black 6-pointed star. At the top of the book is a pink tag with two holes, one star=shaped and one square-shaped.
Below the book are five mushrooms: green, aqua, red, brown, blue.
We can use the pink tag to get some more information out of the book.
Place the tag over each page of the book.
Under the blue star is the number 33. Under the black star is the number 25.
Get the key for the private room
We can combine the mushroom clue with the TV to solve the number clue in the first room and get a trowel.
Counting the mushrooms on the TV:
3 green, 6 aqua, 1 red, 6 brown, 2 blue.
Use the numbers in the shelf of the first room to get a trowel.
Use the trowel on the plant in the room to the right to get a ball, aqua on top and blue on the bottom.
Use the coin on the ball to get a gold key.
The private room
Use the gold key to get into the private room.
There's a locker on the left. The right-hand door has a yellow jacket and a white shirt and some red shoes.
The left-hand door is locked.
A computer needs a password but we can't enter it yet.
A calendar has some red and blue weather symbols.
The top drawer has two buttons, red and blue, that need to be pressed in sequence.
The middle drawer needs 3 numbers.
The bottom drawer has 4 boxes with bricks on them.
There's a tall cabinet on the right. At the top are two bookshelves, with blue books on the top shelf and red books on the lower shelf. There are markings on some of the books.
Use the bookshelf to solve the red/blue button puzzle and get a grabber.
On the left, the marked books are red blue blue red. On the right, the marked books are red blue red blue.
Use the grabber to get the silver key behind the couch.
Use the silver key to get into the left-hand door of the locker in the private room.
On the door is the number 3759 beside a white brick.
Under the shoes there's a letter.
Computer password
At the back of the letter is a clue.
PW: sun, umbrella, sun-and-cloud, cloud, umbrella-with-rain.
Use the letter clue with the calendar to get the password for the computer.
5 sun, 2 umbrella, 3 sun-and-cloud, 3 cloud, 2 umbrella-with-rain.
Try using those 5 numbers as the password. It doesn't work.
We need to add another clue to get the password.
Look at the pig's word again. SUWEMOSATU. 10 letters ...
5 pairs of letters. SU WE MO SA TU
Sunday Wednesday Monday Saturday Tuesday
Looking at the calendar again, for Sunday there is a sun on day 5 and a sun-and-cloud on day 12. The first thing in the password hint is a sun.
So the first number is 5.
Sunday sun = 5
Wednesday umbrella = 1
Monday sun-and-cloud = 13
Saturday cloud = 11
Tuesday umbrella-with-rain = 7
5113117
Get the DVD
The computer gives a new hint.
blue divided by red times black
Using the numbers from the stars, 33/3 * 5 = 11 * 25 = 275
Use the number from the computer clue to get the DVD.
Don't forget to open the DVD box to get the DVD out.
The DVD clue
A little black figure moves around a series of coloured blocks and a number appears for each box.
red 3, green 1, blue 2, pink 7, lime 9, black 6, aqua 5, purple 8
Solve the bottom drawer in the private room
Using the clue from the DVD, we can solve the bottom drawer in the private room to get a present.
There are 4 bricks on the drawer. We have a colour for the numbers 1 2 and 3, but not 4.
Use the number from the locker: 3759
red (click 2 times), pink (click 3 times), aqua (click 6 times), lime (click 5 times)
Escape
Use the present on the door in the main room to escape.
Thanks Barbara. Looking forward to the Summer Festival walkthrough. Keep up the good work :)
Find the Escape Man 202: Summer Festival 2
Raffle ticket
We start off with a pink bag. Open it and get a raffle ticket. Also get 1000 yen.
Use the raffle ticket to get an Escape Man. Pick up a pen.
Behind the booth on the right, there's a paper fan. Behind the fan is an Escape Man.
Buy some treats
Click on the stalls around the room.
Buy some takoyaki. Eat the takoyaki and get a number clue.
2 6 5 4 3 1
Look behind the booth to the left and get an Escape Man.
Buy some more takoyaki. Eat it again, and get the same clue again. Hmm.
Buy some more, and this time, eat them in the right order to get an Escape Man.
Buy some shaved ice. Eat it and keep trying different kinds until you get an Escape Man inside the cup.
Buy a shrinky drink, but get a paper and scissors. The lady says to cut a shape and then give it to her. But we need to choose a shape first.
Try to buy a mask, but all we can do is move them.
Goldfish scoping
Try playing Goldfish scoping at the bottom right. No matter what I do, it just says "Close" and "Sorry, come again". Maybe it will become clear later how to play.
Look carefully at the people
There is an Escape Man there, full size, near the front, left of centre.
Goldfish scoping, part 2
In the area at the back, there is a sweaty man.
Give him the fan, and get a Goldfish Catching Trick. Use the trick to win the game and win two fish.
Click on the fish until an Escape Man appears.
1000 yen note
The 1000 yen note has invisible ink.
Get it wet.
Dip it in the goldfish pond.
Below the Goldfish scoping sign.
Paper and scissors
What shape should we cut?
An escape man, of course.
Click on the escape men and then on the paper. Try to cut the escape man out.
We have to trace the shape first. Use the pen.
Don't forget to open the pen first.
Shrinky drink, part 2
Now that we have cut the paper, we can give it to the Shrinky drink lady. She takes it and tells us to wait and then come back. When we come back, she gives us a baked Escape Man.
Masks
We can move the masks up and down, and sometimes they will go on top of each other and form a new colour. We want green ...
There's a blue mask and a yellow mask that make a green mask. After you make it, a hand will eventually shoot out. Click on it, and get an Escape Man.
Fireworks
The escape men have turned into fireworks.
Click on the back wall. There's a canister for the fireworks with 10 circles on it. Look closely at the escape-men/fireworks. Match the markings on the canister to the position of the fuses on the fireworks.
When the canister opens, place the fireworks and Wheeeee!
Locations of the Escape Men
1. Playing the raffle.
2. On the fan behind the raffle booth.
3. From the takoyaki.
4. Behind the takoyaki booth.
5. In the shaved ice.
6. In the crowd.
7. From the goldfish.
8. On the 1000 yen note.
9. From the paper at the Shrinky Drink booth.
10. From the masks.
Update