
![]() It's nice to be lighthearted, social and full of smiles now and then, but you constantly upbeat extroverts can really try the nerves sometimes. I'm just saying. There needs to be more appreciation for grumps, I say. Without us, who would you happy people have to focus all your cheer-ups on? How else would such poetic phrases as "Turn that frown upside down!" be born? So our first two free online escape games from Self Defiant and No1Game are a wee bit dark and morbid, what with being locked in an asylum or buried in a pit of sand. But, for you happy-go-lucky do gooders, take heart: a cute little duckling from Minoto should provide ample opportunity to tilt head to side and say, "Awwww, so adorabs!" Read more about our Weekday Escape trio...
It's nice to be lighthearted, social and full of smiles now and then, but you constantly upbeat extroverts can really try the nerves sometimes. I'm just saying. There needs to be more appreciation for grumps, I say. Without us, who would you happy people have to focus all your cheer-ups on? How else would such poetic phrases as "Turn that frown upside down!" be born? So our first two free online escape games from Self Defiant and No1Game are a wee bit dark and morbid, what with being locked in an asylum or buried in a pit of sand. But, for you happy-go-lucky do gooders, take heart: a cute little duckling from Minoto should provide ample opportunity to tilt head to side and say, "Awwww, so adorabs!" Read more about our Weekday Escape trio...
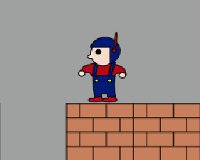 Find the Escape-Men 117: Load Runner - "Oops! Nowhere to escape...and I'll be buried alive here." Ech! With such a morbid beginning, you might well fear No1Game's taking a sadder, darker turn in their escape-men series. Taking a clue from popular and well-loved arcade classics, though, this escapade is much more about fun and games than anything so desperate as life and death. Hope abounds in locating and acquiring the ten little green guys instrumental to rescue, and this is easily done if you can pixel hunt and use patience. Although the gameplay is rooted in this puzzle-dabbled hide-and-seek, the humorous parody is what elevates it to fun entertainment. And, please, think twice before taking careless risks with the lives of video game characters!
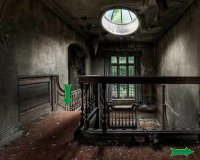 Escape Another Nightmare - If horror movies have taught us anything, it's that if you're a group of teenagers seeking thrills, turn away from that abandoned factory, logger camp, or farmhouse and just run right to your nearest Dave&Buster's for root beer floats! But nobody learns—everybody thinks movies don't apply to real life. And so you set out to face the nightmares plaguing your sleep. Now, trapped in a very creepy building, you must find keys and solve codes to move on. The shadows are not so dark and the setting is less convoluted, making this Self Defiant creation a bit more accessible, less dependent on keen eyesight or a good sense of direction. The moral: always give second thought to any "good idea" that includes "abandoned" and "asylum."
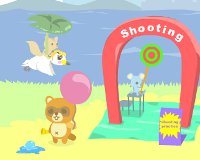 Cute Duckling 3 - Okay, the truth is, I'll take whimsical and cute over dark and scary any day of the week. For that reason, I love Minoto, whose games are also mightily silly...weird even. This creation is a perfect example of just how odd Minoto's games can be, too. As in the other cute duckling episodes, this particular baby water fowl has a nifty water-shooting ability. Employ that skill by moving your cursor up and down to control the duckling's flight path, along with creative item usage, to propel the story forward. The biggest challenge is in finding which sequence of actions will bring results. Those results are sure to put happy smiles back on your heart and make your day feel bright again.
We love escape games, and our readers love talking about them and sharing hints! How about you? Let us know what you think, ask for clues, or help out other players in the comments below.


Walkthrough Guide
(Please allow page to fully load for spoiler tags to be functional.)
Escape Another Nightmare Walkthrough and Hint-Through
If you're not used to SelfDefiant's games, and/or if you're Paul, you'll probably want the walkthrough. Otherwise, try using the hint-through to look up just the item you're missing.
Walkthrough
Go right, to the landing of the stairs. Get the screwdriver.
Go up. Look at the panel on the wall on the left; it's missing a gear.
Go right. Note the box with six colored dials; we'll need to be on the lookout for a code.
Go back downstairs (left, down, left). Go forward into the revolving door.
Make a note of the code above the archway. Looks sort of like a Roman numeral... hmm.
dccxxxiDCCCXXXXXII
There's a grating on the wall on the left, just after the doorway. Use the screwdriver to remove it. Get the green key.
Go left; note the crack in the wall. A crowbar would be handy, hope there's one lying around somewhere.
Go back to the right, then go forward. Correction, *try* to go forward: there's a locked door that needs a gold key. We only have a green key, so go back to the entryway (so you're looking at the revolving door again).
Go backward (down arrow) and use the green key to open the door to the restroom. Read the book on the chair on the right: ah, it's the key to the Roman numeral code.
500000 + 100000 + 100000 + 10000 + 10000 + 1000 + 500 + 100 + 100 + 100 + 10 + 10 + 10 + 10 + 10 + 1 + 1 = 731852
And what's this stuck in the back of the book? Get the green jewel.
Note the colored stripes on the transom windows. This must be the clue to the box with the colored dials. Count the number of stripes of each color.
blue = 4, green = 7, yellow = 3, purple = 8, red = 9, pink = 11
Go into the bathroom stall on the left. Get the purple jewel from the toilet. (Ew!)
Go into the bathroom stall on the right. Prepare to be grossed out and click the toilet. Get the gear.
Try to go left; the door needs a purple key.
Go back (down arrow) to the entryway, then go right and up to the top of the stairs.
Look at the panel on the wall again; put the missing gear in place. Click each gear in sequence starting from the bottom right so they all start moving. (Rather impossibly, I might add.) Get the red jewel.
Go right and look at the box. Set the dials according to the code you saw on the restroom windows.
7, 4, 9, 3, 8, 11
Get the purple key.
Go back downstairs to the restroom. Use the purple key to open the door to the left, then close your eyes for about five seconds. (Just trust me on this.) Open your eyes to see a pool. On the starting block in front of you is a metal box that needs a six-digit code. Use the roman numeral hints to open the box.
731852
Get the gold key.
Go right and back to the entryway, then forward into the revolving door. Go forward once more and use the gold key to open the door.
Get the crowbar from the nearest pillar on the right. Click the middle of the room to see a guy in a black robe appear. He wants four jewels; you only have three.
Go backward (down arrow), then left. Use the crowbar on the crack and get the blue jewel.
Go right and forward. Click the middle of the room to make black robe guy appear again. Click each of your jewels, then click the guy to give him all four of them. Click the guy again to exit.
Hint-through
Map/room names
You start in the entryway. To the right is the stairs, leading to the upstairs room. Behind you is the restroom, and beyond that (to the left) the pool room. In front of you is the revolving door leading to the hallway, which leads in turn to the chapel straight ahead and the doctor's office on the left.
Items
Screwdriver
On the landing of the stairs.
Crowbar
In the chapel on the right.
Gear
Right toilet.
Jewels
Green jewel
Check the book in the restroom.
Purple jewel
Left toilet.
Red jewel
Top of the stairs, panel on the left wall. Need gear.
Blue jewel
In the crack in the wall in the doctor's office. Need crowbar.
Keys
Green key
Behind grating in the hallway. Need screwdriver. Opens: restroom.
Purple key
Box with colored dials in the upstairs room. Code is in the restroom, on the transom windows. Opens: pool room.
Colorblind:
Stripes: blue = 4, green = 7, yellow = 3, purple = 8, red = 9, pink = 11. The dials are, left to right, green, blue, red, yellow, purple, pink.
Gold key
Metal box in pool room. Code is the roman numeral inscription on the arch in the hallway, decoded with the book in the restroom. Opens: chapel.
Exiting
Give your jewels to the guy in the chapel.
Posted by: Reka |
August 28, 2014 3:40 PM
|
August 28, 2014 3:40 PM
Cute Duckling 3 Walkthrough
Beware: snark ahead.
The squirrel sitting on the bird with a plant leaf umbrella (in case you hadn't realized you're playing a Minoto game) follows your mouse, albeit with some delay. Guide him/them/it up to the balloon and click to shoot... something at the balloon. Repeat until the balloon pops.
Get the ice cream gift card that fell from the balloon. Give it to the girl in the ice cream booth. Get the ice cream cone. This is way too normal, are you sure we're still playing the same Minoto game? No matter, I'm sure we'll soon be back to wackyland.
Give the ice cream to the racoon who dropped his previous cone. This causes him to let go of his balloon, so he has now suffered two of childhood's greatest traumas in quick succession: the dropped ice cream *and* the runaway balloon.
Repeat the shooting-at-the-balloon trick until you pop this balloon, too. What is it that you have against balloons, anyway? Get the... speedos??? Right, speedos. OK then.
Go right. Put the swimsuit onto the fountain. OK, why did that end up on his HEAD? And why did putting a swimsuit on his HEAD make him stop, um, making like a fountain down below? Instead of trying to answer such impossible questions, get the construction-hatted critter.
Go right. Put the construction-hatted critter in front of the doors. (Obliging of a guy armed with a jackhammer to let you push him around like this.) Get the bone from the hole after the nightmare creature, ahem, sorry, land crab? insect? whatever the heck that is leaves.
Go left. Give the bone to the puppy. Pick up the puppy.
Go right. Use the puppy on the bear. This causes the bear to go cower behind the power pole, which lets the nightmare critter scuttle up the power pole, scaring the bird away, causing the bird to drop that pink and blue thing from its nest, and getting a firefly to appear on the pole. (Forgive me, I tried to figure out where the firefly came from, but I was distracted by scuttling-caused shuddering.) Get the pink and blue ball.
Go left twice. Throw the ball at the shooting gallery target. Get the car key that falls out of it. What, doesn't everyone store their car keys in those plastic balls you get from vending machines, the ones with the cheap temporary tattoos or even cheaper stickers in them?
Go right. Use the key to unlock the trunk of the car. Get the soldering iron and wire. Because again, doesn't everyone keep a soldering iron and a spool of wire in their car?
Go right. Put the spool of wire in between the broken ends of the power cable. It turns into a big silver block. Use the soldering iron on the big magical silver block. (No, it's not magical because it's a spool of wire that turned into a block, it's magical because you can put it between, and solder it to the ends of, a live power cable without getting electrocuted.)
Click the building. The end. No, I didn't leave out any steps: you literally click the building, and that's the end of the game. That poor bear is still cowering behind the power pole, but apparently there's nothing you can do to help him.
Posted by: Reka |
August 30, 2014 10:51 PM
|
August 30, 2014 10:51 PM