JayisGames.com is now available ad-free!
Jay is Games recommends Cheat Happens with 8,000+ games and 35,000+ trainers!

Tortuga Episode 1


  • Currently 4.2/5
  • 1
  • 2
  • 3
  • 4
  • 5
Rating: 4.2/5 (136 votes)
Comments (30) | Views (18,977)
PatrickTortuga Vol. 1
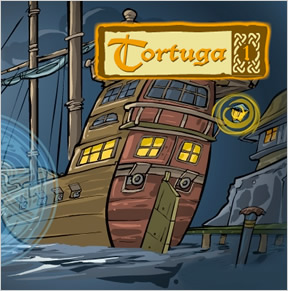
Tortuga Episode 1 is an escape-the-room game set on a pirate ship; the first installment of a series, from Mateusz Skutnik and Marek Frankowski, that promises to be adventuresome, if not epic. Parrots, treasure, peril and puzzle awaits those intrepid enough to brave the pirate ship.

You navigate the screen by parsing your mouse cursor over things and then clicking with the left mouse button—when the cursor turns into a hand, go ahead and click. The words "go back" will appear below the screen when clicking will take you back to a wider view. Otherwise, you're free to explore, poking around for clues and items that can aid your escape. Unlock the door and get past that bloody pirate and you win. Simple, short and sweet.

Analysis: Tortuga is a solid room escape game with iconic graphics dancing on the boundary between cartoon and painting, and fairly clever puzzle design. The clues can be a bit obscure at times, but the pirate motif keeps things coherent. The tension of why you're trapped in this room is added to by the apparent richness of the setting and the promise of further narrative in subsequent chapters. The potential for later versions of the series, as the creators get better at puzzle design, writing, and staging tension, could make this a gem in the genre.

Avast at last,

Play Tortuga Episode 1

Cheers to Clandestino and Marly for sending this one in! =)

Walkthrough Guide


(Please allow page to fully load for spoiler tags to be functional.)

Narrative Walkthrough

Here I am in a ship the first thing I do is

  1. Look to my right. I see a key on the upper right hand corner of the map. Then I look at the pictures on the map. The first one is a pirate with salt, torturing his poor pet. Then I look at the upper right corner picture of a pirate opening a chest, he has a pendulum in his hand and then he' kind of shocked I guess, whatever and I also notice a symbol carved on the top right..

  2. . (Triangle down) .

  3. Well ok I keep going to the right. The door is lock. Hey some familiar faces on these painting. One of the paintings has a keyhole, I try the key I found and it opens. Inside is another key, a small bottle of chili spice, a small map, money bag (that I can put coins in), a rusty key, snooze concentrate and 3 gold coins,(which go inside my new money bag) There is also a symbol here it look like... 'o'

  4. When I am done I look at the room again. And at the bottom of the pole next to the door I notice something. I touch the bottom and it opens, inside Is a pendulum.

  5. I continue looking right and I see the weird animal octopus thing in a bowl.

  6. I go right again and I'm back to the bird. I look at the treasure chest and decide to try the symbols I found. I know that the middle is an upside down triangle, the third is a circle and I guessed the first symbol to be another 'o' so I pressed the button.

  7. Inside there were gold coins, not much though, some cheep treasure chest.

  8. Well I'm bored. Let's see if I can torture the octopus. So I put so chili spice on top of the bowl, and it's kind of mad. Nothing I can do here. Let bother the bird. I go right and I try to talk to the bird but since it's sleeping it get moody when I try to touch him. But hey there is a hook on the ceiling. I place the pendulum there. The bird is hypnotized, that's what happened to the pirate in the picture.

  9. What else can I do. Well I got a key let's see if I can get out. The key works on the door, finally!!! I open the door and!!!!! Get punch in the face. Lousy pirate, Parley doesn't work with him. What else I got...

  10. I got the snooze concentrate, is that like sleeping snooze, well let's try it. I put some of the snooze though the keyhole and hey… I put that nasty old pirate to sleep, that will show him. I may not be Jack Sparrow but I'm off on my next adventure...

Simple Walkthrough

Are you too lazy to read my story????

Walkthrough for the Hidden Secret...

  1. Click to the right side of the screen to get to the area with the Pirate Octopus in a Fish Bowl.

  2. Click on the Small Bottle of Chili Spices in your inventory, then click the opening of the Fish Bowl to drop them in. The Octopus will break free of the bowl, but will not yet reveal its secrets.

  3. Click to the right side of the screen to go the area with the Pirate Parrot Balanced on a Sword.

  4. Click on the Pirate Parrot to investigate it.

  5. Click on the Pendulum you found in the first Secret Compartment, then click on the hook at the upper left corner of the screen near the skylight to hang it there and mesmerize the Pirate Parrot.

  6. Now that the Pirate Parrot is mesmerized, click the small blue middle Parrot Feather to add it to your inventory.

  7. Click to get back to the Pirate Octopus screen.

  8. Click on the Parrot Feather in your inventory, then click on the nose of the Pirate Octopus to tickle it and make it give up its Handwritten Note.

  9. Click on the Handwritten Note to investigate it. You will see a shape, followed by two dots. Make a note of this First Position Shape as you will need it to open the Treasure Chest!

walkthrough

Click on the map to your right.

Click on the Small Key at the top right of the screen hiding on the oar. This will add it to your inventory.

Click on the set of three pictures at the top right of the map. Note the series of three images towards the top right of the second image (the one with the pirate holding the necklace). You will see a dot, followed by a shape, followed by a dot. Make a note of this Middle Position Shape as you will need it to open the Treasure Chest!

Click once to get back to the map screen.

Click to the right side of the screen to get to the area with a door and three pictures.

Click on the very bottom of the wooden column in the corner of the room. This will open up a Secret Compartment!

Click to investigate the Secret Compartment.

Click on the Pendulum to add it to your inventory.

Click to get back to the area with the door and three pictures.

Click on the Small Key in your inventory, then click on the Small Keyhole to the right of the portrait of the pirate with the hat. The Small Keyhole is in the frame of the picture. This will open up the Red Secret Compartment.

Click to investigate the Red Secret Compartment.

Click on the Rusty Key to add it to your inventory.

Click on the Small Bottle of Chili Spices to add it to your inventory.

Click on the Small Map to add it to your inventory.

Click on the Money Bag to add it to your inventory.

Click on each of the three Gold Coins to add them to your inventory.

Note the series of three images towards the top left of the back wall of the Red Secret Compartment. You will see two dots, followed by a shape. Make a note of this Final Position Shape as you will need it to open the Treasure Chest!

Click to get back to the area with the door and three pictures.

Click to the right side of the screen to get to the area with the Pirate Octopus in a Fish Bowl.

Click on the Small Bottle of Chili Spices in your inventory, then click the opening of the Fish Bowl to drop them in. The Octopus will break free of the bowl, but will not yet reveal its secrets.

Click to the right side of the screen to go the area with the Pirate Parrot Balanced on a Sword.

Click on the Pirate Parrot to investigate it.

Click on the Pendulum you found in the first Secret Compartment, then click on the hook at the upper left corner of the screen near the skylight to hang it there and mesmerize the Pirate Parrot.

Now that the Pirate Parrot is mesmerized, click the small blue middle Parrot Feather to add it to your inventory.

Click to get back to the Pirate Octopus screen.

Click on the Parrot Feather in your inventory, then click on the nose of the Pirate Octopus to tickle it and make it give up its Handwritten Note.

Click on the Handwritten Note to investigate it. You will see a shape, followed by two dots. Make a note of this First Position Shape as you will need it to open the Treasure Chest!

Click to get back to the area with the Pirate Parrot Balanced on a Sword.

Click on the Treasure Chest to investigate it.

Now click each of the three lock mechanisms on the Treasure Chest. You will need to click each mechanism so that it matches, the First Position Shape, the Middle Position Shape, and the Final Position Shape in order. Be careful, as some of the shapes look very similar!

Once you have all three shapes correct, click the unlock mechanism underneath the three lock mechanisms to open the chest.

Click on the Bottle of Snooze Concentrate to add it to your inventory.

Click on each of the three Gold Coins to add them to your inventory.

Click to go back to the area with the door and three pictures.

Click on the lock mechanism of the door to investigate it.

Click on the Rusty Key in your inventory, then click on the keyhole in the door to open the door.

Click on the Snooze Concentrate in your inventory, then click on the keyole in the door to spray it on the unsuspecting pirate on the other side of the door.

Congratulations! You have solved the first episode of Tortuga!

30 Comments

Great, but too short. Hope there's going to be more...

Reply

There's got to be something really simple that I'm missing.

I found a key and opened a painting, got a map, salt, key, and a bag of gold. I broke the octopus's tank and now I don't have a clue what to do.

If I open the door, a pirate knocks me out. I think I have the last symbol for the chest (from the back of the cabinet), but I don't know where to find the others.

Reply

That was cute. I am hopeless at point and clicks, and I got almost all the way complete before needed help from the walkthru guide.

Reply

Neddo:

The second symbol is on the map. You can just guess for the first one.

Great game, but waaaaay to short.

Reply

therealtj:

Which map? There are several things on both maps that could be any of those symbols; on the small map alone there's an X, there's a triangle, there's a circle with a dot in the middle; everything is drawn in the same scribbly style so it's hard to tell what's what.

Reply

the middle symbol is

on the big map above the picture of the pirate holding the pendulum

Reply

Neddo,

Look closer at the zoom-in-able spots on the wall map.

Namely, the top set of photos.

Reply

what to do with bottle from chest

use the snoozer bottle through the keyhole to make guy behind door fall asleep

Reply
Kailani7727 November 10, 2008 11:00 PM

Narrative Walkthrough

Here I am in a ship the first thing I do is

  1. Look to my right. I see a key on the upper right hand corner of the map. Then I look at the pictures on the map. The first one is a pirate with salt, torturing his poor pet. Then I look at the upper right corner picture of a pirate opening a chest, he has a pendulum in his hand and then he' kind of shocked I guess, whatever and I also notice a symbol carved on the top right..

  2. . (Triangle down) .

  3. Well ok I keep going to the right. The door is lock. Hey some familiar faces on these painting. One of the paintings has a keyhole, I try the key I found and it opens. Inside is another key, a small bottle of chili spice, a small map, money bag (that I can put coins in), a rusty key, snooze concentrate and 3 gold coins,(which go inside my new money bag) There is also a symbol here it look like... 'o'

  4. When I am done I look at the room again. And at the bottom of the pole next to the door I notice something. I touch the bottom and it opens, inside Is a pendulum.

  5. I continue looking right and I see the weird animal octopus thing in a bowl.

  6. I go right again and I'm back to the bird. I look at the treasure chest and decide to try the symbols I found. I know that the middle is an upside down triangle, the third is a circle and I guessed the first symbol to be another 'o' so I pressed the button.

  7. Inside there were gold coins, not much though, some cheep treasure chest.

  8. Well I'm bored. Let's see if I can torture the octopus. So I put so chili spice on top of the bowl, and it's kind of mad. Nothing I can do here. Let bother the bird. I go right and I try to talk to the bird but since it's sleeping it get moody when I try to touch him. But hey there is a hook on the ceiling. I place the pendulum there. The bird is hypnotized, that's what happened to the pirate in the picture.

  9. What else can I do. Well I got a key let's see if I can get out. The key works on the door, finally!!! I open the door and!!!!! Get punch in the face. Lousy pirate, Parley doesn't work with him. What else I got...

  10. I got the snooze concentrate, is that like sleeping snooze, well let's try it. I put some of the snooze though the keyhole and hey… I put that nasty old pirate to sleep, that will show him. I may not be Jack Sparrow but I'm off on my next adventure...

Simple Walkthrough

Are you too lazy to read my story????

Reply

Well, I got all three symbols, entered them into the chest, yet the chest doesn't open.

What am I missing?

Reply
Kailani7727 November 10, 2008 11:08 PM

Walkthrough for the Hidden Secret...

  1. Click to the right side of the screen to get to the area with the Pirate Octopus in a Fish Bowl.

  2. Click on the Small Bottle of Chili Spices in your inventory, then click the opening of the Fish Bowl to drop them in. The Octopus will break free of the bowl, but will not yet reveal its secrets.

  3. Click to the right side of the screen to go the area with the Pirate Parrot Balanced on a Sword.

  4. Click on the Pirate Parrot to investigate it.

  5. Click on the Pendulum you found in the first Secret Compartment, then click on the hook at the upper left corner of the screen near the skylight to hang it there and mesmerize the Pirate Parrot.

  6. Now that the Pirate Parrot is mesmerized, click the small blue middle Parrot Feather to add it to your inventory.

  7. Click to get back to the Pirate Octopus screen.

  8. Click on the Parrot Feather in your inventory, then click on the nose of the Pirate Octopus to tickle it and make it give up its Handwritten Note.

  9. Click on the Handwritten Note to investigate it. You will see a shape, followed by two dots. Make a note of this First Position Shape as you will need it to open the Treasure Chest!

Reply

Whoops, figured it out two seconds after posting. Nevermind!

I was reading one of the symbols as an X, but it was really a +. Kind of ambiguous, but whatever!

Reply
the unknown November 10, 2008 11:17 PM

walkthrough

Click on the map to your right.

Click on the Small Key at the top right of the screen hiding on the oar. This will add it to your inventory.

Click on the set of three pictures at the top right of the map. Note the series of three images towards the top right of the second image (the one with the pirate holding the necklace). You will see a dot, followed by a shape, followed by a dot. Make a note of this Middle Position Shape as you will need it to open the Treasure Chest!

Click once to get back to the map screen.

Click to the right side of the screen to get to the area with a door and three pictures.

Click on the very bottom of the wooden column in the corner of the room. This will open up a Secret Compartment!

Click to investigate the Secret Compartment.

Click on the Pendulum to add it to your inventory.

Click to get back to the area with the door and three pictures.

Click on the Small Key in your inventory, then click on the Small Keyhole to the right of the portrait of the pirate with the hat. The Small Keyhole is in the frame of the picture. This will open up the Red Secret Compartment.

Click to investigate the Red Secret Compartment.

Click on the Rusty Key to add it to your inventory.

Click on the Small Bottle of Chili Spices to add it to your inventory.

Click on the Small Map to add it to your inventory.

Click on the Money Bag to add it to your inventory.

Click on each of the three Gold Coins to add them to your inventory.

Note the series of three images towards the top left of the back wall of the Red Secret Compartment. You will see two dots, followed by a shape. Make a note of this Final Position Shape as you will need it to open the Treasure Chest!

Click to get back to the area with the door and three pictures.

Click to the right side of the screen to get to the area with the Pirate Octopus in a Fish Bowl.

Click on the Small Bottle of Chili Spices in your inventory, then click the opening of the Fish Bowl to drop them in. The Octopus will break free of the bowl, but will not yet reveal its secrets.

Click to the right side of the screen to go the area with the Pirate Parrot Balanced on a Sword.

Click on the Pirate Parrot to investigate it.

Click on the Pendulum you found in the first Secret Compartment, then click on the hook at the upper left corner of the screen near the skylight to hang it there and mesmerize the Pirate Parrot.

Now that the Pirate Parrot is mesmerized, click the small blue middle Parrot Feather to add it to your inventory.

Click to get back to the Pirate Octopus screen.

Click on the Parrot Feather in your inventory, then click on the nose of the Pirate Octopus to tickle it and make it give up its Handwritten Note.

Click on the Handwritten Note to investigate it. You will see a shape, followed by two dots. Make a note of this First Position Shape as you will need it to open the Treasure Chest!

Click to get back to the area with the Pirate Parrot Balanced on a Sword.

Click on the Treasure Chest to investigate it.

Now click each of the three lock mechanisms on the Treasure Chest. You will need to click each mechanism so that it matches, the First Position Shape, the Middle Position Shape, and the Final Position Shape in order. Be careful, as some of the shapes look very similar!

Once you have all three shapes correct, click the unlock mechanism underneath the three lock mechanisms to open the chest.

Click on the Bottle of Snooze Concentrate to add it to your inventory.

Click on each of the three Gold Coins to add them to your inventory.

Click to go back to the area with the door and three pictures.

Click on the lock mechanism of the door to investigate it.

Click on the Rusty Key in your inventory, then click on the keyhole in the door to open the door.

Click on the Snooze Concentrate in your inventory, then click on the keyole in the door to spray it on the unsuspecting pirate on the other side of the door.

Congratulations! You have solved the first episode of Tortuga!

Reply

I'm pretty sure the "hidden secret" is a normal part of the walkthrough, unless you feel like guessing (which I did) the first part of the code.

Reply

I played it through once, but

didn't get the octopus to give up his note.

so then I looked in the walkthrough

and found what I was missing, but I'm curious, Kailani7727, you found the snooze concentrate in the cabinet behind the portrait? That seems to make the chest completely pointless. I found the concentrate IN the chest, along with three gold coins.

Reply

Very short - shame cause it's very good.

Looking forward to the sequels.

Reply

Looking at the walkthru I realized that there were things I failed to find still I made it. Strange.

Reply

Funny, that

you can only spray the snooze concentrate on the pirate thru the keyhole after you unlocked the door

:)

Reply

Kailani7727's walkthrough is wrong in several places... Notably:

S/he assumes that the symbols are the same for everyone. They're not; it's different for each person. That messed me up.
Secondly, the snooze concentrate is in the treasure chest, not the secret compartment.
Finally, the "secret" is not optional, it's a necessary part of the walkthrough, so why did s/he do it separately?

Reply

Joye,

the "secret" is optional - in the sense that you can solve that puzzle without finding out about the hints - I myself found only one of the three hints yet i managed to solve it - with trial and error, of course.

Reply

As for the mistakes in the walkthrough - I said a couple of times that it's rather dangerous to write those in a rush to be the first one. I myself did it once and was sorry to find out I included some mistakes. And I myself got misled a couple of times by walkthroughs written in a haste.

Writing a walkthrough in a hurry is like being proud of placing the first comment for a post - totally unneccessary.

Reply
houseworkisevil November 11, 2008 5:21 PM

I love all the escape games that Mateusz Skutnik makes! ARRRGH!

Reply

This is from the same guy who did "The Great ___ Escape" and "10 Gnomes." I can't wait to play it!

Reply
Kailani7727 November 11, 2008 11:00 PM

Sorry guys for the mistakes. And Joye & bioLarzen, both of you guys are right. I didn't realize that the symbols aren't the same for everyone until I redid the Adventure a second time and yes I am guilty bioLarzen for writing the walkthough in a rush. I shall not redo my mistakes. Thanks for the comments though!!

Reply

what use has the treasure map behind the painting?

Reply

what are the bag of gold and the map for?

Reply

That's the constant problem with using combination locks in these games. If two of the three symbols can be found, it is a simple matter to "brute force" the lock. Kudos to the team for not demanding the third piece be found before the chest would accept the combination, as some other games have done. Ideally, the discovery of all three would be intertwined so that you couldn't get past the room without finding all the pieces. (Perhaps even hiding the rusty key in the same spot as the pendulum might have helped?)

Reply

Am I the only one who, no mater how many times she tries, inputs the symbols but the chest doesn't open? I swear I'm putting in the right ones, I looked at the symbols on the walls again and again, but it doesn't open. Is it a glitch?

Reply
miasaurus August 23, 2009 10:59 AM

I still can't

get the stupid chest open.

I know I did it right but I give up.

Reply

CAN'T OPEN CHEST!!!! I have tried every possible interpretation of the marks on the map.... aaaarrrrgh

Reply

^ Scroll Up | Homepage >

Leave a comment [top of page]

Please consider creating a Casual Gameplay account if you're a regular visitor here, as it will allow us to create an even better experience for you. Sign-up here!
  • PLEASE UNDERSTAND SITE POLICIES BEFORE POSTING COMMENTS
  • You may use limited HTML tags for style:
    (a href, b, br/, strong, em, ul, ol, li, code, spoiler)
    HTML tags begin with a less-than sign: < and end with a greater-than sign: >. Always. No exceptions.
  • To post spoilers, please use spoiler tags: <spoiler> example </spoiler>
    If you need help understanding spoiler tags, read the spoiler help.
  • Please Preview your comment before posting, especially when using spoilers!
  • No link dropping, no domains as names; do not spam, and do not advertise! (rel="nofollow" in use)
chrpa Jayisgames needs your help to continue providing quality content. Click for details Welcome to the Roundup 66 - Retro with four games! After you find the ten monkeys in the chapter, look in the inventory. You will find a...  ...
chrpa Jayisgames needs your help to continue providing quality content. Click for details Welcome to the Roundup 65 with three games! As mentioned in the previous roundups, only odd-numbered episodes are featured since even-numbered are for Robin Vencel's patrons (the...  ...
chrpa Jayisgames needs your help to continue providing quality content. Click for details Hi! Weekday Escape and Weekday Puzzle are here! First we have two new cans from tomoLaSiDo and then two small rooms from isotronic. That's all for this...  ...
6,365 Views
0 Comments
chrpa Jayisgames needs your help to continue providing quality content. Click for details Welcome to Mobile Monday! We have another beautiful game from Nicolet and it's a winter game as it should be. Tasuku Yahiro have released another of their...  ...

HELP Jayisgames.com

Recent Comments


Display 5 more comments
Limit to the last 5 comments

Game of the week


Dark Romance: Vampire Origins Collector's Edition

Your Favorite Games edit

add
Save links to your favorite games here. Use the Favorites editor.

Monthly Archives