
The Night of the Rabbit
Platform: Mac, Windows
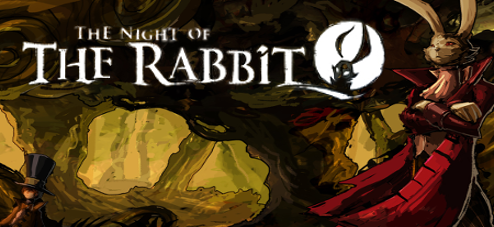
![]() Do you remember the picture books of your childhood? The cozy, sun-dappled worlds encountered in the pages of A. A. Milne and Beatrix Potter were a soothing antidote to the frequent cruelty and unfairness of daily life. The Night of the Rabbit, an indie point-and-click adventure by Daedalic Entertainment, is the digital equivalent of those picture books: visually and aurally lush, with a cast of charming animal characters and a human boy as the plucky protagonist. It's an engaging companion for an evening's play but unfortunately it can also be a little too long-winded for its own good.
Do you remember the picture books of your childhood? The cozy, sun-dappled worlds encountered in the pages of A. A. Milne and Beatrix Potter were a soothing antidote to the frequent cruelty and unfairness of daily life. The Night of the Rabbit, an indie point-and-click adventure by Daedalic Entertainment, is the digital equivalent of those picture books: visually and aurally lush, with a cast of charming animal characters and a human boy as the plucky protagonist. It's an engaging companion for an evening's play but unfortunately it can also be a little too long-winded for its own good.
 Jeremiah Hazelnut is a cheerful young lad who heads out one morning determined to make the most of the two days of summer he has left. He certainly finds adventure in the form of a strangely alive letter that bounds out of his mailbox. Upon following the instructions within he summons an old magician's trunk—and a six foot tall talking rabbit in a purple frock coat called the Marquis de Hoto.
The rabbit is a magician and a treewalker, able to transport himself between worlds. He is looking for an apprentice and Jerry, an aspiring magician himself and possessor of a mysterious magical coin, is his choice. To begin his training the Marquis takes Jerry back to Mousewood, an enchanting realm where hedgehogs repair boats and a dainty mouse on roller skates named Anja runs the local café. As Jerry, you will start small, solving puzzles and combining inventory items to perform errands for the Mousewood folk. But after a lengthy series of quests you will gain the magical knowledge necessary to combat the evil that threatens to unravel this idyllic world...
 The Night of the Rabbit is a point-and-click adventure in the traditional style, which means there are loads of puzzles to solve in between all the dialogue. Talking, and picking up and using items are all accomplished with a single click of the mouse, and scrolling the mouse wheel is all it takes to open your inventory. Holding down the wheel activates Jerry's magic sight, highlighting all the clickable spots on the screen and occasionally turning up a hidden wood sprite or elf. The territory you cover is quite large and a easily-accessible game map is not available, so progress can get tedious at times and will require plenty of trial and error. Luckily the puzzles are mostly sensible, and the solutions never get as bizarre as they were in the good old days of Sierra and LucasArts.
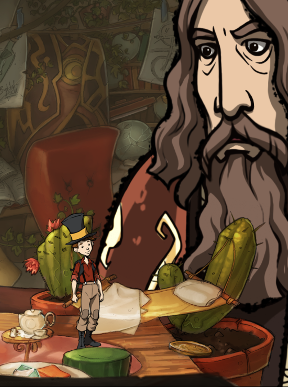
Analysis: Oh, how gorgeous this game is. We wouldn't be surprised to learn that Daedalic Entertainment had holed up in the children's section of the library prior to making this game as the scenery evokes happy memories of the warm, enveloping forests drawn by Arnold Lobel or E.H. Shepard. In screenshots it looks good but in motion it positively blooms, as dandelion seeds waft by on the breeze and fireflies dance in the soft lantern glow at the Hare family's birthday party. It's a vision of childhood as it might exist in the Western collective unconsicous: safe, comfortable, warm, and a little bit magical. The universally excellent voice acting just adds to the charm.
 If only the script were up to the high standards set by the art. Make no mistake, the dialogue is witty and written with a novelist's skill. The pacing, however, is off. Seriously off. The first several hours of the game are ostensibly Jerry's trial period in which he proves himself worthy of magic study, but it seemed to us more like a series of poorly-signposted fetch quests.
The game in general suffers from this lack of direction. Why are you here? What's the point? Who are these strange masked creatures? Where's the big bad guy? A little mystery is good storytelling but these questions are left unanswered for far too long. If you're not yelling, "GET ON WITH IT!" after five hours of charming and funny but pointless dialogue with your animal friends you are made of sterner stuff than we are. The game's initial refusal to open up can get frustrating, but the story gets more involving as Jerry's magical skills grow and the radiant setting and soundtrack will be enough to carry many through the dozy bits.
German game studio Daedalic Entertainment has been sustaining the genre of story-driven point-and-click for years now with games like A New Beginning and Edna & Harvey: The Breakout, and The Night of the Rabbit is a typically well-produced addition to their resumé. Other adventure games may be less unwieldy but few are endowed with this much atmosphere. While its poor pacing frequently tried our patience, The Night of the Rabbit is an enchanting trip down the rabbit hole we're glad we took.
![]() Windows:
Windows:
Get the full version
![]() Mac OS X:
Mac OS X:
Get the full version


Walkthrough Guide
(Please allow page to fully load for spoiler tags to be functional.)
The Night of the Rabbit Walkthrough
(Part 1 - Chapters 1 & 2 + Collectibles)
Collectibles
Dew Drops
Dew Drops are small droplets of water found in outdoor locations all over Mousewood. If you spot a droplet, click it to add it to your collection (the droplet will disappear after it is found). There are 32 Dew Drops in total. Go to the Train Station Windowsill outside the Magician's Giant Room and use the Rockwhisper spell on the large mirror to find out how many droplets you have left to collect.
Dew Drop 1/32 is located in the Town Center of Mousewood.
Look for the droplet at the far left end of the left rope hanging above Town Center.
Dew Drops 2/32, 3/32, and 4/32 are located Behind Town Hall.
Drop 2/32 is found at the far left side of the scene, near the bottom of the large leaf at the center of the ivy brush.
Drop 3/32 is on the very tip of the spiky plant in the background. Look above the broken wall behind Mr. Churchmouse, just below the two hanging ropes, and to the left of the stone archway to find the plant.
Drop 4/32 is on top of the middle leaf of the fern in the foreground near the very bottom right corner of the scene.
Dew Drops 5/32 and 6/32 are located at the Edge of Town.
Drop 5/32 is found on the ivy leaf on the wall a little above the Strange Door.
Drop 6/32 is on the pumpkin vine at the bottom right corner of the scene.
Dew Drops 7/32, 8/32, and 9/32 are located at the Gardens.
Drop 7/32 is on the rim of the barrel beside the blue bunny-shaped chair at the far right side of the scene.
Drop 8/32 is on the lower right petal of the Pretty Flower.
Drop 9/32 is at the tip of the plant found between the Half Statue and the ramp leading up to Town Center.
Dew Drops 10/32, 11/32, and 12/32 are located at the City Wall.
Drop 10/32 is on the blade of grass hanging over the left side of the stream, just a little below the left end of the barrier.
Drop 11/32 is at the middle of the large fern to the left of the mouse guarding the cannon.
Drop 12/32 is at the tip of the blade of grass in front of the orange flowers.
Dew Drops 13/32 and 14/32 are found in the Forest leading to the Path Tree.
Drop 13/32 is hanging at the very tip of the end of the Wall.
Drop 14/32 is on the tip of the patch of grass at the bottom of the scene. Look for it a few inches down from the Large Statue With Acorn.
Dew Drops 15/32 and 16/32 are located at the Path Tree.
Drop 15/32 is on the tip of the grass just to the right of the circle of mushrooms.
Drop 16/32 is also on the tip of a patch of grass, this one is to the right of the flat stone hanging over the pond.
Dew Drops 17/32, 18/32 and 19/32 are located at the Bridge.
Drop 17/32 is very difficult to spot. Look carefully at the top of the stone tablet etched with symbols, on the left side of the Group Of Animal Statues.
Drop 18/32 is also tricky to find. Behind the Group Of Animal statues is a row of waving stalks of wheat. Look behind the top of the farthest right wheat stalk to find the droplet in the background.
Drop 19/32 is at the far right side of the scene. Walk across the bridge and move right towards the grassy field. Look at the bottom of the large blades of grass in the foreground at the bottom right corner of the screen to locate the droplet.
Dew Drops 20/32, 21/32, and 22/32 are located at the Radio Station.
Drop 20/32 is at the middle of the right Marsh Marigold flower.
Drop 21/32 is hanging off the leaf near the upper left side of the large stone archway. Look for it directly above the mushrooms on the snowy path.
Drop 22/32 is only visible after Plato has moved his bike. You can find it at the edge of the blade of grass on the right bank of the Swiftly Flowing Brook. Look directly below the knot at the middle of the log bridge.
Dew Drops 23/32, 24/32, and 25/32 are around the root fields at the Front of the Dwarf House.
Drop 23/32 is on the tip of the plant directly above the left arrow sign that points to the "Bank On The Other Side Of The Brook".
Drop 24/32 is underneath the mushroom growing on the side of the Dwarf House. Look just above the chimney pipe and the open window.
Drop 25/32 is hanging off the stalk of the root plant near the lower right corner of the scene. At the bottom of the screen are two thorny vines, the root (and its droplet) is next to the right vine.
Dew Drops 26/32 and 27/32 are near the waterfall Behind the Dwarf House.
Drop 26/32 is at the bottom of the large dandelion plant at the bottom right corner of the scene.
Drop 27/32 is on the underside of the left leaf stalk of the Really Huge Beet.
Dew Drop 28/32 is at the Train Station Windowsill that leads to the Magician's Giant Room.
Look for the droplet on the ivy leaf at the upper left area of the scene, growing above the broken light.
Dew Drops 29/32 and 30/32 are at the Swamp.
Drop 29/32 is at the top of the giant blae of grass behind Ludwig and near the top left corner of the scene.
Drop 30/32 is on top of the right leaf covering the roof of Plato's House.
Drew Drops 31/32 and 32/32 are at the top of the Cold Tree.
Drop 31/32 is on the underside of the mushroom at the top of the large, patterned pillar.
Drop 32/32 is hanging on the webs of thread underneath the platform. Look for it directly above the lower end of the wooden beam that supports the Moth.
Once you've collected all 32 drops, go to the Train Station Windowsill outside of the Magician's Giant Room. Examine the large Stone Stele to reveal the portrait of the banished apprentice.
Stickers
The Lizard Sticker (1/8) is found at Jerry's Home and can be collected at the very start of the game.
Inspect Jerry's bicycle and click the white outline on the red frame of the bike, just under the seat.
The Ninja Sticker (2/8) is located in the Town Center of Mousewood.
You'll find it at the bottom of the Advertising Pillar With Announcements and just to the right of the Golden Horn With Frog.
The Ladybug Sticker (3/8) is Behind Town Hall.
At the upper left side of the Overgrown Mural, you can see a small piece of paper sticking out of the ivy leaves. Click the paper to collect the Sticker.
The Snail Sticker (4/8) can be seen from either the City Wall or the City Gate.
Look at the top of the right guard's post. You'll see the sticker partially concealed behind the guard's large leaf.
The Bumblebee Sticker (5/8) is at the Radio Station.
Examine the inside of the broken radio to find the sticker on the back wall, underneath the shelf stacked with books.
The Butterfly Sticker (6/8) is inside the Hut of the Wood Dwarves.
You'll find the sticker on the flower vase on top of the table at the back of the room.
The Goldfish Sticker (7/8) is located at the Train Station Windowsill that leads to the Magician's Giant Room.
Examine the section of the wall beneath the ledge of the windowsill and above the wooden platform. The sticker is found there, just left of the ivy leaves.
The Harvey (Rabbit) Sticker (8/8) is at the Swamp.
The sticker is found on the porch of Plato's house, at the right edge of the platform. Look just a little under the cup on the toadstool table.
Stories
Every night, the Woodsprite appears somewhere around Mousewood. If you can locate him, he'll tell you one of his stories. Once he's been found at one location he will move to a new one the next night. You can listen to the stories you've collected by accessing the Audio Book section of the Bonus Collection menu.
Go to the Cafe at night to find the Woodsprite the first time and receive Story 1. He'll be seated at the table beside the Herbal Pharmacy, where you met Ludwig Burrower.
Use the backdoor at the Gardens to enter the Cafe. If the door is locked, you must return to the Cafe during the day time.
Wait for the mouse with the backpack to leave the room, then hang the CLOCK-SHAPED KEY PART from the Magician's Giant Home over the real key hanging on the barrel beside the door.
Now wait for the mouse to return again. He will attempt to lock the door with the false key, leavin git unlocked for you to reopen later.
To receive Story 2, talk to the Woodsprite at the Radio Station during the night. This time, he'll be sitting between the snowy path that leads to the Cold Tree and the "Forest Path On This Side Of The Brook".
For Story 3, talk to the Woodsprite on the next night Behind The Dwarf House. He'll be seated at the edge of the cliff.
For Story 4, talk to the Woodsprite at the Edge of Town on the next night. You'll find him sitting beside the pumpkin at the right side of the Clear Brook.
For Story 5, talk to the Woodsprite by the Bridge at night. He'll be sitting on the left side of the Babbling Brook.
The Woodsprite will automatically tell you Story 6 after you learn your third spell (Fox's Cunning) and travel through the portal tree to return to the Swamp.
For Story 7, talk to the Woodsprite at the Forest Path above the front of the dwarf house. This time, he's sitting to the left of the Big Old Tree Stump.
For Story 8, talk to the Woodsprite at the Old Path Tree (the portal tree you used to enter Mousewood). He will be seated to the left of the ring of mushrooms near the pond.
Chapter 1
Tutorials
Intro
Click the Odd Figure to speak with him.
When the figure teleports to another area of the scene, follow him and talk to him again.
After you speak to him a third time you'll be transported to a new scene.
Home
Follow the radio's instructions to learn the basic interactions needed to play the game. If you don't wish to play the tutorial you can click the X icon at the upper right corner of the screen to skip this section.
First, left click the radio to touch it. Click it a second time to talk to it - notice how the hand icon at the cursor has changed to a mouth.
Pick up the EMPTY BASKET on the windowsill to add it to your inventory.
Open the inventory by scrolling the mouse wheel or by pressing the "I" key. Here you can see important objects that you've collected so far.
Right click the EMPTY BASKET within your inventory to inspect it.
Left click the EMPTY BASKET to interact with it, which will cause it to fall apart. Select the BASKET HANDLE by left clicking it, then click the BASKET WITHOUT HANDLE to combine the two items and repair the EMPTY BASKET.
Re-select the EMPTY BASKET again and then move your cursor outside of the inventory window, allowing you to use the basket on the environment.
Give the EMPTY BASKET to Jerry's Mother. Once she sees the basket she'll ask you to fetch her some blackberries from the forest.
Collect Blackberries
Home
Follow the road up to the Forest Crossroads.
From there, continue down the path that leads deeper into the woods to find the Path Tree.
Path Tree
Pick up the STICK on the ground at the edge of the water.
Walk back to the Forest Crossroads.
Forest Crossroads
Move to the far right edge of the scene to find the berry bushes.
Use the STICK on the thorny bush blocking the blackberries.
The ROSE HIPS berries that fall from the thorny bush will be automatically added to your inventory.
Pick the two clusters of blackberries on the bush to add them to your basket.
Remove the spiderweb covering the third group of berries with the STICK.
Collect the last of the blackberries to completely fill the BASKET WITH LOTS OF BERRIES.
Go left to return Home.
Home
Jerry will automatically place the BASKET WITH LOTS OF BERRIES on the windowsill when he enters the scene.
Now that you're done with the berries, an envelope will appear and fly into the mailbox.
Cast a Carrot Flame
Home
Click The Hazelnuts' Mailbox two times to receive the MYSTERIOUS LETTER.
Inspect the MYSTERIOUS LETTER in your inventory to read the poem with instructions to creating a Carrot Flame:
"After drawing on rock a symbol all in white - grinding white to powder makes it right.
Then add black, in turn, the kind you should be loath burn.
Black and white as they combine, the inside of your vessel line.
Then three more things: tree skin, tree fruit, and lastly, but not least, a root.
At the crossroads, draw a circle with the powder mix obtained, put the vessel in the center of the powder ring thus gained.
Set the circle - bang! - on fire, the carrot flame leaps high and higher, and I will swallow it in haste to enjoy the lovely taste."
Pull out a CRISP CARROT from the Carrot Bed.
Search the Well-Camouflaged Secret Stash to find three items: a MATCHBOOK, COIN WITH HOLE, and DECAYED FIRECRACKER.
Walk up the path to the Forest Crossroads.
Forest Crossroads
Pick up the COLA CAN on the ground at the bottom of the farthest left tree.
You'll find some acorns at the top of the tree on the right side of the path that leads deeper into the woods.
Use the STICK to knock some of them down, then collect the THREE ACORNS that fall to the ground.
Follow the road deeper into the woods to the Path Tree.
Path Tree
Examine the Chalk Quarry to receive a piece of CRUMBLY CHALK.
Use the CRUMBLY CHALK to draw on the Strangely Shaped Rock.
When you draw on the rock, some squirrels will briefly appear at the ring of mushrooms.
Take the TREE BARK the squirrels drop on the ground after they leave.
Place the CRUMBLY CHALK on the Flat Stone beside the blank that crosses the pond.
Pick up the Heavy Round Stone at the edge of the Flat Stone, then drop it on the CRUMBLY CHALK to crush it.
The resulting CHALK POWDER will be added to your inventory automatically.
Go back to the Forest Crossroads.
Forest Crossroads
You should have all the ingredients necessary to creating the Carrot Flame at this point, now you just need to identify the ingredients and combine them in the correct order.
The first lines of the poem, drawing a white symbol on a rock and grinding the white powder, have already been completed.
Now you have to add black powder. The gunpowder in the DECAYED FIRECRACKER should work nicely!
Use the remaining CHALK POWDER on the DECAYED FIRECRACKER to make a POWDERED MIXTURE. Put the POWDERED MIXTURE into the COLA CAN.
The next step requires tree skin, tree fruit, and a root in that order.
Add the TREE BARK (skin), THREE ACORNS (fruit), and CRISP CARROT (root) to the CAN WITH POWDER MIXTURE.
Use the CAN WITH POWDER MIXTURE, BARK, ACORNS, AND CARROT on the ground near the center of the cross roads to create a Mysterious Circle Of Powder With Can.
Lastly, light the circle with the MATCHBOOK to complete the recipe.
Take the POSTER at the upper left side of the trunk lid.
Tear open the uncovered rip at the corner of the lid and then take the revealed MAGIC WAND in the lining.
Use the MAGIC WAND on the Top Hat.
After speaking with the Marquis de Hoto, you'll be able to use the MAGIC COIN.
Access the coin in your inventory or press the middle mouse button or the [spacebar] key to activate it.
The coin allows you to see all of the objects you can interact with in the current scene, which are indicated by glowing sparkles.
Path Tree
Once you arrive with the Marquis de Hoto use the MAGIC COIN to reveal the giant frog in place of the strange statue.
Ask the Marquis about portal trees to travel to the next area.
Chapter 2
Explore Mousewood
Town Center
Talk to the Pudgy Animal With Umbrella standing at the right side of the area.
He'll invite you to visit him at the barrier later, which is found by walking up the ramp to the right of the town gate.
Next, speak with the Mouse With Backpack.
The mouse thinks he's being haunted by a ghost. Use your MAGIC COIN to reveal what's really following him.
In exchange for your services, the mouse will give you a MYSTERIOUS BOOK.
After a few moments, the Marquis will leave the Town Hall building to fetch you.
Town Hall
Talk to the Marquis about finding blue juice, delivering the invitations, and what you should do next. He and Jonathan will give you some advice to make your preparations which will be automatically added to your Journal.
You can access the Journal by opening your inventory and clicking the open book icon at the lower left side of the inventory window or by pressing the "Q" key.
You will receive an ANCIENT INVITATION TO THE TREE TOP FESTIVAL and MAGIC POSTAGE STAMP. The Marquis de Hoto will also teach you to use the Advice Seeker.
If you ever need an extra hint, you can open the inventory and click on the question mark icon at the right end of the magic wand.
Jonathan recommends speaking to Anja at the Cafe, so let's head there next. Exit the Town Hall to return to the Town Center, then click the front door of the left building to enter the Cafe.
Cafe
Ring the bell on top of the counter between the framed picture and the mole to call for Anja.
She'll give you a SUGAR-FREE LOLLIPOP and a VERY DRY CUPCAKE.
Click Anja after the skates over to the left counter or use the bell on that counter to summon her if she isn't there.
Tell her "I'm supposed to order blue juice and baked goods for the Treetop Festival!" She'll inform you that the supply of blue juice from the dwarves near the Coldwater Bridge has stopped. Now you'll have to find a way to contact them.
Remember the traveler at the Town Center who asked you to see him later at the barrier? Let's go visit him now. Exit the cafe, then climb up the ramp to the right of the gate.
Deliver the Leafboat to Spitzweg & Get Rid of the Greenhat
City Wall
Talk to the Pudgy Animal With Umbrella, who is named Spitzweg, standing at the left end of the wall.
He'll tell you he's waiting for a boat from the Hedgehog Brothers which is being delayed for some reason.
To find the Hedgehog Brothers, go back to the Town Center, follow the path Behind Town Hall, then continue through the tunnel to the Edge of Town.
Edge of Town
Talk to either the red or blue Hedgehog Brother to find out that the tools they need to construct the boat have been stolen by a greenhat.
Use your MAGIC COIN to reveal the leprechaun standing beside the brothers. He'll turn invisible to flee the scene, leaving behind a trail of bright green footprints that leads to a Narrow Tunnel Between Roots.
Pick up the Wooden Board beside the boat and the edge of the water to add the OLD FENCE PICKET to your inventory.
Follow the leprechaun and take the tunnel leading Behind Town Hall. He'll appear and then disappear again once you reach the area.
From there, go left to the Town Center, then climb up the Path Over Tree Root found between the advertisements and the Town Hall building to reach the Gardens.
Gardens
When you enter the scene, the leprechaun will reappear on top of the Flagstone With Cloverleaf and then run off again towards the Edge of Town.
Now you know the path of the three areas to find the greenhat: The Edge of Town, Behind Town Hall, and the Gardens.
Pick up the HARD RAKE leaning against the shrubbery by the sleeping Party Guest.
Place the HARD RAKE on the Flagstone With Cloverleaf to set your trap.
Chase the leprechaun in a circle through the Edge of Town and Behind Town Hall to make him go back to the Gardens.
When he arrives, he'll step on the rake on top of the flagstone and drop all the stolen tools.
Pick up the STOLEN TOOLS to add them and a NAIL to your inventory, then return to the Hedgehog Brothers at the Edge of Town.
Edge of Town
Looks like the greenhat is still hanging around! When you reach the Edge of Town, he'll escape through the small hole again.
Use the OLD FENCE PICKET on the Narrow Little Tunnel Between Roots to block his escape route.
Chase the leprechaun around town and then back to the Edge of Town. This time, he'll smack against the blocked tunnel and retreat to the Weird Pumpkin.
Click the Weird Pumpkin to reveal the secret Pumpkin Stash hidden within. The LEPRECHAUN COBALT and SILVER SUGAR SPOON will be automatically added to your inventory.
Give the STOLEN TOOLS to either of the Hedgehog Brothers. Now they can build the boat and send it down the stream to Spitzweg.
Return to the City Wall to find Spitzweg and the delivered leafboat.
City Wall
Speak with Spitzweg to learn he still needs a few more tasks completed before he can travel in his boat.
You'll need to find him a rudder and anchor for the leafboat and also get rid of the large catfish that is swimming by the barrier.
Give Spitzweg the SILVER SUGAR SPOON that you found at the greenhat's pumpkin stash to add it as a makeshift rudder to the leafboat. You'll have to do a bit more exploring to take care of the other two tasks, so we'll come back later.
Walk to the Town Center, then go out to the Mousewood Town Gate. From there, take the stony path on the right to travel to the Bridge.
Find a Way Across the Bridge
Bridge
Talk to the little mouse Humbert who is guarding the bridge.
Although he'll demand 300 leafbucks for you, after your conversation you can overhear him complaining about being very hungry. Perhaps there's another way to appease him.
Return to Mousewood and then go to the Edge of Town.
Edge of Town
Use the SUGAR-FREE LOLLIPOP on the Beehive With Honey at the right side of the stone bridge.
The HONEY LOLLIPOP will be returned to your inventory.
Go back to the Bridge outside of town.
Bridge
Give the HONEY LOLLIPOP to Humbert.
Though he says he'll let you cross just once, you can actually go back and forth across the bridge as many times as you like now.
Go over the bridge and into the dark patch in the wheat to travel to the Radio Station.
Rescue Ursula Owl
Radio Station
First distract the crow with the VERY DRY CUPCAKE you received from Anja at the Cafe.
Take the SHOELACE from the boot in the grass at the left side of the scene.
Use the SHOELACE on the Radio Antenna sticking out of the side of the destroyed radio to pull off the hook at the top of the antenna.
The hook and the shoelace will automatically combine in your inventory to create the SHARP GRAPPLING HOOK.
Use the SHARP GRAPPLING HOOK on the antenna to chase off the crow.
The mouse with a backpack will show up to reward you with an AD FOR VIOLIN LESSONS on a leaf.
Jerry will pick up URSULA and carry her in his inventory.
Return to the Town Hall in Mousewood.
Town Hall
Give Ursula the owl from your inventory to her uncle Conrad.
Now that she's safe and sound, you can return to the Radio Station to continue making preparations for the Treetop Festival.
Deliver the Mail for Plato
Radio Station
Talk to the Frog In Uniform standing beside the frozen bicycle.
Ask "Are you Plato the mailman?" and then inquire about his bicycle to learn that he won't be able to deliver the packages without a working bicycle.
Pick up Plato's Mail on the ground beside the bike to offer to deliver them for Plato.
The PACKAGE, PERFUMED LETTER, LETTER THAT APPEARS MAGICAL, and the HEAVY, WELL-PACKED PACKAGE will all be added to your inventory.
Head back to the Town Center of Mousewood to deliver the first item of mail.
Town Center
Speak to the Young Squirrel waiting by the golden horn to learn that she's awaiting a package from the Supersquirrel Boutique.
Inspect the PACKAGE in your inventory to find that it's the one addressed to Miss Edith Squirrel from the boutique.
Give the PACKAGE to the Young Squirrel. In exchange, she'll give you a LEAFBUCK.
Enter the Cafe.
Cafe
Talk to the mole seated at the table to learn he's Ludwig Burrower, the DJ for Swamp Radio 103.5.
Examine the PERFUMED LETTER to find it's addressed to the "charming voice of 103.5. How convenient!
Deliver the PERFUMED LETTER fan male to Ludwig. He'll give you a MUG WITH LOGO in return.
Take the OPEN ENVELOPE Ludwig leaves on the table next to his letter.
Exit the Cafe, then take the right path that leads Behind Town Hall.
Behind Town Hall
Inspect the HEAVY, WELL-PACKED PACKAGE in your inventory. This one's addressed to Mr. Churchmouse Senior.
Give the HEAVY, WELL-PACKED PACKAGE to Mr. Churchmouse who is standing in front of the large mushrooms.
Click Mr. Churchmouse to talk to him. After your conversation, he'll give you a red thread and tie it to the COIN WITH HOLE in your inventory, making it a COIN WITH HOLE ON THREAD.
Continue through the tunnel to the Edge of Town.
Edge of Town
Examine the last piece of mail in your inventory, the glowing LETTER THAT APPEARS MAGICAL to find it's addressed to Senor Molena.
Next to the similarly glowing Strange Door you'll see a mailbox with the name A. Molena. Put the LETTER THAT APPEARS MAGICAL inside.
Finally all the mail has been delivered! You'll still need to unfreeze Plato's bike, but you're missing a few things to do that so we'll have to worry about it later.
For now, let's get back to helping Spitzweg make the final preparations for his boat. Go back to the Treetrunk Cafe.
Help Spitzweg Complete the Leafboat & Get Rid of the Catfish
Cafe
On the Herbal Pharmacy side of the cafe you'll see a dispenser for Valerian Drops on the counter.
Click the dispenser to use your LEAFBUCK you received when you delivered the package to Edith Squirrel.
The CALMING VALERIAN DROPS will be added automatically to your inventory.
Return to the Town Center and then exit to the Town Gate.
Town Gate
Use the CALMING VALERIAN DROPS on the Large Catfish swimming in the stream to put it to sleep.
Now the barrier is unblocked and Spitzweg only needs an anchor for the leafboat.
Go back to the Town Center then go up to visit Spitzweg at the City Wall.
City Wall
Give the SHARP GRAPPLING HOOK you made when you got rid of the crow at the Radio Station to Spitzweg. He can use it as an anchor, the last thing he needed for his boat!
Travel Downstream in the boat to get to the river at the Bridge.
Get Past Humbert Again
Bridge
After you hop out of the leafboat, click little Humbert to speak to him.
Humbert will demand another toll to pass, but you won't be able to bribe him this time. It looks like only his babysitter Anja will be able to help you deal with the little megalomaniac this time.
Go to the Treetrunk Cafe back in Mousewood.
Treetrunk Cafe
Ring the bell on the cafe counter to call for Anja.
Ask Anja about Humbert to learn that she's trying to find an activity to keep him occupied.
Give her the AD FOR VIOLIN LESSONS that you received from the mouse with the backpack after you rescued Ursula.
Return to the Bridge outside of town.
Bridge
Anja and Humbert will be waiting for you when you arrive.
After a brief conversation, they'll leave the bridge together, allowing you to pass toll-free.
Get inside the Leaftboat and ride it downstream to arrive at the Radio Station.
Find a Way Into the Dwarf House
Radio Station
When you reach the Radio Station in Spitzweg's boat, he'll disembark and give you a bag of INDIAN WHITE PEPPER.
Hop back inside the Leafboat and continue downstream to ride it Behind the Dwarf House.
Behind the Dwarf House
Pick up the SHIMMERING SNAIL at the top of the Really Huge Beet to add it to your inventory.
Use the NAIL you found when you retrieved the Hedgehog Brother's stolen tools to cut a hole in the window.
Attach the SHIMMERING SNAIL to the window to pull off the cut piece of glass and enter the Hut of the Wood Dwarves.
Cure the Dwarf's Cold
Hut of the Wood Dwarves
Talk to Steinberg the dwarf to learn that only Anja Mouse might be able to cure his cold, but he refuses to ask her for help.
Take the Gate Key (which becomes the DWARF WICKET KEY in your inventory) hanging on the Pin Board beside the door at the left side of the house.
Go out the left door to the Front of the Dwarf House.
Front of the Dwarf House
Use the DWARF WICKET KEY to unlock the outer gate.
From now on you can use the front entrance when travelling to the dwarf house.
Go all the way back to the Cafe in Mousewood.
Cafe
Ring the bell on the counter to call for Anja.
When she arrives, tell her that "One of the dwarves is sick!"
The both of you will automatically travel to the Hut of the Wood Dwarves where she'll give you a DOCTOR'S PRESCRIPTION containing a list of ingredients needed to create a medicine for Steinberg's cold. Afterwards, you'll be returned to the cafe.
Inspect the DOCTOR'S PRESCRIPTION note in your inventory to view the list. You'll need: a yellow marsh marigold bud, a fish scale, and some pepper.
You should already have the INDIAN WHITE PEPPER that Spitzweg gave to you after he left the leafboat, so there are just two ingredients left to find.
Leave the town and travel to the Radio Station across the bridge.
Radio Station
Use the COIN WITH HOLE ON THREAD that you received as a promotional item from Mr. Churchmouse on the Blue Juice Vending Machine at the bottom left corner of the area.
Take the FULL BLUE JUICE KEG that is dispensed at the bottom of the machine. The BLUE JUICE STICKER will also be added to your inventory.
Pick the Marsh Marigold flowers that are to the left of the bicycle to take a BRIGHT YELLOW MARSH MARIGOLD BUD. That's the second ingredient for the recipe, just one item left to locate!
Follow the forest path on the right side of the brook to go to the upper level of the front of the dwarf house.
From there, continue down the lower path (next to the right arrow sign) to go to the Cliff.
Cliff
Activate your MAGIC COIN to reveal the scales on the Fish Statue.
Click the statue to add the SHINY FISH SCALE to your inventory. Now you've collected the third and final ingredient!
If you walk left from here taking the Trail Towards Mousewood, you'll arrive at the City Wall. Jerry will open the small gate that was locked before, allowing you to use the shortcut in the future.
Go to the Treetrunk Cafe.
Cafe
Ring the bell to bring Anja to the counter.
Ask her about the dwarf medicine to deliver the three ingredients (the INDIAN WHITE PEPPER, BRIGHT YELLOW MARSH MARIGOLD BUD, and SHINY FISH SCALE).
Anja will also instruct you to mix the medicine into something liquid before administering it to Steinberg.
Pour the the FULL BLUE JUICE KEG into the MUG WITH LOGO you received from Ludwig Burrower after you delivered his mail to make it a MUG WITH BLUE JUICE.
Add the COLD MEDICINE to the MUG WITH BLUE JUICE to complete the COLD MEDICINE IN BLUE JUICE.
Return to Steinberg inside the Hut of the Wood Dwarves.
Hut of the Wood Dwarves
If you try to give the mug to Steinberg, he'll complain that he's too weak to drink the medicine himself.
Transfer the COLD MEDICINE IN BLUE JUICE from the mug to the SILVER SUGAR SPOON in your inventory.
Give the spoon of medicine to Steinberg to cure him of his cold.
Now you'll have plenty of blue juice in time for the festival. All that's left to prepare are the invitations!
Before he goes to sleep, Steinberg will reveal a secret passage in tunnel 47 that works as a short cut straight to the Cafe in Mousewood.
Fix Plato's Bike & Send Out the Invitations
Cafe
Use the MUG WITH LOGO on the Coffee Maker at the right end of the cafe counter.
The MUG WITH HOT COFFEE will only stay hot until you change scenes four times when it becomes COLD COFFEE.
If the coffee goes cold, you can dump it in the Sink under the Coffee Maker back at the cafe, then refill it with hot coffee again.
Use the tunnel 47 under the blue juice barrel to return to the Hut of the Wood Dwarves. From there, go out the left door to the Front of the Dwarf House and then continue left to reach the Radio Station.
Radio Station
If you took the direct route through tunnel 47 from the Cafe, you should still have the MUG WITH HOT COFFEE in your inventory.
Pour the MUG WITH HOT COFFEE on to the frozen Mail Bicycle to thaw the ice.
Plato can finally use his bicycle again, so now you just need to prepare the invitations!
Place the ANCIENT INVITATION TO THE TREE TOP FESTIVAL into the EMPTY OPENED ENVELOPE (that you picked up off the table in the cafe after delivering the mole's mail).
Use the SHIMMERING SNAIL you found on the huge beet behind the dwarf house on the OLD INVITATION IN OPEN ENVELOPE to seal the letter.
Add the MAGIC POSTAGE STAMP to the OLD INVITATION IN SEALED ENVELOPE to create a GIANT PILE OF INVITATIONS.
Give the GIANT PILE OF INVITATIONS to Plato.
He'll take care of delivering all the invitations for you and also give you the CLICKER FROG.
You can use the CLICKER FROG to automatically travel to any location with a Golden Horn With Frog. Click the Mousewood Town Center horn to travel there, then go to the Town Hall.
Meet with the Marquis de Hoto
Town Hall
Talk to the Marquis de Hoto to let him know you've completed all the preparations for the Treetop Festival.
The Marquis will take you through a portal to the Hall of Apprentices.
Hall of Apprentices
Pick up two Half Arc pieces at Jerry's feet, which become the METAL PART and HALF A BALL RUN in your inventory.
Attach the two pieces to the end of the Machine that the Marquis is standing next to.
At the half way point of the glass tube you can see a metal ball stuck in the middle.
Use the LEPRECHAUN COBALT as a magnet to pull the METAL BALL out of the left end of the tube.
Place the METAL BALL into the round space where you placed the two metal parts on the Machine to complete the repairs.
Jerry will receive a set of magic cards and a GHOSTLY KEY.
After speaking with the ghostly figure, the Marquis will return you to the Town Hall. Exit the building and walk to the Edge of Town.
Visit the Magician of Mousewood
Edge of Town
Use the GHOSTLY KEY to unlock the Strange Door (where you delivered Plato's mail for Mr. Molena).
Enter the open door to go to the Train Station Windowsill.
Train Station Windowsill
Examine the Stone Stele at the edge of the windowsill.
The Magician's voice will explain to you that the picture that used to be on the Stone Stele burst into 32 drops of dew.
These dew drops are located on the plants all over Mousewood and its surrounding areas.
For more information and for the locations of all 32 drops, please check the 32 Dew Drops in the Collectibles section of the walkthrough.
Go through the hole in the broken window to enter the Magician's Giant Room.
Magician's Giant Room
Take the NAPKIN at the edge of the teacup full of milk.
Use the SHARP GRAPPLING HOOK on the stick wrapped in ivy to knock it over.
Walk across the stick to the inside of the Cuckoo Clock.
Touch the Metal Arm to find that the joint of the arm is rusted.
Collect the large drop of oil at the left side of the cuckoo clock mechanism with the NAPKIN.
Use the NAPKIN WITH OIL on the rusted Metal Arm to repair it.
Push the Metal arm into the hook at the top of the bellows.
Jerry will automatically pick up the KEY-SHAPED CLOCK PART that falls out.
Click the Metal Knock With Thin Slot to turn on the cuckoo clock and wake the giant Magician.
After speaking with Magician Molena, you will receive an EXCITING BOOK.
Click the book in your inventory to change the time from day to night or night to day.
He will also teach you how to play a game of Quartets.
Quartets is played a lot like the card game "Go Fish" however, instead of finding a pair of two cards, you must collect a quartet of four cards of the same suit.
To play, first select the suit of the card that appears at the center of the game at the start of your turn.
If you have multiple cards in your hand of a particular suit, you should pick that suit first.
Next, select the card you'd like to demand from the other player. The number of the card ranges from 1 to 4 and is indicated by the amount of symbols seen at the upper left corner of the card.
If the opposing player has the card you asked for, they must give it to you and you get to repeat your turn.
However, if they do not have the card you asked for, then you must draw a card from the deck and it is now your opponent's turn.
At the end of the game, whichever player has collected the most Quartets wins!
If you wish to quit the game early, click the X icon at the right side of the screen. Abandoning the game will count as a loss.
Once the game is over, the Magician will give you a STAR MAP and instruct you to use it near the Bridge.
For more, please check Part 2 of the Walkthrough!
Posted by: Trinn |
June 9, 2013 10:19 PM
|
June 9, 2013 10:19 PM
The Night of the Rabbit Walkthrough
(Part 2 - Chapters 3 & 4)
Chapter 3
Enter the First Portal
Bridge
Use the STAR MAP on the Starry Sky to find the locations of the four portal trees.
The one you need to visit is the southern tree, the old path tree you first used to come to Mousewood.
Go back to the Town Gate, then follow the brick road into the dark patch of grass that leads to the Forest Crossroads. From there, go up the wall to the Path Tree.
Once you arrive, the Magician and the Marquis will send you back to the Path Tree in your home world.
Wake the Sleeping Toad & Learn Your First Spell
Path Tree
Try talking to the Toad or using the CLICKER FROG to wake it up.
The snoozing toad will ignore you and say out loud that the "song of the woods" puts it to sleep.
You'll need to find a way to silence the animals of the forest if you want to wake the Toad.
Use the bag of INDIAN WHITE PEPPER on the Toad to make it sneeze and chase away all the nearby birds.
Go across the small bridge to the Forest Crossroads.
Forest Crossroads
At the top of the Lamppost is a Colorful Woodpecker. Try to communicate with it by hitting the Lamppost with the STICK from your inventory.
Select any of the "Pock" speech options to chase the bird away.
Walk left to follow the way Home.
Home
Look inside the Dry Rain Barrel to find a cricket. Jerry will kick the barrel to make it stop chirping.
Now that all the loudest creatures of the woods have been quieted, you can return to the sleeping toad at the Path Tree.
Path Tree (Home World)
Wake the Toad with the CLICKER FROG to speak with it.
Select any of the first three speech options.
Next, ask the Toad about "The streams of time?"
Then ask about "The whispering of the rocks?"
The Toad will teach you the Rockwhisper spell, then you will automatically return to the Path Tree back in the Mousewood world.
Path Tree (Mousewood)
The Marquis will be waiting for you when you arrive to teach you how to use the Rockwhisper spell.
Access your inventory and select the purple icon labeled "Rockwhisper" near the top of the magic wand.
Cast Rockwhisper on the Odd Crystal Rock to listen to it.
After the short cut scene, the Marquis will ask you to find the greenhat to take you through the second portal tree.
Go to the Gardens back in Mousewood
Find the Greenhat
Gardens
When you enter the scene, you'll hear the voice of someone singing.
Use the MAGIC COIN to reveal the leprechaun bathing in the tub of dishwater.
Take the Green Garments on the table by the sleeping party guest.
In exchange for his clothes, the leprechaun will agree to meet Jerry at the second portal tree behind the town hall at night. Jerry will hold on to the GREEN HAT.
Use the EXCITING BOOK to transition the time from day to night.
Talk to the Grumpy Garden Owner guarding the gate to the party.
First ask him "What are you celebrating?"
Next ask "Why are you standing out here all alone instead of joining in?"
Then ask "So there's no cake at your party?"
Next ask "Where did you get those great party lights?."
Lastly, ask "Where can I get a glownut?"
One of those glownuts would be perfect for lighting the tree where you need to meet with the greenhat. Maybe you can bribe the rabbit with the missing birthday cake, but for that you'll need to speak to Anja.
Use the EXCITING BOOK again to change the time back to day, then go to the Cafe.
Make a Cake for the Hares
Cafe
Ring the bell at the cafe counter to call for Anja.
Tell Anja "I've heard that the Hare family is waiting for a cake..."
Anja will give you a list of ingredients: a handful of sweet red berries, chocolate, some milk, and beet syrup."
Use the NAIL on the giant CHEESE WHEEL at the lower right corner of the room to break off an AROMATIC BUT HARD PIECE OF CHEESE.
Go to the Magician's Giant Room.
Magician's Giant Room
Use the EMPTY BLUE JUICE KEG on the cup of milk to fill a KEG OF MILK.
Pick up the chunk of chocolate beside the small, green sofa chair to receive both the CHOCOLATE and HEAT-RESISTANT TINFOIL.
Return to the Gardens.
Gardens
Click the Keg to remove the TAP.
Go back to the Cafe, then use the tunnel to travel to the Hut of the Wood Dwarves. From there, take the back door to go Behind the Dwarf House.
Behind the Dwarf House
Use the TAP on the Really Huge Beet to extract some of the beet syrup.
Fill the MUG WITH LOGO with beet syrup from the tap to make it a MUG WITH BEET SYRUP.
Go to the Radio Station.
Radio Station
Examine the Tasty Smelling Berries.
The guard won't let you past, but it sounds like some cheese fondue might be enough to bribe them.
Use the EXCITING BOOK to change the time to night.
Place the HEAT-RESISTANT TINFOIL on the Small Campfire to make a pot.
Put the AROMATIC BUT HARD PIECE OF CHEESE into the Pot On The Fire to melt it.
Add the INDIAN WHITE PEPPER to the Cheese Fondue to season it.
Take the SWEET RED BERRIES from the bush behind the guard.
Read the EXCITING BOOK again to change the time back to day, then go to the Cafe.
Cafe
Ring the bell at the cafe counter to call for Anja.
Give Anja the four ingredients you collected for the cake: the chunk of CHOCOLATE, the KEG OF MILK, the MUG WITH BEET SYRUP, and the handful of SWEET RED BERRIES.
Anja says the cake will be ready by tomorrow. Go out to the Town Center, then use the EXCITING BOOK twice to skip to the next day then return to the Cafe.
Pick up the TASTY-LOOKING CAKE on the cafe counter. Anja will come out again and ask you to deliver it to the Hares.
Go out to the Gardens.
Gardens (Day)
Give the CAKE to the Grumpy Garden Owner standing at the gate.
In exchange, he'll grant you an invitation to the Hare birthday parties.
Use the EXCITING BOOK to change the time to night again.
Light the Town Hall Portal Tree & Meet With the Greenhat
Gardens (Night)
When the time transitions to night, the Hare will invite you into the party where the now-alert Party Guest will give you a TROPHY.
Take a GLOWNUT from the barrel of Glowing Nuts next to Jonathan.
Now you have a source of light, but you still need to find a way to burst the Glownut at the town hall portal tree.
Read the EXCITING BOOK again to switch back to daytime, then go to the Cafe.
Cafe
Wait for the mouse with the backpack to leave, then place the KEY-SHAPED CLOCK PART over the Key hanging beside the back door.
If the mouse is in the room when you hang up the false key, he'll try to unlock the door with the wrong key and catch that it's a fake.
Search the Wastebasket by the Pharmacy counter to retrieve the KEY-SHAPED CLOCK PART if he throws it away, then try again while the mouse is gone.
Now you can use the back door to enter the Cafe at night.
Go to the Garden and use the EXCITING BOOK to change the time to night, then re-enter the Cafe through the unlocked door.
Talk to the woodsprite sitting at the table to receive Story 1, which is added to your bonus collection. Check the Bonus Stories in the Collectibles section of the walkthrough to learn where you can find all the bonus stories. (Coming Soon!)
Fill the MUG WITH LOGO at the Coffee Maker.
Add the CALMING VALERIAN DROPS to the MUG WITH HOT COFFEE to make it a HOT COFFEE WITH REVERSE EFFECT.
Remember that the coffee will stay hot until you change scenes four times.
Go back out to the Gardens, then climb up the ramp to take the shortcut to the Town Center. From there, go up to the City Wall.
City Wall
Give the HOT COFFEE WITH REVERSE EFFECT to the guard standing beside the cannon to put him to sleep.
Click the Cannon to aim it at the treetop over town.
Put the GLOWNUT inside the Cannon to fire it at the tree.
Go back to the area Behind Town Hall.
From there, enter the Town Hall building through the glowing window at the bottom of the wall.
Town Hall
Search the Papers on the upper floor to find a Quartets Card. Refer to the Quartets Cards in the Collectibles section of the walkthrough for the locations of the other cards. (Coming Soon!)
Climb the ladder to reach the Top of the Tower.
Top of the Tower
Click the Big Branch to hop to the leprechaun on the other side.
Talk to the Grim Man In Green to go through the second portal tree.
Learn Your Second Spell
Portal Tree
Speak with the Grim Man In Green and give him his GREEN HAT.
Make any three "wishes" to the leprechaun. After your conversation, he'll disappear again.
Enter the Tower through the door on its left side.
Tower
Take the OLD FLAG hanging over the window.
Use the MAGIC COIN to reveal the Grim Man In Green, then click him to talk again.
He'll say that he can't cast a rainbow while he's unhappy and that only something very special and shiny would make him happy.
But he doesn't want to just be given something special, he wants to find it for himself.
Go back out to the Portal Tree.
Portal Tree
Try to place the TROPHY on the tower windowsill.
The greenhat won't be interested at first because it's not shiny enough.
Use the OLD FLAG to clean up the dull goblet. The leprechaun will take it from the window and make a rainbow.
Return to the interior of the old Tower.
Tower
Touch the Rainbow to learn the Greengrow spell. Jerry will also pick up the Quartets card on the ground at the end of the rainbow.
The Greengrow spell can be used to summon rain and to help plants grow.
Go outside, then touch the Tree to return Behind Town Hall in Mousewood.
From there, walk to the Town Center. Make sure the time is night and use the EXCITING BOOK if you need to switch from day to night.
Perform Jokes for Mr. Churchmouse
Town Center
Click Mr. Churchmouse to speak with him.
First ask, "Your son is a magician too? I don't believe it!"
Mr. Churchmouse will request that you put the waternut in the glass for Junior.
Once you perform the trick, ask Mr. Churchmouse "Can I borrow your waternut?"
Next, select "You want jokes?! I'll improvise for you!"
After Jerry's performance tanks, Mr. Churchmouse will give him a PENCIL AND BLANK PAPER to write down better jokes when he finds them.
Go to the Gardens.
Gardens
Talk to Jonathan who's standing to the right of all the other party-goers to hear his three jokes.
He'll give you the first half of three jokes, but he's forgotten all the punchlines. You'll have to find someone else who can finish the jokes.
Go to the Radio Station.
Radio Station
Read the EXCITING BOOK to change the time to day.
Show the HALF JOKES Jerry has written down on the paper to Ludwig Burrower. He'll give you the the punchlines to make the COMPLETE JOKES.
Return to the Town Center.
Town Center
Use the EXCITING BOOK to change the time to night.
Give the COMPLETE JOKES to Mr. Churchmouse.
After your performance, he'll reward you with the ABSORBENT WATERNUT.
Go back to the Radio Station.
Find the Mysterious Fox
Radio Station
Read the EXCITING BOOK to change the time to day again.
Place the ABSORBENT WATERNUT in the Flooded Path, the stream to the right of the old boot.
Use your Greengrow spell on the waternut root in the stream to make it grow into a tree and soak up all the water.
With the water gone, you can now safely travel to and from the Swamp.
Use the EXCITING BOOK once again to change the time back to night, then go to the Bridge.
Bridge
Walk towards the grass on the right side of the scene to view a strange green flame glowing at the top of the field.
Use your Greengrow spell on the Field With Eerie Green Lights to summon a raincloud.
Follow the fox towards the Radio Station and then further into the Swamp.
Swamp
Use the Rockwhisper spell on the conspicuous Other Fox Statue to catch the disguised fox.
Jerry will follow her through the portal tree and to the fox's world.
Learn Your Third Spell
Portal Tree
When you arrive, Jerry will remark that he hears something chiming.
Look through the MAGIC COIN to reveal KITSUNE'S GOLDEN BELL in the bush between the Large Wooden Statue and the Fox Statue.
Use the Rockwhisper spell to listen to the fox statues lined up at the left side of the area.
Each statue will give a hint to where the gatekeeper is sleeping. Use their clues to find which fox statue belongs to the gatekeeper.
You can find the gatekeeper in the top row, at the second statue from the left.
Use the Rockwhisper spell on the gatekeeper's statue to wake it. It will move to the Large Wooden Statue beside the gate.
If you ring the large Iron Bell, the shaken gatekeeper will complain about the loud noise. You'll have to find a way to alert him without disturbing his heightened senses.
Ring KITSUNE'S GOLDEN BELL to speak to the gatekeeper. After your conversation, he'll open the gate for you.
Go through the open gate, after a brief cutscene you'll be returned to the Temple Gate to speak with Kitsune.
Ask her "This is probably a silly question, but what are you? Fox or human?"
Next, say "But I'm a human, not a fox!"
Kitsune will offer to teach you her spell if you can make a sad person happy.
Go through the opened gate and into the Bamboo Gardens.
Bamboo Gardens
Talk to the forlorn Poet to learn he's having difficulty finding inspiration, although he does seem to be focused on the pond he's sitting next to.
Use the CLICKER FROG on the pond to call out a frog.
Use the CLICKER FROG a second time on the Curious Frog to make it jump back into the pond, which will inspire the poet.
Return to the Portal Tree.
Portal Tree
Speak to Kitsune to learn the Fox's Cunning spell.
You can use the Fox's Cunning spell to cast an illusion, which will make a person see something that isn't actually real.
After you learn your spell, Kitsune will take you back to the Swamp.
When you arrive, the Wood Sprite will appear to give you Story 6. Continue left to the Radio Station.
Find a Flower for the Moths
Radio Station
Read the EXCITING BOOK to change the time to day.
Use the Greengrow spell on the Mushrooms above the snowy path to make them grow larger.
Climb the mushroom stairway to reach the top of the Cold Tree.
Cold Tree
Use the EXCITING BOOK to change the time back to night.
Click the Mysterious Moth to talk to her. She won't let you pass unless you have wings.
Cast the Fox's Cunning spell on the moth to create wings on Jerry's back.
Go through the tunnel on the right to enter the Temple of the Moths.
Temple of the Moths
Speak with the Moth Priestess With Egg sitting beside the Icy Tree.
Ask, "Do you have a portal I could use?" The priestess will tell you that she first needs a flower seed for the High Priestess.
Take the BUNDLE OF FLAX hanging on top of the fence at the left edge of the platform.
Leave the cold tree and go back to the old Path Tree in the forest.
Path Tree
If you visit this place at night, the spider will not be sitting in its web.
Click the Spiderweb to add the OLD SPIDERWEB to your inventory.
Travel to the area Behind the Dwarf House.
Behind the Dwarf House
Use the BUNDLE OF FLAX on the Really Huge Beet With Tap to make it a BUNDLE OF FLAX WITH SYRUP.
Combine the BUNDLE OF FLAX WITH SYRUP and the STICK to create the LONG BRUSH WITH SYRUP.
Read the EXCITING BOOK to change the time to day.
Use the LONG BRUSH WITH SYRUP on the Forked Branch hanging off the side of the cliff.
Tie the SHARP GRAPPLING HOOK to the base of the Forked Branch.
Pick up the rope at the end of the grappling hook and put it through the window of the dwarf house.
Go through the back door into the Hut of the Wood Dwarves.
Hut of the Wood Dwarves
Click the Switch on the wall beside the window to turn off the blue juice machine.
Pick up the Shoelace End (from the grappling hook outside) on the floor, then attach it to the temporarily stopped Large Flywheel.
Hit the Switch a second time to turn the machine back on.
The spinning flywheel will wind the rope and pull back the forked branch outside.
Go out the right door to return Behind the Dwarf House.
Behind the Dwarf House
Attach the OLD SPIDERWEB to the Sticky Restrained Forked Branch.
Open the back door again to re-enter the Hut of the Wood Dwarves.
When you enter the room, the shoelace will snap automatically. Go back outside again behind the house.
Use the LONG BRUSH WITH SYRUP on the dandelion seed trapped in the net to take the DANDELION PARACHUTE.
Read the EXCITING BOOK to change the time to night, then go back to the Temple of the Moths on top of the Cold Tree.
Temple of the Moths
Put the DANDELION PARACHUTE into the Clay Pot With Soil at the bottom of the Winged Statue.
Use the Greengrow spell on the Clay Pot With Seed to help the dandelion seed grow into a plant.
In exchange for the flower, Moth Priestess will open the portal to the next world for you.
Warning! If you have any Collectibles such as quartets cards, stickers, dew drops, or stories that you still need to find now is your last chance to do it! After travelling through this portal, the world will be changed when you return.
Enter the portal to travel to the frozen world.
Learn Your Fourth Spell
Portal Tree
Click the Snow-Covered Rock twice to dig away the snow and reveal the Head Of A Statue.
Use your Rockwhisper spell on the Head Of A Statue to speak with it.
First select the speech option, "You are the first statue that actually wants to talk to me."
Next ask, "What kind of a god are you, then?"
In the distance, a bolt of lightning will strike a tree in the distance.
Follow the path to the Icy Sea.
Icy Sea
Remove the tarp covering the boxes to the right of the scientist.
Take the EXPERIMENTAL STRING OF LIGHTS sticking out of the middle crate.
Take off Another Tarp underneath the broken radio to uncover the Battery Block.
Wrap the EXPERIMENTAL STIRNG OF LIGHTS around the withered tree.
Pick up the end of the Plug from the lights and attach it to the Battery Block.
Go back up to the Portal Tree.
Portal Tree
Cast the Rockwhisper spell to talk to the Head Of A Statue.
Ask "What kind of a god are you, then?" again to make it strike the tree by the Icy Sea with lightning.
This time, the bolt of lightning will power the battery and turn on the lights around the tree.
Return to the Icy Sea.
Icy Sea
Click the Polar Whale to learn your last spell, the Glimmer of Hope.
Go back to the Portal Tree. The portal should now be open, allowing you to travel through it to return to the Temple of the Moths near Mousewood.
Chapter 4
Discover What Happened
Temple of the Moths
After the brief cutscene when you arrive, the rose hips that were in your inventory will dry out, turning into Itching Powder.
Also, Jerry will pick up THE LEAF THE MARQUIS LEFT BEHIND.
Jerry will be automatically transported to the old Path Tree in his home world.
From there, go up to the Forest Crossroads, then walk left to go Home.
Home
Inspect the Faded Poster on the front door.
Use the Rockwhisper spell on the Weathered Statue to speak with it.
When Jerry goes to sit down, cast the Glimmer of Hope spell on him.
Return to the old Path Tree.
Path Tree
Click the center of the tree to reopen the portal.
Jerry will teleport to the Path Tree in the Mousewood world where Plato will be waiting for him.
Go to the Magician's Giant Room.
Capture the Three Lizards
Magician's Giant Room
Click the Shelf. The Magician in the bottle will teleport you across.
Take the LARGE MONOCLE sticking out of the case at the rear left side of the shelf.
Use the NAIL to tear open the corner of the Small Bag.
Pick up the CORN KERNEL that falls out of the bag.
Place the CORN KERNEL into the Sunlit Gap to the right of the Magician's bottle.
Put the LARGE MONOCLE in front of the Sunlit Gap to pop the kernel and free the Magician.
After speaking with the Magician, he will give you three BANISHING BOTTLES to capture the three lizards with.
Go to the Town Center.
Town Center
Talk to the Dubious Figure. It seems he's selling suspicious bottles full of vapor.
Put one BANISHING BOTTLE into the Bottle Rack behind the Dubious Figure.
Once the bottle is in place, Jerry will talk to the lizard and trick him into opening the Banishing Bottle.
Jerry will pick up the CAPTURED LIZARD on the ground.
Enter the Town Hall.
Town Hall
Click the Odd Figure to listen to him. He doesn't seem to think you own anything of value and he appears to be intoxicated.
Cast the Fox's Cunning spell on the Odd Figure to trick him into dealing with you.
Select the speech option "Sure, where do I sign?". After making a deal, the lizard will take a drink from his bottle.
Talk to him a second time and say, "Sure! A bird never flew on one wing. I want another contract!" to make him drink again
Speak with him a third time and select "The price for acorns and nuts just crashed...".
Now that the lizard is drunk, he'll believe your lie and flee into the lower left suit of armor.
Put the ITCHING POWDER into the armor to chase out the lizard.
Follow him out the window to the path Behind Town Hall.
Behind Town Hall
Look through your MAGIC COIN to reveal the camouflaged lizard.
Click the lizard to speak with him. It seems he's got a very dry throat and still isn't thinking straight.
Offer him a BANISHING BOTTLE to trick him into opening it. Jerry will pick up the second IMPRISONED LIZARD.
Next, travel to the Swamp.
Swamp
Talk to the Not Very Trustworthy Figure to see him draw fortunes. It appears that he only draws a white ball for good luck while everyone else receives a bad ball and a bad fortune.
Ask him, "Can you also tell your own fortune?" After drawing a white ball the lizard will do a celebratory dance, which will knock down the Blue Beet and chase the fly to the Pretty Flower.
Click the Blue Beet on the ground to add the DWARF ROOT PRICE to your inventory.
Speak with the lizard and ask him to tell his own fortune again. When he does a dance this time, it will leave the small door at the top of the Drum Hatch on his back open for a short time.
Quickly move to the Pretty Flower and touch it to shake the fly off the flower.
While the lizard is distracted by the fly, put the DWARF ROOT PRICE into the opened Drum Hatch to block it.
The lizard will give up on the fly and try to throw his white fortune ball into the Drum Hatch, which will bounce off the blue beet and fall to the ground.
Pick up the WHITE BALL from the ground, then inspect it in your inventory.
Replace the peeling note stuck to the WHITE BALL with the BLUE JUICE STICKER to make the MANIPULATED WHITE BALL.
Ask the lizard to tell his own fortune once again to knock the blue beet out of the drum hatch.
Next, ask him to tell your fortune. He'll leave the drum hatch open again temporarily while he's telling you about your bad luck.
Touch the Pretty Flower again to distract the lizard with the fly.
While he's distracted and the hatch is left open, drop the MANIPULATED WHITE BALL into the Drum Hatch.
Talk to the lizard again and ask him one last time to tell his own fortune.
This time, he'll draw the white ball with the fortune you altered.
Give the BANISHING BOTTLE to the Not Very Trustworthy Figure to trap the third and final INCARCERATED LIZARD.
Return to the Magician's Giant Room.
Magician's Giant Room
Give the CAPTURED LIZARD to the Old Magician to hand him all three lizards.
The Magician will transport you to a closet in order to choose your coat.
Choose Your Coat
Closet
Move all of the coats on the left side of the rack to the right side to reveal a light and a door handle.
Inspect the Light to discover a keyhole. Click the Keyhole to open the door.
Go out the door to the Bedroom.
Bedroom
Click the sliding door at the left side of the room to open it.
Lift the uncovered Corner Of The Rug in the open doorway to reveal a Storage Niche.
Open the Storage Niche and search through the Musty Cardboard Box inside.
Jerry will find his coat and return to the Magician's Giant House.
Magician's Giant Room
After speaking with the Magician, Jerry will remember his father and receive a Quartets Card.
The Magician will then transport you to the Hall of Apprentices.
Find the Clearing of the First Tree
Hall of Apprentices
Place the LEAF THE MARQUIS LEFT BEHIND on the Metal Frame at the bottom of the tree.
Jerry will take the UNCANNY SOUND CARRIER from the revealed cache, then teleport to the Forest Path near Mousewood.
Forest Path
Place the UNCANNY SOUND CARRIER inside the Hole In Big Old Tree Stump.
Examine the Big Old Tree Stump to find four carvings at its sides. You'll need to find four objects to place inside these carvings.
Go to the Path Tree in the forest outside of Mousewood.
Path Tree
Use the UNCANNY SOUND CARRIER on the Odd Crystal Statue beside the Old Path Tree.
Pick up the AMBER (1/4) that falls to the ground from the shattered crystal.
Next, go Behind Town Hall.
Behind Town Hall
Use the UNCANNY SOUND CARRIER on the Odd Crystal Statue beside the large rock wall.
Pick up the AMBER (2/4) that falls to the ground from the shattered crystal.
Go to the Swamp outside of town.
Swamp
Use the UNCANNY SOUND CARRIER on the Odd Crystal Statue at the bottom of the portal tree.
Pick up the AMBER (3/4) that falls to the ground from the shattered crystal.
Travel to the Temple of the Moths at the top of the Cold Tree.
Temple of the Moths
Use the UNCANNY SOUND CARRIER on the Odd Crystal Statue beside the Ghostly Shape of a bent nail.
Pick up the AMBER (4/4) that falls to the ground from the shattered crystal.
Return to the Forest Path.
Forest Path
Put the four AMBERS into the carvings at the bottom of the Big Old Tree Stump.
Once all the ambers are in place, the misshapen rock will create a room made of glass.
At the back of the glass room you'll see an Image Plate with a sliding tile puzzle that is impossible to solve.
Cast the Glimmmer of Hope spell on the Image Plate to break it which will also shut off the acid fountain.
Take the SILVER KEY in the base of the fountain.
Use the SILVER KEY to unlock the Mysterious Wooden Door and travel through the portal to the clearing of the first tree.
Escape the Mists
Crossroads
Cast the Advice Seeker spell to call the Magician for help.
The Magician will give you a piece of TREE BARK and instruct you to use it to cast a summoning spell like you did once before. He must mean the Carrot Flame!
After your conversation with the Magician, a Mysterious Raven will appear on the tree branch at the lower right corner. Click the raven to speak with it.
Ask, "What kind of place is this?" The raven will reveal a Stone Wheel at the top of the crossroads.
Click the Stone Wheel to turn it.
Windows into five different scenes will appear at the end of each path.
Click the Stone Wheel a second time to change the windows into five new scenes.
Remember the recipe to create a Carrot Flame? Reread the MYSTERIOUS MESSAGE in your inventory if you need a reminder:
"After drawing on rock a symbol all in white - grinding white to powder makes it right.
Then add black, in turn, the kind you should be loath burn.
Black and white as they combine, the inside of your vessel line.
Then three more things: tree skin, tree fruit, and lastly, but not least, a root.
At the crossroads, draw a circle with the powder mix obtained, put the vessel in the center of the powder ring thus gained.
Set the circle - bang! - on fire, the carrot flame leaps high and higher, and I will swallow it in haste to enjoy the lovely taste."
Use the INDIAN WHITE PEPPER to draw a symbol on the Stone With Marking.
Examine the Rusty Metal Door, Half Pried Open. Jerry will remark that it's the wood dwarves' locker and find that it's still locked.
Use the DRIED LONG BRUSH WITH SYRUP to open the locker and take the DWARF ROOT inside.
Search the NET WITH ACORNS from the window into the Town Hall scene at the top to take out THREE ACORNS.
Touch the Stone Wheel again to change the windows back to the five original scenes.
Inspect the Cannon to take out a handful of BLACK POWDER.
Combine the BLACK POWDER with the INDIAN WHITE PEPPER in your inventory to make a POWDER MIXTURE.
Put the POWDER MIXTURE, TREE BARK, THREE ACORNS, and DWARF ROOT in that specific order into the MUG WITH LOGO.
Use the MUD WITH POWDER MIXTURE, BARK, ACORN, AND ROOT on the center of the Crossroads marked by the three small, round stones to draw a Powder Circle With Mug on the ground.
Examine the Campfire in the far left scene to take out a burning piece of wood.
Use the burning wood on the Powder Circle With Mug to light it and cast the Carrot Flame.
If you click outside of the area, Jerry will burn his fingers. If that happens just pick up another charcoal from the Campfire.
Once the spell is complete, a masked magician will appear in the summoning circle.
Tell him, "I'm stuck here... all the paths are leading me in circles."
The magician will enchant your MAGIC COIN to show you the path.
To use it, select the MAGIC COIN then hold it over each path. The Coin will glow bright purple when it is in front of the correct path.
Follow the path highlighted by the coin four times to reach the First Tree.
Complete the Four Acts of "The Curse of Zaroff"
First Tree
Click The Great Zaroff to speak with him.
Select any speech option to be transported to the first act of Zaroff's play.
Act One
Click the Toad to make it jump in the air. When it lands, the Toad will knock down objects from the ceiling.
Pick up the Styrofoam Chestnuts that fall onto the stage to add the FAKE CHESTNUTS to your inventory.
Move aside the Scenery shaped like boulders to the left of the giant Toad to uncover the back wall.
Click the Light Switch on the wall. A light will turn on at the left side of the scene, revealing a Voice Tube.
Talk to the Voice Tube to call for a spotlight on the Toad. The giant toad will be temporarily blinded.
While the Toad is incapacitated, quickly put the FAKE CHESTNUTS into its nostrils to make it sneeze off the Zaroff posters.
Use the CLICKER FROG on Plato to dispell Zaroff's curse.
Jerry will be automatically transported to the next scene and the IRON NAIL is added to your inventory.
Act Two
Go to the torn curtain at the left side of the scenery, then use the IRON NAIL to cut open the Rift In Landscape.
Click the lever once to put it in the middle position. Press the Round Button to drop a sandbag onto the stage, whicih will pull off some of the fake grass on the floor.
Change the lever to the lower position and push the Round Button again to drop another sandbag, which will hit the ground and knock over the leprechaun.
Touch the leprechaun's hat to free him of Zaroff's curse.
Click the Tree With Nail to take the BRONZE NAIL. Jerry will be transported to the third scene automatically.
Act Three
Use the UNCANNY SOUND CARRIER on the large Bell to create a deafening sound that will make the large fox statue cover his ears.
While he's distracted, quickly use KITSUNE'S GOLDEN BELL on Kitsune.
After she's awakened, the sound carrier will shatter in your inventory, becoming a BROKEN SOUND CARRIER.
Ring KITSUNE'S GOLDEN BELL to Kitsune a second time to free her and start the final scene. The GOLD NAIL will also be added to your inventory
Act Four
Take the GIANT CANDY CANE stick up at the back of the floating ice.
Examine the Christmas Tree to remove the STRING OF LIGHTS.
Attach the STRING OF LIGHTS to the GIANT CANDY CANE to create a FESTIVE FISHING ROD.
Use the FESTIVE FISHING ROD on the Ocean, then click the Cable that Jerry fishes up two times to yank the fan all the way left to the ice.
Click the Machine to turn the fan towards the polar whale, which will free it from Zaroff's curse.
Remove the Nail beside the fan to take the SILVER NAIL and escape Zaroff's play.
Defeat Zaroff!
Zaroff will start the magic battle by casting a spell. For each spell he casts, use one of your own spells that matches in color.
If his spell is purple, counter it by casting your Rockwhisper spell on top of the symbol in the air.
If the spell is green, use the Greengrow spell.
If it's Red, use the Fox's Cunning Spell.
If Zaroff's spell is blue, use the Glimmer of Hope spell.
While the spell is in the air, quickly use one of the four nails from your inventory to draw the magic power out of the air.
Look through your MAGIC COIN to view what type of nail needs to be used on which particular spell.
The IRON NAIL should be used on a purple Rockwhisper spell cloud.
The SILVER NAIL is used on a green Greengrow spell cloud.
The BRONZE NAIL is used on the red Fox's Cunning spell cloud.
The GOLD NAIL is used on the blue Glimmer of Hope spell.
For each spell you absorb with the nail, Zaroff will lose one of his attacks. After you've absorbed all four of his spells, Zaroff will be defeated!
Posted by: Trinn |
June 15, 2013 7:41 AM
|
June 15, 2013 7:41 AM