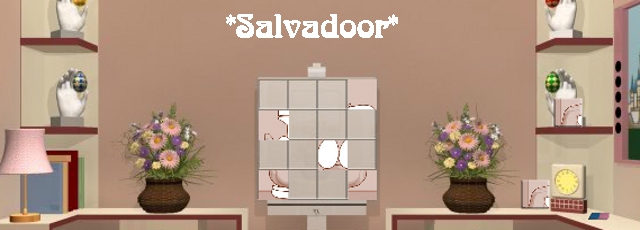
JayisGames.com is now available ad-free!
Jay is Games recommends Cheat Happens with 8,000+ games and 35,000+ trainers!

Salvadoor


  • Currently 4.7/5
  • 1
  • 2
  • 3
  • 4
  • 5
Rating: 4.7/5 (119 votes)
Comments (39) | Views (21,803)

Salvadoor

DoraSoothing pastel palette? Mellow soundtrack? "I have no clue how to solve this"? Awww yeah, it's TomaTea time with the escape game Salvadoor, which is... uh... gosh that's pink. Surrounded by painted eggs, flower arrangements, and puzzles aplenty, in order to get out of the locked door, you'll have to hunt for clues to decipher the combinations to TomaTea's customary code locks. Just click around to navigate and interact, watching the tip of your cursor for a glow when you're passing it over something you can click on, and click the little "i" on an item's portrait in your inventory to view it up close. Doing so can allow you to manipulate them into different things when possible, or even combine them with other things you're carrying.

TomaTea knows how to make a clever code-based puzzle, and Salvadoor definitely shows that off as you encounter a slew of locked drawers and their corresponding input panels. In most cases when you're stuck, it's probably because you haven't examined your inventory as much as you could, since the uncluttered area design doesn't offer much room for things to hide. Some of the puzzles are more intuitive and fun than others, though if you enjoy feeling incredibly smug whenever you finally realize what the developer intends for you to do, Salvadoor is here to pat you on the head. Low on stress and high on elegance, Salvadoor's peaceful design and clue-based puzzles will remind you why TomaTea is loved by so many.

Play Salvadoor

Walkthrough Guide


(Please allow page to fully load for spoiler tags to be functional.)

Dear JiG: I've clarified a few things in this version, so if you're adding a walkthrough link, please use this one!

Salvadoor Guide (updated)

General notes

This guide contains everything you should need to know to finish the game, but it is not a step-by-step walkthrough! Instead, it's designed to help you find particular items you might be missing, solve specific codes, etc.

I'll be referring to the four walls of the main room based on a significant item featured in each view. Going clockwise, there's the Ship Wall, the Window Wall, the Ladder Wall, and the Easel Wall.

Drawing tile locations

1. Ship Wall: In front of the model ship.

2. Ship Wall: On the middle shelf on the right.

3. Window Wall: On the end table.

4. Easel Wall: On the middle shelf on the right.

5. Easel Wall: Next to the clock.

6. Easel Wall: Inside the left cabinet.

7. Ship Wall: Inside the right cabinet.

8. Attic: On the small sofa.

9. Window Wall: Inside the end table drawer.

10. Ship Wall: Inside the left cabinet.

11. Easel Wall: Inside the right cabinet.

Finding and constructing items

Eraser

Easel Wall: Next to the clock.

Chess Pawn

Ship Wall: On the middle shelf on the right. (Only one pawn can be taken.)

Chess King

Easel Wall: Inside the left cabinet.

Attic Key

Ship Wall: Inside the right cabinet.

Yellow Pencil

Ship Wall: Inside the right cabinet.

Blue Pencil

Window Wall: Inside the end table drawer.

Red Pencil

Ship Wall: Inside the left cabinet.

Ship Key

Attic: In the upper left corner of Dali's most famous work, "The Persistence of Memory."

Binoculars

Easel Wall: Inside the right cabinet.

Screwdriver

This needs to be constructed from the CHESS KING and CHESS PAWN.

Take a closer look at the king's base.

The code to open the base will be given to you by the marionette's left hand after you solve the marionette puzzle on the Ship Wall.

Clockwise to 9, counterclockwise to 3, clockwise to 11, counterclockwise to 6. The king will transform into a screwdriver blade.

Now take a closer look at the pawn.

Remove its head to obtain a screwdriver handle.

Add the screwdriver blade to the handle to obtain a finished screwdriver.

Entering the attic

You'll need to remove the ladder from the Ladder Wall.

For that, you'll need the SCREWDRIVER.

Remove the screws and click the ladder to move it under the trap door.

Now use the ATTIC KEY on the lock to enter the attic.

Solving the codes and puzzles

Not all of the puzzles need to be solved in a specific order, but some do. This order will work, so if you don't know what to do next, try the section corresponding to the next puzzle you haven't solved.

Ship Wall: The marionette puzzle

The goal here is simply to make the picture on the left look like the picture on the right by clicking the ten buttons to move the marionette's body parts.

You should click the buttons the following numbers of times. Going down the right column (since moving the torso first will make it easier to see what you're doing): 3, 3, 0, 3, 1. Going down the left column: 3, 7, 3, 3, 2.

Easel Wall: Left cabinet

This code is displayed under the clock on the right side of this view.

It needs to be read from left to right (not top to bottom).

Circle, Circle, Square, Square, Square, Circle, Circle.

Ship Wall: Right cabinet

This code can be found on the back of one of the 11 drawing tiles.

Any tile will do: you don't need to have found them all to see the code!

The code should be read from the largest symbol to the smallest.

Square, Circle, Upward-pointing triangle, Downward-pointing triangle.

Attic: The round window

Solving this puzzle requires following the arrows to construct a path from the origin in the lower left corner to the target in the center.

Each tile you reach indicates the direction you need to move next, and the number of tiles you need to move in that direction.

So, for example, three right arrows means to move three tiles to the right of that tile.

You should eventually reach every tile that has an arrow on it, and no tile that does not. If that doesn't happen, you must have taken a wrong turn, so just hit the reset button and try again.

Once the window is open, you can look through it to see a lighthouse, but this won't be especially useful unless you have a particular item in your inventory.

Easel Wall: Right cabinet

This code is revealed by the colored butterflies on the masts of the ship in the middle of the Ship Wall.

You'll need to insert and turn the SHIP KEY to see the code.

The code is revealed by the order in which the butterflies stop moving.

Yellow, Blue, Red, Green. (For the color-blind: from left to right, click the buttons 3, 4, 2, and 1 times.)

Window Wall: End table

This code is given by the black-and-white mosaic portrait of Dali in the attic.

Upside-down faces correspond to dark squares, while right-side-up faces correspond to light squares.

Click to turn the middle square in the top row dark, followed by all of the squares in the bottom row.

Ship Wall: Left cabinet

This code can be found by using the ERASER on a particular Dali print in the attic.

It's the only print containing text: the drawing called "The City of Drawers."

ADOR

Easel Wall: The colored drawing

This is the big one! You'll need to have obtained the 11 DRAWING TILES, the YELLOW, BLUE, and RED PENCILS, and the BINOCULARS before you can solve this puzzle.

Place the 11 DRAWING TILES on the easel and swap tiles until the image is unscrambled.

As a guide to the image: a rook's head with a clock face should appear in the upper left, a butterfly in the upper right, and a pair of hands holding four eggs in the lower half.

Once the drawing is "prepared," you need to color it with the pencils. But which colors to use? Take a look around the room to find out.

General notes

In case you need it, there's a guide to color mixing sticking out of one of the books on the left side of this view.

For the color-blind, the pencils in your inventory are located in the following positions: yellow in the upper left, red in the upper right, blue in the lower left.

If you accidentally use the wrong color on an object, just use the ERASER.

Choosing the right colors

There's a rook of a different color on the top right shelf along the Ship Wall.

It's orange, or red plus yellow.

Take a look at the clock on the right end of the Easel Wall.

It's colored yellow.

You've already solved a code with four of the five butterflies on the ship's masts, but you haven't needed the fifth.

It's purple, or red plus blue.

Finally, what about the eggs? There are four colored eggs on the shelves, but which order to use?

I mentioned that you'd need to use the BINOCULARS. Where would be an appropriate place to do that?

Go up to the attic and look through the binoculars at the lighthouse. (You'll need to have opened the round window first.)

What the...everything's purple! Maybe the binoculars need to be modified a bit first?

Take a closer look at the binoculars and flip the red and blue filters out of the way. Ah, much better.

Asterisk, Star, Heart, Diamond.

Now it's just a matter of matching colors to shapes by referring to the eggs on the shelves, and coloring the eggs in that order.

Blue, Yellow, Red, Green (blue plus yellow).

Easel Wall: The clock

This is the final code, which is revealed only after you've finished coloring the drawing on the easel.

At this point, there should be only one item remaining in your inventory: the BINOCULARS. How might you use them again?

Flip the colored filters back into place and use the binoculars to look at the finished drawing.

V, I, X, I. And with that, you're out!

39 Comments

Patreon Crew SonicLover October 22, 2014 1:04 PM

Finished with no help! Here's a hint for anyone who got stuck the same place I did:

Just because you don't have all of a collectible doesn't mean you can't do anything with it.

Reply
Patreon Donator Reka October 22, 2014 1:26 PM replied to SonicLover

That was very helpful, SonicLover! Thanks!

This one definitely exercised my brain.

Reply

Well, I now have

3d binoculars, two pencils, and an eraser. I got the code from the lighthouse by flipping the binocs, but what now? None of the puzzles will let me solve, so I am obviously missing something.

Thanks.

Reply

The power of random clicking.

Figured it out by

having the eraser selected and clicking a certain item upstairs.

Reply
ninjamomma October 22, 2014 3:41 PM

Thanks, Sonic Lover!

Reply

Pow! Finished with no help! What gave me the most trouble was

coloring the picture. But double-checking the unused clues helped

Reply
merchantfan October 22, 2014 8:25 PM replied to neo1973

OK,

I've tried clicking everything up there with the eraser and it's not working. What am I missing?

Reply
callmerob October 22, 2014 8:28 PM

@merchantfan,

Don't deface a fine work of art! OK maybe you do...

Reply
merchantfan October 22, 2014 9:06 PM replied to callmerob

Alright

but how do I color? I can see which order I might do it in and how to make the colors I'm missing, but when I click the pencils to the canvas it does nothing.

Reply
lynnehammar927 October 23, 2014 12:56 AM

I should never play a Tomatea game without a walkthrough! Not only am I stuck, but the comment here about

a clue in the lighthouse using the binocs

means nothing to me. I'll come back later and try this one again!

Reply

merchantfan,

Are you sure you've solved the puzzle correctly?

Reply

Walkthrough on the way. :)

Reply

Salvadoor Walkthrough

General notes

This guide contains everything you should need to know to finish the game, but it is not a step-by-step walkthrough! Instead, it's designed to help you find particular items you might be missing, solve specific codes, etc.

I'll be referring to the four walls of the main room based on a significant item featured in each view. Going clockwise, there's the Ship Wall, the Window Wall, the Ladder Wall, and the Easel Wall.

Drawing tile locations

1. Ship Wall: In front of the model ship.

2. Ship Wall: On the middle shelf on the right.

3. Window Wall: On the end table.

4. Easel Wall: On the middle shelf on the right.

5. Easel Wall: Next to the clock.

6. Easel Wall: Inside the left cabinet.

7. Ship Wall: Inside the right cabinet.

8. Attic: On the small sofa.

9. Window Wall: Inside the end table drawer.

10. Ship Wall: Inside the left cabinet.

11. Easel Wall: Inside the right cabinet.

Finding and constructing items

Eraser

Easel Wall: Next to the clock.

Chess Pawn

Ship Wall: On the middle shelf on the right. (Only one pawn can be taken.)

Chess King

Easel Wall: Inside the left cabinet.

Attic Key

Ship Wall: Inside the right cabinet.

Yellow Pencil

Ship Wall: Inside the right cabinet.

Blue Pencil

Window Wall: Inside the end table drawer.

Red Pencil

Ship Wall: Inside the left cabinet.

Ship Key

Attic: In the upper left corner of Dali's most famous work, "The Persistence of Memory."

Binoculars

Easel Wall: Inside the right cabinet.

Screwdriver

This needs to be constructed from the CHESS KING and CHESS PAWN.

Take a closer look at the king's base.

The code to open the base will be given to you by the marionette's left hand after you solve the marionette puzzle on the Ship Wall.

Clockwise to 9, counterclockwise to 3, clockwise to 11, counterclockwise to 6. The king will transform into a screwdriver blade.

Now take a closer look at the pawn.

Remove its head to obtain a screwdriver handle.

Add the screwdriver blade to the handle to obtain a finished screwdriver.

Entering the attic

You'll need to remove the ladder from the Ladder Wall.

For that, you'll need the SCREWDRIVER.

Remove the screws and click the ladder to move it under the trap door.

Now use the ATTIC KEY on the lock to enter the attic.

Solving the codes and puzzles

Ship Wall: The marionette puzzle

The goal here is simply to make the picture on the left look like the picture on the right by clicking the ten buttons to move the marionette's body parts.

You should click the buttons the following numbers of times. Going down the right column (since moving the torso first will make it easier to see what you're doing): 3, 3, 0, 3, 1. Going down the left column: 3, 7, 3, 3, 2.

Ship Wall: Left cabinet

This code can be found by using the ERASER on a particular art print in the attic.

It's the only print containing text: the drawing called "The City of Drawers."

ADOR

Ship Wall: Right cabinet

This code can be found on the back of one of the 11 drawing tiles.

If you've expanded the tiles in your inventory but can't find the code, it means you haven't found enough tiles yet. Keep looking!

The code should be read from the largest symbol to the smallest.

Square, Circle, Upward-pointing triangle, Downward-pointing triangle.

Easel Wall: Left cabinet

This code is displayed under the clock on the right side of this view.

It needs to be read from left to right (not top to bottom).

Circle, Circle, Square, Square, Square, Circle, Circle.

Easel Wall: Right cabinet

This code is revealed by the colored butterflies on the masts of the ship in the middle of the Ship Wall.

You'll need to insert and turn the SHIP KEY to see the code.

The code is revealed by the order in which the butterflies stop moving.

Yellow, Blue, Red, Green. (For the color-blind: from left to right, click the buttons 3, 4, 2, and 1 times.)

Window Wall: End table

This code is given by the black-and-white mosaic portrait of Dali in the attic.

Upside-down faces correspond to dark squares, while right-side-up faces correspond to light squares.

Click to turn the middle square in the top row dark, followed by all of the squares in the bottom row.

Attic: The round window

Solving this puzzle requires following the arrows to construct a path from the origin in the lower left corner to the target in the center.

Each tile you reach indicates the direction you need to move next, and the number of tiles you need to move in that direction.

So, for example, three right arrows means to move three tiles to the right of that tile.

You should eventually reach every tile that has an arrow on it, and no tile that does not. If that doesn't happen, you must have taken a wrong turn, so just hit the reset button and try again.

Easel Wall: The colored drawing

This is the big one! You'll need to have obtained the 11 DRAWING TILES, the YELLOW, BLUE, and RED PENCILS, and the BINOCULARS before you can solve this puzzle.

Place the 11 DRAWING TILES on the easel and swap tiles until the image is unscrambled.

As a guide to the image: a rook's head with a clock face should appear in the upper left, a butterfly in the upper right, and a pair of hands holding four eggs in the lower half.

Once the drawing is "prepared," we need to color it with the pencils. But which colors to use? Take a look around the room to find out.

General notes

In case you need it, there's a guide to color mixing sticking out of one of the books on the left side of this view.

For the color-blind, the pencils in your inventory are located in the following positions: yellow in the upper left, red in the upper right, blue in the lower left.

If you accidentally use the wrong color on an object, just use the eraser.

Choosing the right colors

There's a rook of a different color on the top right shelf along the Ship Wall.

It's orange, or red plus yellow.

Take a look at the clock on the right end of the Easel Wall.

It's colored yellow.

You've already solved a code with four of the five butterflies on the ship's masts, but you haven't needed the fifth.

It's purple, or red plus blue.

Finally, what about the eggs? There are four colored eggs on the shelves, but which order to use?

I mentioned that you'd need to use the BINOCULARS. Where would be an appropriate place to do that?

Go up to the attic and look through the binoculars at the lighthouse.

What the...everything's purple! Maybe the binoculars need to be modified a bit first?

Take a closer look at the binoculars and flip the red and blue filters out of the way. Ah, much better.

Asterisk, Star, Heart, Diamond.

Now it's just a matter of matching colors to shapes by referring to the eggs on the shelves, and coloring the eggs in that order.

Blue, Yellow, Red, Green (blue plus yellow).

Easel Wall: The clock

This is the final code, which is revealed only after you've finished coloring the drawing on the easel.

At this point, there should be only one item remaining in your inventory: the BINOCULARS. How might you use them again?

Flip the colored filters back into place and use the binoculars to look at the finished drawing.

V, I, X, I. And with that, you're out!

Reply

I seem to be stuck a lot earlier than you guys were, since none of these clues help me.

I only have 6/11 puzzle pieces, and an eraser. I've assembled and used the screwdriver.

I've solved the dancing prince puzzle, unscrewed the ladder, and solved the L/R circle/square puzzle.

Apparently I don't know enough about anything to solve any more puzzles.

Reply

Catherine: from the sound of it, SonicLover's hint above should point you in the right direction.

Take a closer look at those puzzle pieces, because one of them will get you into one of the cabinets.

Reply
yaddab October 23, 2014 4:32 AM replied to merchantfan

@merchantfan

I could not colour with adblock running. I saved and reloaded.

This I found irritating, I had paused adblock to run the game, I don't mind that at all, I don't have any problem watching an ad to "pay" for a game. Then I kept getting a really annoying pop up one that covered the game so I paused it again. BUT with it paused, though I could play the game, I could not colour and complete the picture. THAT sucks.

Reply

I didnt block any ads or anything and I couldn't get the pencils to color either!

Reply

doesn't look like this walkthrough is working for me. I understand step by step walkthroughs so if someone has time could someone make a step by step walkthrough, because i'm very confused.

Reply

Dear JiG: I've clarified a few things in this version, so if you're adding a walkthrough link, please use this one!

Salvadoor Guide (updated)

General notes

This guide contains everything you should need to know to finish the game, but it is not a step-by-step walkthrough! Instead, it's designed to help you find particular items you might be missing, solve specific codes, etc.

I'll be referring to the four walls of the main room based on a significant item featured in each view. Going clockwise, there's the Ship Wall, the Window Wall, the Ladder Wall, and the Easel Wall.

Drawing tile locations

1. Ship Wall: In front of the model ship.

2. Ship Wall: On the middle shelf on the right.

3. Window Wall: On the end table.

4. Easel Wall: On the middle shelf on the right.

5. Easel Wall: Next to the clock.

6. Easel Wall: Inside the left cabinet.

7. Ship Wall: Inside the right cabinet.

8. Attic: On the small sofa.

9. Window Wall: Inside the end table drawer.

10. Ship Wall: Inside the left cabinet.

11. Easel Wall: Inside the right cabinet.

Finding and constructing items

Eraser

Easel Wall: Next to the clock.

Chess Pawn

Ship Wall: On the middle shelf on the right. (Only one pawn can be taken.)

Chess King

Easel Wall: Inside the left cabinet.

Attic Key

Ship Wall: Inside the right cabinet.

Yellow Pencil

Ship Wall: Inside the right cabinet.

Blue Pencil

Window Wall: Inside the end table drawer.

Red Pencil

Ship Wall: Inside the left cabinet.

Ship Key

Attic: In the upper left corner of Dali's most famous work, "The Persistence of Memory."

Binoculars

Easel Wall: Inside the right cabinet.

Screwdriver

This needs to be constructed from the CHESS KING and CHESS PAWN.

Take a closer look at the king's base.

The code to open the base will be given to you by the marionette's left hand after you solve the marionette puzzle on the Ship Wall.

Clockwise to 9, counterclockwise to 3, clockwise to 11, counterclockwise to 6. The king will transform into a screwdriver blade.

Now take a closer look at the pawn.

Remove its head to obtain a screwdriver handle.

Add the screwdriver blade to the handle to obtain a finished screwdriver.

Entering the attic

You'll need to remove the ladder from the Ladder Wall.

For that, you'll need the SCREWDRIVER.

Remove the screws and click the ladder to move it under the trap door.

Now use the ATTIC KEY on the lock to enter the attic.

Solving the codes and puzzles

Not all of the puzzles need to be solved in a specific order, but some do. This order will work, so if you don't know what to do next, try the section corresponding to the next puzzle you haven't solved.

Ship Wall: The marionette puzzle

The goal here is simply to make the picture on the left look like the picture on the right by clicking the ten buttons to move the marionette's body parts.

You should click the buttons the following numbers of times. Going down the right column (since moving the torso first will make it easier to see what you're doing): 3, 3, 0, 3, 1. Going down the left column: 3, 7, 3, 3, 2.

Easel Wall: Left cabinet

This code is displayed under the clock on the right side of this view.

It needs to be read from left to right (not top to bottom).

Circle, Circle, Square, Square, Square, Circle, Circle.

Ship Wall: Right cabinet

This code can be found on the back of one of the 11 drawing tiles.

Any tile will do: you don't need to have found them all to see the code!

The code should be read from the largest symbol to the smallest.

Square, Circle, Upward-pointing triangle, Downward-pointing triangle.

Attic: The round window

Solving this puzzle requires following the arrows to construct a path from the origin in the lower left corner to the target in the center.

Each tile you reach indicates the direction you need to move next, and the number of tiles you need to move in that direction.

So, for example, three right arrows means to move three tiles to the right of that tile.

You should eventually reach every tile that has an arrow on it, and no tile that does not. If that doesn't happen, you must have taken a wrong turn, so just hit the reset button and try again.

Once the window is open, you can look through it to see a lighthouse, but this won't be especially useful unless you have a particular item in your inventory.

Easel Wall: Right cabinet

This code is revealed by the colored butterflies on the masts of the ship in the middle of the Ship Wall.

You'll need to insert and turn the SHIP KEY to see the code.

The code is revealed by the order in which the butterflies stop moving.

Yellow, Blue, Red, Green. (For the color-blind: from left to right, click the buttons 3, 4, 2, and 1 times.)

Window Wall: End table

This code is given by the black-and-white mosaic portrait of Dali in the attic.

Upside-down faces correspond to dark squares, while right-side-up faces correspond to light squares.

Click to turn the middle square in the top row dark, followed by all of the squares in the bottom row.

Ship Wall: Left cabinet

This code can be found by using the ERASER on a particular Dali print in the attic.

It's the only print containing text: the drawing called "The City of Drawers."

ADOR

Easel Wall: The colored drawing

This is the big one! You'll need to have obtained the 11 DRAWING TILES, the YELLOW, BLUE, and RED PENCILS, and the BINOCULARS before you can solve this puzzle.

Place the 11 DRAWING TILES on the easel and swap tiles until the image is unscrambled.

As a guide to the image: a rook's head with a clock face should appear in the upper left, a butterfly in the upper right, and a pair of hands holding four eggs in the lower half.

Once the drawing is "prepared," you need to color it with the pencils. But which colors to use? Take a look around the room to find out.

General notes

In case you need it, there's a guide to color mixing sticking out of one of the books on the left side of this view.

For the color-blind, the pencils in your inventory are located in the following positions: yellow in the upper left, red in the upper right, blue in the lower left.

If you accidentally use the wrong color on an object, just use the ERASER.

Choosing the right colors

There's a rook of a different color on the top right shelf along the Ship Wall.

It's orange, or red plus yellow.

Take a look at the clock on the right end of the Easel Wall.

It's colored yellow.

You've already solved a code with four of the five butterflies on the ship's masts, but you haven't needed the fifth.

It's purple, or red plus blue.

Finally, what about the eggs? There are four colored eggs on the shelves, but which order to use?

I mentioned that you'd need to use the BINOCULARS. Where would be an appropriate place to do that?

Go up to the attic and look through the binoculars at the lighthouse. (You'll need to have opened the round window first.)

What the...everything's purple! Maybe the binoculars need to be modified a bit first?

Take a closer look at the binoculars and flip the red and blue filters out of the way. Ah, much better.

Asterisk, Star, Heart, Diamond.

Now it's just a matter of matching colors to shapes by referring to the eggs on the shelves, and coloring the eggs in that order.

Blue, Yellow, Red, Green (blue plus yellow).

Easel Wall: The clock

This is the final code, which is revealed only after you've finished coloring the drawing on the easel.

At this point, there should be only one item remaining in your inventory: the BINOCULARS. How might you use them again?

Flip the colored filters back into place and use the binoculars to look at the finished drawing.

V, I, X, I. And with that, you're out!

Reply

Hi Paul! Sorry to hear my walkthrough isn't working for you. Hopefully someone can help out with a step-by-step one. I probably won't be doing any more of those, mainly because I really want to encourage folks to explore a bit before falling back on the walkthrough.

If you're stuck at a particular point, let me know what's in your inventory and I can probably help you figure out what to do next. Alternatively, try just selecting the first puzzle you haven't yet solved under "Solving the codes and puzzles." There are step-by-step instructions for each puzzle that should get you back on track. (If you need any additional items for a particular puzzle, the instructions will let you know, and the "Finding and constructing items" section will tell you where they can be found.)

Reply
https://www.google.com/accounts/o8/id?id=AItOawnrLT_DgOiK7Leoj0eRHY69GNEFT33XtTU October 23, 2014 1:32 PM

Might have been a good idea to add images of the visual puzzles.

Also mention WHERE to use that final code, I was scratching my head for ages over that!

Reply

Good point, I'll consider adding screenshots for things like the picture-tile puzzle next time.

I mentioned in the revised walkthrough that the puzzles were listed in (one possible) order of solvability, so hopefully that will help folks figure out where the final code needs to go.

Reply

I've now determined my problem:

I am unable to unscrew the ladder for some reason. Click on the screwdriver, click on the screws, nothing happens. How do you make this occur?

Reply

Augh power of posting. Never mind, I got it.

Reply

Most of us lowly mortals are not able to post images on JIG.

Reply

I wonder if the Latin meaning to one of the codes was intentional.

"I conquered" indeed!

Reply
Patreon VIP abfdrumz October 23, 2014 6:59 PM replied to CptnSuz

Well, more like

"I lived" ("I conquered" would be "vici"). But either way, it kinda works. :)

Reply
https://www.google.com/accounts/o8/id?id=AItOawm7LpwMklbXvf7ycsrBfuP75zt-rP7QDFw October 23, 2014 7:24 PM

Thanks for the walkthrough. I never would have made it with out all the help.

Reply

it's ok abf. some of the ones you have done lately were not bad but when it jumps all over the place it confuses me is all. don't mean to be a complainer. hehe :)

Reply

Hint please... All I have is an eraser, and I can't find a thing to do with it.

Reply
Patreon VIP abfdrumz October 24, 2014 11:58 AM replied to MrsRavoon

@MrsRavoon: it's not time for the eraser yet, but

take a look at the clock for a clue. Also,

assuming you've also collected at least a few of the drawing tiles by now, make sure you've given them a closer look.

Reply
Snarfhead October 24, 2014 1:38 PM

Man, do I love TomaTea escapes! Made it out with no help, but I could've poked around that room for a couple of hours and just enjoyed the music and clue seeking.

Reply
Snarfhead October 24, 2014 1:39 PM

Meant to say, "Thanks JIG for putting it up!"

Reply

This was really fun! I got stuck at the exact place the first comment predicted, and that little hint was all I needed. This was a little bit on the hard side, but I loved it.

Reply

Coloring the drawing worked for me only in Explorer. Could not get it to work in Chrome with or without ads.

Reply
Carny Asada October 25, 2014 7:39 PM

Oh, groan! The final code

spells "I lived" in Latin

Reply

is anyone still working on a step by step?

Reply
Patreon Donator Reka October 30, 2014 2:37 AM replied to Paul

Just for you, Paul. :)

Step-by-step Walkthrough

Ship view

  • Examine the eggs in the left corner; note their colors and patterns.

    The red egg has hearts; the green egg has diamonds.

  • Collect the first puzzle piece from next to the green egg. Examine the back of it and note the shapes.

    From the outside in: square, circle, upward-pointing triangle, downward-pointing triangle.

  • Look at the clock in the left corner. Get the puzzle piece and the eraser. Note the pattern of circles and squares.

    From left to right (ignoring top row vs. bottom row): circle, circle, square, square, square, circle, circle.

  • Compare the two pictures. Use the buttons to make the left prince match the right prince.

    Check the other walkthrough if you need exact instructions.

    After you get it right, click the left picture and observe the red arm.

    The arm stops and changes directions at 9:00, 3:00, 11:00, and 6:00.

  • Get the puzzle piece from next to the ship. Note the butterflies and the hole for a wind-up key.

  • Look at the chess figures on the shelves in the right corner. Get the puzzle piece and a chess pawn from the lower shelf. Note that the "white" rook is actually orange.

  • Examine the chess pawn and remove its head to reveal a square hole.

  • The left cabinet needs a four-letter clue which we haven't seen yet.

  • The right cabinet needs a four-shape clue which we have seen.

    It's the code on the back of the first puzzle piece.

    Get the puzzle piece, the key, and the yellow pencil.

Easel view

  • Look at the eggs in the left corner.

    The yellow egg has stars; the blue egg has flowers.

  • Examine the paper that's peeking out of the books.

    It has the color mixing rules: blue and yellow make green, etc.

  • The left cabinet needs a clue involving squares and circles, which we've already seen.

    The clue is on the bottom of the clock.

    right, right, left, left, left, right, right.

    Get the puzzle piece and the chess king.

  • Look at the bottom of the chess king. We've seen this clue already.

    It was the rotating arm of the prince in the left picture.

    Turn clockwise to 9, counter-clockwise to 3, clockwise to 11, and counter-clockwise to 6.

    The chess king turns into a screwdriver blade, but with a very weird handle.

    Look at what used to be the chess pawn and add the screwdriver blade to make a full screwdriver.

  • The right cabinet needs a four-color clue which we haven't seen yet.

Ladder view

  • The ladder is screwed to the wall; good thing we just constructed a screwdriver, ain't it?

  • Once the ladder is unscrewed, climb it and open the padlock with the key.

Attic view

  • Get the puzzle piece on the left.

  • Look at the melting clocks picture on the left wall; find the part that doesn't belong.

    There's a wind-up key coming out of the tree on the left.

  • Look at the picture on the top right. Note the pattern of upside-down vs. right-side-up.

    RUR
    RRR
    UUU

  • Look at the picture on the bottom right. Use the eraser on the caption.

    "Salvador Dali" minus "Salv" and "Dali" equals "ador".

  • Click the round door. Starting in the lower left corner, click the arrows as indicated.

    Here are the first few steps:

    1. First column, last row

    2. First column, 4th row

    3. 4th column, 4th row

    4. 4th column, last row

    5. 2nd column, last row

    If you do it right, you'll end up clicking every square with arrows on it (and no blank squares), and the middle square will be last.

Window view

  • Get the puzzle piece from next to the flowers.

  • The small drawer needs a 3x3 button clue.

    Remember the Dali portraits in the attic? Upside-down equals dark, right-side-up equals light.

    Get the blue pencil and the puzzle piece.

Ship view, take two

  • Open the left cabinet using the clue from the attic.

    Remember the picture you used the eraser on?

    Get the puzzle piece and the red pencil.

  • Use the wind-up key on the ship and observe the butterflies.

    The purple butterfly (top of the main mast) doesn't move at all. The others stop moving in turn: first the yellow (top of the mizzenmast), then the blue (bottom of the mizzenmast), then the red (bottom of the foremast), and lastly the green (top of the foremast).

Easel view part two

  • Open the right cabinet using the clue from the ship.

    Yellow, blue, red, green, or 3 clicks, 4 clicks, 2 clicks, 1 click.

    Get the puzzle piece and the binoculars.

  • Put the puzzle pieces on the easel and solve the puzzle.

    The tower with a clock on it goes on the top left. The butterfly goes on the top right. The four eggs held by two hands take up the bottom half of the picture.

    If you do it right, you'll briefly see a message that says "prepared!"

Back to the futur[ahem, sorry] attic

Look at the binoculars and flip open the color filters. Use the binoculars to look at the lighthouse and note the designs.

Flower, star, heart, diamond.

Easel part three

Time for some coloring!

The tower hint is the mismatched chess rook: orange (yellow plus red, which is the top two pencils). The clock itself is yellow (top left pencil), like the clock in the corner of the room. The butterfly hint is the one that didn't move when you wound the key: purple (blue plus red). For the eggs, combine the lighthouse clue with the eggs in the room: blue (bottom pencil), yellow, red, green (yellow plus blue). If you mess up, just use the eraser.

When you're done, flip the color filters back on the binoculars and look at the eggs in the picture.

V I X I

Getting out

There's one item we haven't used yet.

Remember the clock? Click the button on its bottom right, then input the code you just saw.

Get the key and use it to open the door.

Reply
JetSetVegas October 30, 2014 6:30 PM

Nice surprise! Tomatea has added a little Tesshi-e into their game. This was cool. I got stumped because Tomatea added a few elements I wasn't used to, but that's my fault, not theirs. Keep upping your game Tomatea, it's a welcome change.

Reply

^ Scroll Up | Homepage >

Leave a comment [top of page]

Please consider creating a Casual Gameplay account if you're a regular visitor here, as it will allow us to create an even better experience for you. Sign-up here!
  • PLEASE UNDERSTAND SITE POLICIES BEFORE POSTING COMMENTS
  • You may use limited HTML tags for style:
    (a href, b, br/, strong, em, ul, ol, li, code, spoiler)
    HTML tags begin with a less-than sign: < and end with a greater-than sign: >. Always. No exceptions.
  • To post spoilers, please use spoiler tags: <spoiler> example </spoiler>
    If you need help understanding spoiler tags, read the spoiler help.
  • Please Preview your comment before posting, especially when using spoilers!
  • No link dropping, no domains as names; do not spam, and do not advertise! (rel="nofollow" in use)
chrpa Jayisgames needs your help to continue providing quality content. Click for details Hi! Weekday Escape and Weekday Puzzle are here! First we have two new cans from tomoLaSiDo and then two small rooms from isotronic. That's all for this...  ...
6,365 Views
0 Comments
chrpa Jayisgames needs your help to continue providing quality content. Click for details Welcome to Mobile Monday! We have another beautiful game from Nicolet and it's a winter game as it should be. Tasuku Yahiro have released another of their...  ...
6,161 Views
2 Comments
chrpa Jayisgames needs your help to continue providing quality content. Click for details We've got a new game from Rinnogogo's magical world and this time it really is magical.. Not only do you get to meet cute animals that express themselves...  ...
chrpa Jayisgames needs your help to continue providing quality content. Click for details After a few weeks of patient waiting, we have been rewarded - the new game from Ichima Coffeedo is here. We got a wonderful new game - it's...  ...

HELP Jayisgames.com

Recent Comments


Display 5 more comments
Limit to the last 5 comments

Game of the week


Dark Romance: Vampire Origins Collector's Edition

Your Favorite Games edit

add
Save links to your favorite games here. Use the Favorites editor.

Monthly Archives