
![]()
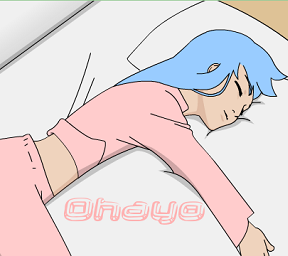 "Good mornin', good mornin'! It's great to stay up late. Good mornin', good mornin' to you." There are many great ways to wake up in the morning, to song, to sunshine, to birds singing, or to a bed that propels you through a closed window. Okay, maybe that last one isn't perhaps the best way to greet the morning, but it is a rather fabulous way to begin the latest room escape from the strange mind of Detarou, Ohayo.
Yes, Detarou greets the morning in some strange, strange ways, but that's to be expected. Ohayo is the usual surreal mind trip through a house filled with odd characters and strange puzzles, sprinkled with a hint of the bizarre. Pretty much like every morning in Detarou-world. Navigation bars, a changing cursor, an easy to access inventory (one click to use an item, two clicks to examine it), and a nifty save feature are all there to enhance the journey through the unknown. Just watch out for Pandas. Seriously.
If you've ever played any of Detarou's games then you know what to expect: multiple ways to escape, a few ways to die, and a plethora of eccentric characters and situations to explore as you once again try to escape a nightmarish house that only a particular kind of mind can envision. Greet the day (whatever time it actually is) with a hearty dose of Ohayo, and a pretty unique wake-up call.
Game not loading? Try this alternate link.


Walkthrough Guide
(Please allow page to fully load for spoiler tags to be functional.)
Ohayo Walkthrough
General Information
There are four different endings to the game, two in which you die, two in which you escape. The walkthrough will cover all four.
There are some color-based puzzles in the game, so the walkthrough will contain directions for the colorblind where possible.
A single click on an inventory item primes it for use, a double click pulls up the object in close up.
Remember to examine everything you pick up, objects may hide other clues.
Never trust a panda.
Good luck!
Exploration
You begin the game facing a corner of the room with a bed. The bed contains a girl, sleeping.
Click on the bed for a close up.
Awww, she's sleeping peacefully. Let's change that. Back up.
Click underneath the bed. Ooops, I guess she's awake now.
Click on the reclining Buddha where the bed was for a close up.
Take the note from the reclining Buddha. Note the arrow line and the symbols.
Click on the note to flip it over. Another clue!
Whatever that thing is, it doesn't want batteries. Looks like it wants one of those rechargeable battery packs instead.
Close down the note and back up.
Click on the bed to bring it back down, then turn right.
You are now facing a broken window where sleeping beauty presumably went through. Hope she's okay.
Below the window is a low cabinet. The right set of sliding doors are unlocked, but there's nothing in there. The left set of doors has a 3 digit code lock.
Turn right.
You are facing a wall that has three ropes hanging in front of three symbols. To the left of the symbols is a corridor. Click on the corridor to go through.
Now you are facing a short hall with three doors, one on the left, one in front, and one on the right.
Click on the left door to enter the room. Inside is a panda bear in a trench coat. That can't be good...
If you click on the panda he will open his coat, revealing a red arrow pointing upwards. Note that there is now a navigation bar at the top of the screen.
DO NOT CLICK ON THE UPWARD NAVIGATION BAR! If you do, you will die.
Back away slowly from the crazy panda.
If you click on the door in front of you, you will see that it is locked. Looks like we need a silver key.
If you click on the right door you will find a nice corner office with a guy at a desk. Note the diamond with the number 3 on the window.
You can click on the guy for a close up, and you can click on his face, but nothing happens.
Note that there is something lying on the floor in front of the desk. Click on it and you will find 5 little dolls.
Back up three times, or until you are back looking at the wall with the three ropes and symbols.
Click on the symbol wall for a close up.
The symbols look like an eye, lips, and a nose.
Pull the ropes to the left of each symbol. The eye will show the letter g when you pull the rope, the lips will show a capital E, and the nose will show a capital L.
Back up and turn right.
Yeargh! Now you can see a seated man with a spider crab on his head. Note the stand to the left of the man with the Japanese lettering on it.
Click on the stand for a close up and click again to flip over the paper. Now you will see a clue that is a combination of the lips, nose, and eye. Note the lines to the side of the symbols.
Click on the crab man for a close up and you will get a view of a white panel. Click on the panel for a truly gruesome sight.
Back up twice and turn right.
You are now facing a door with a gold lock. This may be the door out.
Turn right.
You are now facing a guy in a polar bear suit and another dude in a box.
Click on the polar bear guy's face for a close up.
Nice Kabuki makeup job there. Note the batteries shoved up his nose. Take the batteries and back up.
The box the dude is in is sporting the symbol of a spade and the number 3. It is sitting on top of a small dresser.
Click on the dresser for a close up.
The bottom drawer is unlocked and empty. The top drawer needs a 4 digit code.
Back up and turn right.
In the corner is an old man in a baby's onesie. Looks like he wants something.
Turn right.
And it just gets weirder and weirder...
On top of this L-shaped cabinet are a couple of guys dancing. You can click on them for a close up, but it isn't very enlightening.
The top left of the cabinet has a door that has a strange lock involving 5 flip switches of various colors and a button below.
Below that door are two drawers. Click on the drawers for a close up.
The top drawer has a symbol of a club with the number 7 on it.
The bottom drawer has some pink clips and a picture of a corner office. Take the clips and back up.
Below the drawers is another door with a simple key lock.
In the middle of the lower part of the cabinet is another door, this one with eight sliders and a button surrounded by an odd symbol.
In the right lower part of the cabinet is another door, this one with a circular lock with colored buttons.
Turn right.
You should now be back at the bed.
Time to solve some puzzles!
The Sliding Door 3 Digit Lock
Turn right to face the broken window and the low cabinet.
The left sliding doors of the cabinet have a three digit code. We have seen all of the clues to crack this one.
The clues are the paper to the left of the crab guy, and the three symbols with ropes on the wall.
Remember the eye showed a lower case g, the lips showed an upper case E, and the nose showed an upper case L.
Remember on the paper the lines to the left of the symbols? Those lines are usually used when indicating the bottom of something, to distinguish between two letters or numbers that can be different depending upon where the bottom is, like the numbers 6 and 9.
The lines indicate that the symbols should be upside down.
Remember the letters for the symbols?
Turning the g for the eye upside down makes it look like a 6.
Turning the L for the nose upside down makes it look like a 7.
Turning the E for the lips upside down makes it look like a 3.
Since the lips were first on the paper, then the first number is a 3. The nose was next, which is the 7. The eye was last, which is the 6.
Enter the code 376 into the three digit code lock, then push the button beneath.
You should hear a sound if you enter the code correctly.
Click on the left slider door to open it and you will find a bust with a binky (pacifier).
Take the pacifier and back up.
Now what?
The Very Old Baby
Remember the old guy in the onesie?
Turn left three times to face the old guy in the corner.
If he wants to be a baby, let's humor him.
Click on the old guy for a close up, then put the binky in his mouth.
Hey, the old guy is so happy he's doing a dance!
Watch the dance closely, it is a clue.
Back up.
The Slider Lock Cabinet Door
Turn right to face the L shaped cabinet.
Click on the lower middle door for a close up.
This is the lock that involves eight sliders and a button. Does that symbol around the button look familiar?
It looks like the symbol on the note we picked up earlier.
Look at the note again. Note the arrow line goes down the left side of the symbol, then up the right side.
Look at the sliders. Have we seen something in the room that involves eight left or right movements?
The old baby's dance is eight movements to the left and right. To be precise, he moves right, right, left, right, left, left, right, left.
Now to apply it to the lock. On the left side, go from top to bottom and set the sliders right, right, left, right.
On the right side, go from bottom to top and set the sliders left, left, right, left.
The trick is to go down on the left side, and up on the right.
Once you've set the sliders click on the button below.
The button will turn green and you will hear a noise. Click on the door handle to open it.
Inside you will find a digital clock. Click on the side of the clock to turn it over.
Looks like it needs batteries.
But wait! Remember the back of the note?
DO NOT INSERT BATTERIES INTO THE CLOCK!
We need to find a rechargeable battery pack.
Close down the clock and back up.
The Flip Switch/Color Lock
Remember the drawer where we found the pink clips?
That drawer also had a picture of the corner office.
Let's go see if that guy at the desk can help.
Turn right three times until you are facing the wall with the ropes/symbols.
Click on the corridor to enter it.
Click on the right door to enter the corner office.
Click on the guy behind the desk for a close up.
We can click on his face, so let's try putting something on his face.
How about the clips?
Put the clips on the guy's face.
Click on the clips to pull the strings.
Click again to remove the clips.
Back up.
Note the positions of the little dolls on the floor have changed.
Click on the dolls for a close up and note which ones are now bent and which ones are still straight.
Back up three times until you see the wall with the ropes/symbols.
Turn left three times to face the L shaped cabinet.
Click on the upper left door, the one with the flip switches.
We now have the clue to open this door.
The clue is the dolls in the corner office.
The ones that were upright indicate a down switch, the ones laying flat indicate an up switch.
That would make the pattern down, up, up, down, down.
Set the switches to match the dolls.
Once the switches are set click on the button below.
The button will change color and you will hear a sound indicating that it is now unlocked.
Click on the handle to open the door and you will see a panel with some symbols and numbers.
There is a spade with the number 1, a club with the number 1, a heart, an equals sign, and a diamond with the number 4.
Note the colored circles above, black, red, and white.
Now what?
The 4 Digit Dresser Lock
We now have all we need to solve that 4 digit lock on the dresser drawer underneath the guy in a box.
Back up and turn left twice to face the polar bear dude.
Click on the dresser drawer with the code lock.
The clues are scattered around the room, in the note, and in the newly opened switch door.
Remember the note? It had a heart, a club with a plus sign, a diamond with a plus sign, and a spade with a minus sign.
Around the room we found a diamond with a 3, a spade with a 3, and a club with a 7.
Inside the door we found a spade with a 1, a club with a 1, and a diamond with a 4.
From here it is simple math. The first club we found had a 7, the note indicates a +, and the second club had a 1, so 7 + 1 = 8.
The first diamond had a 3, the note indicates a +, and the diamond behind the door had a 4, so 3 + 4 = 7.
The first spade had a 3, the note indicates a -, and the spade behind the door had a 1, so 3 - 1 = 2.
As for the heart, the symbols behind the door indicate that the heart = the diamond, so the heart should also be 7.
Put it in the order of the symbols behind the door: 2877.
Enter the code and push the button beneath.
You should hear a sound indicating that the drawer has unlocked. Click on the drawer to open it.
Inside you will find some tighty-whiteys (or y-fronts, depending upon your country of origin). Inside the underwear is a silver key, take it.
Back up twice.
The Middle Door
The middle door in the corridor had a silver lock, let's try the key there.
Turn left three times to face the ropes/symbols.
Click on the corridor to enter it.
Click on the forward door for a close up and use the silver key on the lock. You should hear it unlock.
Click on the door to open it.
Inside you will find a panel on the wall with digital numbers and a large button. It looks like the digital clock, but larger.
There is also a man in a suit here.
Now what?
Click on the guy for a close up.
Note the positive and negative symbols on his forehead?
We still have those batteries.
Place the batteries in the guy's nose.
Note that his toupee flies up, revealing a gold key.
Take the gold key and back up.
The Color Wheel Lock
Once you have the key, back up until you see the ropes/symbols wall.
Turn left three times to face the L shaped cabinet.
Click on the lower left door, the one with the regular lock.
Use the gold key on the lock to open the door.
Inside you will find some more symbols. This looks like the five flip switches and the button from the top door of the cabinet.
Also note the arrow going from left to right.
Back up, then click on the top door of the cabinet for a close up.
The switches on this lock now need to be set to match the note in the lower cabinet.
From left to right: up, down, up, down, and up.
The colors are now red, blue, green, green, and yellow.
The button below is also blue.
Back up, then click on the lower right door, the one with the color wheel lock.
For the color-blind: The colors on the lock are upper left red, upper right yellow, lower left green, and lower right blue.
According to the note we found, we should use the colors from the five switches and the button, which is red, blue, green, green, yellow, blue.
For the color-blind: upper left, lower right, lower left, lower left, upper right, lower right.
Once you've entered the colors, push the white button in the middle of the wheel to unlock the door.
Inside you will find a robot with the rechargeable battery unit, take the unit and back up.
The Digital Code
Pull up the digital clock from your inventory.
Turn it over and open the battery bay.
Place the rechargeable battery pack inside, close it, and then turn the clock over.
Note that the clock now says I I 9 2 H, with the red bar at the top.
Close down the clock, then turn right three times to face the ropes/symbols wall.
Click on the corridor, then click on the middle door to enter the room.
Click on the digital panel for a close up.
Note that the red bar is at the bottom.
Since the bar is at the bottom, when it was at the top on the clock, we need to turn the clock code upside down.
The code would now be H 2 6 I I.
Click on the bars on the digital lock to make the symbols. For the H, remove the top and bottom bars. For the 2, remove the upper left and lower right bars. For the six remove the upper right bar. For the I I use the last number and remove all the bars in the middle.
Once you've entered the code, press the red bar.
A gold key will appear in the slot below, take it and back up.
Regular Escape (Dancing Guys)
Back up twice to the ropes/symbols wall.
Turn right twice to face the locked door.
Click on the door for a close up and use the gold key to unlock the door.
Click on the open doorway to escape.
Enjoy the dance.
Stamp Escape (Dancing Dolls)
Follow the regular escape to the point where you unlock the door.
Unlock the door, but do not go through the doorway.
Back up and turn left twice to face the ropes/symbols.
Click on the corridor, then click on the middle door to enter.
Click on the digital panel. Note that it is doing something strange.
A pattern emerges: First the O blinks, then there is a series of up and down blinks on the other three numbers.
Note the pattern: middle, right, left, left, right, middle.
Back up three times to face the ropes/symbols.
Click on the ropes/symbols wall for a close up.
Now manipulate the ropes in the same pattern, middle, right, left, left, right, middle.
The middle symbol will open, revealing a stamp. Take the stamp.
Back up and turn right twice to face the out door.
Click on the door for a close up, then click on the open door to escape.
Enjoy the dancing dolls.
How to Die 1: The Panda
When you enter the room with the panda, click on the panda to reveal the red arrow.
A navigation bar will appear at the top of the screen. Click on it.
Enjoy being killed by the panda.
How to Die 2: The Digital Clock
When you first get the digital clock, open the back and place the regular batteries inside.
Enjoy the explosion.
Posted by: grinnyp |
November 4, 2012 5:06 PM
|
November 4, 2012 5:06 PM