
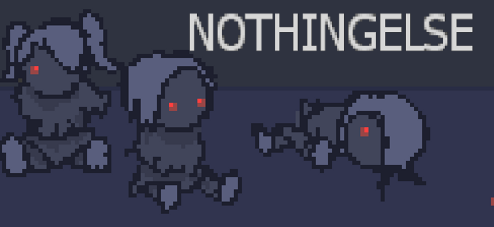
![]() A quiet night means the perfect time to escape the troubles of home with a good book, right? Except in Ivan Zanotti's horror adventure game NothingElse, your relaxing escapism takes a turn for the terrifyingly surreal when you find yourself pulled into another layer of reality that seems to resemble your own... only more warped and unsettling. Use the [arrow] keys to move and [Z] to interact. You'll need to click on some objects as well, usually those in close-up screens, and not every interactive item highlights when you pass by it, so make sure to examine everything.
A quiet night means the perfect time to escape the troubles of home with a good book, right? Except in Ivan Zanotti's horror adventure game NothingElse, your relaxing escapism takes a turn for the terrifyingly surreal when you find yourself pulled into another layer of reality that seems to resemble your own... only more warped and unsettling. Use the [arrow] keys to move and [Z] to interact. You'll need to click on some objects as well, usually those in close-up screens, and not every interactive item highlights when you pass by it, so make sure to examine everything.
 NothingElse is short, but still might give players a bit of trouble, with puzzles that rely more on interpreting visual or deliberately strangely phrased clues to proceed. The control scheme is a little odd, and the combination of mouse, [arrows], and [Z] to play doesn't really feel natural, especially since it's never that clear when you need to click on something, or whether an unhighlighted object is something you should check out. The story is, uh. Well. It's there. Sort of. So much is left up to interpretation or stated artfully rather than frankly that it's easy to come out a little bewildered, but it's not a happy game. Freaky? Absolutely. Though nowhere near as creative in gameplay and frights as the developer's previous hit, Imscared, NothingElse has some seriously unnerving and tense moments that can make your skin crawl. Part of a good horror story, I've always believed, is allowing the viewer to fill in all the missing gaps themselves. After all, someone's personal imagined horror is always going to scare them more than anything you come right out and tell them. Is NothingElse too ambiguous? That's up to you. But with some creative imagery and tense moments, it's still worth checking out for the short time it'll take.
![]() Windows:
Windows:
Download the free full version
![]() Mac OS X:
Mac OS X:
Not available.
Try Boot Camp or Parallels or CrossOver Games.


Walkthrough Guide
(Please allow page to fully load for spoiler tags to be functional.)
NothingElse Walkthrough
Part 1 - The Normal World
Bedroom
Walk left to the door, then press Z to open it.
Continue left into the Hallway.
Hallway
The right door is non-interactive, but notice that the left door is locked. You'll have to return later to open it.
Open the door at the end of the hallway, and continue left to enter the Hall.
Hall
Open the right drawer at the bottom of the large cabinet. Take the KEY inside.
Walk to the table at the left side of the room and press Z to read the note.
Memorize the instructions on the first page: "Type 28 to unlock the chest."
The left door is locked for now, so move right to return to the Hallway.
Hallway
Now that the key is in your inventory, you can unlock the left door.
Press Z to unlock and open the door automatically, allowing you to enter the Antry.
Antry
Go to the chest at the right side of the room and press Z to examine the lock.
Remember the note from the hall? But if you try to type 28, the number at the bottom becomes 10.
It seems the numbers you press are added together, and the sum appears at the bottom of the keypad.
Push the number 9 key twice to add 18, equaling a total of 28 (2 + 8 + 9 + 9 = 28), then hit the check mark button to open the chest.
Press Z to take the BOOK from the opened chest.
Exit the Antry and walk right to re-enter the Bedroom.
Bedroom
Walk up to the bed and press Z.
With the BOOK in your inventory, you will lay down on the bed to read it.
Part 2 - The Corporeal World
The Other Side
Open the hatch in the floor.
Drop down through the hole to reach the Opposite Room.
Opposite Room
Open the door on the right. Note that there is also a door on the left at the top of the wall.
For now, walk right to enter the Mirror room and then continue right until you reach the stairs at One Way.
From there, move up the stairs to the Dilemma room, then walk left to the Dollhouse.
Dollhouse
Examine the doll on the table at the left side of the room.
Note the glowing eyes on the doll and the arrow on the table pointing from left to right.
The first doll only has the left eye showing, the second doll has two glowing eyes, and the third doll has a left eye showing just like the first doll.
The third doll is fallen over, so her open left eye is the one at the top and the closed right eye is at the bottom. This is important, so remember it for later!
There's also an extra eye on the edge of the table.
Press Z again to back away from the table, then walk right twice to enter the Memento room.
Memento
Inspect the mannequin standing at the right end of the room.
There are 7 buttons going down the middle of the mannequin's dress that you can click to highlight. But which buttons should you highlight? There must be a clue nearby!
Highlight the buttons on the dress to match the pattern of the glowing red eyes you saw on the dolls in the Dollhouse room.
Remember the fallen over third doll, her left eye was the one at the top, and the closed right eye was at the bottom.
With that clue in mind, if the first doll has her left eye open and her right eye closed then you know to highlight the first button at the top of the dress, but leave the second button down untouched.
The second doll had both eyes open, so highlight both the 3rd and 4th buttons.
The third doll's left eye is open, meaning you must highlight the 5th button, but the right eye was closed so leave the 6th button blank.
Lastly, there was one extra red eye lying at the end of the table. Highlight the last button at the bottom of the dress.
Solution.
Once you've completed the puzzle, move left to the Dilemma room and then go up the stairs to the Last Corporeal Floor.
Last Corporeal Floor
Take the PAIR OF GLOVES hanging from the hook on the wall to the left of the doorway.
Note that the strongbox at the right side of the room is locked.
Exit the room and go down the stairs to return to the One Way area. From there, walk right to reach the Garbage.
Garbage
Now that you have the gloves from the Last Corporeal Floor, you can search through the garbage bag on the floor in this room.
The KEY will be added to your inventory.
Return to the Last Corporeal Floor at the top of the stairs.
Last Corporeal Floor
Examine the strongbox at the right side of the room again; the KEY from the garbage bag will automatically ulock it.
Take the LADDER from the opened box.
Go back down to the bottom floor. Walk left twice to return to the Opposite Room.
Opposite Room
Move the door at the top of the left wall.
Press Z on the wall to place the ladder.
Use the ladder to travel to The Bridge.
Part 3 - The Ethereal World
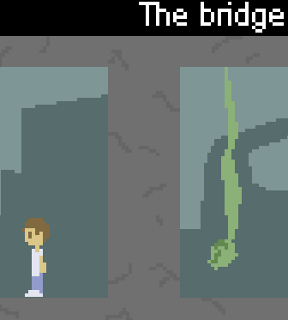
The Bridge
Drop down the stairs and walk all the way to the left.
As soon as you pass half way through the Amalgamation room a tall, green figure will start following you.
If it catches you, you'll be returned to the start of the bridge.
Don't stop moving left until you reach the Truth area
Truth
Inspect the paper on the ground to read the message.
Continue left to the Passage.
Passage
Approach the tunnel at the left side of the area and your character will automatically go into a crouch.
Crawl left through the tunnel. After a few rooms, the green figure will reappear.
It will return you to the start of the Passage again if you're caught; keep fleeing from it by moving left until you reach the Get Out area.
Get Out
The green creature appears to start pursuing you more quickly once you enter this room.
Quickly interact with the vent (the black square in the wall) to exit the passage before you are caught, which will put you at the Passage Inside area.
From there, walk right to The Two of Them room.
The Two of Them
Read the note on the stone at the middle of the room.
"The world comes first, more than anything."
At the end of the road comes family, the second one.
Standing in between, the pain of the unheard scream,"
embraced by the flower of Evil.
on the same path of evil,
a beast called Love exhales his last breath."
Walk right to find the Furnace.
Furnace
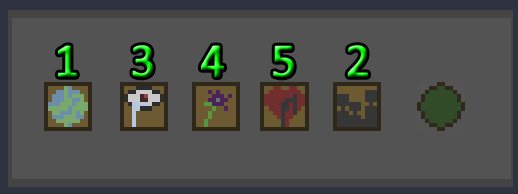
Examine the button panel at the bottom of the right wall.
You'll see a series of buttons, each with a unique symbol. From left to right it's: the Earth, a crying eye, a flower, a heart, and three figures.
Press the buttons in the same order that the thing their symbols represent appear in the poem.
The first one, the world is easy to match with the globe.
The second line mentions family, which is represented by the button with three figures.
The third line is about the "unheard scream" or pain that doesn't make noise, which is represented by the crying eye button.
The fourth line is also easy, it references the flower button directly.
The last line mentions the beast called Love, which is also easy to match with the heart button.
Push the buttons in the same order as the lines on the poem: World, Family, Crying Eye, Flower, Heart.
Solution.
The button panel will disappear from the wall after the puzzle is solved, allowing you take the SCREWDRIVER from the revealed cache.
Walk left to return to the Passage Inside, then re-enter the vent to go back to the Get-Out area. From there, move left again to reach the Exit.
Exit
Move all the way left until you hit the wall blocking you.
With the SCREWDRIVER from the Furnace puzzle in your possession, you can press Z to unblock the exit.
Go all the way left until you find The Ladder.
The Ladder
Get on the ladder and climb upwards.
You'll notice an Outlet Valve at the second section of the ladder, if you hit the valve a large red flame will eject from the pipe just above your head.
Leave the valve off for now so that you can pass it safely.
Continue to climb up to Long Farewell area. At this point, the green creature will begin to pursue you again.
As quickly as you can, climb back down to the Outlet Valve and interact with it to turn on the flame.
The green creature will move into the fire and be destroyed.
Turn off the valve once this happens and climb safely up to the Exit at the top. Continue right to travel to the Home Road.
Follow the Home Road until you reach the Personal Hell.
Personal Hell
Enter the building through the front door. Walk past the flickering man and woman, then open the door at the right side of the room.
Move right down the long hallway, open each of the doors and continue moving right until you find the bedroom at the end.
Approach the figure reading in bed.
Posted by: Trinn |
June 2, 2013 6:34 AM
|
June 2, 2013 6:34 AM