
 Dear reader, I'm afraid it's time to stop what you're doing and start monkeying around! That's right, today we're bringing you the second edition of our Monkey Go Happy Roundup! Today we'll explore a bizarre old temple, a cool mountain scene illuminated by a bright sun and colorful sky, a house that looks suspiciously like gingerbread, and finally in a strange maze.

First we find our orange friend sad inside an old temple filled with odd puzzles. Cryptic markings on the wall hint at certain lights and switches to be flipped, and what are all those fuses laying about?
Next, we arrive at a scene with a bit of a Halloween theme - there are candies to be found and given away, along with other puzzles to solve. You will make the monkey happier by giving rather than receiving!
Another Halloween type scene awaits you! Once again, there's candy abound, including in that tasty looking house. Help the monkey round them up, and discover quite the unusual surprise at the end.
Finally, you find yourself trapped in an odd maze. This one will test your sense of direction as you try to navigate through and find the hidden treasure at the end!


Monkey GO Happy Roundup 2 (Stage 129-132)
Stage 129: Bronze Temple
Exploration
Two spooky skull devices whose eyes or mouth light up surround a doorway with a semicircular light above which lights up in several different shapes. A small pyramid in the middle doesn't seem to do anything yet, but perhaps you can fix it using the device on the left with fifteen pairs of holes. Pick up the 3 fuses and 2 Mini Monkeys from the floor and doorway.
Move left to a room with a dome marked with a triangle in a circle with a humanoid hole to its upper right. A pipe connects it to a wall where several clues are painted. Pick up the 2 panel parts from the floor on each side of the dome, as well as 3 fuses on the pipe and floor.
Move right and forward to a room with a similar dome, pipe and wall clues, but the dome has a circled plus mark and its hole is vase-shaped. Pick up the 2 panel parts from the floor on each side of the room, as well as 3 fuses on the dome and pipe and 2 Mini Monkeys on and beside the dome.
Move back and right to a room with a similar dome, pipe and wall clues, but the dome with a purse marking has a more angular hole. Pick up the 2 panel parts, 3 fuses, and 2 Mini Monkeys (in roughly the same locations as the previous room).
Now that your inventory is full with 6 panel parts, 12 fuses and 6 monkeys, you can proceed to the puzzles proper.
Fit
Three of the panel parts are not like the others.
So combine the parts in pairs (click the Combine Items button and then two parts in either order): the vertical long part with the part with a hole at the top, the horizontal long part with the part with a hole at the right, and then the last two parts.
Now you should have 3 panel buttons.
Fill
Use the wall clues from this room (the right room) to unlock the dome in the left room.
First, match the dot clues by clicking the skulls (in the central room) twice until their left (our right) eyes light up.
Then, match the symbol clue on the doorway panel by clicking it once. (You'll find that the symbol over the door is actually 2 overlapping copies of that on the wall clue.)
Then go to the left room and place the tall panel button that matches the hole, and push it to open up the dome and get a fuse and a Mini Monkey.
Next up, you have to use the clue from this room (the left room) to unlock the dome in the front room.
Go back to the central room and click the skulls thrice and once and the doorway panel twice.
Then go to the front room, use the long panel button on the hole, and push it to open up the dome and get another fuse and Mini Monkey.
Finally you have to use the clue from this room (the front room) to unlock the dome in the right room.
Go back to the central room and click the left skull twice and the doorway panel thrice.
Then go to the right room, use the last panel button on the hole, and push it to open up the dome and get another fuse and Mini Monkey.
Finish
Use all fifteen fuses on the device next to the pyramid in the central room, and it accordions up into a tower of flashing lights with a Mini Monkey on top.
Your bonus clue from this stage is XX = 2.
Stage 130: Mountain Spooks
Exploration
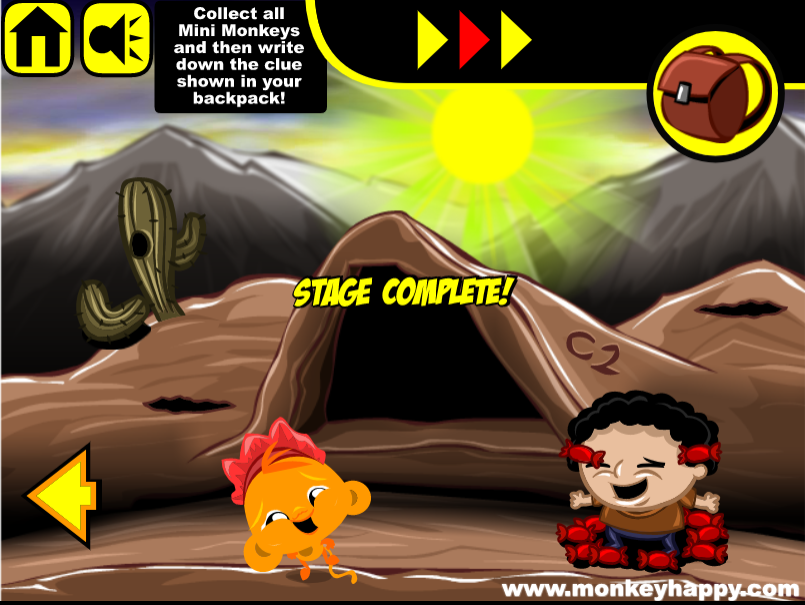
A cave which blends into the mountain scape has a door locked with spooky faces and a cryptic code on its right side, and a boy standing in front wants 20 pieces of candy. Take the ghost (not real, hopefully) from atop the cave, as well as the 3 candy and 2 Mini Monkeys lying around. But you're not done! Click the cacti and the small mounds on the left and right of the cave to reveal 3 pieces of candy that were previously hidden.
Move left to a cabin with a more usual door lock (it requires a key), as well as several clues beside the door and on the ground on the right. In front, a girl wants a hockey mask and a machete. So pick up the 3 candy and 2 Mini Monkeys lying around, and also click the cactus and mounds to get another 3 pieces of candy.
You should have 12 pieces of candy and 4 monkeys, which means it's time to solve some puzzles.
Skulls
Use the clue from the cabin door to unlock the cave.
Click the buttons to show skulls with the eyes indicated on the front of the cabin, by clicking the 1st, 2nd, 3rd, 4th buttons 4, 2, 1, 3 times.
Then click the big button to open the cave, which contains a key, a piece of candy and a Mini Monkey.
Unlock
The key opens the cabin, and inside you find a rectangular panel on the back wall with an irregular hole (and a clue beneath it), three small round holes on the left and right walls, a boy (already in costume?) who wants a jack-o-lantern and a table with a lit candle on it. Pick up the knife from the floor, as well as the 3 pieces of candy and 2 Mini Monkeys throughout the room.
Numbered
Use the letter-number clues you've found throughout the game to solve the puzzle with the cabin's wall holes.
A, B and C indicate the lower-left, upper-left and upper-right holes, and the numbers indicate that they should be clicked 1, 3, 2 times respectively.
So do that, and then place the ghost in the back wall and push it to open up the panel, which hides a creepy costume, a piece of candy and a Mini Monkey.
Spook
Give the costume to the girl outside, who goes on a murderous rampage (hopefully not real). Pick up the pumpkin she left behind, and the piece of candy hidden behind it.
Now you have everything you need to make your own lantern: combine the knife and pumpkin in your inventory, and then the candle and carved pumpkin.
Use the finished lantern on the boy who wants it, and he walks over so you can pick up the 2 pieces of candy and Mini Monkey from behind him.
Sweet
Use all 20 pieces of candy on the boy from the first screen. While he's happily tossing them up in the air, pick up the last Mini Monkey between his feet.
Your bonus clue from this stage is XXX = 1.
Stage 131: Candy Hearts
Exploration
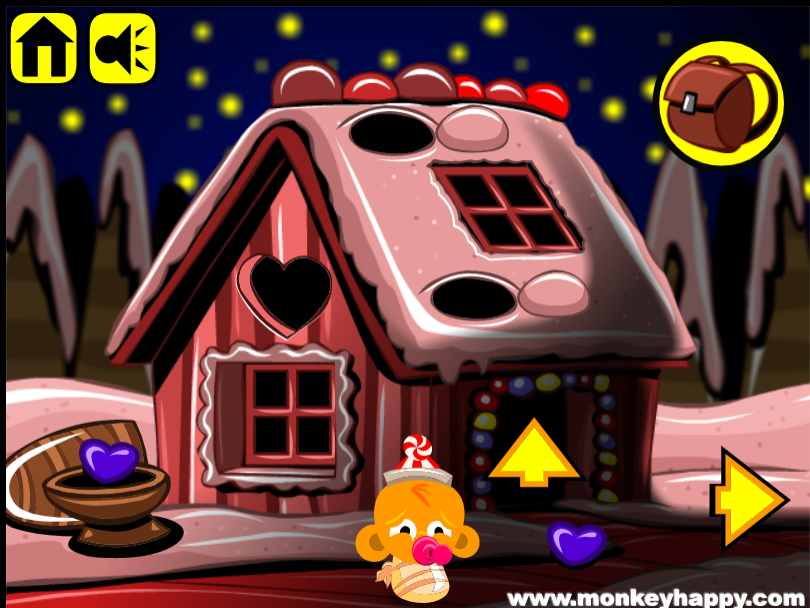
At first glance, this is just a candy house with a purple candy heart and 2 Mini Monkeys, but you can click all the bulges and windows and the tree, and the heart shape to find 6 candy hearts.
Open the door and go in to find a giant candy panel surrounded by four holes and a note with helpful clues. Pick up the spoon, puzzle piece, piece of candy and 2 Mini Monkeys.
Back out and move right to a candy mountain with a guy who wants a cup of unspecified liquid, as well as a large blob of red sugar blocking the way and a semicircular display further ahead which flashes red sectors. Pick up the 2 candy hearts and 2 Mini Monkeys, and then click all the trees and mounds on screen to find another 4 candy hearts.
(Current total: 14 Candy and 6 Monkeys.)
Gouge
Use the spoon to clear out the sugar blob, opening up the path to the mountain peak.
The path to the peak ends in a small bowl of water with two more semicircular things to the left and right. Pick up the broken cup, puzzle piece, 2 candy hearts and 2 Mini Monkeys, and click the mound to the left of the path to get another piece of candy.
Square
Combine the two puzzle pieces to form a square puzzle button, then place that in the diamond-shaped hole at the back of the house.
Then use the note to adjust the four holes on the walls.
The holes cycle through purple, red, yellow colors, which correspond to B, C and A on the note.
So click them
23

11
times, and then click the diamond button to open up the back of the house, and take the glue and 2 candy hearts, and the Mini Monkey that was hidden behind the glue.
Serve
Glue the cup together (by combining it with the glue) and then fill it in the bowl of water on the mountain peak.
Then give the full cup to the guy who wants it. He walks away and you can pick up the last candy heart.
Ace
Place all twenty hearts in the now-empty bowl, and arrange the other devices to match the clues on the note.
Set all the four holes to A, which is yellow (3 clicks on each button away from black, or 1, 0, 2, 2 extra clicks).
Notice that the letters A, B, C in the square grid of the note are in the left, right and middle columns.
So set the red (C) semicircle along the mountain path to the middle position, and the yellow (A) and purple (B) semicircles on the mountain peak to the left and right positions.
Now that you're done with the setup, push the candy hearts down, and a royal bear rises up in their place with a Mini Monkey on top.
Your bonus code from this stage is XXXX = 2.
Stage 132: Mini Maze
(It's not much of a maze to me, but I don't see any other theme in this level.)
Exploration
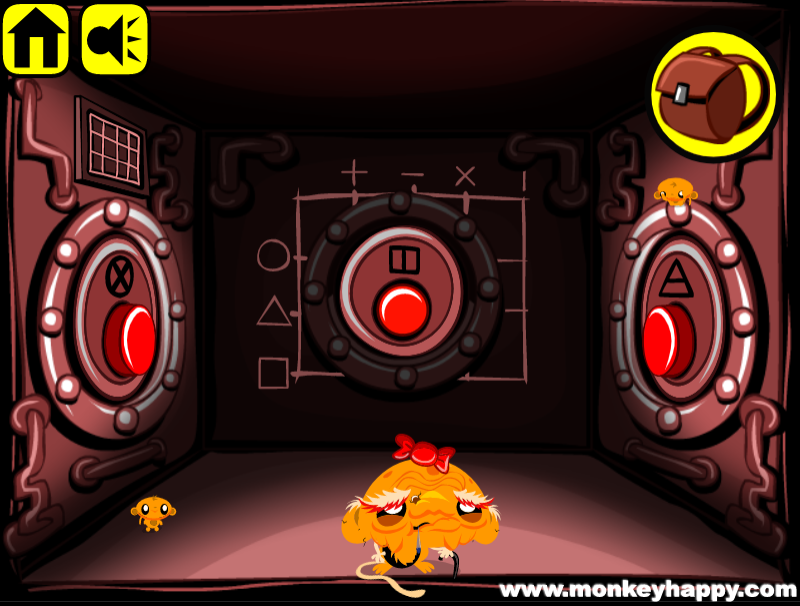
You start off in a room blocked in by three doors with red buttons marked by weird symbols. The middle door covers a grid of lines marked by other symbols, and there's a smaller matching grid above the left door with two pointers you can move around. Pick up the 2 Mini Monkeys.
Coordinate
The symbols on the door are formed by the symbols on the grid, in pairs.
So open the left door by placing the pointers on the left door's device on Circle and Cross (2nd from top, 4th from left, i.e. click them once and thrice).
And then the middle door by placing the pointers on Square and Vertical Bar (bottom, far right).
And then the right door by placing the pointers on Triangle and Minus (3rd and 3rd).
Triple Exploration
Go to the left room, which has a device in the back wall and a propeller in the left wall, marked by a symbol above it. (I see you there, Mini Monkey. Don't fidget so much!) Pick up the remote control in the lower right, and the 2 Mini Monkeys that you can actually reach.
Go to the front room, which has a bunch of holes surrounded by shapes in the walls and ceiling. A panel in the middle of the room is marked with an interesting pattern. Pick up the screwdriver from the lower-right corner, as well as 2 Mini Monkeys.
Go to the right room, which looks very similar to the left room except for one small clue and some batteries on the floor. Pick up the 2 Mini Monkeys here.
Rotor
Stop the fans in the side rooms using their symbol clues.
The left room has a symbol with Square around a Plus, so move the pointers on the grid to the bottom and 2nd from left.
Then click the button below the fan to stop it, and pick up the dial needle and Mini Monkey from behind.
Do the same with the right room, which has a Triangle (3rd from top) around a Vertical Bar (rightmost). After stopping the fan using its button, you can pick up the dial needle behind it.
Point-and-click
Unscrew the remote and insert its batteries (using the Combine Item function).
Also use the two dial needles on the semicircular dials in the left and right room, and use the clue from the front room to set the dials.
The shapes on the left and right of the panel in the front room are a circle and a rectangle.
So click the needle in the left room twice (so it points up) and the one in the right room thrice (so it points up and right).
There's just one clue left.
The shape in the middle of the front room panel is a circled minus, so set the grid pointers to 2nd from top, 3rd from left.
Finally, use the working remote on the panel, which opens up into a fish tank. Thankfully, the Mini Monkey isn't drowning, and you can pick it up to complete your collection.
Your bonus clue from this stage is X = 5.
Bonus Stage 33
The bonus clues from the stages combine to form the code 2125, so enter that in the box to open it!
Thanks again for the walkthroughs KK
Update