
Monkey GO Happy Roundup 13
By Arceus
|
May 2, 2018
Comments (1) | Views (7,703)
 Oh no! What unlucky predicaments has our monkey gotten himself in for this unlucky-numbered
installment of puzzles?
It's not a giant beanstalk, but perhaps it's something close? Collect peas, help an old man go
fishing, and more.
A stone golem lays dormant except to shrug; help the monkey collect pebbles among other
things to complete this level.
Our monkey friend has just gotten around to celebrating Easter, and an abundance of chicks and
bunnies are approaching, baskets in hand, hoping for treats. Help others to help the monkey go
happy himself!
You'll need to use your technical and word-play knowledge in this last puzzle to figure out how
to open a series of interconnected doors in a maze.


Monkey GO Happy Roundup 13 (Stage 173–176)
Stage 173: Easy Peas-y
Exploration 1
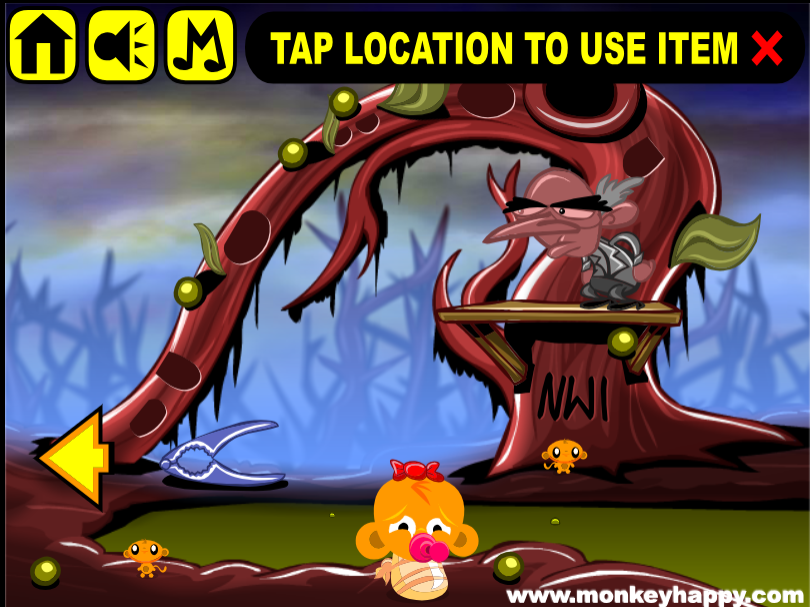
A large tree with roots sprawling everywhere grows up past the top of the screen where the end of a rope hangs out of reach. There's also a round display that cycles through roman numerals (but not really, just the letter
Irepeated 1 to 5 times), and four unusual gourds which puff out clouds of smoke when clicked. Move each of the three large leaves aside, and then pick up all 7 peas and 2 Mini Monkeys.Go right to a screen with a bent tree trunk forming an arch at the edge of a bubbling bog. A man stands on a platform near the base of the tree and asks for a fishing rod. There's another round display above him. Observe the clues on the tree, then push four leaves aside and pick up the blue pebble, nut cracker, 9 peas, and 2 Mini Monkeys.
(You should now have a total of 16 peas and 4 Mini Monkeys.)
Cup
Use a clue from the bog tree to solve the puzzle on the first screen.
The shapes carved in the bog tree match, from left to right, the 1st, 2nd, 3rd, 4th, 4th, 3rd, second gourds at the base of the large tree.
So click those gourds in that order, and the rope slowly lowers until you can climb it.
Exploration 2
At the top of the rope, you find another circular display, a hut… and a walking walnut? This brown creature asks you for 30 peas. Read the clue beneath him, then push aside five leaves and pick up all 9 peas and the Mini Monkey.
Enter the house, where a man asks you for a (peeled) walnut. There's a panel with digits on the left wall, another panel with a round hole on the right wall, and letter clues above and below those. Pick up the giant spoon, 3 peas and a Mini Monkey.
(You should now have a total of 28 peas and 6 Mini Monkeys.)
Depths
Use the spoon in the bog to scoop out a pea.
Count
Looking around, you find that the gourds at the base of the tree can still be activated.
So use a clue from the treehouse to do something else with them.
The panel on the left wall of the treehouse reads 4–1 1–3, which can be interpreted as "4 to 1, 1 to 3".
So click the 4th, 3rd, 2nd, 1st, 1st, 2nd, 3rd gourds. Once you have it correct, all of them puff smoke at once and you hear something unlock.
So go back to the treehouse, where the left wall panel has opened up. Pick up the walnut in shell as well as the pea and Mini Monkey behind it.
Crunch
Use the nut cracker to remove the walnut from its shell (using the Combine Items button in your inventory).
Then give the walnut to the man, who steps aside and lets you take his fishing rod.
Collection
Now that you have all 30 peas, give them to the creature on the tree branch. He doesn't leave anything behind as he walks off to the right, but you can now follow him to the next screen.
Exploration 3
At the end of this branch, there's nothing but a round display, a green tube that dispenses some green peas (?), and a Mini Monkey.
Corners
Place the pebble in the right wall of the treehouse, and use the letter clues to unlock it.
The four letter clues are: NWI near the swamp, SWIII on the branch and NEIV and SEV in the treehouse.
This can be read as:
North West 1
South West 3
North East 4
South East 5
so set the displays on those screens to the appropriate number of
Is.Once correct, push the pebble in to unlock the panel. Take the line and hook and Mini Monkey.
Bait
Combine the rod and line, and give it to the fisherman.
Now all we need is a fish. Maybe we can speed up the process?
Push the green tube to dispense bait into the bog, then quickly run down to the screen with the fisherman.
A large fish swims over to the bait, and click the fisherman to reel in the fish at the right time!
Once you've caught the fish, the last Mini Monkey appears next to the fisherman.
Your bonus clue from this stage is (circle with line ϕ)=1.
Stage 174: Pebble Hill
Exploration
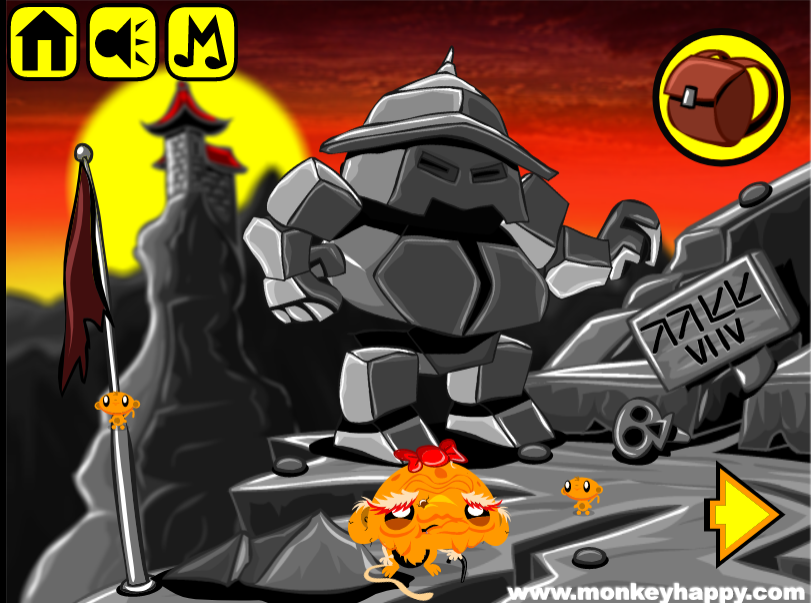
A huge golem stands on a cliff edge, but all he does is growl. There's also an unusual sign on the right, a slightly torn flag on the left and a large rock beside the flagpole. Click that rock to move it, then pick up the skull lever beside the sign, as well as 5 pebbles and 3 Mini Monkeys around the screen.
Go right to face a cave entrance. The large stone door has a curved slot in it, and there are two faces on the right that you can click to rearrange. An ape(?) on the right seems to be guarding something useful, and he demands 20 pebbles. Push aside the rock in the lower-left corner, then pick up 8 pebbles and 3 Mini Monkeys.
(You should now have 13 pebbles and 6 Mini Monkeys.)
Sign
Place the skull lever in the cave door, then the clue from the sign to unlock it.
Tilting your head to read the sign properly, you find that the arrows point in the ↗↗↙↙ directions, and the symbols below read VI IV.
So move the eyes on the left face to the upper right and those on the right face to the lower left, and click their mouths 6 and 4 times to show the corresponding number of teeth.
Then pull the skull lever, making the door rise.
Before you enter, retrieve the skull lever from the door.
Exploration 2
A flame on the left lights up this smaller cavern, which ends in another slotted door at the back. There's also a panel on the right wall with a round hole in it and a star marking above. In the foreground, two triangular devices light up from the bottom up in four steps when clicked. Pick up the dagger, 6 pebbles and Mini Monkey.
Sign 2
Place the skull lever (which you reclaimed from the first door) in the second door, and use the clue from the sign above to unlock it.
The triangles on the sign point in the ↖↙↘↗ directions, so move the eyes on the faces to the upper left, lower left, lower right, upper right.
The two dots beneath each pair of triangles indicates that the mouths on each face should have only two teeth showing.
The pairs of lines on the sides are a clue that each of the triangular devices should have two stripes lit up.
Once you've set all those correctly, you can open up the door to find a pebble.
Rocks
Give all 20 pebbles to the ape, and he walks away. Pick up the stick and then read the clue on the floor.
Flammable
Use the dagger to cut off the cloth flag.
Then combine the cloth with the stick to form a torch.
Then light the torch in the flame in the cave.
Then place the lit torch in the dark area where you got the last pebble. Now you can see a wooden box with a thin vertical slot and a Mini Monkey behind.
Pry
Use the dagger to open the wooden box and get a yellow peg from inside.
Star
Place the peg in the marked wall panel, then use the floor clue to unlock it.
The x2 on the right refers to the pairs of devices: those on the left and right should be set identically.
The squares with dots in the middle indicate that all the eyes on the faces should be reset to the center position.
The large 7 beneath the squares matches the position of the mouth, so make each of them show seven teeth.
The ¾ on the left tells you to fill each triangle up to 3 steps out of 4.
Once done, push the peg to unlock the star panel. Take the ball and Mini Monkey from inside.
Ending
Give the ball to the golem, who kicks it around. Pick up the Mini Monkey between his feet.
Bonus clue from this stage: (circle with 1 dot) = 5.
Stage 175: Egg Paint
Eggsploration
Wait, there's nothing to explore, and you don't even have an inventory! April Fools?
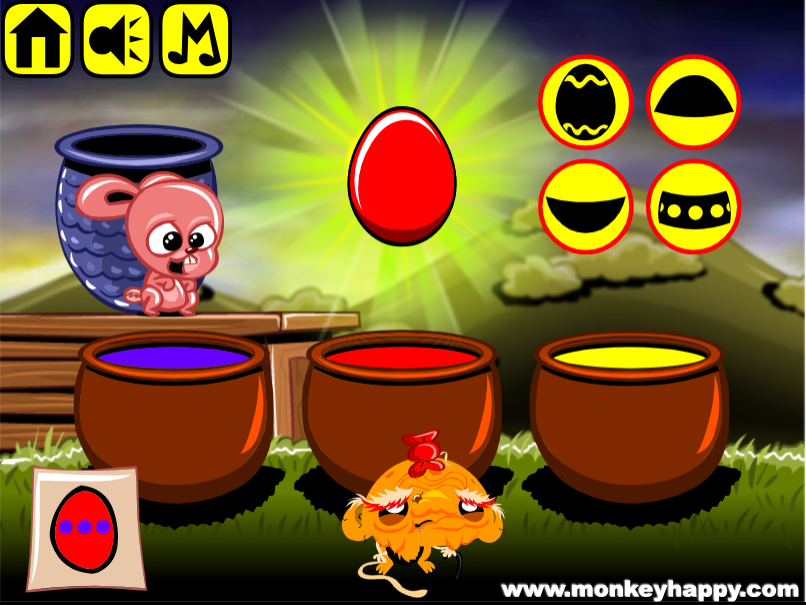
There's just an egg, three buckets of colored paint to dip it in, and four buttons that cover and uncover various areas of the egg.
(Hmm, let me look up some Factory Balls walkthroughs for reference…)
Hints
First, some hints:
Paint doesn't affect covered areas, so you want to paint the areas you can cover first.
Masks can be placed and removed in any order.
It can be very helpful to figure out what pairs of masks do in combination.
One way of doing it is to always paint areas in the following order, where you can paint over later areas but not earlier ones:
Top background, bottom background
Middle background
Middle foreground (dots)
Top foreground, bottom foreground (squiggles)
Painting
I'll label the buttons and buckets as follows:
A: Mask with squiggles
B: Top cap
C: Bottom cap
D: Middle band with round holes
1: Purple paint (left bucket)
2: Red paint (middle)
3: Yellow paint (right)
At the end of each solution, you need to remove all applied masks.
Three dots
2 BCD 1
Middle stripe
3 BC 1
Tricolor
1 C 3 B 2
Dots and bottom cap
3 C 1 BD 2
All the details
2 BC 1 D 3 ABC 3
Two colors on yellow
3 BCD 2 AB 2 BC 1
Yellow on two colors
2 B 1 CD 3 AB 3
Squiggles on two colors
3 B 1 A 2 BC 1
All the details 2
2 BC 3 D 1 AB 3 BC 1
And then the stage is complete!
Since there were no Mini Monkeys at all, you just get the bonus clue straight away: (circle with two dots) = 3.
Stage 176: Word Maze
Exploration
This dull metallic room with three labeled doors has an unusual device on the left with four sliders and a large button. Pick up the lever to uncover a grid of letters, and also pick up 2 Mini Monkeys.
Spell
Use the clue from the grid of letters to unlock the right door.
Arrange the sliders so that their positions, from left to right, correspond to the letters ITEM in the grid.
That is to say, click the sliders 0, 1, 2, 3 times, and then the button. The door opens.
Exploration: "Item"
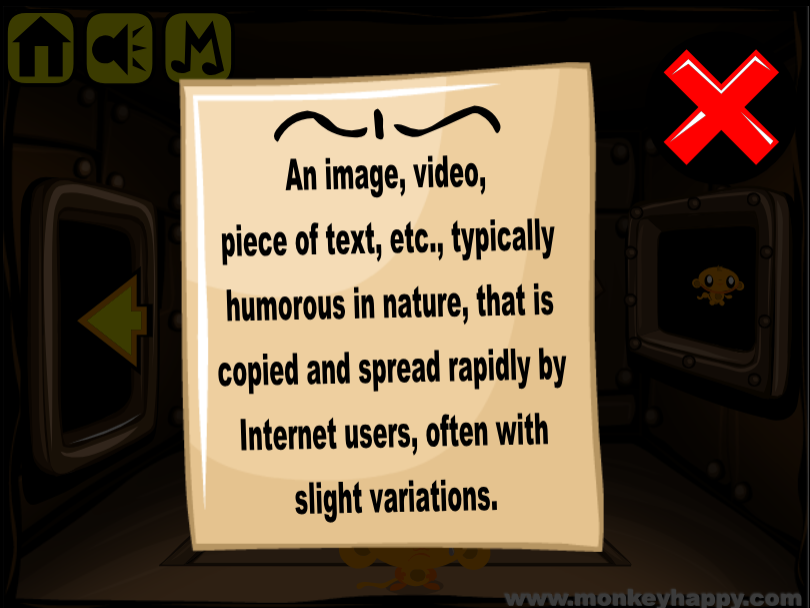
This room has locked panels on the floor and right wall, as well as a device on the back wall with a Mini Monkey on it. Read the paper beside the device, which has a decorative pattern and a long definition of some sort.
Viral
Use the clue from the definition to unlock the panel with the matching pattern.
If you've been on the Internet for an extended period of time, you know that such an image, video, piece of text etc. is called a MEME.
So arrange the sliders to match that word in the grid, and then push the button again.
You hear something unlock, and sure enough, the panel in the next room is now open. Take the wheel bit and Mini Monkey from it.
Lever
Place the lever in the back wall of the second room. As you pull it repeatedly, it cycles through various pairs of numbers (1, 2) and letters (B, C, D).
So set it to 1-C to unlock the door marked 1-C (and later 1-D to unlock the door marked 1-D).
Exploration: 1-C and 1-D
1-C, to the left of the starting room, has locked wall panels with clues on the left and back walls, as well as a stuck floor panel. Pick up the Mini Monkey here.
(Unlock 1-D by pulling the lever twice.)
1-D, forward from the starting room, has a locked left wall panel, three round holes in the back wall, and a large rectangular hole in the floor. Take the manhole lifter and Mini Monkey.
Words
Let's unlock all the wall panels right now. (Make sure the door to 1-D is unlocked.)
The panel on the left of 1-D shows a small bug that's commonly known as a
MITE.
Enter that in the device in the first room and push the button. You should hear the panel unlock.
The panel on the left of 1-C shows an alarm clock, which reminds you of
the TIME.
The panel on the back wall of 1-C shows a phrase and digits beneath which
indicate the 3rd, 5th, 9th, 10th letters in the phrase: EMIT.
Enter each of those two words in the device in the first room, and push the button to unlock those panels.
If you return to 1-C and 1-D you'll find a total of 3 wheel bits and 3 Mini Monkeys, one from each wall panel.
Lift
Use the manhole lifter on the floor panels in the left and right rooms to get 2 wheel bits, one from each.
Wheels
You now have all 6 wheel bits. Paying attention to the jagged edges, combine them in pairs to form 3 wheels.
Then place all three wheels (in any order) on the back wall of 1-D.
A red demon rises from the hole in the floor, along with the last Mini Monkey.
Bonus clue from this stage: (line with semicircle) = 4.
Bonus Stage 44
The math in this bonus is easier than last time. Work out the equations above the boxes (1+4=5, 3×5=15 and 15−5=10), and then the equations in the boxes (15÷5=3, 5−3=2, 3+1=4, 10÷5=2) to get the final code: 3242.
Enter that in the box to open it!
Update