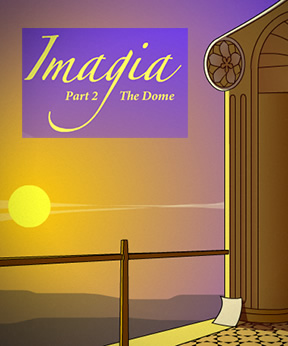
Imagia 2: The Dome
![]()
 In Imagia 1: The Tower, we were introduced to a world with lots of mysteries and no answers. Imagia 2: The Dome picks up right where Imagia 1 left us, pointing and clicking our way around a mysterious rooftop, gathering clues about just what we're trying to accomplish in the first place. If you were hoping for answers in this sequel from Kayzerfish (Ralf Hebecker and Nikita Tutubalin), I'm afraid we're still in questions without answers mode. You know, like the first season of Lost, only no smoke monster.
Using only your trusty pointing device, point-and-click to navigate about the dome to find hidden objects that yield clues, and thus gathering hints to solve the mystery of this latest Imagia chapter.
Imagia 2 improves over the original by actually having the cursor change over hotspots, although some hidden objects run on the small side and blend in with the scenery. Once you find an object and click on it, it will enter your inventory, either on the left or the right. Mouse over an object in the inventory to learn its name. If the object is a piece of paper, click on it to examine it for clues. Otherwise, objects can be picked up from the inventory and used in-game on certain hotspots. In addition to visual clues in scenery and clues in notes, there is one audio clue in the game. The last important thing to be aware of is the save button in the lower left, another big improvement over Imagia 1.
 Analysis: As a beta tester, the most difficult part of the game for me was the audio clue. It's quite soft and liable to be mistaken for mere background noise. Since I generally turn the sound off entirely when playing these kinds of games, I never would have thought to pay attention to the sound without being told. So here I'm telling you: pay attention to the sound. Luckily, the audio clue is now paired with a visual clue. It's still a very subtle effect, but it's a much fairer clue now and observant players should be able to figure it out by themselves.
That said, the note clues in the game are outstanding. They manage to clearly give information without any words at all. Although the game offers multiple language options, they aren't really necessary. The puzzles in the game are visual/spatial logic problems, and thus are equally accessible to all gamers.
In comparison to the first game, the art in Imagia 2 is less cartoonish and more polished, but there's also a bleakness and starkness here. In the first game, there was plenty of evidence that someone else had recently been there, a certain human messiness, as well as the mysterious damage. It was also a much more material game, with lots of object combining and fussing about. In contrast, Imagia 2's inventory puzzles are very limited, and even to the extent that they are present, they are mostly being used in conjunction with the clues in the notes.
The myth-building in Imagia 2 is as restrained and subtle as the art, and a player could miss it all together. The observant player, however, should gather enough to seriously pique curiosity and build anticipation for subsequent chapters to soon follow. Hopefully we won't have to wait for Imagia season six to find out that actually we're all inside a little child's snowglobe. SPOILER ALERT.


Walkthrough Guide
(Please allow page to fully load for spoiler tags to be functional.)
Imagia 2 Walkthrough
Staying on the Surface
Go through the doorway on the right, into the center.
Pick up the rope which is hanging over the beam at the 1:30 position (if you imagine the beam farthest from you as the 12:00 position on a clock).
Pick up the tiny blue piece of glass (an inlay part) at the extreme right of the screen.
Go to the sunny, 10:30 beam exit.
Pick up the sketch 1 which is lying against the wall.
Examine the sketch. Click the lower right corner for a secret, then back out.
Go forward to the 12:00 position. Pick up a piece of snippets 1 from the lower left hand corner.
Go right to the 1:30 position. Pick up another piece of snippets 1 from between the pillars. Pick up sketch 2 from the left side of the screen.
Examine sketch 2 and click the upper left corner for a secret, then back out.
Go down twice to the 4:30 position. Pick up the frame from the railing, sketch 3 from the lower left, and two inlay parts. One is at the corner of the inner pillar and the wall, and one is at the bottom of the outer pillar.
Examine sketch 3 and click the lower left corner for a secret, then back out.
Delving Deeper
Go to the 6:00 position. Pick up a piece of snippets 2 on the left. Pick up a green inlay piece on the right.
Use the rope on the railing.
Climb down the rope, down again, and down one more time.
Click on the window to zoom in. It's subtle, but there is a pale symbol on the top of the window. Click on it to find another secret, then back out.
Click on the right side to get to the bird's nest area. Pick up a green inlay part, another piece of snippets 2 and another piece of snippets 1.
Go back up to the top and go to the center. Pick up the last piece of snippets 1 and examine the tiny round window second from the left for another secret.
Solving the Puzzles
Now it's time to start deducing from clues. Snippets 1 is now complete, and it applies symbols to the sides of the tower, with the solid circle being the sun side of the tower.
From that, you can deduce which symbol is supposed to be which side.
The white diamond inside a circle on the first part of snippets 2 therefore is the 9:00 position. Go there and press the petals on the flower according to snippets 2. Take the crank.
The other half of snippets 2 is a white triangle inside a square. This applies to the 3:00 position. Go there and press the petals in the right order to get another inlay piece and a prism.
Go to the center and use the crank on the hole on the right side of the model. Note the symbols on the base of the model. Turn the crank so that it is pointed to the left and the symbol facing you is the white triangle in a circle.
Go down to the 6:00 position and Click on the manhole in the center. The manhole lid has been removed, revealing a crystal key. Take it and also click on the bottom of the hole to remove the false bottom and take a gold florin.
Back out and examine the florin for another secret.
Now, follow the clues in sketches one, two and three to know where to place the prism, key, and frame with inlay pieces.
First, the prism goes on the sun side, that's pretty obvious and made explicit in sketch 3.
Next, go to the twilight side in the 1:30 position, the black triangle side, deduced from sketches 1 and 2. Place the frame on the railing, and use the inlay pieces on the frame.
Finally, go to the center and use the crystal key on the top of the dome of the model. Then, click on the key to turn it until a beam of light is reflected towards the 1:30 side.
Go to the 1:30 side. The frame is now lit up by the beam. Click on it to complete the game.
The Six Secrets
The back of sketch 1, click lower right corner
The back of sketch 2, click upper right corner
The back of sketch 3, click lower left corner
The blue window in the center of the model
The pale symbol on top of the large window down the rope
The gold florin in the false bottom of the manhole
Posted by: joye |
December 8, 2010 12:55 PM