JayisGames.com is now available ad-free!
Jay is Games recommends Cheat Happens with 8,000+ games and 35,000+ trainers!

Enigma


  • Currently 4/5
  • 1
  • 2
  • 3
  • 4
  • 5
Rating: 4/5 (103 votes)
Comments (55) | Views (7,089)

Weekday Escape

GrinnypThis week's escape is a previous work from one of the talented new designers recently featured on Weekday Escape. Remember Rosetta Escape, with its cool and fresh new take on escape the room puzzles? Well, Otousan designed a game before that, a lovely little gem titled Enigma. Buckle up folks, It's Weekday Escape time!

Enigma
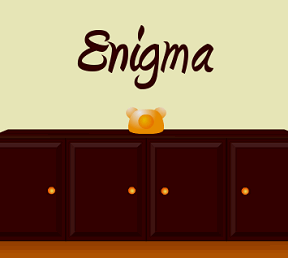
At first glance Enigma is pretty bare bones. A room, 4 walls, a door, a few pieces of furniture, all in a very flat cartoony style is basically all you see in this fun little point-and-click escape. However, the depth reveals itself as you explore the small space. Once again we have the basic conventions of a standard room escape: keys, screwdrivers, and lots of doors and drawers to open. Then you stumble across the unique puzzles, centered around a cool, retro orange rotary dial phone.

You can see here the germ of what would later become the amazingly complex tile puzzles of Rosetta Escape, this time contained within the aforementioned phone. Each puzzle becomes a little more difficult than the last, requiring some lateral thinking. The combination of the expected elements with the keys and screwdrivers and the original puzzles dealing with the phone are what make Enigma so fun, and are definitely the blueprint for the later game with its even more convoluted puzzles.

Move around by using the arrows at the side and bottom of the screens and click on items for a close up or to manipulate them, all pretty basic navigation. A changing cursor would have been nice, but frankly the space is so uncluttered that it's pretty easy to see what you can click on for a close up. Although a Japanese game, Enigma requires absolutely no knowledge of the language to complete it. All of the puzzles are use of found objects, logic, or math. The only puzzle that features letters uses basic English alphabet, so no worries there. Some of the puzzles are color based, though, so the game might be difficult for the color-blind crowd.

Is this the perfect escape game? Well, no, but it's nice to go back and see the progression from Enigma to Rosetta Escape, and realize that we have here a very talented designer who is not afraid to create unique and fun puzzles rarely seen in standard room escapes. Enigma is not that difficult, but it might take more than a few minutes to find your way out of this charming game. However, taking your time is half the fun. Sit back, relax, and see if you can solve...Enigma (cue appropriately dramatic music here)!

Play Enigma

Walkthrough Guide


(Please allow page to fully load for spoiler tags to be functional.)

(Note: this is my first attempt at a walkthrough. Enjoy!)

Walkthrough

Phone / Cupboards

Check the cupboards for items.

The outer cupboards are unlocked, the right one contains a blue "key".

The inner cupboards are locked.

Examine the phone.

Note two holes below it that explains why the inner cupboards are locked.

Painting / Safe

Examine the painting.

Note the panel in the corner, which is secured by a slot screw.

Door

Examine the door - note that we need a code.

Examine the blue rectangle (lightswitch).

Switching the lights off leaves the painting lit up.

Couch

Examine the couch.

The right cushion contains a key.

The left cushion contains an on/off switch.

The on/off switch controls the light above the painting.

Painting / Safe

Use the key on the safe.

You will find a panel secured by cross screws and another on/off switch.

This controls the spotlight on the painting.

Turn the painting light off and the spotlight on.

It will highlight the blue shape and a code (blue code) when the lights are turned off. Note that all codes are different for each game.

Phone / Cupboards - Blue Key

Use the blue key on the phone.

Keep note of the positions of the numbers, then click on the blue key to start the puzzle.

Enter in the blue code, then press the centre button to end.

You should see the left peg pop out of the hole.

You can now open the left inner cupboard to find a cross head screwdriver.

Painting / Safe

Open the green panel using the cross head screwdriver.

You will find the red key, and a series of buttons.

Note which buttons are depressed.

How does this relate to the painting?

X and Y could mean coordinates, and the second button is pressed on each set of buttons.

The spotlight on the painting is on the second column of the second row.

Maybe the principle applies to the red key.

Press the buttons that correspond to the red shape.

Press the 4th button on both rows (4th column, 4th row).

Turn the lights off and find the red code.

Phone / Cupboards - Red Key

Use the red key on the phone.

As with the previous key, keep note of the positions of the numbers, then click on the red key to start the puzzle.

Enter in the red code, then press the centre button to end.

Note that the numbers rotate counter clockwise by one position after each button press.
0 -> 1 -> 2 -> ... -> 8 -> 9 -> 0

You should now be able to open the right inner cupboard to find a flat head screwdriver.

Painting / Safe

Zoom in on the painting to get a close up with the panel in the corner.

Unscrew the panel with the screwdriver.

Press the button.
The painting moves aside to show another white shape.

Obtain the white code.

Turn the lights off to find the white code.

You must first turn the painting light on (from the couch).

Phone / Cupboards

As with the other codes, there must be a white key to use on the phone.

Examine the cupboards.

Open all the cupboards.

Note there is a space below both inner cupboards.

Open it to find the white key.

Phone / Cupboards - White Key

Use the white key on the phone.

Keep note of the positions of the numbers, then click on the white key to start the puzzle.

Enter in the white code, then press the centre button to end.

Note that the numbers rotate in a particular manner.

Depending on the number you press, the numbers will rotate by a certain number of positions.

The numbers rotate position counter-clockwise by what number you pressed. ie if you press 0, the numbers stay in place. If you press 1, the numbers rotate by 1 position. If you press two, the numbers rotate by 2 positions etc.

Another way to think about it is:
0 -> 0
1 -> 2
2 -> 4
3 -> 6
4 -> 8
5 -> 0
6 -> 2
7 -> 4
8 -> 6
9 -> 8

To get your head around what order to press the numbers, press each button, then starting with whatever number the button changes to, count your way around the dial to the next button, until you have all 4 buttons pressed.

The left side of the phone will pop open to reveal what looks like a number equation.

The Last Code

The phone will reveal a number equation, with ABCDE on it (remember the door code?).

Solving these as algebraic equations doesn't give us enough information on what the code is.

Examine the phone again.

Note that some numbers are visible while the rest are not.

These numbers are the ones used in the code, but you need to use logic to work out which number corresponds to which letter.

To solve the code, start by noting which numbers can and can't be each letter, using the equations.

Each code is different every game, but as an example:

D + 3 = A
B + 2 = C
E < D

2 4 5 6 8

- A must be 3 greater than D, so A must be 8 (5 + 3), as no other numbers satisfy the condition. This also means that D must be 5.
- C must be 2 greater than B, so C can be 6 (4 + 2) or 4 (2 + 2). This also means that B can be 2 or 4.
- E must be less than D, and D is 5, so E can be 2 or 4.
- C must be 6, as there are no other letters that can be 6. This also means that B must be 4.
- E can't be 4, so this means that E is 2.

Enter the code in the door. Click back, then click the door again to open it.

Out!

Enigma Walkthrough

General Information

  • Pick up everything you can, even if you can't take it with you.

  • Math is your friend.

  • There will be directions for the colorblind.

  • Some puzzle solutions are random. The best I can do in the walkthrough is tell you the process by which you can find the solutions.

  • Good luck!

General Exploration

  • You begin the game facing a low cabinet with 4 doors, and an orange object sitting on top. Click on the orange object for a close up.

  • A telephone! A rotary dial telephone! Which needs a key, which we don't have. You might notice that the numbers are in an odd place for a rotary dial. Back up.

  • Open the right cabinet and get the blue key.

  • You can open the left cabinet, but there is nothing in there. The two center cabinet doors are locked.

  • Turn left.

  • You are now looking at a green couch with some hideous yellow pillows. Lift the right pillow to take the brown key.

  • Lift the left pillow and you will see something in the arm of the couch. Click on that item for a close up.

  • Looks like an on/off switch. Back up.

  • Turn left.

  • Here's the door. There's a switch to the left of the door. Click on it and the lights will turn off and on.

  • Below the doorknob is a code panel. Click on it for a close up.

  • Looks like we're looking for a 5 digit code involving both letters (A through E) and numbers. Back up.

  • Turn left.

  • You are now facing a picture underneath a light. Note the phones in the picture are in a rainbow of colors.

  • Click on the picture for a close up and you will see a small panel to the right of the lower right corner. Click on the panel for a close up and you see you will need a flat head screwdriver to open it.

  • Back up twice.

  • If you click on the lamp above the picture you will get a close up and see that the lamp is on.

  • Back up.

  • Below the picture is a safe. Yes, it is locked.

  • Turn left and you are back where you began, at the low cabinet and the phone.

Exploration Part 2, Manipulating Things

  • Click on the orange phone for a close up.

  • Note that the shape on the end of the blue key matches the shape of the phone.

  • Put the blue key in the key slot in the upper right of the phone. This will cause the number dial to spin around. Make note of where the zero ends up, the numbers will move clockwise from the zero.

  • Click on the key again and the numbers will be covered. You can click on the orange buttons below each number space to reveal one number at a time.

  • If you click on the big orange button in the center, the blue key will go back to your inventory.

  • Looks like we need to figure out the sequence in which to push the buttons.

  • Back up.

  • Turn left.

  • Click on the left couch pillow then click on the on/off switch for a close up. Click on the "off" switch and back up.

  • Turn left twice and you will notice that the lamp above the picture is now off.

  • Use the brown key from your inventory to open your safe.

  • Click on the open safe and you will see a green panel which requires a phillip's head screwdriver to remove it, and an on/off switch.

  • Move the switch to on and back up.

  • Turn right once to the door, and click on the light switch to turn off the room lights.

  • Turn left to the safe/picture and you will see one of the phones are lit up, the blue one (this will only work if the switch on the couch arm is set to "off"). Click on that phone twice for a close up and get the code written on it.

  • Note: This code changes every time you play the game.

  • Back up and turn right.

  • Click on the light switch beside the door to turn the lights back on (you will see the switch glowing in the dark).

  • Let's review the lights and the switches: The switch by the door controls the main room lighting, the switch in the arm of the couch controls the lamp above the picture, and the switch in the safe controls some sort of back lighting behind the picture that highlights one phone at a time.

  • At this point you have all of the clues to solve the blue key code.

Blue Key Code

  • Turn right (or left) until you are facing the low cabinet with the orange phone.

  • Click on the phone for a close up.

  • Insert the blue key in the key slot and notice where the zero on the dial lands.

  • Click on the key and the numbers will be covered up.

  • Click on the buttons below the numbers with the code you just got from the blue picture on the wall (note: both the position of the numbers on the dial and the code changes from game to game). As you click the buttons you will briefly see the numbers so you can tell if you are getting it correct.

  • The trick is to remember where the zero is, and count up clockwise from there (1, 2, 3, etc.) around the dial.

  • When you've entered the 4 digit number you got from the picture, push the center button.

  • Notice that this time the key disappears rather than go back into your inventory. Also, a brown button has just popped up in front of the phone, on the left.

  • Back up once and open the middle left cabinet, which is now unlocked.

  • Take the phillip's head screwdriver from the cabinet. Notice that there is some sort of drawer at the bottom of the cabinet that extends to both sides of the middle.

  • Turn right once to face the picture and the safe.

  • Click on the safe to open it and click on the inside for a close up.

  • Use the screwdriver on the screws to remove the green plate.

  • Click on the plate to remove it (once the screws are gone) and you will find some buttons labeled "X" and "Y" and a red key.

  • Note that on the "X" row of buttons and on the "Y" row of buttons the second button from the left is depressed.

  • Back up.

Red Key Code

  • Click on the picture for a close up.

  • Notice that the blue phone (already used) is in the 2nd row 2nd column position.

  • In math, if you are creating a Cartesian coordinate system, the X axis is the one that runs horizontally (left to right), while the Y axis runs vertically (up and down).

  • The buttons in the safe are then coordinates on a chart, the X axis and the Y axis.

  • Note the red phone picture that is the exact same shade as the key. That phone is in the 4th row, 4th column (or 4, 4 in the Cartesian coordinate system).

  • Back up and click on the safe to open it.

  • Click on the inside of the safe and click on the green panel to remove it.

  • Push the 4th from the left "X" button and the 4th from the right "Y" button and back up.

  • Turn right, click on the switch to turn off the room lights, and turn left.

  • You will see that the red phone is individually highlighted.

  • Click on the red phone twice for a close up to get the code (again, this code changes from game to game).

  • Back up, turn right, and turn the lights back on.

  • Turn left (or right) twice to face the orange phone.

  • Time to use the red key.

  • Click on the phone for a close up.

  • Insert the red key and watch where the numbers go.

  • Click on the red key again to cover the numbers.

  • Click on your first number. You will notice when you click on the number the dial moves.

  • Now comes the tricky part: The number dial has just moved one position counter-clockwise.

  • That means if you just clicked, for instance, the zero button, that button has now become the number 1 button. So when you go to click the second number in the sequence, you have to mentally take into account that the numbers have shifted once in a counter-clockwise direction.

  • Each time you click a number in the code, the dial will shift again, so keep track of where the numbers are.

  • When the code is entered, click the center button and the red key will disappear. If you did it incorrectly, the red key will go back into your inventory and you can try again.

  • When you click the center button and the key disappears, another button will pop up in front of the phone, on the right side. Back up.

  • Now open the right hand center cabinet door and take the flathead screwdriver.

  • Open the left hand center cabinet door as well and you can see the drawer in the bottom of the cabinet. Click on the drawer to open it and take the white key.

  • Turn right.

White Key Code

  • You should be back facing the picture and the safe. Click on the picture for a close up.

  • Notice that there is no white phone in the picture of the phones. This could be a problem.

  • Remember that little panel to the bottom right of the picture? Click on it for a close up.

  • Use the flat head screwdriver to remove the screw and click on the panel to open it.

  • Yes, push the big red button. Nothing will blow up. Hopefully.

  • Once you push the button you will back out to the picture on the wall and watch it move away. Behind the picture is a large white phone outline.

  • However, this one probably won't have any backlighting like the ones in the picture, so we're going to have to light it up separately when the room lights go out.

  • Back up from the picture and turn left (or right) 2 times until you are facing the couch.

  • Lift up the left pillow, click on the on/off switch, and turn it back to "on".

  • Back up and turn left once to the door.

  • Turn off the light switch and turn left once.

  • Notice that the large white phone on the wall is lit from above. Click on it to get the code (this changes from game to game).

  • Back up, turn right, and turn the lights back on.

  • Turn right twice to the phone and click on the phone for a close up.

  • Put the white key in the slot and note where the numbers end up.

  • Click on the white key to turn it and the numbers will be covered.

    • Before you enter the code, do an experiment.

    • Click on the button where the 1 is, and you will see the 1 briefly, then the dial will move.

    • Click on the same button again and it should now be a 2. The dial will move again.

    • Click on the same button again, and it is now a 4.

    • Click again and it is an 8.

    • Click again and it is a 6.

    • Click again and it is a 2.

    • What this tells us about the dial progression is this: When you click on a number, the dial will then rotate to that number plus itself.

    • For instance, if you click on the 1, then it will rotate to the 2 (1 + 1).

    • Click on the 2, and it will rotate to the 4 (2 + 2).

    • Once you get into double digit numbers, it will rotate to the second number of the 2 digit number. I.E., click on the 8, and it becomes a 6 (8 + 8 = 16). Just remove the 1 from the beginning to get the number.

    • Knowing this, you can then enter the code from the wall. Remember, every time you click the dial will rotate and all of the numbers will change. You will have to count backwards or forwards from the number you know, the one you just clicked.

  • Once you know how the dial rotates, enter the 4 digit code from the wall and press the center button.

Getting Out

  • Once you enter the white key code correctly, the left "ear" of the phone will open up, revealing a note.

  • Take the note and notice the math code.

  • This math code changes each time you play the game. You should have 3 lines of code, two of them addition and one of them a greater-than.

  • Back up once and notice that there are now only 5 numbers visible on the phone. Write these numbers down (again, this changes from game to game).

  • Back up and turn left twice to the door.

  • Click on the code beneath the door for a close up.

  • You are going to have to solve the math problem on the note to get the code.

  • You have 5 letters in the code, from A to E, and 5 numbers from the phone, so each letter is one of those unique numbers.

  • Once you solve the math, enter the numbers into the code in the order of the letters, from A to E.

  • Back up once, then click on the door to open it.

  • Click on the open door to escape!

55 Comments

Stage name October 27, 2010 1:39 AM

Hooray! I finally finished one of these before the walkthrough went up!

Short but good.

Reply

Stuck on the

white key

Reply

Gah, I feel like I'm so close!

I've got the code revealed behind the bear picture, and now I can't figure out what I'm supposed to do :(

Reply

Oops, nevermind... I missed a key, silly me :|

Reply

Got the sequence, finally. Was there any clue how to

predict where the numbers would end up, besides pressing the first, checking to see where the numbers went, remembering it, pressing the first and second, checking it... etc.?

Reply
totallythatguy October 27, 2010 1:58 AM

I'm having trouble with the last problem:

E+3=B, A+2=C, D

Any hints as to what I should do?

Reply
totallythatguy October 27, 2010 2:03 AM

Nevermind! Figured it out.

Reply

I'm stuck. Found:

blue key and screwdriver, used both. Have red key, cannot figure out code. Also have panel next to bear poster that I cannot open.

Any hints?

Reply
Stage name October 27, 2010 2:11 AM

totally:

There's a big hint on the phone dial itself. After that it's just math.

Reply
Stage name October 27, 2010 2:15 AM

Posey:

What's behind the panel you opened with the Philips screwdriver? The X,Y buttons will help you to your next code

Reply

Figured out

the red key, now confused on the white one. What is going on with the numbers?

Reply

I'm out. Power of posting!

Reply
Black Drazon October 27, 2010 2:27 AM

Andrew:

The dial for the white key seems to rotate a number of times based on the number you just inputted. So if you entered 1, it would rotate one place, 9, nine places (though I had some trouble with 9). 0 naturally means it does not rotate at all.

Reply

Black Drazon, I think you have the pattern wrong. I had a completely different one, that was

math-based and logical

.

Reply
Anonymous October 27, 2010 4:07 AM

@stage name I'm having difficulty figuring out the hint.

Reply
Anonymous October 27, 2010 4:48 AM

where is white key?

Reply
stupidcheeseboy October 27, 2010 4:55 AM

Gah! Where is the white key?

Reply
stupidcheeseboy October 27, 2010 5:00 AM

typical! immediate POP!

Reply

I registered to comment. I have been a huge fan of JIG for awhile now. I find it to be the smartest site for escape games and it has led me to explore other games as well. I am a particular type of person in that I'm probably smart enough to figure out stuff on my own. However, I can't help but want the instant satisfaction of knowing what's going to happen next. With that said, this is the first game that has made me feel like a complete idiot. :)

I got the blue key and the safe key pretty obviously. LOL Now I don't know what to do. It amazes me (often) how quickly y'all figure things out. So...since I've flipped the poster light on and off and then circled the room with the room lights off...what, without giving it all away, should I do next?

Reply

I really thought I had, but since I now have a screwdriver, I guess I hadn't. Thank you.

P.S. You write my favorite walkthroughs. :)

Reply

cant do anything with white key, i see a white pic. whats next?

Reply

Well, thanks GrinnyP...I'm out with no more help needed! I did like that the game was pretty simple/logical. It made "sense", for an escape game.

Reply

Let me join those whose only need for instant and eternal happiness and joy is the wherebaouts of the white key...

I noticed that I can click close up on the

lamp above the picture with the color bear-heads,

but cannot seem to do/find anything there. And that's not typical with p'n'c games - if i can bring something close up it usually means I can/should do something there, right? Am I missing something in that particular location?

bio

Reply

Update: found the white key.

Reply

A very good game, I enjoyed it thoroughly. The interface is simple, and the puzzles are logical and above average in difficulty. There is not much pixel hunting, but i did spend too much time finding the

hidden compartment in the cabinet below the telephone.

I like the use of lights in games. However, this game is no where near my favorite lighting game Loom Dawn.

The game is fun and should not require a walkthrough; perhaps a hint. Solo escapes are sweeter.

Thanks grinnyp

Reply
jsagemonster October 27, 2010 8:06 AM

Help Stuck on the final code !!!!

Reply

gmpilot and Black Drazon about phone:

Math might work perfectly fine, but Black Drazon is not wrong. For the red key, the dial rotates one position every time you choose a number. For the white key, it rotates as many positions as the number you pressed -- so 7 positions (counterclockwise) for a 7, 0 positions for a zero, etc. This can be determined by observations/trial and error. After that it's just counting.

I liked this one; it works the way I think.

Reply

Yay! Out on my first run, and without hints at all!

jsagemonster:

the final sequence uses the numbers highlighted on the "phone" dial and the equations on the "ear". The only possible sequence would thus be 57693

Reply

Jsagemonster:
for the final code there are only 5 numbers you need to be using and you already have those. From that there is only one way those 5 numbers will fit in the equation.

Reply
Daibhid C October 27, 2010 8:45 AM

A hint for the last puzzle:

There are two possible solutions for both equations with the numbers provided, but working out which ones are unworkable doesn't require too much math. Start with B being less than E, which should disqualify one of the solutions for the first equation even though you don't yet know what B is.

Reply
vederblich October 27, 2010 9:00 AM

I've always hated those comments saying "the first time I completed a escape game without any hints", it always made me feel more stupid for not getting it. But I can't resist saying it: Today I finally got through the game without cheating! AND Don't it feel good!

The puzzles are very logical and mostly based on basic maths. Which is good! No illogical leaps of the mind, just plain and simple. Plus bonus for the fact that it was based on doing sort of the same puzzle 3 times, and still didn't get boring.
Since I did it without help, I'm assuming this is a ridiculously easy game. But still, simple and streamlined doesn't necessarily mean boring. I liked it. And not JUST because I finally got initiated in the non-cheating crew...

Reply

Out without even reading the comments... that's rare for me, I usually have to read at least one comment before figuring out how to exit and more often than not I have to resort to the walkthrough at some point.

I didn't use math for the white key puzzle... I guess I cheated by stopping and mapping out where the next number would be and then remembering the pattern of the buttons... I didn't realize that the pattern was as many turns as the number itself until I read the comments...

Reply
Patreon Crew SonicLover October 27, 2010 10:10 AM

I'm not sure I thought about the white key puzzle in the right way, although I did get the right solution in the end.

I pressed the same button repeatedly and noted how it changed. I observed that whichever number was displayed on click n+1 would be double the number on click n, multiplied by two and with the tens digit dropped. From there I worked out where the other digits would have to be.

Reply

I was feeling down in the dumps until I remembered ... it's Wednesday! YAY!!

Thanks, GrinnyP! Can't wait to get started. I see there's no walkthrough yet, but lots of discussion to help me out. :)

Reply

(Note: this is my first attempt at a walkthrough. Enjoy!)

Walkthrough

Phone / Cupboards

Check the cupboards for items.

The outer cupboards are unlocked, the right one contains a blue "key".

The inner cupboards are locked.

Examine the phone.

Note two holes below it that explains why the inner cupboards are locked.

Painting / Safe

Examine the painting.

Note the panel in the corner, which is secured by a slot screw.

Door

Examine the door - note that we need a code.

Examine the blue rectangle (lightswitch).

Switching the lights off leaves the painting lit up.

Couch

Examine the couch.

The right cushion contains a key.

The left cushion contains an on/off switch.

The on/off switch controls the light above the painting.

Painting / Safe

Use the key on the safe.

You will find a panel secured by cross screws and another on/off switch.

This controls the spotlight on the painting.

Turn the painting light off and the spotlight on.

It will highlight the blue shape and a code (blue code) when the lights are turned off. Note that all codes are different for each game.

Phone / Cupboards - Blue Key

Use the blue key on the phone.

Keep note of the positions of the numbers, then click on the blue key to start the puzzle.

Enter in the blue code, then press the centre button to end.

You should see the left peg pop out of the hole.

You can now open the left inner cupboard to find a cross head screwdriver.

Painting / Safe

Open the green panel using the cross head screwdriver.

You will find the red key, and a series of buttons.

Note which buttons are depressed.

How does this relate to the painting?

X and Y could mean coordinates, and the second button is pressed on each set of buttons.

The spotlight on the painting is on the second column of the second row.

Maybe the principle applies to the red key.

Press the buttons that correspond to the red shape.

Press the 4th button on both rows (4th column, 4th row).

Turn the lights off and find the red code.

Phone / Cupboards - Red Key

Use the red key on the phone.

As with the previous key, keep note of the positions of the numbers, then click on the red key to start the puzzle.

Enter in the red code, then press the centre button to end.

Note that the numbers rotate counter clockwise by one position after each button press.
0 -> 1 -> 2 -> ... -> 8 -> 9 -> 0

You should now be able to open the right inner cupboard to find a flat head screwdriver.

Painting / Safe

Zoom in on the painting to get a close up with the panel in the corner.

Unscrew the panel with the screwdriver.

Press the button.
The painting moves aside to show another white shape.

Obtain the white code.

Turn the lights off to find the white code.

You must first turn the painting light on (from the couch).

Phone / Cupboards

As with the other codes, there must be a white key to use on the phone.

Examine the cupboards.

Open all the cupboards.

Note there is a space below both inner cupboards.

Open it to find the white key.

Phone / Cupboards - White Key

Use the white key on the phone.

Keep note of the positions of the numbers, then click on the white key to start the puzzle.

Enter in the white code, then press the centre button to end.

Note that the numbers rotate in a particular manner.

Depending on the number you press, the numbers will rotate by a certain number of positions.

The numbers rotate position counter-clockwise by what number you pressed. ie if you press 0, the numbers stay in place. If you press 1, the numbers rotate by 1 position. If you press two, the numbers rotate by 2 positions etc.

Another way to think about it is:
0 -> 0
1 -> 2
2 -> 4
3 -> 6
4 -> 8
5 -> 0
6 -> 2
7 -> 4
8 -> 6
9 -> 8

To get your head around what order to press the numbers, press each button, then starting with whatever number the button changes to, count your way around the dial to the next button, until you have all 4 buttons pressed.

The left side of the phone will pop open to reveal what looks like a number equation.

The Last Code

The phone will reveal a number equation, with ABCDE on it (remember the door code?).

Solving these as algebraic equations doesn't give us enough information on what the code is.

Examine the phone again.

Note that some numbers are visible while the rest are not.

These numbers are the ones used in the code, but you need to use logic to work out which number corresponds to which letter.

To solve the code, start by noting which numbers can and can't be each letter, using the equations.

Each code is different every game, but as an example:

D + 3 = A
B + 2 = C
E < D

2 4 5 6 8

- A must be 3 greater than D, so A must be 8 (5 + 3), as no other numbers satisfy the condition. This also means that D must be 5.
- C must be 2 greater than B, so C can be 6 (4 + 2) or 4 (2 + 2). This also means that B can be 2 or 4.
- E must be less than D, and D is 5, so E can be 2 or 4.
- C must be 6, as there are no other letters that can be 6. This also means that B must be 4.
- E can't be 4, so this means that E is 2.

Enter the code in the door. Click back, then click the door again to open it.

Out!

Reply
Jayunderscorezero October 27, 2010 12:34 PM

Woo! I made it through an escape game without the walkthrough, for once! I feel oddly proud.

Reply

So many great comments ...

Laughing @ Vaderblich's comment (annoyed when others brag-post, but it feels so great when you do it yourself)

Agreeing with Ethbay (with persistence we could all finish these without any help ... but the old need for instant gratification trips us up)

Black Drazon and I must think alike, because his/her hint on the white key/phone code made perfect sense to me and I got it immediately. (The other postings on this puzzle were completely Greek to me.)

Not out yet, but thanks, everyone!

Reply

i'm confused on red key.

i can't keep track of the "counterclockwise by 1" thing because after i do it's either a different number far off by what it originally was,or it's the same number. i don't get it.

just way too confusing.

Reply
SoberHorseThief October 27, 2010 3:59 PM

That was fun and relaxing! For a change I needed no hints. Not that it was so easy, and certainly not that I'm so smart (or getting better at these things). Just worked out nicely today!

Reply

Like Lynne, I'm always cheered by the appearance of a new escape on Jay is Games. Oh sure, there are other sites that host/link to escape games, but this one really is the best.

I especially enjoy the surprise of an escape game on a Non-Wednesday (I mean a genuine escape game, not just one with escape-like features) such as Link Dump Fridays have been adding a few in...

So I'm wondering... any chance of adding another escape day? I'd love to escape Mondays!

elle

p.s. This game was fun, but far too short; just not enough to fill-up for another week.

Reply
nerdypants October 27, 2010 8:33 PM

It took me waaaay too long to figure out that

for the last code, you're supposed to use the numbers that you can see on the phone, instead of the ones that are blocked out.

Reply

This one was short and sweet. I have stumbled through some of the other escape games that others fly through, yet I finished this one fairly quickly on my own. I like this one for its emphasis on observation, a push to explore different variables, and the inclusion of a little memorization. I always enjoy the addition of a light switch, too. =) The only thing that could have made this better is to have more of it, but we have Rosetta Escape for that. Thanks go to Otousan for his/her unique approach to escape design!

Reply

Nothing like a walkthrough-free escape to cap off the night. ^_^ Gotta admit, the puzzles in this one were pretty creative.

Reply

nothing like abother difficult game with walkthrough to make the walkthrough even more difficult. the white key puzzle is difficult. how do i do this?

Reply
nerdypants October 28, 2010 8:03 PM

Paul, about the white key puzzle:

How to solve the phone part of the puzzle (which buttons to push):

Just like before, you put the key into the phone and memorize where the numbers are. But this time, whenever you press a button, the numbers move a certain number of spaces, depending on the number you push. For instance, if you push 0, the buttons move 0 spaces. But if you push 2, then the phone moves 2 spaces, meaning that the button you just pushed is now the 4 button. If you press the 9 button, the phone rotates 9 spaces, meaning that the button you just pushed is now the 8 button, because the phone rotated nine spaces ahead: 0-1-2-3-4-5-6-7-8.

It takes a bit of concentration, but stick with it!

After you've entered the code (which you got from the big white bear head on the wall), the left ear of the phone pops out with a little note on it.

How to solve the problems on the note:

First of all, you should notice that some of the numbers on the phone have been blocked out. The numbers that you can still see are the ones that you use for the code (which seems simple, but had me confused for quite a while).

Now, the note mentions the letters A, B, C, D, and E. These letters are variables that represent the numbers on the phone.

Your job is to bust out your algebra skills and figure out which letter corresponds to which number. How I did this was a write out the numbers from 0-9, scribble out the numbers that were blocked out on the phone, and then look at the equations on the note to see what would work.

For example:

If my note says "A + 2 = C", I might look at my numbers (below) and see that if A is 1, then A + 2 = 3, meaning that C = 3.

1#34##78##

I hope that helps!

Reply

Love These Games ! I am getting better at them every day .I sometimes have to adjust my screen just to see some objects better otherwise I am just Pixel hunting. thought I would never use that crazy stuff they taught in math class how wrong I was lol

Reply

Okay... I feel really worthless right now. I'm stuck, with the

safe opened and the the seemingly useless blue stick

with me. I'm trying to win a puzzle game without a walkthrough for once. My mind just doesn't work with escape games. Other people are laughing with their friends about how easy it is, I'm hiding under the bed with a laptop in the middle of the night, silently crying.

Reply
nerdypants October 30, 2010 7:06 PM

Josh:

I would suggest you find out what all three switches around the room do. The wall switch, the switch in the safe, and the one hiding in the couch all control different lights.

And don't feel bad. I have trouble with "easy" games all the time.

Reply

^ Scroll Up | Homepage >

Leave a comment [top of page]

Please consider creating a Casual Gameplay account if you're a regular visitor here, as it will allow us to create an even better experience for you. Sign-up here!
  • PLEASE UNDERSTAND SITE POLICIES BEFORE POSTING COMMENTS
  • You may use limited HTML tags for style:
    (a href, b, br/, strong, em, ul, ol, li, code, spoiler)
    HTML tags begin with a less-than sign: < and end with a greater-than sign: >. Always. No exceptions.
  • To post spoilers, please use spoiler tags: <spoiler> example </spoiler>
    If you need help understanding spoiler tags, read the spoiler help.
  • Please Preview your comment before posting, especially when using spoilers!
  • No link dropping, no domains as names; do not spam, and do not advertise! (rel="nofollow" in use)
chrpa Jayisgames needs your help to continue providing quality content. Click for details Welcome to the Roundup 66 - Retro with four games! After you find the ten monkeys in the chapter, look in the inventory. You will find a...  ...
chrpa Jayisgames needs your help to continue providing quality content. Click for details Welcome to the Roundup 65 with three games! As mentioned in the previous roundups, only odd-numbered episodes are featured since even-numbered are for Robin Vencel's patrons (the...  ...
chrpa Jayisgames needs your help to continue providing quality content. Click for details Hi! Weekday Escape and Weekday Puzzle are here! First we have two new cans from tomoLaSiDo and then two small rooms from isotronic. That's all for this...  ...
6,365 Views
0 Comments
chrpa Jayisgames needs your help to continue providing quality content. Click for details Welcome to Mobile Monday! We have another beautiful game from Nicolet and it's a winter game as it should be. Tasuku Yahiro have released another of their...  ...

HELP Jayisgames.com

Recent Comments


Display 5 more comments
Limit to the last 5 comments

Game of the week


Dark Romance: Vampire Origins Collector's Edition

Your Favorite Games edit

add
Save links to your favorite games here. Use the Favorites editor.

Monthly Archives