
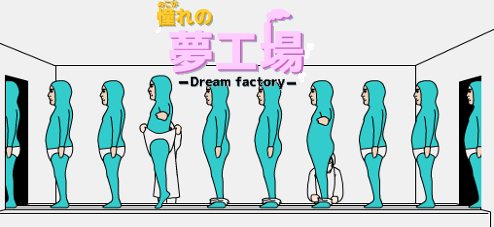
![]() Prepare to cock your head in confusion like a cute puppy in a hit YouTube video, because Detarou's Dream Factory is one strange escape game... even by Detarou standards. It goes without saying that you're trapped somewhere weird, but this doesn't look like any factory floor I've ever seen... unless this is where they assembled Tingle and he's been the result of a horrific experiment gone wrong all along! Just click to navigate using the grey bars that pop up at the edges of the screen, and again anywhere else to interact when the cursor changes. Items can be used by clicking once to select them, or double-clicking to get a close-up view. Since there are multiple endings, you'll also want to make sure you save every now and again too.
Prepare to cock your head in confusion like a cute puppy in a hit YouTube video, because Detarou's Dream Factory is one strange escape game... even by Detarou standards. It goes without saying that you're trapped somewhere weird, but this doesn't look like any factory floor I've ever seen... unless this is where they assembled Tingle and he's been the result of a horrific experiment gone wrong all along! Just click to navigate using the grey bars that pop up at the edges of the screen, and again anywhere else to interact when the cursor changes. Items can be used by clicking once to select them, or double-clicking to get a close-up view. Since there are multiple endings, you'll also want to make sure you save every now and again too.
 Part of what makes a Detarou game so much fun is the way clues tend to be hidden not only everywhere, but in different places. While it may be fairly obvious you're looking at a puzzle solution, you'll usually need yet another clue to figure out how to implement it, and connecting the dots in such a way is extremely satisfying. Dream Factory is no different, and filled with plenty... odd... and surprising moments to boot... though unfortunately at least one of them might be a little uncomfortable and suggestive for some players. If you don't offend easily, however, Dream Factory will definitely need you to put not only your thinking cap but your sleuthing pants and detective mustache on. It's complex, sneaky, on the longer side, and full of the off-kilter strangeness you've come to expect... even if this doesn't look like any dream I'd want to have on a regular basis.
Game not loading? Try this alternative link.


Walkthrough Guide
(Please allow page to fully load for spoiler tags to be functional.)
Dream Factory Walkthrough
Room 1: Exploration and Four-Color Panel
You begin facing a poster of a girl with a frog. Back up to get a wider view of a desk area. Take a look around the desk area...
Examine the bottom drawer to see it needs a 3-digit code. The clue is a silhouette of a frog.
In the right side top drawer there is a clue. Make a note of the symbol and numbers.
On top of the desk you can see a transparency, zoom closer to view it: it has a series of symbols, 3x3.
There's also a grey box with a crown symbol on it and two gold latches on either side.
In a cardboard box next to the desk is a DUMMY WITH A KEY in its mouth. Take it.
Turn left to see a door, a table with a gold spheres ornament on it, and a grey cabinet. Look closely at everything in this view, too...
Open up the top part of the cabinet to see four dolls, each a different color (from left to right: red, yellow, green, blue) and a different number stripes.
The bottom doors of the grey cabinet need a key.
For the gold spheres ornament, make a note of their arrangement and the symbol on the second sphere.
Next to the door is a panel with four buttons. As you press them, they change color. Hmm.
Now you're ready to open the door lock and leave this room...
Use the information from inside the top drawer of the desk and the dolls in the cabinet to change the colors on the panel next to the door.
SOLUTION:
top = green
bottom = yellow
right = blue
left = red
Colorblind Help:
Blue is 1 click. Red, 2 clicks. Green, 3 clicks. Yellow, 4 clicks.
When the colors are correct, press the center button and the door will unlock.
Go through the door to the next room.
Room 2 Exploration, Lockers, Grey Cabinet and Desk Drawer
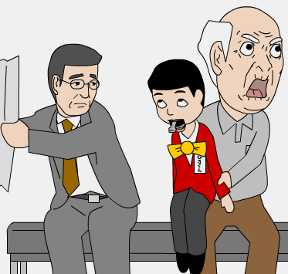
When you first enter the second room, you see two men sitting on a bench. Walk over to them...
Give the DUMMY to the old man.
Take the grey KEY from the dummy's mouth.
Back up into the first room again and zoom in on the bottom doors of the grey cabinet:
Use the KEY to unlock the doors and open the right side.
Get the COW DOLL.
Return to the second room and turn left to see a row of lockers and metal shelves. Examine the left locker door:
Arrange the gold spheres in the correct positions on their sliders.
SOLUTION:
Use the gold spheres ornament, matching the arrow's direction above the locker puzzle to orientate the clue, to get this arrangement...
- - - O -
- - - - O
O - - - -
- - O - -
- O - - -
Press the rectangular button when the spheres are set correctly to unlock this locker.
Open the locker and get the FROG DOLL.
Back up to see the shelves again and zoom in on the middle shelf:
Put the FROG DOLL on the stand and make a note of the numbers as they light up.
Take the FROG DOLL back.
Then, do the same thing with the COW DOLL.
Return to the first room and turn to face the desk. Examine the bottom desk drawer:
Input the code from the FROG DOLL.
SOLUTION:
8 6 9
Open the bottom drawer and get a NOTEBOOK. Look through the notebook for more clues.
Go back to the second room and turn right twice to see door with a green circle and a table with a pig on it. Zoom in on the door:
Input the correct 4-digit code to unlock then open this door.
SOLUTION:
Use the clues from the NOTEBOOK and the upper right desk drawer to get a code...
4132
Go through the door to the third room.
Room 3 Exploration, Pandas, Levers and Pig
When you first enter, you'll see a headbanger with pink hair, a door needing a gold key, and a podium with some levers on it. Let's explore a little more, though.
Turn right to see an elevator. Next to it is a red number panel...
Looks like you need a key card to operate it and some sort of number code.
Turn left and you'll see another door. It's unlocked but you can ignore it, unless you want to meet some bad pandas...
When you first enter the panda room, there is something you should do right away...
SAVE YOUR GAME!
Now, if you want to end your game right off, go through the fake exit door to the left of the pandas. Otherwise, ignore it!
Turn back to the podium and zoom in on the levers...
You need to arrange the levers in the proper positions.
The clues you gathered from the other room and your notebook will give you the answer.
SOLUTION:
On the second page of the notebook, you'll see a lever symbol with a crescent moon on it. Below that are some more symbols. Notice how those symbols match the transparency on the desk--the moon is in the center. So, relate these symbols to compass directions and turn each lever in that direction. Example: sun is southeast, star is northwest...
WEST - SOUTH - NORTH
NORTHWEST - SOUTHWEST - NORTHEAST
Done correctly, the panel opens up and you can get the RACCOON DOLL.
Back up into room two and turn to face the shelves again...
Put the RACCOON DOLL on the stand and note its numbers.
Back up, turn and notice that the frog guy is now sitting on the bench. So go back look in the left door of the lockers..
Here is another clue. That image in the middle of the dots should remind you of something.
Back out and turn to face the table with the pig on it:
Click on the pigs arms in the correct sequence.
SOLUTION:
LEFT-RIGHT-RIGHT-LEFT-RIGHT-LEFT
Get the KEY CARD and make note of the symbols on it.
The Elevator
Once you get the key card from the pig doll, go back into the third room and turn right to face the elevator. Zoom in on the red number pad on the wall...
Slide the KEYCARD into the slot to activate it.
Then, enter the correct 5 digit code...
Use the clues on the keycard itself, the third page of the notebook, the transparency on the desktop and the frog, cow and raccoon dolls.
SOLUTION:
6 7 0 4 1
When you've entered the correct code, press the "enter" button in the lower right corner to open the elevator doors.
Step inside the elevator.
Lift up the poster to see another clue, some colored dots on either side of tapered black line...
---- - purple
blue - ----
orange - orange
Turn right to see a man in a pink shirt.
Take the TORN NOTEBOOK PAGE from his pocket.
Optional Fourth Ending:
Somewhere in the elevator, by experimenting, you canfind the optional "fourth ending." Be warned that you might want to save your game first and it might be uncomfortable for some players.
Turn right again and press the up arrow to take the elevator to the next floor.
Upper Floor, Dragonfly, Grey "crown" Box, and 2x4 Digits Squares
When you arrive on the top floor, turn right and examine the podium.
Note that its dragonfly shape and colors should look familiar, matching two different clues.
Back up and zoom in on the niche above the podium:
Using the clue from your notebook, place the animal dolls in the correct order on the stand.
SOLUTION:
RACCOON-FROG-COW
Now, zoom in on the podium again and push the buttons in the proper sequence.
SOLUTION:
The color dots under the poster in the elevator give you the side and sequence...
TOP RIGHT - MIDDLE LEFT - BOTTOM RIGHT - BOTTOM LEFT
...then press the head (circle).
Then watch the animals for another clue...
Note the sequence of how the raccoon and cow light up on either side of the frog, which has a crown on its belly.
Back up, re-enter the elevator and press the down button. Turn right and back up into the first room. Return to the desk and examine the grey box.
Press the gold latches on either side of the box in the correct sequence.
SOLUTION:
RIGHT-LEFT-RIGHT-LEFT-RIGHT-RIGHT
Get the TORN PIECE OF PAPER from inside the crown box.
Read the completed page in your inventory, using the symbols to get a number clue.
Go back upstairs, turn left, and examine the panel on the wall:
There is a row of buttons across the top and a row across the bottom. Enter the create code in top and bottom buttons...
SOLUTION:
Use the clue from the reconstructed paper, the symbols on the desk and the animals' numbers...
top: 9 0 4 3
bottom: 1 8 5 8
...then press the rectangular button on the right.
When correct codes are entered, a GOLD KEY will appear in the slot below. Get it.
Normal Ending
Go downstairs and turn to face the door with the gold doorknob.
Save your game!
Use the GOLD KEY to unlock the door and exit.
Red Stamp Ending
Go downstairs and turn to face the door with the gold doorknob.
Save your game!
Use the GOLD KEY to unlock the door BUT DON'T EXIT! Instead, turn
around and go back to the second room.
Turn to the shelves and put the FROG DOLL back on the stand.
Make a note of its numbers.
Now go back up the elevator to the upper floor and turn left.
Examine the 2x4 digits button panel.
Press the buttons above and below each square until you've recreated
that code in the square shapes...
SOLUTION:
You need to recreate the numbers 4023 like on the frog's belly. When you
do this, the numbers on the buttons will be...
top: 4 3 5 5
bottom: 7 4 6 5
...press the rectangular button and get the red stamp.
Go back downstairs and exit.
Panda Revenge
After unlocking the exit door, return to the panda room and give the FROG DOLL to the pandas.
Posted by: elle |
April 9, 2013 3:17 PM
|
April 9, 2013 3:17 PM
Walkthrough
Part the First: Drawers, Puppets, and Lockers
You start out with a pretty picture of a pretty girl holding a pretty frog. Pretty!
Back up. On this wall we have a trashcan, a desk, and a box. Let's check out that trashcan!
A magazine, and a wad of clear...something. Alas, nothing clickable here. Moving on.
Let's skip the desk for now and check out that box.
A creepy ventriloquist dummy with a key stuck in his mouth! Ah, Detarou. Go ahead and pick him up, then try to grab that key... hm, he won't let it go. Guess we have to find some way to open his mouth.
Okay, over to the desk.
Checking out the top first, we have a pencil cup (which we can't click), a box with a crown and two clickable orange sides, and a light rectangle. Zooming in on that rectangle gives us...
...a 3x3 array of some shapes. Probably important; let's write those down.
On to the drawers!
Starting with the skinny drawer on the top right...
...a familiar silhouette surrounded by the numbers (clockwise from top) 1, 3, 2, and 4. Better note down that configuration; looks important.
The top two left drawers don't seem to have anything we can click on, just another magazine and a half-eaten...something, so let's go to the bottom left one.
A frog silhouette, and a lock requiring a 3-digit combination. We'll have to come back to this one!
Back all the way up to the main wall view and turn right. Uhhh...okay. Typical Detarou fare, but doesn't seem to be anything we can use, so let's turn right again. Uh huh. Oh hey, a cabinet! Turn right again to see more of that wall...the cabinet, a table with some hangy ball things, and--YAY! A door!
First things first--check out that cabinet.
The top two doors open to reveal...
...four of the infamous head-on-a-stick characters we've come to know and love from Detarou. From left to right, they are:
red face with 4 stripes, yellow face with 2 stripes, green face with 1 stripe, and blue face with 3 stripes. Now that looks like an important clue to write down!
Let's check out those bottom doors now...locked, darn it.
Hmm, I wonder if that dummy's key would open them?
Back out to the main wall view and zoom in on the hangy ball structure.
Hmm, nothing to click on, but maybe it's a clue for a future puzzle? Better write down the positions of the different balls, making sure to note the orientation of that little black triangle.
Back out to the main wall view again. Time to bust through that door! Or...y'know, open it. Give it a click and see what the lock looks like.
Okay, four buttons that cycle through different colors with a round button in the middle.
From the clue in the top desk drawer, we know that the buttons are numbered (clockwise starting from the top) 1, 3, 2, 4. From the heads-on-sticks in the cabinet, we know that 1 is green, 2 is yellow, 3 is blue, and 4 is red. Change the colors of the buttons appropriately, then hit that middle button. SWISH! (For the colorblind: click 3 times on the top button, once on the right, 4 times on the bottom, and twice on the left, then once on the middle.)
Click on the door to move to the next room!
Hmm, a nice young man reading a newspaper, and an old fellow that looks a little lonely.
Perhaps he's a retired ventriloquist?
Give him the dummy. GAAHH!!! Those things are way creepy...
oh hey, we can take the key now.
Let's see if that key does indeed open the bottom of that cabinet.
Back up a couple of times until you're facing the wall in the first room with the cabinet, then click on the cabinet, then open up the bottom doors with the dummy's key.
On the right side, aww, a cute lil cow! Pick him up. On the left side, another magazine, but nothing we can use.
We're done here for now, go back to the second room with the crazed ventriloquist.
Turn right.
A door with a green lock requiring a 4-digit code, and an overalls-clad pig sitting on a table with a dude underneath him. We don't have a code for that door yet, so check out the pig.
Seems we can move his right and left arms...interesting. Bet there's a code somewhere for him!
Back away from the pig and turn left, then left again. Some shelves, and a row of lockers. Those shelves look interesting...let's go poke around them some.
Feel free to zoom in on the top two boxes and the leotard guys, but there's nothing to do there. We're interested in that third shelf with the gizmo on it.
Hey, looks like we can put something here...
...hmm, didn't that little cow have a hole in the bottom? Let's see if he fits here...
...of course he does! And what's more, he gives us an important clue. Make a note of the numbers that light up on his tummy, and their positions according to the three squares under him
(3 5 2)
Now grab that cow and let's move on!
Back up and check out those lockers on the right. Just for fun, let's open them from right to left.
In the right one...
nothing. Bummer.
In the middle one...
some dude in tights pointing and laughing at us. I'd like to smack him in the face, I think.
Now let's try that left one...
hmm, five yellow balls and a black triangle (pointing downward). Where have we seen something similar?
Refer to the hangy ball structure in the first room and set these balls accordingly, paying attention to the orientation of the black triangle. The result should look similar to this:
---O-
----O
O----
--O--
-O---
Now hit that bottom white button for the SWISH! indicating we got it right. Open the locker to smack laughy-pointy-guy in the face. Haha! Oh hey look, a guy dressed as a frog handing us a little frog figurine. Take it from him. Thanks, frog guy! Hmm, looks like this frog has a hole in the bottom similar to the cow. I wonder... Oh, feel free to open and close the left locker a few times to give laughy-pointy-guy what for. Just 'cause it's fun.
Once you're through indulging your violent tendencies, let's go back to the gizmo on the shelf...
and see what numbers our little frog gives us.
(8 6 9)
Take him back and--wait a tic. Didn't we see a frog silhouette somewhere requiring a 3-digit code?
Let's go back and check out that bottom drawer on the desk in the first room.
Ah, there he is!
Enter your frog code
(8 6 9)
and open it up.
Hey, a notebook! Bet there's all sorts of helpful stuff in here. Go ahead and flip through it. Lots of information here, so let's go through one page at a time.
First page is blank.
Second page:
Left-to-right arrow over a green circle and a head-on-a-stick silhouette with a circular arrow. Hmm...didn't we see a round green lock requiring a 4-digit combination in the second room? That figure underneath the circle must be a clue to the combination! Remember the clue from the top right desk drawer?
Line up the clue on the page with the clue in the drawer and follow the circular arrow for your answer (4 1 3 2).
Make a note of this for now.
Third page:
What looks like a lever with six shapes underneath (those look a lot like some of the shapes we saw on top of the desk in the first room!).
Fourth and fifth pages:
Silhouettes of 3 figurines each pointing to a sequence of 3 shapes. Those top two figurines look just like our frog and cow, don't they? I'll bet the 3 digit codes from those figurines line up with the indicated shapes in that 3x3 grid on top of the desk. Better make note of those. Wait, there's a 3rd figurine here! We must have one more to find. Better keep an eye out.
Sixth page:
Same 3 figurines above some sort of butterfly figure.
Seventh page appears to have been torn out.
Let's go see what's beyond that round green lock, shall we? Head back to the second room and face the door with the green lock on it.
Zoom in and enter your combination
(4 1 3 2)
and hit the bottom button for that lovely SWISH!
Now to investigate the third room! Head through the door.
Part the Second: Punks, Pandas, Pigs, and Perverts
Whoa dude, take it easy before you hurt something. OH YAY, brown door with yellow knob, this looks like our exit! Too bad it's locked. Bummer.
Zoom in on the right of the door, then check out the pedestal with the six levers on top. Wait--what was on that third page of our notebook?
The six shapes tell you where to point each lever. Refer to the 3x3 grid of shapes from the top of the desk and point each lever accordingly:
left, down, up
top left, bottom left, top right
then hit the bottom yellow button.
Aww, a little raccoon...with a hole in the bottom! This must be our last figurine.
Go back to the gizmo on the shelf in the second room and get your last three numbers.
(1 4 7)
Don't forget to take him with you when you're done!
Wait, something's different here...looks like the guy dressed as a frog is now, erm, visiting the young man who really just wants to read his newspaper.
Wonder if he was hiding anything in his locker...let's check, shall we? Look in that left locker again...
...a ha, a clue! Zoom in for a closer look. Could that be a pig snout surrounded by left/right indicators? I think it could! Note down the sequence.
(LRRLRL)
Time to visit our piggy friend! Back away from the locker and turn right twice, then zoom in on Farmer Pig.
Click his arms according to the locker clue and the guy underneath will...somehow...pop his head out of the pig's tummy and give you a keycard with some shapes on it.
Don't ask, just take the card.
Return to the third room to the wall with the exit door, and turn left.
SAVE YOUR GAME.
Head through the grey door, even though you know perfectly well what's in there...
Those little buggers. Look, another brown door with a yellow knob! That must be an alternate exit! Let's head thr--oh poo. **BAD PANDA ENDING**
Load up your save and don't go through the grey door again. Really, you should have known better. This time, turn to the right and zoom in on the door with the red panel, then zoom in on the red panel. Looks like this is where our keycard goes!
Based on the numbers you got by putting your 3 figurines on the gizmo on the shelf and the clue from pages four and five of your notebook, you should be able to sort out which number goes with which shape for the keycard combination. But wait, what's that empty circle in the middle?
Don't overthink this...it's just a zero.
Combining these clues, you get
6 7 0 4 1
for the keycard combination.
Swipe your card, enter your combination, and (against your better judgment) head into the elevator with the rather creepy gentleman.
Take a look underneath that poster for a clue.
A black shape tapered at the bottom, with colored circles on either side: purple in the top right, blue in the middle left, and orange in both the bottom left and bottom right.
Turn right. Er...hello. Click on him anyway; he's got a clue for you.
Looks like half of a torn page...could this be part of our notepad's missing seventh page?
SAVE YOUR GAME (and prepare to feel a tad violated).
Okay, now he's licking his lips at us. Turn away, then back to face him.
Ew, dude. Not cool. Turn away and back to face him again.
OH GOD WHY. Turn away and back one more time.
AAGGHH!!! ** BAD CREEPY TONGUE WAGGING GUY ENDING **
Take a shower and reload your game. This time, just turn right and hit the elevator button.
Part the Third: Frog Kings and Happy Endings
In the lower room, feel free to zoom in on the leotard-underwear-guy assembly line, then turn right. Zoom in on the little alcove, then zoom in on the pedestal.
Hey look, a butterfly looking figure with buttons! I'll bet our sixth page clue would come in handy here.
The clue indicates that we should put our three figurines in order of raccoon, frog, cow in the inset above the pedestal. So, let's do that.
Back up, then zoom in on the inset and insert your figurines.
Hmm, nothing's happening...maybe we have to activate the butterfly figure first?
The clue from Elevator of Horrors indicated purple on the top right, blue on the middle left, then both oranges at the bottom. Zoom back into the pedestal and press the corresponding buttons (for the colorblind: top right, middle left, bottom left, and middle right), then hit the round button at the top.
Wow, look at our little friends now!
The frog has a crown on his belly, and the raccoon and cow seem to be lighting up orange in a certain order. Could this be, at long last, a clue for the crown box on the desk in the very first room? Note down the sequence
(RLRLRR)
and back up.
Turn left twice and zoom in.
Now this is an odd sort of combination lock...seems to require two rows of four numbers. The top half of that torn page looked like it was indicating a top row of four numbers...but where's the bottom half?
Time to open up that crown box.
Back all the way up to the first room (yes, you have to ride in the elevator again) and zoom in on the top of the desk. There it is!
Zoom in on the crown box and click the orange sides in the sequence you got from the lower room.
(RLRLRR)
A ha, our missing half.
Now you can match the shapes up to their corresponding numbers.
Again, don't over think the empty circle, it's just a zero.
You now have your combination:
9 0 4 3
1 8 5 8
Head to the third room, down the elevator (whimper), and back to the left wall.
Enter your combination and hit the right white button. THUNK! Hooray, our key to freedom!!
Head back up the elevator (I never thought I'd wish for stairs, honestly) to the third room and our exit door.
Unlock the brown door with the gold key.
SAVE YOUR GAME!
Head on through to freedom and pink-haired headbangers!! **NORMAL END**
But that's not good enough, is it? Oh no, you want your precious red stamp. Reload and don't go through the door just yet!
Back up and go back down the elevator. Cry a little if you must.
Go visit your figurine friends again. That frog sure looks handsome with his crown...I wonder if we can take him back with us?
Hey, we can! Yay! Let's see if he does anything different on the gizmo on the shelf. Back up the elevator and back to the second room, then set King Froggy on the gizmo.
Well that's different...the number 4023 with four white buttons on top and four on bottom. Hmm...
You know, now that you mention it, that last combination lock did have some oddly changing shapes in the middle part, didn't it? I wonder if we could make numbers out of them?
Back down the elevator...let's take another look at that lock on the left wall.
Fiddle around with the upper and lower buttons until the black lines in the middle form the numbers 4023, then hit the white button. You should end up with
4 3 5 5
7 4 6 5
HUZZAH!! Oh joy of joys, our beloved red stamp. Grab it, head back up the elevator and run like the wind! ** PERFECT RED STAMP END **
Posted by: Sessie |
April 9, 2013 4:11 PM
|
April 9, 2013 4:11 PM