
Dismantlement: Fan
![]()
 Deconstruction can be a tricky business. Stripping down something to its most basic parts can expose flaws and contradictions, whether it be philosophy, art, or literature. As the controversy of deconstruction rages on, we must ask ourselves, "What the heck does this have to do with casual gameplay?" Okay, fine, you come up with an original way to introduce the fifth in a series of Dismantlement games. Yes, ladies and gentlemen, put your hands on your screwdrivers, it's time for Dismantlement: Fan!
For those just arriving to the party here's a brief overview: created by gam.ebb.jp, the Dismantlement series are fantastically fun little point-and-click puzzles about... well, dismantling things. They've taken a task that might have appeared in a room escape or an adventure story — breaking down an object — and elevated it to its own unique genre. Each game starts with a simple household object and leaves it to the gamer to dismantle it piece by piece until it is reduced to its component parts. One thing that makes the series so much fun is how realistic the appliance appears, at least on the outside. The interior, with its maze of strange switches, locks, and puzzles, is another story. This is an appliance designed by Rube Goldberg with a nasty hangover and an attitude to match.
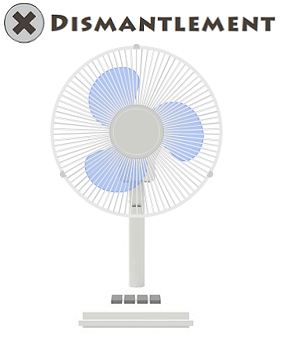
As with all the games, in Dismantlement: Fan all you have is your trusty screwdriver (and, hopefully, a few brain cells) to take apart yet another appliance; this time an oscillating fan. A navigation button on the screen allows you to move from the front to the back (and back again), as well as move in and out of close ups as you puzzle out how to take apart a rather unique appliance that appears to incorporate some tricky little puzzles into its basic structure. Your mouse cursor acts as the aforementioned screwdriver to remove screws (when you can find them) and help you gleefully reduce a once useful fan to a pile of spare parts.
The Dismantlement series is very popular with our regular visitors, and Dismantlement: Fan delivers the goods with a nice variety of logic, math, and word puzzles that need to be solved before you are left with a heap of, well, components. This time around you're taking apart something much bigger than a Radio, Mouse, or Alarm Clock. Hmmm, perhaps my suggestion of taking apart a Toyota is not far in the future...
You are still faced with a bit of pixel hunting this time around, as well as one color puzzle that will make the game difficult for those with color-blindness. Nevertheless, the games continue to evolve and get better with each iteration. Without all the tricky fiddling with controls that graced the previous installment, Dismantlement: Alarm Clock, Dismantlement: Fan is much closer in style to the first of the series, Radio, with quite a bit of physical deconstruction to be had.
One still has to wonder about gam.ebb.jp's habit of putting bombs in common household appliances, but, well, one presumes the fifth time around you'd be used to it by now. For anyone who likes puzzles, logic, or just ripping things apart, take a few minutes and have fun destroying yet another common household object. Got your screwdriver? Then get dismantling!
Thanks to Pcplague, James, and Cyberjar88 for sending this one in!


.jpg)
Walkthrough Guide
(Please allow page to fully load for spoiler tags to be functional.)
Dismantlement: Fan Walkthrough
General Information
Your mouse pointer is your screwdriver.
Click all around, there are areas that you can only see in close up if you click the right place.
There will be directions for the colorblind in the walkthrough.
Have fun!
Opening the Base
To begin the game click on the screw (two times).
You are now facing the front of the fan.
On the base of the fan are what look like four gray buttons. Click on them for a close up.
There are four buttons, each with a different number of dots on them (from left to right: five dots, one dot, three dots, and six dots).
There is also the word "Energy" with the first E highlighted.
Click the return button to go back to the long view.
Click just underneath the base to see the bottom of the fan base.
The base plate has what looks like a four digit puzzle at the bottom, click on it for a close up.
In close up you can see that what is needed is four letters. Back up twice (using the return button).
Click on the center of the fan and you will see the word "Wind" on the middle plate, with both the W and the d highlighted.
Back up and click on the top of the fan.
Here you see the word "People" with the P and the e highlighted.
Back up and click on the "back" button to see the back of the fan.
Click on the back of the fan (where the blades are spinning) for a close up.
Now click on the very top of the scene and you will get a view of the top of the motor housing.
Notice the pop-up button? Click on it and you will see the word "Develop" with the D and the p highlighted.
Back up (twice) and return to the front view of the fan.
Click below the base to see the bottom of the base.
Click on the puzzle for a close up.
Time to solve the letter puzzle!
All the clues you need are in the four words, Energy, Wind, People, and Develop.
Pay attention to the highlighted letters.
You will notice that the last letter of some of the words is the first letter of other words.
Starting with Wind, the order is Wind, Develop, People, Energy.
The highlighted letters in that order are W, D, P, and E.
Enter the letters W, D, P, and E into the puzzle.
If you entered the letters correctly, the lock icon will open and you will hear a click.
Back up once to see the entire base. You should now see four screws in the four corners of the bottom of the base.
Click on each screw to remove it.
Once the screws are gone click on the bottom of the base to remove it.
Stopping the Blades
Once the bottom of the base is gone, you will see what looks like a circuit board divided into four quadrants.
At the top and bottom of the circuit board you will also see some wires coming in from the top and bottom. Notice that the bottom wires are on a switch that is not connected to the motherboard.
Click on that bottom set of wires for a close up then again to connect them.
Back up to the full view of the circuit board.
Click on the upper left quadrant of the board.
Notice the symbol for the fan blade with an X across it. This would seem to indicate that here is where you stop the blade from spinning.
Notice that there are five rows of what look like transistors.
One object in each row has a dark green outline around it.
The top row has the third transistor outlined, the next row the second, the next row the fourth, the next row the first, and the bottom row the second.
Back up twice until you are facing the front of the fan.
Click on the buttons on the base for a close up.
Which buttons should we push?
Perhaps the highlighted transistors are a clue?
The highlighted transistors would seem to indicate a pattern of (from the left) 3, 2, 4, 1, 2.
That doesn't work.
Let's look at the buttons closely.
Maybe the dots have something to do with it as well?
The rows of transistors give the order of the buttons to push, but there is a second step.
Each button must be pushed the number of times equal to the dots on the button.
From the left: Push the 3rd button three times, then the 2nd button once, then the 4th button six times, then the 1st button five times, then the second button once.
If you entered the sequence correctly, you should hear a click.
Back up.
Cool, the blades have stopped.
Notice in the blade housing, around the edges, are three areas at the top, lower left, and lower right.
Click on each of those areas for a close up and remove the screws.
Back up until you are at the front of the fan (long view).
Click on the middle of the blade housing (where you saw the word Wind) for a close up.
Click on the center plate to remove it.
Gee, the fan blade is locked. Looks like another puzzle!
Removing the Fan Blade
Back up to the front long view, then click below the base to look at the circuit board.
This time look at the upper right quadrant of the circuit board.
The fan blade symbol would seem to indicate that this is the area that has the clue to remove the fan blade.
What we have here are a bunch of circles. Some have a small blue area to the left, some have a small magenta area to the right.
There is also a line running through the circles, with an arrow.
The line with the arrow would seem to indicate the order in which the circles should be.
The circles with the small blue areas to the left would seem to indicate the direction "left".
The circles with the small magenta areas to the right would seem to indicate the direction "right".
Use the line with the arrow to determine the order they should be read, starting with the top row from left to right, the middle row from right to left, and the bottom row from left to right.
That would give the directions left, left, left, right, left, left, left, right, left, left, left.
Back up twice to the front of the fan.
Click on the middle of the fan blade for a close up.
Notice the arrows above the center of the fan blade, one arrow pointing to the left, one to the right.
You should click those arrows in the pattern indicated by the circles on the circuit board (see spoiler above).
If you click the arrows correctly the lock symbol in the middle of the fan blade becomes unlocked.
Click on the middle of the fan blade to remove the cover, then click on it again to remove the fan blade.
Looks like another puzzle is locking down the motor assembly.
Removing the Motor Assembly
Back up until you are facing the front of the fan (long view).
Click below the base to see the circuit board.
Click on the lower right quadrant for a close up.
You see the words ESS Fan and an arrow going from the letter S to the letter E.
Notice where the S starts, and the direction the line goes in.
Back up to the front of the fan.
Click on the center of the fan for a close up.
There is a gray plate with six dots, top, upper left and right, lower left and right, and bottom.
You want to click those dots in the order indicated by the clue on the circuit board.
Click the dots in this order: upper right, top, upper left, lower right, bottom, lower left.
If you click the dots in the correct sequence, the lock icon opens up.
Click the gray faceplate to remove it.
Click the center of the fan to remove the back of the "cage" that held the fan blade.
You should now see three screws, at the top, lower left, and lower right of the plastic front that houses the motor assembly.
Remove the three screws.
Click in the center of the plastic cover to remove it.
You can now see the motor assembly but it won't come out.
Back up and go to the back of the fan.
Click on the back of the motor assembly area for a close up (where the black vents are).
Click again for a closer close up and you will notice a screw in the top vent. Remove the screw.
Back up once.
Click on the top to return to the area where the pop-up button is.
Click on the pop-up button to remove it.
Back up twice and return to the front of the fan.
Click on the motor assembly for a close up.
Click below the motor (the circular part) where it meets the shaft of the fan stand.
We have another puzzle, this time with Roman Numerals.
Hmmm, four digits.
Where have we seen four things with numbers on them?
Think back to the buttons on the base of the fan.
Each button had a different number of dots on it.
Five dots, one dot, three dots, and six dots.
In Roman numerals that would be V, I, III, and VI.
Notice, however, in the puzzle that the two middle digits should be switched.
Enter V, III, I, and VI into the puzzle.
If you entered the digits correctly, screws appear on either side of the puzzle.
Remove the screws.
Click on the puzzle to remove it.
Back up to the long view of the front of the fan, then go to the back view of the fan.
Click on the vent cover for a close up, then click again to remove it.
You should now see the back of the motor assembly.
Click below the motor assembly (below the circular thing) for a close up.
Yep, another puzzle.
This one has four white wires leading to four squares.
If you click on the squares you will notice that they change color.
Back up and go to the front of the fan.
Click below the base to see the circuit board.
Click at the top of the circuit board where the wires come in for a close up.
Okay, we have the same left to right arrow that we saw in the color puzzle on the back.
We also have four circles, from left to right: half white/half red, half red/half yellow, red, and half blue/half yellow.
I'm sure that is the hint for the solution of the puzzle.
Back up twice and go to the back of the fan.
Click on the base of the motor assembly twice for a close up.
Now what color do we set these squares?
The clue is in the circles on the circuit board.
Do you remember your color theory?
White plus red gives you pink, red plus yellow gives you orange, red is just red, and blue plus yellow gives you green.
From left to right set the squares to pink, orange, red, and green.
For the colorblind: Click the first square (on the left) once, click the second square four times, click the third square three times, and click the last square twice.
If you entered the color sequence correctly, the lock icon opens.
Click on the color puzzle to remove it.
Remove the screw that is revealed.
Back up once and click on the motor assembly to remove it.
Click on the black dot on the pole for a close up.
There's a symbol for three circles in a pyramid formation, with a black circle in the top circle.
Back up once.
Notice the wires hanging down at the bottom. Click on them for a close up.
There's a symbol for three circles in a pyramid, with the lower right circle containing a square.
Back up again and go to the front of the fan.
Final Disassembly (and Bomb)
Try not to get blown up.
Click below the base to go back to the circuit board.
Click on the lower left quadrant.
The picture says "Warning", and appears to indicate something at the top of the pole that held up the fan blade.
Back up once.
Click on the top set of wires for a close up, then click on the wires to remove them.
Back up, then click on the bottom set of wires.
Click on the bottom set of wires to remove them.
Back up to the front of the fan.
Click on the top of the pole for a close up (twice).
Okay, we have a red button. Click on the button.
Clicking on the red button reveals the screws holding down the circuit board.
Back up twice and click below the base to look at the circuit board.
Close up on each screw one by one and remove them.
When you are done, back up until you can see the entire circuit board.
On the right of the circuit board, where the yellow line bisects it, is a red semi-circle. Click on that to remove the circuit board.
And we have a bomb. The countdown has begun.
There's something in the upper right of the base, between the two holes where the screws were. Click on this area for a close up.
Another pyramid of circles, this one with a triangle in the lower left circle. Back up.
Click on the bomb for a close up.
Notice the three circles around the screw that controls the bomb?
Each circle has a darker circle inside it.
Do not click on the screw yet, otherwise you will blow up.
According to the clues we've seen, the top circle should have a circle, the lower right circle should have a square, and the lower left circle should have a triangle.
If you click on the circles you can change the symbol inside.
Change the symbols to a square in the lower right, and a triangle in the lower left.
Once you have the symbols set correctly, click on the screw to deactivate the bomb.
Click on the timer to remove it.
Remove the screw underneath the timer.
Click on the black square where the timer was to remove the bomb assembly.
Congratulations, you have made your household safe again from exploding appliances!
Posted by: grinnyp |
May 17, 2010 10:51 AM
|
May 17, 2010 10:51 AM