JayisGames.com is now available ad-free!
Jay is Games recommends Cheat Happens with 8,000+ games and 35,000+ trainers!

Click Drag Type 3!!


  • Currently 4.5/5
  • 1
  • 2
  • 3
  • 4
  • 5
Rating: 4.5/5 (168 votes)
Comments (240) | Views (26,297)

Click Drag Type 3 logo

Jaycdt3.gifHot on the heels of our first game design competition, the impetus for which was Simple Andy's brilliant collection of simple puzzle games known simply as Click Drag Type, comes another installment of the series that includes five (5) brand new puzzles!

Click Drag Type 3 picks up where the others left off. In fact, this collection includes a brand new interface that houses all three puzzle collections in one. There's no finer, more creative collection of discovery puzzles than the Click Drag Type series.

So what are you waiting for?

Play Click Drag Type 3

Walkthrough Guide


(Please allow page to fully load for spoiler tags to be functional.)

Here is a walkthrough compiled from selected comments
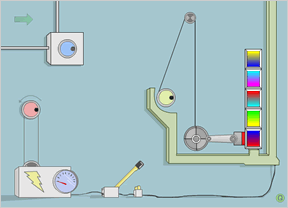
Puzzle #1

  • The "recycle" icon is when you mess up the key and need a new one.

  • Drag the key into the box which will open.

  • Shave down the key so that it lines up to either side. This will open the box below.

  • Drag the sliders on the outside edges so the transparent box forms over the "empty" box to get each number.

  • Type in the numbers from left to right in the white area, then click the green arrow.

Puzzle #2

  • In this puzzle, you must have the sound on.

  • The red dial is for the even numbers and the blue is for the odd numbers.

  • When the lock is closed you are able to turn your dial Right Blue - 1, Left Red - 2, Left Blue - 3, Right Red - 4.

  • Unlock the lock and bring either the red dial or blue dial to the other side to mute it.

  • Then lock it again.

  • Turn the dial that is audible to one side or the other.

  • Listen to the calculation and type what the answer is to the corresponding number on the bottom.

  • Turn the dial for the other number.

  • Repeat this process for the other dial.

  • When this process is done, click on the green arrow.

Puzzle #3

  • On the left side of the puzzle area are four circles with colours. Drag all the circles to the top of the screen.

  • Take note of one colour and drag it down to the bottom. It will change into the colour it needs to be attached to.

  • Click and hold on the first coloured wire that represents the top colour and draw a line to the corresponding coloured wire on the bottom.

  • Repeat this process until all wires are connected.

  • If a mistake has happened or you need to redo, use the wire cutters to erase ALL wire drawings.

  • If done correctly the phone will ring.

  • Drag the receiver to desired volume and wait for a pause in numbers. The number right after the pause is the first number in sequence.

  • Place these numbers in the white box and click green button.

Puzzle #4

  • Drag one of the "eye glasses" around the patterned area to look for "tabs"; Square, Circle, Triangle, and X.

  • In the bottom left area you can drag a little leaver left or right to set to "Move" or "Turn". Use this to adjust the squares so that the tabs on the outside match the tabs on the inside.

  • When they are matched, drag the eye glass around the area that matches the colour of the tabs. This will form a number.

  • Place the number in the corresponding colour in the lower right corner.

  • You will notice that the red input area has 2 underscores. This indicates two digits in the number.

  • Repeat this process till all numbers are entered and then hit the green arrow.

  • Clarification (thanks SkylerF!): Grab the red lens. On the tiles, you will see red lines, while the border markings are a different color. Using the red lens, get those markings lined up. Grab the lens with that color. NOW you will see a number.

Puzzle #5

  • At the very top is a half circle with a green dot in it. Just move your mouse over this area. A sliding menu will open on the left side with a key and check mark icon.

  • Click on the key icon to get an eye glass.

  • Bring the eye glass to the four-square object.

  • Click on screen to get rid of eye glass.

  • The "mechanical" box in the lower right corner is to paint the colours onto the four-square object.

  • To select what square does not receive the colour, click on a green machine empty square to have them turn to an X. Only the green machine squares that are blank will receive colour.

  • To add colour, which the machine will use, place a canister (Red, Blue, Yellow) that you need near the left side of the machine near the tube.

  • It may be necessary to place two colours to combine them to make a combined colour; Red/Blue = Purple, Red/Yellow = Orange, Blue/Yellow = Green.

  • When you have the colour(s) inserted, place the four-squared object at the top of the green machine.

  • The top blue machine is a cutter. The dark right angle lines represent the square to be cut, and the lighter line connecting them is the cut it will make. If there is no line, then the square is removed (don't worry, the square isn't gone. You can put the square back with the cutter.)

  • To rotate the square to be cut, click on the curved arrow tips.

  • To change the shape of the cut, click within the grey square border.

  • When desired shape and square to be cut place the four-square object on the left side of the machine. You will need to do this a few times to get the right shaped "key".

  • When you are done and match the eye glass example, click on the check mark instead of the key.

Puzzle #6

  • boards: In order to correctly build that shape, you'll have to slide the lowermost rectangle to the top left.

  • nails: You've only got four nails to hold it all together, but fortunately you can pull and redo nails. You can check your work by clicking boards - connected boards highlight and move in unison.

Puzzle #7

  • Line up the circles using the red level meters.

  • Move the circles until the bars above them become clear, unclick it and it should turn blue.

  • Once you have all the circles placed correctly, form a 2 with the arms.

  • After that the lock at the bottom right should turn into an arrow.

  • Type 2 in the white box and click the arrow. You're done.

Puzzle #8

  • Rearrange the gray boxes so the dark gray parts are coming out of it and point to boxes.

  • Make sure none are pointing at nothing.

  • Then cut the wood to fit between the gray boxes to interconnect them.

  • Then click on the green arrow.

Puzzle #9

  • Grab the cover plate to the left of the plunger and slide it right to reveal the paintbox.

  • If the plunger causes two boxes to slide over each other, paint those boxes the same color.

Puzzle #10

  • Listen to the correct song on the left, and try to match that with the pieces on the bottom.

  • After you get the bottom song to play in the correct order, match the shape of the pieces with their colors from the cards.

  • Take the shape of the first piece of the song (along bottom), match it to a color (from the cards), and then change the first color block on the left to the matching color.

Puzzle #11

  • You must first move the 4x4 square to the left, and click each box so the imgage disappears.

  • Now you can see 2 yellow strips, one going vertical one going horizontal, and you can see that there are 4 letters at the top and 4 at the right. Move the horizontal yellow strip to the top and the vertical to the right (not covering the letters).

  • Hover over the first letter at the top (D) and an image appears. Now on the 4x4 square on the far left side of it click the 4 boxes till you find that image (make sure its only that image on that vertical line).

  • Now do the same for the 3 other letters.

  • Now the big board comes to play. Place the image in the 4x4 square on the far left over every D square on it 1 at a time.

  • Look at the next image and see if it covers a C, then the same for an A, and then a C again. If they dont all cover the correct letters then move onto the next D.

  • When you find it use the colours under the images on D,C,A,C and place them in the yellow strip at the top.

  • Then follow this for the right hand side yellow strip and when you finish it, the level will be complete, if not then you have the colours wrong so do it again.

Puzzle #12

  • The objective is to make a number on the right that is missing in the box in the upper, left.

  • The missing number is...5

  • You can use the lightbulb to see which points make a connection to light a line.

  • The length of a bar determines how "diagonal" the cable will be.

  • Work you way from the bottom of both side to the top. As you sometimes cannot drop the "cursor" below existing bars.

  • Immediatly delete bars that do not belong to the 5 by clicking on them.

Puzzle #13

  • Click the dark dot in each dial to rotate that dial, each dial moves something.

  • Drag the lever at the bottom to connect/disconnect the circuit.

  • The battery dial reads low. Circuits need power...

  • The piston is an electro magnet.

  • The gradient boxes look like they need to be put in a different order.

Puzzle #14

  • First, circle the "hint" button in the upper right.

  • There are four sets of shapes. These will flash. Note the order in which they flash.

    • For example, when I did the puzzle, the left-most set of symbols flashed in this order: 3412. The topmost flashed in this order: 2341

  • If you click on the bars with the symbols, the bars will move across the screen in a certain direction.

  • In the empty grid, one of the squares is highlighted blue. You can move it around by dragging a line from where it is to an adjascent square.

  • To solve:

  • Start with the leftmost bar. Find the symbol that flashed first. Move the blue highlight cursor to the first square in that row. Draw that symbol that flashed first in that square.

    • In my example, the 3rd row flashed first. The leftmost bar goes from left to right, so I drew that symbol into the first column of row 3.

  • Find the symbol that flashed second. Move the blue cursor to the 2nd square in THAT row. Draw the symbol that flashed second in that square.

  • Repeat until you have 4 symbols in the grid for the 4 symbols in the leftmost bar.

    • NOTE: The rightmost bar travels right to left, so "1" in the rightmost bar means the last column, 2 means the next to last, etc. The same inverse logic goes for the bottom bar as compared to the top.

Puzzle #15

  • Your goal is to make the big multi-color round travel, in a specific order, to intersect with each of the smaller colored circles.

  • The first color you need to visit is indicated in the round.

  • When you visit the first, you'll get the second.

  • The columns on the left and right are for you to direct the round.

  • Work from top to bottom inside the columns.

  • You'll need to "paint" the columns with intermittent color. (A little red here, a little purple there.)

  • The width of the line you paint inside the column, determines the angle of turn.

240 Comments

Yay! First to post! The puzzles I have played are all from clickdrag type 2, so look there for help

Reply

yay!

Reply

Tim - there are 3 columns of puzzles in this collection. The first two are from CDT2, the 3rd column of puzzles are all new ones.

Reply

Just forth? Well, I'll play it right now.

Reply

Darn it, the car thing is...is...well, let's say it's difficult to tell what to do!

Reply

i just dont understand the 11th:|

Reply

Giorgio - Yes, Andy just released the new puzzles today.

I just received them in my email and posted this up straight away. Fresh goodies for you this Monday, folks! =)

Reply

AHHHHHHHHH it wont load!!!

Reply

Patience Alli. There is no loading screen on this collection, and it therefore has to download almost completely before you will see anything but a white square. And it's a little over 1.5MB is size.

Reply

Finally figured out #15. Great compilation, even the first few puzzles changes slighty. Overall a great game!

Reply

On puzzle twelve, the arrows on the puzzle sometimes don't work as they should on Firefox.

Reply

number 12?

Reply

Puzzle 13 also crashed the program.

Reply

yay, I figured out 15 and finished it :)

Anyone needing tips and hints on the 15 let me know.

Reply

I am stuck on 14. Any hints?

Reply

ok i've been looking at 12 for a while, and yeah... i still do not understand it.. can someone please help :)

Reply

just figured out 12!

Reply

hint for 12

looks a lot like an electronics project

The lightbulb makes a good voltmeter

have you figured out how to make the LED 8 light up?

Can you make other numbers

Reply

ahh! sorry, i don't have 12. i saw that the little things on the wires that come down from the bulb lit up when alinged with the right hole on each side panel.. so i connected all 8 together.. now what?!

Reply

14

Try drawing arrows into the 16 empty tiles on the table. To draw arrow hold down and move the cursor.

Draw circle or something into Hints spot on right top corner.

Notice the order how arrows light up after you activate the hint.

Reply

All fifteen completed in 45:54. Nice batch of puzzles :-D

Reply

thanks for the hint rob..i

i made a 7 with the led's.. is something supposed to happen?

Reply

i have no clue on the 11th 1 help plz

Reply

Hints for number 11:

Tried clicking on the 4x4 grid? Then perhaps try holding it over the 11x13 one.

Hovered over the letters at the top and at the right? They definitely matter.

Look for matching letters and colours. The battery bars are the key.

Reply

Well, its seems there are some bugs for me, i played the last round first (as ive done the first 2 versions of click type), and this seemed to cause lots of problems in the previous games (I was "drawing" on games i shouldnt have been, and the nail/wood game wouldnt work at all).

And i couldnt figure out 12, 14, or 15 at all

:(

Reply

Nice ones! I still have to solve number 12, 13, 14 and 15, but I think I got some ideas for a couple of them. However, trying to solve puzzles around midnight is never a good idea :P

Reply

Please Digg this people. =)

Reply

Still stuck on 12, 14, and 15.

I have a good understanding of 12 as far as making the numbers, just not what to do with them.

Reply

yeah, same as spazzbite on 12, i can do it, but none of the numbers are clickable or whatever.... what to do!

Reply

anyone care to help as to the point of 12? i can get

the lines to light up, but nothing else.... what do we do with the numbers on the side? i can make them, and still nothing happens...

Reply

Hints for 12 and 15 please.

Another hint for 14 (read tonypa's hints first):

i had to do this puzzle on paper first.

Take a note of which squares flash 1st, 2nd, 3rd, 4th

Reply

Still lost on 14......

Reply

hint for 12

What are the numbers?

How many are there?

What is the biggest one?

Reply

On 12, are you supposed to not be able to move the brackets past the rods? This seems like an unnecessary complication, and so I'm imagining it's a bug.

And whenever I try 14, the pencil stays after I switch to another puzzle.

The bugs are less than I expected from CDT.

Reply

ok still no clue...

i got the first one ok, but the rest are haaarrrd :(

i love this game :)

Reply

finished number 12! thanks for the very subtle hint Mythmon ;)

Reply

Any clues on 13 or 15. No idea where to start

Reply

15

The boxes on the left/right will turn red/blue when dragged within. They will cause the small bot to turn....experiment....


Any more defined clues for #14??????

Reply

I got 14 finally.

Try taking a screenshot or drawing the grid and arrows, and be sure to note by number the order that the arrows blink in each group. Imagine the numbers as a distance.

Reply

Still no idea about what the numbers mean on 12.

Only worked out the basics for 15

The timeline controls for turning left and right.

tips for 13.

Click the dark dot in each dial to rotate that dial, each dial moves something.

Drag the lever at the bottom to connect/disconnect the circuit.

The battery dial reads low. Circuits need power...

The piston is an electro magnet.

The gradient boxes look like they need to be put in a different order.

Reply

i worked out 15, i was thinking it was more complex than it is.

What doesnt matter:

Direction doesnt matter
Dont need to mix colours either

Reply

I had to palm my forehead after 12. I honestly could not believe I missed it.

What's missing in the grid?

Reply

Hints for the peskiest levels:

Level 12:

Move the two ends of wire coming off the lightbulb around on the various points until you get it to light up. Keep going until you found all seven matching light points. This gives you a clue on how to make connections.
Play around with the arrows. Try putting both tabs on the points third from the bottom and trigger a bar. See what happens to the LED display on the right?
Now play with the horizontal white bars on the side. Set one high and one low and, with both tabs in the bottom most position, trigger a bar from the side you have set high. Play with this for a bit.
Your goal is to make connections to create a number in the LED display. The clue to which number you need is in the grid on the upper right. You need to make one specific number to complete the puzzle.

Level 14:

In addition to the hints above; be sure to click the pencil on the each of the bars containing the blue arrows. Notice that they each travel in a different direction?
Need more?

The flashing order is only part of the riddle. Each bar's starting (first) position is unique.

Level 15

Your goal is to make the big multi-color round travel, in a specific order, to intersect with each of the smaller colored circles. The first color you need to visit is indicated in the round. When you visit the first, you'll get the second. The columns on the left and right are for you to direct the round.
Need more?

Work from top to bottom inside the columns. You'll need to "paint" the columns with intermittent color. (A little red here, a little purple there.) The width of the line you paint inside the column, determines the angle of turn.

Reply

Hint for #15

The bot changes colors

Even after I figured out what I was supposed to be doing it was still a huge pain in the butt to get the timing down.

Reply

I'm still stuck on number 12...

I've figured out the sequence to connect the two sides correctly. The LED lights up an 8, predictably.

Numbering the contacts from 1 to 7, top to bottom, on both sides, the connections go;
1-7
2-3
3-2
4-7
5-5
6-4
7-1

To connect them up in the right order, I started at the bottommost contacts first. That way I didn't have any problem moving the tab marker past a bar already in position.

But I still don't get

...what the numbers and the LED have to do with it.

Reply

Most, most, most excellent. My favorite was 15.

I also noticed the bugs on levels 8 (mentioned in comments in the original CDT thread), 12, 13, and the line-drawing bug mentioned.

In 14, how do you change which square is highlighted? I solved the puzzle by making random little loops until I had visited each square, but there must be an intuitive way to do it that I missed. Either that or you can add another bug (it seems like I hit them all anyway).

Finally, I was pleased to discover that the author and I grew up in the same town!

Reply

hmm, maybe I'm just an idiot tonight, but I can't for the life of me figure out #11. Nobody else seems to be having trouble...

I looked for the pattern of letters represented by the letters on the sides and the location on the grid you get when you mouse over them, but that implied that there'd be three C's side by side on the right side of the second row from the bottom, and there aren't any three C's grouped together horizontally at all....

Reply

IrritAnt: You need to create a specific number using the LED. To find the number, look closely at the numbers in the right-hand grid. How many are there? How many connection points are there? What is the highest number in the grid?

Reply

Caleb:

Have you tried clicking on the squares in the colorful box thing? (It moves too!) Have you tried mousing over the letters in the top and left hand box?

Hope that helps!

Reply

Caleb, I ran into a similar problem until I realised...

...the answer has two seperate parts to be solved independently.

Reply

I still don't get #14, and none of your hints make sense to me either (

distance? numbers? draw it on paper

? what?). ☹

Reply

hint Problem 12:
in te sequence of numbers on the left, look what number

its missing, and you`re done

Reply

Thank you, denicerbeist, for the hint on 11! Of course, hover over the letters in the boxes. I thought I was going mad on that one.

zxo, in 14 you can change the highlighted square by drawing lines anywhere on the stage. By drawing line right from left the highlighted square will move left.

Reply

I encountered a nasty bug in puzzle 14 - the highlighted sqaure moves in leaps, from corner to corner, and there's no way of reaching any of the other squares.
I got really frustrated with it, until I read tonypa's remark to zxo which led me to believe that this is a bug and not a gameplay feature, and after closing and reloading the game (quitting and restarting didn't do the trick) the problem was solved.

Reply

Wooo, finally finished all 15. 01:49:40... but i DID go and have lunch :-P

Reply

I also have a good understanding of 12 as far as making the numbers, just not what to do with them.

Reply

Here's how #15 works.

  • The robot (the large circular object in the central field) needs to hit all of the targets (white prohibitory signs filled with colors).

  • The color of the robot tells you which target it needs to hit next.

  • You need to program the trajectory of the robot to hit each target in turn.

  • What happens when you click on the robot?

  • What happens when you click on it while it's moving?

  • The vertical bars on the left and right sides of the screen are where you set the program.

  • That "left and right" part in the previous hint was itself a huge hint.

  • Each instruction in the program is a rectangle.

  • Note how each rectangle is pinned to the edge of the screen.

  • You're drawing a bar graph of turn magnitudes. The taller (farther from the edge of the screen) a bar is, the more strongly the robot will turn in that direction.

  • Obviously, drawing two bars at the same time with the same magnitude won't accomplish much.

  • But what happens if you have two bars of inequal magnitude, or a bar on one side but not the other?

  • That horizontal line that sweeps down the screen is time — or, put differently, a cursor moving through the bar graphs, perceiving the bar or non-bar on each side of the screen and setting the turn strength of the robot accordingly.

  • You need to write a program that will drive the robot through all of the targets in the correct order.

Reply

Thanks Andy for the new CDT puzzles, you did it again! I think that any of the new puzzles could have done well in the JIG competition. now I can't get sleep or work done for several days (since I try to solve them without cheating ;)

Reply

finished them all except 14..

i've read all the hints and i think i understand how to..

so i'll have a go later!

total time so far: 01:04:59

Reply

still don't get 14th puzzle... can someone out there give me another hint?

Reply

I really enjoyed CDT 1-10 but most of the new batch of puzzles seem far too vague and over-complicated to me.

11 - Too vague.
12 - Good idea, but too many complications.
13 - Best of the new set, just right IMHO.
14 - Too vague.
15 - Too vague.

Just my humble 2c.

Reply

fact is... i think i did the right thing but nothing seems to happen

Reply

First puzzle of the third set has an uncomfortable bug.

Clicking on "up" or "down" arrow on the EXACT same spot will cause the button to malfunction, which is not the part of the puzzle itself (although it's not obvious). You can see something is wrong by the little hand turning into the arrow while you click. The fact gets even more confusing since at times the button really shouldn't function (puzzle-wise) so things can get frustrating.

My advice is to rock the arrow left and right while you are clicking the up/down buttons so you can easily decide whether the button really isn't working or the bug is bugging with you :).

Reply

What do you type in the box on level 1?

Ive done the key

Reply

Level 13 - I rearranged the boxes so the gradient goes with the right order and... nothing. Help?

Reply

Again, I really liked this Click Drag Type, the concept is very interesting. Some puzzles are REALLY hard to understand though, but as soon you get it, nice to solve.

Good job!

Reply

Great stuff, although I almost came a cropper due to the reliance on colour in many of the games. I'm one of the 12% or so of the male population who is colour blind... luckily the free app Color Cop has gotten me out of trouble so far. If any of the other puzzles are more action orientated then I might be in trouble.

Reply

I didn't know there was a Click Drag Type 2! Do you have a link to that?

Reply

Oh nevermind, the puzzles are all included. Don't mind me.

Reply

The hints for #11 are too vague.

I understand that the letter boxes to the top and right change when the arrow is hovered over it.

I also know that the smaller box can be clicked on to reveal an abstract painting of some sort.

I also know that some of the sections within this abstract painting correspond with some of the things that appear when you hover the arrow over the lettered boxes to the top and right.

Do I let the sections that match the lettered boxes to remain while the rest of the smaller boxes are clear so I can see through them? Or do I do the reverse? I am also completely at a loss as to how the colored boxes figure into the puzzle. One is horizontal and the other is vertical. I would figure that they correspond with the lettered boxes to the top and right but I can't figure out the relationship. Please help me and try not to be too vague.

Reply

Excellent additions to the collection. None of them got me too stuck, and most of them were a matter of working out the mechanics, and then working towards a solution.

Reply
generalstark September 5, 2006 4:43 PM

CDT3 done in 50:24. This was the toughest group out of the three, by far.

Reply

for 14

if you draw a line upwards the blue area will move

Reply

MAJOR SPOILER/WALKTHORUGH FOR #11

Roll Over the letter DCAC and click to remove the matching squares and the 4x4 grid. Move the smaller grid onto the bigger one until the correct letter show up in the correct space lookign sumthing like this:

D---

--A-

-C-C

----

Use those colours the letter r on to know wot colour the battery bar at the top shud b, goin left to right.
now click the 4x4 grid so the image is back to normal and do the same thing but with the letter BACC. It should look like this:

--B-

A---

--C-

---C

Again find the right letter but this time go from top 2 bottom and click to change the colours on the battery bars on the left going from top to bottom. Puzzle Completed!

Hope this helps. May not b very clear but the best i could describe it :D

Reply

number 14...........plz post spoilers :P

Reply
mysteryguy September 5, 2006 8:40 PM

is this the code for #2 cuz it doesnt work

2 3 9 8

Reply

Thanks EvlSph! I didn't realize...

...

It was LITERALLY two separate puzzles!

Reply

mysteryguy:

You have the last number wrong. The last problem in the sequence is (20-24)+4.

Reply

well, i've solved every one but 12...
it may be bugs in the game thwarting me, but i can't seem to do it

Reply

arg... well, i managed it!

did anyone esle have trouble with the little ledges not wanting to move past the poles(?) already in place?

Reply

Hey Ruka! Yes, I did, too. But sometimes I could get them to move past the poles, so I'm not sure if it was by design or just a bug.

Reply

Level 13 crashes for me to.

Browser: Opera 9.01 build 8552

Reply

Nice game. And this think the creator is younger than I am; what am I doing with my life?

(He's 3/16/87, I'm 2/13/87. So only by 26 days, but still. :)

Reply

Heres a trick to make 15 easier:

just fill in both bard completely with color, then decrease their size by clicking on the dark band and dragging them toward the edge.
start hte robot, and adjust the thickenss of each bar as the robot moves around, to turn the robot.
I found this much easier to do than to try to time all the colors on each bar perfectly.

Reply

Is it just me, or are there new glitches?

In puzzle 4, some of the colors and shapes wouldnt switch or rotate.
And in puzzle 7, for some weird reason, when i moved the rings, my cursor was stuck in "pencil mode" like in puzzle 14.

Is my computer weird or did someone else notice these?

Reply

I was craving CDT after the games competition so much that I was about to play CDT 1 & 2 for the zillionth time; the new puzzles made me very happy.

They certainly live up to expectations! I like the more physics bent of many of the puzzles. I found these challenging, but do-able (I used the spoilers only twice -- both times I didn't realize that a part of the screen was important -- my most common problem with CDT). My only gripe is that it's too darn hard to move the square in #14 -- I spent forever thinking that moving to different squares was a part of the puzzle (it's not -- use your pencil to drag the highlighted square over to an adjacent square).

#15 was my favourite of the collection; ironically I got it right away

I thought that the circular thing was a bar magnet and the two sides were magnetic fields that turned on and off with time. With this in mind, I solved the puzzle almost immediately. It wasn't until I solved the puzzle and read the behind-the-scenes that I realized I was wrong *grin*

I also really enjoyed the behind-the-scenes -- a great insight into the process of both imagining and coding games; and a nice prize for solving the puzzles.

Reply

For #14 Walkthrough

To start off, circle the hint button in the top right corner and note the order the arrows light up for each separate group. It's easier to record the order on paper.
Pick one of the four groups of arrows and click on it, noting the direction it travels in.
Using the left set as an example, the second to bottom arrow lights up first. The set travels right across the grid.
For the first column the group of arrows touches, mark the square that the first arrow (that is, the first one that lit up) hits. Record the direction of the arrow onto that square.
The second column on the grid would have the bottom square marked because it was the bottom arrow that was lit up second.
Repeat for all 16 squares.
So, just in case I got a bit wordy above and didn't make any sense, the things to keep track of are:
Order the arrows lit up.
Direction that each set of arrows moves.
Which square the arrows overlap based on the aforementioned order.

Reply

Is it just me or is #12 buggy?

Eg.
- The Right cable disappears whenever anything is clicked on.
- The Right slider won't move down after dropping the first rod.
- After certain combinations, no rods will drop down at all.

Is that part of the puzzle or just a bug?

I tried #12 after completing all the others, in case that's relevant.

Jon.

Reply

Woo-hoo! Thank you, Maviellas. I needed only the first sentence of your walk-through to figure out how the puzzle worked. ☺

For posterity, my final time was 2h03m56s (including much hair-pulling on puzzle #14, which is definitely the hardest puzzle in this third installment).

Reply

I hope I just don't spend my whole day playing this game.

Reply

I really love CDT! Awesame puzzles, so much originality and insperation! I could play games like CDT all night, if you wouldn't be finished sooner or later :)

@Jonathan #12

most stuff you described sounds like to be part of the puzzle: Complete spoiler follows.

# You have to make a number on the right, that is missing in the box in the upper, left.

5

You can use the lightbulb to see which points make a connection to light a line.
The length of a bar determines how "diagonal" the cable will be.
Work you way from the bottom of both side to the top. As you sometimes cannot drop the "cursor" below existing bars.
Immediatly delete bars that do not belong to the 5 by clicking on them.

Reply

yeah jon, i had trouble with both the sliders and the rods not wanting to drop. never had the cables dissapear tho...

the sliders are obviouly a bug because sometimes they will move and sometimes they won't. It was odd tho, becasue in one attampt of that game, i found that the left slider wouldn't move UP past a pole, and the right slider wouldn't move DOWN. But like i said, it's infrequent what the sliders/poles do

Reply

Solved it.

In the end I must say I'm disappointed with this edition. While I liked the "behind the scenes" feature, the bugs really dragged it down. If someone cares, here are the exact level by level details:

Level 11 - easily the best of the bunch, although many people seem to hate it. Confusing but easy once you figure it out.
Level 12 - This one has a nasty problem I mentioned earlier - the fact that clicking on up/down arrows can be quirk if you press on the exact spot. Top that with the fact that the buttons really stop working puzzle-wise sometimes what you get is needless confusion. Solution is also a bit unintuitive.
Level 13 - This one frustrated me the most. I solved it and the green arrow didn't turn on. I spent next 15 minutes trying to figure out what to do, in vain. When I tried it again, the arrow behaved as it should.
Level 14 - imaginative interface, yet starts acting erratically after awhile.
Level 15 - The worst of the bunch. There were some nasty bugs with the interface, sometimes I could draw magnets, sometimes I couldn't, sometimes they stopped begin pullable when the puzzle was half-done, sometimes some strange extra lines began appearing.. passing this was more of a chore then anything else.

There. Final verdict: puzzles 10/10, buggy interface 5/10. Some polishing and you've got a true gem of the game.

Reply

I had trouble with the bars and tabs on level 12 but I never got the impression it was a bug. It seemed to me to be part of the puzzle - in that, you had to drop the connection bars in the correct order. The tab won't move under a bar that's been dropped from it's side, but will move up or down past a bar that's fallen against it from the opposite side. I worked carefully up from the bottom, plotting the tab moves and it worked just fine.
I did encounter a little bug on level 14 though. At one point the cursor would only move into the grid corners and wouldn't move from box to box. I had to close the game window and re-launch the game to fix it.

Reply

Yeah, I've decided to not even complete the game because my sliders on 12 have just stopped moving altogether. Shame, I really enjoyed the other two games.

Reply

You haven't read carefully enough what I wrote.

Yes, sliders sometimes won't move if the bar is blocking their place. It's all part of the puzzle and it's ok.

But if you click on the up/down arrow button a few times on the exact same spot, it will NEVER work more than one time, and this IS a bug. You don't need to set any of the bars. If you move the mouse just slightly to the left or right the button will work again.

As I said, this is not a game-breaking bug, but it draws you away from the puzzle itself.

Reply

Lol, I did all 15 in 1:14, but then again, I had a snack about halfway through, and spent 15 minutes getting aggravated at puzzle 14, until I realized I'd forgotten to actually /click/ the next arrow. ^.^;;

What really threw me off was the fact that the drawing cursor from 14 stayed into puzzle 15, and thus I thought I was supposed to draw or something.

Reply

I must be a real simpleton or I have a glitch but in two of the puzzles (I do not remember their number 5 or 6 or 7). One is the planks. I lined up the planks, got red crosses on all the boxes except the last two. Have moved the planks forward and backward, to and fro and still nothing. Whay can't I click the arrow?
The other one - the circles with the connected closed wrench like things. I moved the circles so I could put the wrench ends over the circles and nothing.
What is the matter?

Reply

Woohoo! I almost instantley knew what to do one number 15 but it was just so tedious. I also really like the Behind the scenes thing. I remember a about a year ago playing the original CDT. Not the one you featured Jay. There was an even earlier version. Then I remember the preview of CTD2 which was actuall puzzle 6. Then CDT2 came out and I was so happy. I thought that was the end of the CDT series but then a week ago I found the greatest and hardest gem of the series. Thanks Jay and Andy!

Reply

Please help for 14 I read all hits above but couldt able to solve .Any clear hint will be great.

Pleaseeeeeeeeeeee

About 1 day I am trying to solve this 14

Reply
RockRoyalty August 1, 2007 5:26 PM

Thanks so much Eli Sherer, without your solution to number 9 I don't think I would have ever completed it! Id been trying for days! It gets really frustrating after a while, I understand completely how to do it, I just couldn't get the right solution! :P:P Thanks again.

Reply
Knave Scurvy August 28, 2007 2:25 AM

For those struggling to get number fifteen done in time try turning earlier and quicker so that you grase the one you want to hit and are almost heading where you want to be instantly.

For number 13 I get all of the squares in the right order and nothing changes

Reply
Anonymous August 30, 2007 7:43 PM

ok when i do #14 nothing flashes. help

Reply

12 and 13 are good, but overall, the new installment seems a bit halfhearted. The first two installments were excellent, but I think the guy just ran out of good ideas for puzzles this time. Thankfully 12 and 13 almost made up for the nightmare that was 15.

Reply
GuyWhoDislikesVagueWalkthroughs September 23, 2007 1:54 AM

Shave down the key so it lines up to either side??? What does that mean?

Reply
Anonymous October 5, 2007 10:24 PM

Great stuff!! Had a blast solving them (at work). Thanks!

Reply

I have a major problem with #13! Whenever I pick up a square with the crane the whole browser hangs and I need to crash it via the task manager. Tried on both IE and Firefox, crashes them both.

Reply
darth meatloaf October 29, 2007 8:30 AM

aaarrrrrggggggghhhhhh!!!!!!!!!! MINE WON'T EVEN LOAD!!!!!!

stupid thing...

Reply
free2ride123 November 18, 2007 3:07 PM

On #8, how do I turn the wood pieces so that they fit in the horizontal places?? I need help please!!!

Reply
frostygiggles November 26, 2007 8:21 PM

Your job is to draw each of the 16 arrows on the sides into the grid. Draw on the top right icon and notice the way the arrows light up in, this is the clue for placing them.

So for example if in the first row, the arrow on the left lights up as number 3 in that column, it means it must be placed as number 3 counting from the left, and if the arrow on the right light up as number 4, it must be placed as number 4 counting from the right.

You draw the arrows with the pencil.spoiler

15:37 for CDT 3

Reply

omg will someone please send me a full screen shot of number 14 .. i really dont get what you mean in the walkthroughs .. please someone send me a picture please thanks .. my email adress is [email protected] .. please send it me please .. thanks xx

Reply

im stuck on level 8 i cut the wood but they wont stay between the boxes. am i doing something wrong????

Reply

come on guys 14m 36s first go. am i good or what? (don't answer that)

Reply

ok for 14, if it's skipping squares, make sure you have cookies enabled so it can save, then refresh and try again. this glich happens if you quit the puzzle without solving it, and it'll also let you draw lines anywhere. hope this helps ^_^

Reply

The thing that bothers me about #15 is the incredible amount of time you spend TRYING to accomplish what you need to by the time you figure out how to accomplish it. It kind of defeats the purpose of the CDT series.

Reply

Help! CDT3 isn't loading! But it was earlier today...

Anyone?


[Edit: CDT3 is working for me. Are you sure you're still having trouble? -Jay]

Reply
CDT gone? now back February 16, 2008 1:54 PM

Jay, Thanks for the speedy response. CDT3 back up & running, but now I can't get #8 to work. I have

turned all the grey boxes to face eacch other

and I can

cut the logs to the appropriate length

but when I

place the logs to bridge the boxes

they

v a n i s h !

What am I doing wrong?

Reply

Oh, BTW, I've gotten all the others and they work just fine.

Jayisgames is the best. I've spent far too much time on your site, and playing the games you review. I mean that in the best way. Thanks!

Reply
CDT gone, back, done! February 16, 2008 2:14 PM

Okay, I don't know exactly what happened, but I closed the window and reloaded the page, and now it works fine and I was able to complete.

From the looks of other entries (and even a comment on the "behind the scenes") it seems that others have had similar problems with this one. Weird.

Apologies for the multiple postings.

Keep up the good work!

Reply

If you have trouble with Puzzle number 8, like I did for hours! Open the game up in Internet Explorer instead of Firefox. I could not get the last piece, and then when I went back to main menu it was still there to taunt me!!! But it worked fine with Explorer.

Reply

In level 6 i got the shape.... how do I use the nail gun?

Reply
kelseyjane June 7, 2008 9:01 PM

i'm stuck on #6.
i've finally found out how to place the boards and i think i have the nails right. but i also have the problem of the "crane" like not accepting my thing. i press the button, it goes down, my nails dissapear, and i goes back up...???
help!

Reply
Anonymous June 22, 2008 2:12 PM

Watch out for many of the puzzle 14 spoilers. Several are very misleading and may add to you frustration.

Reply
why-guy July 15, 2008 4:37 AM

#12 is as easy as everyone is saying

just look at whats missing

Reply

I need help on #6.

Reply

I am puzzled at 4, I can't figure out what the red number is, even though I tried to drag them around and put them in weird places and all, can someone just help me, or tell me the number?

Reply

your hints about 14 are too vague. Just give the solution already.

Reply

CDT#14

^ ( ( ^
> ( v v
> v v >
^ ^ ( >

Reply
nerdypants February 28, 2010 4:30 PM

For the love of god... how do I do #8... I tried reloading the page, I tried opening it in IE instead of Firefox... If someone who's done this could just please tell me where I'm supposed to click to place the boards, I would be so so so so grateful.

Please. I don't know what I'm doing wrong. ;_;

Reply
nerdypants February 28, 2010 4:33 PM

Ah! I got it!

I kept clicking on that red rectangle, which is why they kept disappearing. Oh wow. I thought that's what I was supposed to grab to move it.

Reply

the first column is from clic drag type 1

Reply
SkylerF May 3, 2011 10:50 AM

I can't seem to get problem #4 to work. I followed the walkthrough directions...using 2 different interpretations.

Reply
SkylerF May 3, 2011 10:37 PM

Clarification on 4:

Grab the red lens. On the tiles, you will see red lines, while the border markings are a different color. Using the red lens, get those markings lined up. Grab the lens with that color. NOW you will see a number.

Reply
SkylerF May 3, 2011 10:49 PM

And now I'm stuck on 14. THAT comment is clear as mud. No, mud is clearer!

Reply

I think number 15, even when you know how to do it, Is tedious and boring because of how slow the "vehicle", (as Andy calls it) moves.

Reply

I don't know why, but after playing level thirteen for a little while, flash crashes....

Reply
gregoroma May 22, 2016 10:55 PM

hey guys, i finally figured out a decent way to explain puzzle 14!

its like a game of sudoku you'd find in a news paper. the clues are explaining which number goes where. basically, sub the symbols for numbers and its almost the same, figure out which number goes where without getting two of the same.

Reply

^ Scroll Up | Homepage >

Leave a comment [top of page]

Please consider creating a Casual Gameplay account if you're a regular visitor here, as it will allow us to create an even better experience for you. Sign-up here!
  • PLEASE UNDERSTAND SITE POLICIES BEFORE POSTING COMMENTS
  • You may use limited HTML tags for style:
    (a href, b, br/, strong, em, ul, ol, li, code, spoiler)
    HTML tags begin with a less-than sign: < and end with a greater-than sign: >. Always. No exceptions.
  • To post spoilers, please use spoiler tags: <spoiler> example </spoiler>
    If you need help understanding spoiler tags, read the spoiler help.
  • Please Preview your comment before posting, especially when using spoilers!
  • No link dropping, no domains as names; do not spam, and do not advertise! (rel="nofollow" in use)
chrpa Jayisgames needs your help to continue providing quality content. Click for details Welcome to the Roundup 66 - Retro with four games! After you find the ten monkeys in the chapter, look in the inventory. You will find a...  ...
chrpa Jayisgames needs your help to continue providing quality content. Click for details Welcome to the Roundup 65 with three games! As mentioned in the previous roundups, only odd-numbered episodes are featured since even-numbered are for Robin Vencel's patrons (the...  ...
chrpa Jayisgames needs your help to continue providing quality content. Click for details Hi! Weekday Escape and Weekday Puzzle are here! First we have two new cans from tomoLaSiDo and then two small rooms from isotronic. That's all for this...  ...
6,365 Views
0 Comments
chrpa Jayisgames needs your help to continue providing quality content. Click for details Welcome to Mobile Monday! We have another beautiful game from Nicolet and it's a winter game as it should be. Tasuku Yahiro have released another of their...  ...

HELP Jayisgames.com

Recent Comments


Display 5 more comments
Limit to the last 5 comments

Game of the week


Dark Romance: Vampire Origins Collector's Edition

Your Favorite Games edit

add
Save links to your favorite games here. Use the Favorites editor.

Monthly Archives