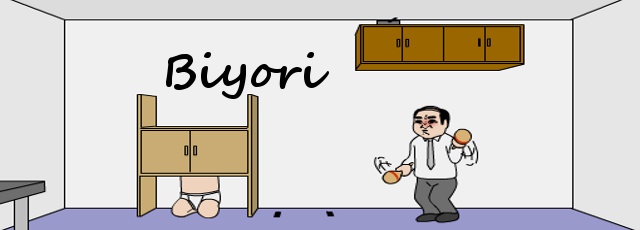
JayisGames.com is now available ad-free!
Jay is Games recommends Cheat Happens with 8,000+ games and 35,000+ trainers!

Biyori


  • Currently 4.2/5
  • 1
  • 2
  • 3
  • 4
  • 5
Rating: 4.2/5 (61 votes)
Comments (13) | Views (11,989)

Biyori

DoraConfused and unsettled in just a few clicks? That's the calling card of a Detarou escape game, and if you woke up this morning thinking, yes, I would like to see a suggestive lion costume while a man plays the maracas, Biyori is here to fulfill your needs. It's just you and a room full of men who have, um, interesting means of expression. Biyori admittedly features a lot of material right off the bat that is designed to make you either weirded out or uncomfortable, but that's par for the course where Detarou is concerned. Just click to search and interact with things and people, and pay attention to the clues you'll need to solve the puzzles and contraptions keeping you stuck in this place.

Like a lot of Detarou games, Biyori offers very little instruction apart from some cryptic hints, making it easy to spend a lot of time going in circles or stuck on red herrings. Though it initially looks almost barren and straight-forward, there's more than one room to explore, and Biyori quickly piles on more than meets the eye. Detarou has always been great at creating puzzles that force you to change your way of thinking or looking at them, and as usual you'll need to do a lot of backtracking to use or re-use clues you've discovered in different ways. So much backtracking, in fact, that you might want to jot down or take screencaps of the hints you encounter so you don't have to keep running back and forth to refresh your memory. Does it make a whole lot of sense? No. Ha. No. But it's every bit as surprising and strange as fans have come to expect, so gird your loins and sally forth.

Play Biyori

Game not loading? Try to play Biyori here instead!

Walkthrough Guide


(Please allow page to fully load for spoiler tags to be functional.)

SUPER QUICK NO FUN WALKTHROUGH…
It's my first walkthrough and I wanted to see how little info you might need just to blast through the game. There's no searching around and no hints. Just cold hard spoilers that suck the fun out of puzzles.

Click START.

Click the bottom brown bar.

The code for the safe is…

8157. Take the glass.

Go left twice. See the box on the shelf? The code is…

SMKL. Take the with smudge disc.

Go left once. See the wooden doll in the wall? Ignore it.

See the grey door? The code is…

73659. Go inside.

See the sumo? Ignore him. Open the glass doors instead an take the greens smudge disc.

Go back to the sumo. See the yellow kaiser helmet? The code is…

LRRLLR. Take the pipette and…

...use it on the green smudge. Then use the pipette on the white smudge to create a red smudge.

Go right once and click on the panel next to the smiling door. The code is…

GRGBYRW. Take the ladder.

Exit this room through the door next to the fitness enthusiast.

Put the ladder where those black marks are. Grab the remote control.

Go back to the sumo and use the remote on that car.

Go back to where you saw the wooden doll and take the doll.

Go back to where the ladder is. Click above the underwear man cabinet.

insert the doll in the hole.
Hit the doll.
Open the cabinet doors and take the hammer.

Go back to where the man is exercising.

Use the glass on the mask to get water.

Go to the fireplace and use the water on the fire. Take the key.

Go back to where the sumo used to be but now there's a crashed car.

Use the key on the sliding cabinet doors.

Take the block an smash it with the hammer. Take the key.

Fix the block with the red smudge.

Go back to the car and go left.

SIDE QUEST…

Go in the door and smash the buttons with the hammer. Or, just press the buttons and die. SAVE FIRST!

Insert the block in the hole above the boxes to open the big smiling door.

Use the golden key on the door.

Click the open door to exit or…

...back away from the door and find the red stamp for the perfect ending instead.

The red stamp is in the panel to the right of the big door. Click the yellow square 6 times. Take the stamp and exit.


SUPER HINTY MORE FUN WALKTHROUGH

That other walk through I did is boring and no fun. If you'd rather have a chance to think for yourself a little bit, try this one. It's my second walk through, ever. Let me know if it was worth me staying up all night to make it. :-O

Click START

You may have seen this sort of tricky poster in other Detarou games.

You have to zoom out to begin escaping.

Click the brown bar below the poster.

EXPLORATION

This is the lionman view.

There is a fireplace, a safe, and a framed painting of solid colors here. Click on the lionman for…

ROAR!

Just like with the angel poster, if you're zoomed in on something, try clicking the bottom of the game (e.g. - the carpet below the lionman's feet) to back out.

Look at the painting and remember where it is for later.

Also, take a look at the combination lock on the safe.

Then, click on the fire. See something in there?

It's a key, but it's too hot to pick up. So, back out.

JOKE BREAK…. Why is it a Trump key?

Because, it's been fired.

Now, let's go left for the first time. Still getting the lay of the land here.

This is the underwear man view.

There is a half-naked man stuck inside a double-doored cabinet, a man shaking some maracas, a cupboard way up high, and…

some black marks on the carpet.

Zoom in on the cabinet by clicking anywhere on it. From here you can click on the doors to try to get inside.

But the man inside won't let you!

Or, you can…

…click above the cabinet doors.

Where you'll find a hole…

…and a black, finial sort of shape.

Back away from the cabinet and zoom in on the maracas man.

Shake it, salaryman! SHAKE IT!

Back away slowly and click on the cupboard.

Way up on top of the cupboard is an object. What is it? Maybe a dust pan? All we know now is…

…that you can't reach it.

Back out and then go left one time. This is the rocket man view

There is a man wearing a rocket helmet and exercising his - um - back muscles… I guess. Also, there is a couch, a large nook in the wall, and a table.

Click anywhere on the table to zoom in.

On top of the table is a little book and a microscope.

Click on the little book to see what's inside.

Then, have a look through the microscope.

Pretty boring stuff, huh? I mean. Science. Am I right?

Let's back away from the table and zoom in on the nook.

There's no way around it, you're going to have to reach over that unmotionless posterior, because…

…you really need to take a look at that white box in the middle.

This box has a combination lock, but we don't know the code yet. So let's us just back away from the nook.

From the rocket man view, go left.

This is the hats view.

You can see a weird thing sticking out of the wall on the left, a door in the middle with a keypad lock, and a brown hutch with heads on it.
Zoom in on the weird thing

It's only slightly less weird now. What is it?

It's a Japanese Kokeshi doll.

Back away. You can't take it. But it does have an interesting shape. Doesn't it?

Click on the door to see the keypad. That's all. Just look at it. Then, back out.

Click on the hutch.

You can zoom in on the hats and the strange objects on that middle shelf, but you don't need to. Just admire them from afar. Or, you can go in for a closer look. Whatevs.

Back away and go left again so that you're back at the lionman view. Now that you've explored the four views of this room, it's time to put your noggin to the test. GAMBATE!

TIME TO GET TO WORK

Let's try to figure out how to open the box in the rocket man view.

The code on the box is a combination of letters A-Z.

Where have we seen some letters recently?

On the hats! But, what else do we know about the hats

They all have different colors.

So, where else have we seen some colors?

On the painting above the safe!

Okay, now we're cooking. Let's combine our knowledge of the painting and the hats.

No? Well, check this out…

The hats have different colors AND different letters. Coincidence?

Nope… Red = K, Green = L, Blue = M, Yellow = S


The painting has all the colors of the rainbow, but…

They're in a mysteriously specific order.

Green-Red-Blue-Yellow

If you combine that knowledge, you end up with a code for the box.

Did you try LMKS?

Didn't work, right?

Try combining your knowledge of the painting as it compares to the interface of the lock.

Try thinking on your head.

The painting has white spaces, too. So, compared to the lock…

…those white spaces look like the buttons. Which means that…

…the painting is upside-down!

The code for the rocket man butt box must be…

SMKL

Look at us and our spacial reasoning! Woo!

Inside the box is a disc with a white smudge inside. Take it.

Hey, look. Our first item! Let's take a look at it.

Pretty boring. Maybe we need a closer look.

Like really, really, close.

Hey, didn't we see a microscope around here?

JOKE BREAK

If we get any closer we'll be behind it.

Place the white smudge disc on the microscope platform and click the eyepiece.

Does what you see remind you of anything?

Anything at all?.

Well, whatever. Let's go see if we can crack open that ol' gray door.

Click on the door to access the keypad lock.

Does it remind you of anything?

Maybe we can combine what we know about this keypad (it has numbers 0-9, the letter C, and an arrow) with something else we know.

Didn't we just get up close and personal with something that had an arrow?

Sure we did. The weird numbers on the white smudge disc! Let's try it.

Do they match up somehow with the keypad?

Maybe if you...

Line the arrows up. Does that make sense? No?

Well one of these things is the clue for the other. Which one do you think it is?

It's the white smudge disc. That's which one it is. The numbers on the disc tell you in which order to punch the numbers on the keypad. The code is…

73659
Then punch the arrow to enter the code.

Hey, now you're inside another room! This is the sumo view.

EXPLORATION TIME #2.

In this view there is a sumo straddling a remote control car. Click on the sumo to see it, then back out. Sumo's are dangerous!
To the right of the sumo is a metal cabinet with glass doors and a cube with a kind of yellow TajMahal cake looking thing on top. Click anywhere in this area to zoom in.
Click on the glass doors of the metal cabinet.

Take the disc. It's got a green smudge inside.star

Back out and click on the TajMahal cake to zoom in.

Try clicking on the arrows.

Waggle. Waggle.

When you're done appreciating whatever that is, back out.
Then, click on the sliding doors to zoom in. Click them again and see the lock. It takes a key. Pretty standard sort of lock.

The arrow for backing out from the lock is a little higher than normal, but it's easy to find.

Back out.
Then, back out again.
Then, go left.

This is the four boxes view. See the four boxes? Click anywhere near there to zoom in.

You can look inside each of the boxes. Do that, then have a look-see at the smiling face. Now, back out.

You can go inside that door if you like, but don't right now. Let's keep moving on. I mean, if you really want to go in there then…

…make sure to save the game first. Then, you're on your own.

Go left again.

This is the jazzercize view.

That door leads back to the original room. But, for now, click on the jazzercizeer to zoom in.

You can't do anything with the man-in-motion, but you can click on the mask.

JOKE BREAK

What kind of mask is that? Kabuki?

Noh.

Do you know what kind it is?

Noh.

Okay, now that you're zoomed in to the Japanese Noh theater mask. Click it.

Eew. Gross!

Now back all the way out and go left.

This is the plant view.

The major feature of the plant view is that large smiley face in the middle. To the right of it is a an access hatch. Click on it.

Click on the hatch again to zoom in to the five colored squares. Click on them to get a feel for things, then back out to the plant view.

Click the plant.

It's fun to tickle the tummy, but what are those black shapes? Back out.

So, now you've explored the new room. Let's get to work.

GETTING TO WORK PART 2

Since we're at the sumo view, let's try to figure out that cake thing. Zoom in on it.

Remember how that sort of candle thing waggles when you click the arrows? Sort of left right left right depending on which arrow you click?

And, you can click the arrows in whatever order you want?

Is there a special order? Probably. So what is it?

There's got to be a clue somewhere. Maybe we forgot. Let's look around again.

Probably would help to look in the first room as well.

What's in the first room that we haven't used yet

Maybe on a shelf…

…above some hats.

The object between the sun and moon shaped objects on the shelf above the hats looks a lot like the top of our weird candle.

Can we combine what we know about the Sun, the Moon, and the candle top with something else?

Haven't we recently seen some moon and sun shapes somewhere?

Next to a tummy that's fun to tickle?

Aw, heck. Let's do it! We know that the shapes next to the tummy go like

Moon-Sun-Sun-Moon-Moon-Sun, from top to bottom.

But, there's an arrow.

We also know something about the shapes above the hats…

…and how they're arranged.

The sun on the left and the moon on the right.

Why not lets combine that information and waggle us some weird candle. Just…

…follow the arrow. And click some arrows. If we assume that…

Sun = left. And, Moon = right. And, that the order of the tummy shapes is bottom to top. The waggle order must be…

LRRLLR

AUGH! Well, I guess that wasn't a TajMahal cake after all. It's a bald, yellow, jaundiced dude in a box. What?! Well, anyway, take that pointy object and back away. Far, far, away..

Let's take some time out to assess our inventory.

We should have two discs with smudges (white and green), and a pointy thing with a sort of squeezy bulb on one end.

Where have we seen something about something white, something green, and something pointy? Maybe…

inside the little book next to the microscope?

Read the little book again and follow the instructions on the left side.

You have now created a red smudge!

While you're at the microscope table anyway, you might as well see what the green smudge looks like up close.

Germs in Japan are weird, but don't let them distract you from whatever else you see in there.

You've found a clue on the green smudge. SCIENCE!

LKLMSK, and a square.

What are we going to do with it? Let's ignore it and maybe it'll go away.

Instead, hasn't that safe been untouched for too long? Sitting there all smug in it's lockedness. It's time to discover the secrets of the lockedness monster!

We've already seen the lock interface. It has four number wheels, and arrows above and below with which to select the correct combination.

You're a pro by now. You can figure this on out on your own.

No? Well, can you remember something else we've seen that also has four numbers?

I'm just throwing this out there, but we haven't figured out what those boxes are for yet.

Weren't there numbers inside those boxes? Those four boxes? The numbers? Inside?

The colored numbers?

Yellow 5, Red 7, Green 1, Blue 8

But what order do they go in?

Could the boxes themselves be important? Maybe an important clue that we can combine with information we've seen before?

Take another look at the little book near the microscope, again.

There are four colored box shapes on the right page with dots above and below.

So, we have four numbers. Four Boxes. Four Colors. Four places for numbers on the safe combination. Some dots.

The dots sort of make the boxes on that page look like the safe combination lock. Could the code to the safe lock…

...correspond to the colors of the boxes on that page? And…

...the colors of the number inside the boxes from the other room?

Yes! The code is…

8157

Enter the code. Open the safe. Take the glass.

What can you do with a glass?

Fill it with something.

Something gross.

Like water from someone's nose?

Yes. Go do that and come back to this room again. That water may be useful.

Look around for a place to use the water

You got it. The fireplace. Use the water to put out the fire. Get the key.

Okay, now rest your brain and go use that key where you know it has to go.

There's only one key hole so far. Go insert the key in…

...the lock on the sliding doors on the cabinet next to the sumo.

Take the smiling block. Where have you seen something smiling?

Well, two places but this is a small block.

Go back to the four boxes view and…

...insert the block into the smiling indentation. Back away, and look around. Did something happen?

The large smiley face is gone and now there's a brown door with a golden lock. Now it's time to figure out how to open that door.

But, first, isn't there something else we haven't deal with yet?

That panel to the right of the brown door isn't going to open itself.

Zoom in on the buttons.

More colors, hmm? Haven't we exhausted all the colors and all the combinations yet?

Turns out, yes. And no. We have to reuse some old information in a new way.

Remember the green smudge clue?

What were the letters? Have you seen those particular letters somewhere before?

It's a hat trick!

Combine your hat knowledge with the green smudge clue to reveal that the code for the hatch is…

Wait, there are five colors on the hatch. What's the white square for?

Consider the square at the end of the green smudge clue. What color is that? The code for the hatch is… for real this time…

GRGBYR and White!

Enter the code. Open the hatch. Get the ladder.

Now that you have the ladder. You can probably get at something really high.

Wasn't there a dust pan or something on the cupboard?

Go to the underwear man view and find a place to put the ladder.

It goes where those black marks are. Turns out they're indentations shaped like ladder feet.

When the ladder is in place, click on it. Then…

Look out maracas man!

Well he's still alive. Might as well pick up the remote control and find a use for it.

Wasn't there a remote control car somewhere?

Go to the sumo view and click on the sumo to zoom in.

Use the remote control on the car.

OH NO SUMO! LOOK OUT! Well, he made a hole somewhere. You can't help him.

But, you can go find out where his head went.

Go to the hats view and notice the wooden doll has been pushed out of the wall and is on the floor. Pick it up.

The doll has an interesting shape. Have you seen that shape before?

It's stairing you in the face!

You saw that shape above the underwear man. Next to…

…a hole. A hole that just might fit -- it does. Go put the wooden doll in the hole.

Once the doll is in the hole, you can click on it to hit it down.

KABONG! What happened?

I bet you can open the cabinet now.

Open the cabinet and take the hammer. And, click on the doll again. It's fun!

What's left? Hmmm. Were you wondering about the drawing of the face in the little book with the key on it's tongue?

Might as well try to figure that out. What sort of looks like that drawing?

The smiley face block sort of does.

Maybe there's a key inside it.

Go get the block from the wall in the second room. How would you get the key out, would were it inside, that is?

It's hammer time, and you can indeed touch this. Touch it hard with the hammer. Smash the block with the hammer and get the key. The golden key.

Okay, now you can exit the game. Just go back to the brown door and insert the golden key into the golden lock.

CRIPES, MAN! Where's the door?!

Somehow you have to raise that smiling face again. But how. You smashed the block!

Can you fix the block?

Well, the little book hasn't been wrong yet.

There is only one clue left in the little book.

Something red closes the mouth of an evil chomping rectangle?

Seems legit. (Too legit, as they say, to quit.) Do we have any chomping rectangles?

No, but we do have something that had previously been a rectangle.

The smiling block that we smashed.

Fix the block with the red smudge. It's glue!

Go back and re-insert the block into it's indentation. The door has returned. You have the golden key. You can leave. Go ahead.

Or you can keep going because there's a second, Detarou approved, ending!

RED STAMP ENDING

You have to find the famous Detarou red stamp. It's around here somewhere.

Try first saving the game. Then unlock the brown door. But, don't go through it.

Remove the smiling block and turn around

Sx6?

Probably means do something to S, six times

S? Where is an S that can have things done to it multiple times?

Didn't S = Yellow at some point?

Go to the hatch and click the yellow button six times.

Open the hatch and get the stamp.

But now the brown door is gone again.

Replace the block and now you can exit.

Or, you can save the game and do one more fun thing.

PANDA REVENGE TIME

Rememeber that door you were ignoring this whole time? Go in there.

The evil pandas are beckoning you to come forth!

Go forth and zoom in on the pedestal.

Save the game!

Click on any of the buttons to…

DIE! Muahahahah!

When the game ends, click REPLAY and then LOAD GAME. Choose the appropriate data block to restart the game from where you saved it last.

Now, select your hammer and smash the pedestal.

KABOOOOOOOM! REVENGE!

Okay, now you can exit through the brown door.You have won Biyori Escape with the coveted red stamp ending!

13 Comments

shjack180 April 26, 2014 6:59 PM

Yes, yes, yes!!!! A Detarou escape game for me to play! So excited to start and possibly struggle through this! :D

Reply
shjack180 April 26, 2014 7:31 PM

I had a good long laugh when

I used the remote control on the car

and a real car came crashing through the wall

also when I used the ladder

and the man got hit and crumpled by the cabinet

When others start playing and posting, I need help. I have

the petri dish with red substance (I can't find anything ripped or broken to apply it to), the white brick with a face (that opens the wall panel with a face that is in front of the exit door), and the wooden doll (that I have no clue what to do with)

What clue, application, or item and I missing here?

Reply
shjack180 April 26, 2014 7:36 PM

Woops, never mind. Out with the red stamp even. Such a great game!

Reply

Can you not get revenge on the panda this time?

Reply
shipoopie April 27, 2014 1:09 AM

@Tenzhi

Yes! Revenge on the panda!

Go in the door next to the four boxes and smash the buttons with the hammer!

Reply
Jamilworm April 27, 2014 1:17 AM

I got stuck right at the beginning trying to figure out the

letters and colors puzzle.

I was able to find the solution by looking up a video walkthrough, but I have no idea how one is supposed to figure it out. Something to do with

the colors above the safe in reverse order? How are you supposed to know to reverse the order?

Can anyone please explain?

Reply
shipoopie April 27, 2014 1:22 AM

@Jamilworm

The letters and color puzzle is upside down because those white spaces on the poster represent the buttons on the letter selecting interface. Rotate the poster.

Reply
shipoopie April 27, 2014 1:39 AM

SUPER QUICK NO FUN WALKTHROUGH…
It's my first walkthrough and I wanted to see how little info you might need just to blast through the game. There's no searching around and no hints. Just cold hard spoilers that suck the fun out of puzzles.

Click START.

Click the bottom brown bar.

The code for the safe is…

8157. Take the glass.

Go left twice. See the box on the shelf? The code is…

SMKL. Take the with smudge disc.

Go left once. See the wooden doll in the wall? Ignore it.

See the grey door? The code is…

73659. Go inside.

See the sumo? Ignore him. Open the glass doors instead an take the greens smudge disc.

Go back to the sumo. See the yellow kaiser helmet? The code is…

LRRLLR. Take the pipette and…

...use it on the green smudge. Then use the pipette on the white smudge to create a red smudge.

Go right once and click on the panel next to the smiling door. The code is…

GRGBYRW. Take the ladder.

Exit this room through the door next to the fitness enthusiast.

Put the ladder where those black marks are. Grab the remote control.

Go back to the sumo and use the remote on that car.

Go back to where you saw the wooden doll and take the doll.

Go back to where the ladder is. Click above the underwear man cabinet.

insert the doll in the hole.
Hit the doll.
Open the cabinet doors and take the hammer.

Go back to where the man is exercising.

Use the glass on the mask to get water.

Go to the fireplace and use the water on the fire. Take the key.

Go back to where the sumo used to be but now there's a crashed car.

Use the key on the sliding cabinet doors.

Take the block an smash it with the hammer. Take the key.

Fix the block with the red smudge.

Go back to the car and go left.

SIDE QUEST…

Go in the door and smash the buttons with the hammer. Or, just press the buttons and die. SAVE FIRST!

Insert the block in the hole above the boxes to open the big smiling door.

Use the golden key on the door.

Click the open door to exit or…

...back away from the door and find the red stamp for the perfect ending instead.

The red stamp is in the panel to the right of the big door. Click the yellow square 6 times. Take the stamp and exit.

Reply
shipoopie April 27, 2014 9:49 AM


SUPER HINTY MORE FUN WALKTHROUGH

That other walk through I did is boring and no fun. If you'd rather have a chance to think for yourself a little bit, try this one. It's my second walk through, ever. Let me know if it was worth me staying up all night to make it. :-O

Click START

You may have seen this sort of tricky poster in other Detarou games.

You have to zoom out to begin escaping.

Click the brown bar below the poster.

EXPLORATION

This is the lionman view.

There is a fireplace, a safe, and a framed painting of solid colors here. Click on the lionman for…

ROAR!

Just like with the angel poster, if you're zoomed in on something, try clicking the bottom of the game (e.g. - the carpet below the lionman's feet) to back out.

Look at the painting and remember where it is for later.

Also, take a look at the combination lock on the safe.

Then, click on the fire. See something in there?

It's a key, but it's too hot to pick up. So, back out.

JOKE BREAK…. Why is it a Trump key?

Because, it's been fired.

Now, let's go left for the first time. Still getting the lay of the land here.

This is the underwear man view.

There is a half-naked man stuck inside a double-doored cabinet, a man shaking some maracas, a cupboard way up high, and…

some black marks on the carpet.

Zoom in on the cabinet by clicking anywhere on it. From here you can click on the doors to try to get inside.

But the man inside won't let you!

Or, you can…

…click above the cabinet doors.

Where you'll find a hole…

…and a black, finial sort of shape.

Back away from the cabinet and zoom in on the maracas man.

Shake it, salaryman! SHAKE IT!

Back away slowly and click on the cupboard.

Way up on top of the cupboard is an object. What is it? Maybe a dust pan? All we know now is…

…that you can't reach it.

Back out and then go left one time. This is the rocket man view

There is a man wearing a rocket helmet and exercising his - um - back muscles… I guess. Also, there is a couch, a large nook in the wall, and a table.

Click anywhere on the table to zoom in.

On top of the table is a little book and a microscope.

Click on the little book to see what's inside.

Then, have a look through the microscope.

Pretty boring stuff, huh? I mean. Science. Am I right?

Let's back away from the table and zoom in on the nook.

There's no way around it, you're going to have to reach over that unmotionless posterior, because…

…you really need to take a look at that white box in the middle.

This box has a combination lock, but we don't know the code yet. So let's us just back away from the nook.

From the rocket man view, go left.

This is the hats view.

You can see a weird thing sticking out of the wall on the left, a door in the middle with a keypad lock, and a brown hutch with heads on it.
Zoom in on the weird thing

It's only slightly less weird now. What is it?

It's a Japanese Kokeshi doll.

Back away. You can't take it. But it does have an interesting shape. Doesn't it?

Click on the door to see the keypad. That's all. Just look at it. Then, back out.

Click on the hutch.

You can zoom in on the hats and the strange objects on that middle shelf, but you don't need to. Just admire them from afar. Or, you can go in for a closer look. Whatevs.

Back away and go left again so that you're back at the lionman view. Now that you've explored the four views of this room, it's time to put your noggin to the test. GAMBATE!

TIME TO GET TO WORK

Let's try to figure out how to open the box in the rocket man view.

The code on the box is a combination of letters A-Z.

Where have we seen some letters recently?

On the hats! But, what else do we know about the hats

They all have different colors.

So, where else have we seen some colors?

On the painting above the safe!

Okay, now we're cooking. Let's combine our knowledge of the painting and the hats.

No? Well, check this out…

The hats have different colors AND different letters. Coincidence?

Nope… Red = K, Green = L, Blue = M, Yellow = S


The painting has all the colors of the rainbow, but…

They're in a mysteriously specific order.

Green-Red-Blue-Yellow

If you combine that knowledge, you end up with a code for the box.

Did you try LMKS?

Didn't work, right?

Try combining your knowledge of the painting as it compares to the interface of the lock.

Try thinking on your head.

The painting has white spaces, too. So, compared to the lock…

…those white spaces look like the buttons. Which means that…

…the painting is upside-down!

The code for the rocket man butt box must be…

SMKL

Look at us and our spacial reasoning! Woo!

Inside the box is a disc with a white smudge inside. Take it.

Hey, look. Our first item! Let's take a look at it.

Pretty boring. Maybe we need a closer look.

Like really, really, close.

Hey, didn't we see a microscope around here?

JOKE BREAK

If we get any closer we'll be behind it.

Place the white smudge disc on the microscope platform and click the eyepiece.

Does what you see remind you of anything?

Anything at all?.

Well, whatever. Let's go see if we can crack open that ol' gray door.

Click on the door to access the keypad lock.

Does it remind you of anything?

Maybe we can combine what we know about this keypad (it has numbers 0-9, the letter C, and an arrow) with something else we know.

Didn't we just get up close and personal with something that had an arrow?

Sure we did. The weird numbers on the white smudge disc! Let's try it.

Do they match up somehow with the keypad?

Maybe if you...

Line the arrows up. Does that make sense? No?

Well one of these things is the clue for the other. Which one do you think it is?

It's the white smudge disc. That's which one it is. The numbers on the disc tell you in which order to punch the numbers on the keypad. The code is…

73659
Then punch the arrow to enter the code.

Hey, now you're inside another room! This is the sumo view.

EXPLORATION TIME #2.

In this view there is a sumo straddling a remote control car. Click on the sumo to see it, then back out. Sumo's are dangerous!
To the right of the sumo is a metal cabinet with glass doors and a cube with a kind of yellow TajMahal cake looking thing on top. Click anywhere in this area to zoom in.
Click on the glass doors of the metal cabinet.

Take the disc. It's got a green smudge inside.star

Back out and click on the TajMahal cake to zoom in.

Try clicking on the arrows.

Waggle. Waggle.

When you're done appreciating whatever that is, back out.
Then, click on the sliding doors to zoom in. Click them again and see the lock. It takes a key. Pretty standard sort of lock.

The arrow for backing out from the lock is a little higher than normal, but it's easy to find.

Back out.
Then, back out again.
Then, go left.

This is the four boxes view. See the four boxes? Click anywhere near there to zoom in.

You can look inside each of the boxes. Do that, then have a look-see at the smiling face. Now, back out.

You can go inside that door if you like, but don't right now. Let's keep moving on. I mean, if you really want to go in there then…

…make sure to save the game first. Then, you're on your own.

Go left again.

This is the jazzercize view.

That door leads back to the original room. But, for now, click on the jazzercizeer to zoom in.

You can't do anything with the man-in-motion, but you can click on the mask.

JOKE BREAK

What kind of mask is that? Kabuki?

Noh.

Do you know what kind it is?

Noh.

Okay, now that you're zoomed in to the Japanese Noh theater mask. Click it.

Eew. Gross!

Now back all the way out and go left.

This is the plant view.

The major feature of the plant view is that large smiley face in the middle. To the right of it is a an access hatch. Click on it.

Click on the hatch again to zoom in to the five colored squares. Click on them to get a feel for things, then back out to the plant view.

Click the plant.

It's fun to tickle the tummy, but what are those black shapes? Back out.

So, now you've explored the new room. Let's get to work.

GETTING TO WORK PART 2

Since we're at the sumo view, let's try to figure out that cake thing. Zoom in on it.

Remember how that sort of candle thing waggles when you click the arrows? Sort of left right left right depending on which arrow you click?

And, you can click the arrows in whatever order you want?

Is there a special order? Probably. So what is it?

There's got to be a clue somewhere. Maybe we forgot. Let's look around again.

Probably would help to look in the first room as well.

What's in the first room that we haven't used yet

Maybe on a shelf…

…above some hats.

The object between the sun and moon shaped objects on the shelf above the hats looks a lot like the top of our weird candle.

Can we combine what we know about the Sun, the Moon, and the candle top with something else?

Haven't we recently seen some moon and sun shapes somewhere?

Next to a tummy that's fun to tickle?

Aw, heck. Let's do it! We know that the shapes next to the tummy go like

Moon-Sun-Sun-Moon-Moon-Sun, from top to bottom.

But, there's an arrow.

We also know something about the shapes above the hats…

…and how they're arranged.

The sun on the left and the moon on the right.

Why not lets combine that information and waggle us some weird candle. Just…

…follow the arrow. And click some arrows. If we assume that…

Sun = left. And, Moon = right. And, that the order of the tummy shapes is bottom to top. The waggle order must be…

LRRLLR

AUGH! Well, I guess that wasn't a TajMahal cake after all. It's a bald, yellow, jaundiced dude in a box. What?! Well, anyway, take that pointy object and back away. Far, far, away..

Let's take some time out to assess our inventory.

We should have two discs with smudges (white and green), and a pointy thing with a sort of squeezy bulb on one end.

Where have we seen something about something white, something green, and something pointy? Maybe…

inside the little book next to the microscope?

Read the little book again and follow the instructions on the left side.

You have now created a red smudge!

While you're at the microscope table anyway, you might as well see what the green smudge looks like up close.

Germs in Japan are weird, but don't let them distract you from whatever else you see in there.

You've found a clue on the green smudge. SCIENCE!

LKLMSK, and a square.

What are we going to do with it? Let's ignore it and maybe it'll go away.

Instead, hasn't that safe been untouched for too long? Sitting there all smug in it's lockedness. It's time to discover the secrets of the lockedness monster!

We've already seen the lock interface. It has four number wheels, and arrows above and below with which to select the correct combination.

You're a pro by now. You can figure this on out on your own.

No? Well, can you remember something else we've seen that also has four numbers?

I'm just throwing this out there, but we haven't figured out what those boxes are for yet.

Weren't there numbers inside those boxes? Those four boxes? The numbers? Inside?

The colored numbers?

Yellow 5, Red 7, Green 1, Blue 8

But what order do they go in?

Could the boxes themselves be important? Maybe an important clue that we can combine with information we've seen before?

Take another look at the little book near the microscope, again.

There are four colored box shapes on the right page with dots above and below.

So, we have four numbers. Four Boxes. Four Colors. Four places for numbers on the safe combination. Some dots.

The dots sort of make the boxes on that page look like the safe combination lock. Could the code to the safe lock…

...correspond to the colors of the boxes on that page? And…

...the colors of the number inside the boxes from the other room?

Yes! The code is…

8157

Enter the code. Open the safe. Take the glass.

What can you do with a glass?

Fill it with something.

Something gross.

Like water from someone's nose?

Yes. Go do that and come back to this room again. That water may be useful.

Look around for a place to use the water

You got it. The fireplace. Use the water to put out the fire. Get the key.

Okay, now rest your brain and go use that key where you know it has to go.

There's only one key hole so far. Go insert the key in…

...the lock on the sliding doors on the cabinet next to the sumo.

Take the smiling block. Where have you seen something smiling?

Well, two places but this is a small block.

Go back to the four boxes view and…

...insert the block into the smiling indentation. Back away, and look around. Did something happen?

The large smiley face is gone and now there's a brown door with a golden lock. Now it's time to figure out how to open that door.

But, first, isn't there something else we haven't deal with yet?

That panel to the right of the brown door isn't going to open itself.

Zoom in on the buttons.

More colors, hmm? Haven't we exhausted all the colors and all the combinations yet?

Turns out, yes. And no. We have to reuse some old information in a new way.

Remember the green smudge clue?

What were the letters? Have you seen those particular letters somewhere before?

It's a hat trick!

Combine your hat knowledge with the green smudge clue to reveal that the code for the hatch is…

Wait, there are five colors on the hatch. What's the white square for?

Consider the square at the end of the green smudge clue. What color is that? The code for the hatch is… for real this time…

GRGBYR and White!

Enter the code. Open the hatch. Get the ladder.

Now that you have the ladder. You can probably get at something really high.

Wasn't there a dust pan or something on the cupboard?

Go to the underwear man view and find a place to put the ladder.

It goes where those black marks are. Turns out they're indentations shaped like ladder feet.

When the ladder is in place, click on it. Then…

Look out maracas man!

Well he's still alive. Might as well pick up the remote control and find a use for it.

Wasn't there a remote control car somewhere?

Go to the sumo view and click on the sumo to zoom in.

Use the remote control on the car.

OH NO SUMO! LOOK OUT! Well, he made a hole somewhere. You can't help him.

But, you can go find out where his head went.

Go to the hats view and notice the wooden doll has been pushed out of the wall and is on the floor. Pick it up.

The doll has an interesting shape. Have you seen that shape before?

It's stairing you in the face!

You saw that shape above the underwear man. Next to…

…a hole. A hole that just might fit -- it does. Go put the wooden doll in the hole.

Once the doll is in the hole, you can click on it to hit it down.

KABONG! What happened?

I bet you can open the cabinet now.

Open the cabinet and take the hammer. And, click on the doll again. It's fun!

What's left? Hmmm. Were you wondering about the drawing of the face in the little book with the key on it's tongue?

Might as well try to figure that out. What sort of looks like that drawing?

The smiley face block sort of does.

Maybe there's a key inside it.

Go get the block from the wall in the second room. How would you get the key out, would were it inside, that is?

It's hammer time, and you can indeed touch this. Touch it hard with the hammer. Smash the block with the hammer and get the key. The golden key.

Okay, now you can exit the game. Just go back to the brown door and insert the golden key into the golden lock.

CRIPES, MAN! Where's the door?!

Somehow you have to raise that smiling face again. But how. You smashed the block!

Can you fix the block?

Well, the little book hasn't been wrong yet.

There is only one clue left in the little book.

Something red closes the mouth of an evil chomping rectangle?

Seems legit. (Too legit, as they say, to quit.) Do we have any chomping rectangles?

No, but we do have something that had previously been a rectangle.

The smiling block that we smashed.

Fix the block with the red smudge. It's glue!

Go back and re-insert the block into it's indentation. The door has returned. You have the golden key. You can leave. Go ahead.

Or you can keep going because there's a second, Detarou approved, ending!

RED STAMP ENDING

You have to find the famous Detarou red stamp. It's around here somewhere.

Try first saving the game. Then unlock the brown door. But, don't go through it.

Remove the smiling block and turn around

Sx6?

Probably means do something to S, six times

S? Where is an S that can have things done to it multiple times?

Didn't S = Yellow at some point?

Go to the hatch and click the yellow button six times.

Open the hatch and get the stamp.

But now the brown door is gone again.

Replace the block and now you can exit.

Or, you can save the game and do one more fun thing.

PANDA REVENGE TIME

Rememeber that door you were ignoring this whole time? Go in there.

The evil pandas are beckoning you to come forth!

Go forth and zoom in on the pedestal.

Save the game!

Click on any of the buttons to…

DIE! Muahahahah!

When the game ends, click REPLAY and then LOAD GAME. Choose the appropriate data block to restart the game from where you saved it last.

Now, select your hammer and smash the pedestal.

KABOOOOOOOM! REVENGE!

Okay, now you can exit through the brown door.You have won Biyori Escape with the coveted red stamp ending!

Reply
MrsRavoon April 30, 2014 8:21 PM

I'm exactly where shjack180 was when they first commented, and I'd love a hint.

Reply
MrsRavoon April 30, 2014 8:36 PM

Ah, there's what I was missing...

And here I thought I'd been so thorough at checking around pieces of furniture.

Reply

@shipoopie - thanks for the walkthrough (I used the second one you posted) :-) Very super-hinty, and helped give me just the right number of pointers to get me through - you helped me through the first puzzle whilst I was still trying to get my head into the game, and then at one midway point where I just needed the pointer in the right direction.

Reply

^ Scroll Up | Homepage >

Leave a comment [top of page]

Please consider creating a Casual Gameplay account if you're a regular visitor here, as it will allow us to create an even better experience for you. Sign-up here!
  • PLEASE UNDERSTAND SITE POLICIES BEFORE POSTING COMMENTS
  • You may use limited HTML tags for style:
    (a href, b, br/, strong, em, ul, ol, li, code, spoiler)
    HTML tags begin with a less-than sign: < and end with a greater-than sign: >. Always. No exceptions.
  • To post spoilers, please use spoiler tags: <spoiler> example </spoiler>
    If you need help understanding spoiler tags, read the spoiler help.
  • Please Preview your comment before posting, especially when using spoilers!
  • No link dropping, no domains as names; do not spam, and do not advertise! (rel="nofollow" in use)
chrpa Jayisgames needs your help to continue providing quality content. Click for details Hi! Weekday Escape and Weekday Puzzle are here! First we have two new cans from tomoLaSiDo and then two small rooms from isotronic. That's all for this...  ...
6,365 Views
0 Comments
chrpa Jayisgames needs your help to continue providing quality content. Click for details Welcome to Mobile Monday! We have another beautiful game from Nicolet and it's a winter game as it should be. Tasuku Yahiro have released another of their...  ...
6,161 Views
2 Comments
chrpa Jayisgames needs your help to continue providing quality content. Click for details We've got a new game from Rinnogogo's magical world and this time it really is magical.. Not only do you get to meet cute animals that express themselves...  ...
chrpa Jayisgames needs your help to continue providing quality content. Click for details After a few weeks of patient waiting, we have been rewarded - the new game from Ichima Coffeedo is here. We got a wonderful new game - it's...  ...

HELP Jayisgames.com

Recent Comments


Display 5 more comments
Limit to the last 5 comments

Game of the week


Dark Romance: Vampire Origins Collector's Edition

Your Favorite Games edit

add
Save links to your favorite games here. Use the Favorites editor.

Monthly Archives