
Escape from the Brick Room

![]() Welcome to the strange and somewhat twisted world of Tesshi-e, where the news of a friend opening a new restaurant means not only free food but a restaurant that is specifically set up as a room escape game as well. Escape from the Brick Room is a rather unimaginative title for a quite imaginative and tasty escaping experience.
Welcome to the strange and somewhat twisted world of Tesshi-e, where the news of a friend opening a new restaurant means not only free food but a restaurant that is specifically set up as a room escape game as well. Escape from the Brick Room is a rather unimaginative title for a quite imaginative and tasty escaping experience.
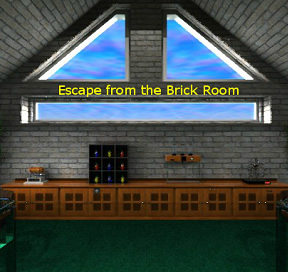 Qualities you can expect to find in Tesshi-e escape games are also found in this one: easy-to-use controls, lots of puzzles, minor pixel hunting, two escape scenarios, construction of a vehicle from strange spare parts, and the always present wobbly picture puzzle. Tesshi-e has graced us with some new and intriguing puzzles as well as a bit of a twist on the classic wobbly picture puzzle, which makes Escape from the Brick Room one of their better efforts. And as usual they have constructed a space so easy on the eyes that it almost seems a shame to want to escape rather than linger and enjoy the scenery, although that extremely familiar muzak in the background will drive you out sooner or later.
With gorgeous graphics, fun puzzles, and the usual twisted logic Tesshi-e is a mid-week favorite for both escaping and a lovely snack, even if it is virtual. Time to visit your friend's new eatery and enjoy an escape from the everyday.


Walkthrough Guide
(Please allow page to fully load for spoiler tags to be functional.)
Escape from the Brick Room Walkthrough
General Information
Examine everything you pick up.
Try everything you pick up on everything else you pick up, there's construction ahead.
There will be directions for the colorblind in this walkthrough.
There are two escape scenarios, regular and happy coin.
Good luck!
Exploration
You begin by facing a nice bar. To the left of the bar is the door out. It's locked.
Click on the bar for a close up.
On the bar, to the left (against the wall) is a white machine of some sort, click on it.
One of Tesshi-e's patented strange devices. This one has a notch shaped like a bottle. Back up.
Behind the bar is a small alcove that holds a sound system and a mysterious object to the right of the sound system.
Click on the mysterious object for a close up.
The object is a spade shaped ornament with the number 2 on it. Back up.
Click on the sound system for a close up.
Once you are in close up on the sound system notice the wires running along the wall. Click on the white wire cover to take part of it.
Back up twice and turn right.
You are now facing a wall with two big windows. There are two tables against the wall underneath the windows.
To the left of the left window is a small wall panel, click on it.
There are three buttons on the top of this panel, from left to right: blue, yellow, and red. There's also a small round button below the three buttons.
We don't have a code for this, so back up.
Click on the left table for a close up.
You can open the window a little, but you can't go outside.
On the table is a diamond-shaped ornament, click on it for a close up.
The diamond shaped ornament has the number 25 in it. Back up twice.
Click on the right table for a close up.
You can click on the right window for a close up, and you can open it, but you still can't go outside.
On the table is a club shaped ornament, click on it for a close up.
Inside the club shaped ornament is a round object, take it (stack of 4 coasters).
Once you've picked up the coasters you can see the club shaped object has the number 786.
Back up twice and turn right.
You are now facing a long, low cabinet that stretches the entire wall. There are five sets of doors in the cabinet.
On top of the cabinet on the left is an odd device, click on it for a close up.
This device has a four digit code, and there are four card suit symbols on it. Back up.
To the right of the card suit device is a cubby, click on it for a close up.
Inside the cubby are Mr. Birdy figurines of different colors. Top row (left to right): blue, yellow, red. Middle row: red, blue, red. Bottom row: yellow, blue, yellow.
Back up.
To the right of the Mr. Birdies is another strange device, click on it for a close up.
Yet another device, this one has differently shaped containers on the top. Back up.
On the right of the cabinet is the last of the strange devices, click on it.
It's a strange ornament with eight lights in a circle. If you push the red button on the base you can see the circles light up. Back up.
Time to click on the cabinet doors. Starting with the far left and moving towards the right.
Click on the far left set of doors for a close up.
The door is locked and there is no visible key hole or code key. All you see is a small red light. Back up.
Click on the next set of doors for a close up.
This set of doors is also locked (surprise). There is a small controller on the top of the door with arrows going up, right, left, and down. Back up.
Click on the next set of doors for a close up.
This is the middle set of doors, and they are also locked. Here you can see a normal keyhole. Back up.
Click on the next set of doors for a close up.
These doors have no visible lock, but there is a small panel above with three symbols: square, star, and circle. The panel is screwed down. Looks like we need a screwdriver! Back up.
Click on the far right set of doors for a close up.
This set of doors has a code lock, click on it for a close up.
Hmmm, this lock has zodiac symbols on it. Back up twice.
Turn right.
You are facing a wall with another table. On the wall are two paintings, a large Mr. Birdy painting over the table and a smaller painting on the right side of the wall.
There is also a set of double doors here, of course they're locked.
Click on the table for a close up.
There's another ornament on the table, click on it for a close up.
It's a heart shaped ornament, and it contains a book of matches. Take the matches.
Once you pick up the matches you can see the number 380 in the heart shaped ornament.
Back up once.
Look closely at the Mr. Birdy picture. Notice the small button at the bottom right of the frame?
Click on the button and a pattern on the picture lights up. Looks like a line (in the shape of a number 2) with an arrow at the end.
Back up.
Click on the smaller picture to the right of the doors for a close up.
Yes, it's our old friend the wobbly picture puzzle. Notice the letters in the corners.
Back up and turn right.
You should be back facing the bar now. Time to solve some puzzles!
The Wall Panel (Part 1)
Turn right once to face the two tables.
Click on the small panel on the wall to the left of the tables.
Note the buttons, from left to right: blue, yellow, and red.
Where have we seen those colors in the room?
There are two clues to this puzzle: (1) the cubby with the colored Mr. Birdy figurines and the Mr. Birdy picture.
Each of the birdies in the cubby are colored either blue, red, or yellow.
Clicking on the button on the Mr. Birdy picture frame shows the path to take with the figurines, starting at the upper left, going right, down, left, down, then right along the rows.
Imagine the buttons labeled, from left to right, 1, 2, and 3 (1= blue, 2 = yellow, and 3 = red).
The sequence to push the buttons (as indicated by the line on the Mr. Birdy picture) is 1, 2, 3, 3, 1, 3, 2, 1, 2.
After you hit the correct sequence, push the small round button.
A small tab opens up, click on the tab to open the panel.
Inside you will find a spade shaped key. You will also find a small hole that looks like it needs something inserted.
Take the key and back up.
The Middle Cabinet Doors
Turn right to face the low cabinet.
Click on the middle set of doors for a close up.
Use the spade key on the doors to open them.
Inside you will find a bottle of wine. Take it and back up.
The Far Right Cabinet (Zodiac Symbols)
Click on the far right cabinet for a close up.
Click on the code key for a close up.
Note the equals signs between the symbols?
Could that be a clue to the solution?
Each wheel of the lock has different zodiac symbols on it.
You want to rotate the wheels until each one is showing the same symbol (the = sign).
The symbol you are looking for is Capricorn, it looks like a funky N.
Once you've got the code lock set, back up once and click on the doors to open them.
Inside is a lever, take it and back up.
The Wall Panel (Part 2)
Turn left to face the two tables again.
Click on the panel on the wall to the left of the windows for a close up.
Insert the lever and it will turn, causing a canopy to extend over the windows. Notice that something falls out of the canopy.
Back up from the lever.
Click on the left window for a close up. Notice the word "welcome" on the canopy. Back up.
Click on the right window for a close up.
Click on the window again, then click again to open the window.
Use the cable cover to retrieve the ball from the patio.
Click on the ball while in close up to open it and get a club key.
Back up twice.
The Wobbly Picture Puzzle
Turn left (or right) twice to face the wall with the double door and the one table.
Click on the small picture on the right (to the right of the doors) for a close up.
Note the letters on the corners of the picture?
The clue is on the canopy over the left window.
The canopy has the word "welcome" on it.
You need to click on the corners in the order it takes to spell the word "welcome".
That means the order is: upper right, lower left, lower right, upper left, upper left, lower right, lower left.
When you enter the code correctly, the picture will slide up to reveal a pair of pliers. Take the pliers.
Notice that at the far back of the alcove behind the picture is a key on a string and a red button. Yes, there will be construction to get it.
Back up.
The Double Doors
Click on the double doors for a close up, then use the club key to open them.
Inside you will see an umbrella leaning against the back wall, take it.
On the right is a window, click on it for a close up.
Through the window you can see the button and hanging key in the alcove. Notice the slot for a lever below the window.
Back up.
Click on the ceiling at the back of the space for a close up.
There's the string that's holding up the key. If only we could cut it! Back up.
On the left is another set of double doors, click on them for a close up.
There's some sort of circular code key on the right door, click on it for a close up.
Hmmm, does this pattern look familiar?
The key to the pattern is the odd circular ornament on the low cabinet, the one with the eight lights.
When you pushed the button on the ornament, each light lit up in a specific pattern. This is the pattern to push the buttons.
Imagine the pattern like this: the top button is North, the right button is East, the bottom button is South, and the left button is West.
The pattern to push the buttons is: N, SW, NE, SE, S, W, E, NW.
If you push the buttons in the correct order the lock will light up.
Click on the handle to open the door.
Inside you will find some tape, take it.
On the back wall are some triangular symbols. Make a note, they're probably important.
Back up twice to the main room.
The Second from the Left Cabinet
Turn left to face the low cabinet again.
Click on the second from the left set of doors for a close up.
Note the controller on the door, the one that points up, right, down, and left.
Have we seen anything in the room that would indicate the pattern to push?
The pattern is on the back wall of the safe in the double door alcove.
The triangles in the pattern indicate the directions to push.
The pattern is left, up, down, up, down, up, right.
After you push the controller in the proper manner, click on the doors to open them.
Take the hippo figurine from inside.
Back up.
I Need a Drink
Seriously, it's been a long escape.
Remember the wine bottle that you picked up?
Remember the strange white machine on the bar with the bottle shaped slot?
Turn left (or right) twice to face the bar.
Click on the bar for a close up, then click on the white machine for a close up.
If you place the bottle of wine in the machine, the green lights on the left light up.
That might be useful.
Take the wine back, then back up twice.
Turn left (or right) twice to face the low cabinet.
Click on the odd device to the right of the cubby with the Mr. Birdy figurines.
Looks like you can pour something into those things on the top of the machine.
Use the wine on the left container.
Notice that a star appears in the center of the machine. Also notice that the left light on the left side lights up.
Does that light look like the ones in the white machine?
Back up, turn around and head back to the bar.
Put the wine bottle in the white machine. The bottle is no longer full.
Notice how many lights light up on the left. Only three of the lights will light up.
Take the wine bottle back and back up twice.
Turn around (left or right twice) to face the low cabinet, then click on the wine machine again.
Place the bottle underneath the spout in the center of the machine and click on the white button to empty the left container.
You are going to need to repeat this process twice more, once for the center container (square, 7 lights) and once for the right container (circle, 5 lights), pouring the wine, backing up, going to the white machine to see the lights, coming back, etc.
Once you've poured the wine into all of the containers and gotten the symbols and numbers, place the wine at the center one last time. Push the white button to pour the wine back in the bottle and a drawer will pop out of the machine (if all three lights have gone green).
In the hidden drawer is a screwdriver, take it and back up.
The Second from the Right Cabinet
Click on the second from the right cabinet doors for a close up.
This is the cabinet with the small wooden panel that is screwed down.
Note on the panel the symbols, a square, a star, and a circle.
Use the screwdriver on the panel to remove it.
Removing the panel exposes a code key that needs three digits.
So what is the code?
Remember all that business with the wine and the two strange machines?
Each time you put the wine in the container machine a symbol lit up.
That corresponded with the number of lights the remaining wine in the bottle would light up in the white machine on the bar.
The numbers were star = 3, square = 7, and circle = 5.
But they need to go in the order of the symbols above the code key: square (7), star (3), circle (5).
Thus the code is 735.
Enter the code and click on the doors to open them.
Inside the cabinet is a colander, take it.
While the colander is in close up, notice the sticks inside, take them.
Back up.
Construction, Tesshi-e Style!
Turn right to face the wall with the double doors.
Click on the small picture to the right of the doors for a close up.
Click on the picture to open it up.
Time to build a car to fetch that key!
Pull up the hippo from your inventory.
Place the colander on the hippo's back in the grooves there.
Click on the hippo to turn it upside down.
Note the feet on the hippo, we need to cover them.
Close down the hippo and pull up the cable cover from your inventory.
Use the pliers on the cable cover to cut it into two smaller parts.
Pull up the hippo from your inventory, then use the cut cable cover on the feet.
Use the tape on the covers to secure them to the feet.
Now use the sticks on the covers to create axles.
Use the coasters on the sticks to create wheels.
Click on the hippo to turn it right side up.
Place the hippo car into the alcove, then click on it to push it to the back.
Back up and click on the double doors.
Go through the doors and click on the window on the right.
Notice that the hippo car is in the perfect position, right below the key.
Now we just need to figure out how to get the key.
Also note that the button at the back of the alcove is glowing green since the hippo hit it.
Is there somewhere else we've seen something like that?
Back up twice.
Getting Out (Regular Escape)
Turn left to face the low cabinet.
Click on the far left set of doors, the ones with the single red light.
Notice that the light is now on and glowing green, it was activated when the hippo hit the button at back of the alcove.
Click on the doors to open them.
Inside you will find a candle, take it.
On the back of the open cabinet is a math problem, (heart x diamond - club) / spade.
Back up.
Click on the odd machine on the left of the cabinet, the one with the card suits.
Now how do we figure out the code?
The code is in the math problem we just found in the cabinet.
Use the values of the various card suit ornaments in the equation to get the answer.
(380 x 25 - 786) / 2 = 4357.
Enter the code in the machine and out will pop a lever, take it.
Back up and turn right.
Click on the double doors then open them.
Pull up the candle from your inventory.
Light the candle with the matches.
Now pull up the umbrella from your inventory.
Use the lit candle on the umbrella.
Once the candle is positioned on the tip of the umbrella, use the tape to secure it.
Now click on the ceiling to see the string.
Use the umbrella/lit candle combo to cut the string.
Back up and click on the window for a close up.
Note that the key fell into the hippo.
Now place the lever in the slot below the window.
Click on the lever and it will raise the inside of the alcove.
Back up twice to the main room.
Click on the small picture to the right of the double doors for a close up.
Click on the picture to open it, then take the hippo car.
Take the heart key from the colander.
Back up and turn right.
Click on the door for a close up.
Use the heart key on the door to escape.
Enjoy a leisurely drink with your friend!
Getting Out (Happy Coin Escape)
Follow the regular escape until you get the heart key from the hippo car.
Pull up the key from your inventory.
Click on the key once to turn it over, then click and hold to observe the key.
Note the pattern on the key: spade x club + heart + diamond.
One again substitute the values for the symbols: 2 x 786 + 380 + 25 = 1977.
Turn left to face the cabinet.
Click on the card suit machine (the one on the left of the cabinet) for a close up.
Enter the code from the key and the machine will open up to reveal the happy coin.
Take the happy coin and back up.
Turn left (or right) twice to face the door.
Click on the door for a close up and use the heart key to escape.
Enjoy your yummy (?) oozing rice-filled omelet.
Happy coin will bring happiness to you!!
Posted by: grinnyp |
November 16, 2011 3:40 AM
|
November 16, 2011 3:40 AM