JayisGames.com is now available ad-free!
Jay is Games recommends Cheat Happens with 8,000+ games and 35,000+ trainers!

Lunar Rainbow Room Escape


  • Currently 4.1/5
  • 1
  • 2
  • 3
  • 4
  • 5
Rating: 4.1/5 (102 votes)
Comments (52) | Views (9,345)

Weekday Escape

GrinnypSome escape games are exercises in pure logic. Some escape games are exercises in hidden object hunting. Some escape games are exercises in being in touch with your inner MacGyver, necessitating the combining of many different items to create something that will enable you to escape. Which type of game is preferred is up to the player, but a nicely balanced game seems to hold all three aspects, logic, hunting, and construction. So for this week we are eschewing atmosphere, back story, and all other extraneous aspects and going back to the basics. Welcome to Lunar Rainbow Room Escape.

lunarrainbowroom.jpgCreated by Strawberry Cafe, makers of Strawberry Cafe Escape, Lunar Rainbow Room Escape is a simple, basic, fun room escape with no hidden story or agenda. You're in a room, and you want to get out. This can be accomplished by the usual tasks of peeking into every nook and cranny, solving several puzzles, and, yes, putting together found objects to create something else.

Navigation through the space is accomplished with the obligatory arrows on the sides, top, and bottom of the screen. Inventory control is a breeze with the handy "about item" button allowing you to pull up anything you have for a close up. There is, however, no changing cursor so there will be a small amount of pixel hunting. Fortunately the game designers have compensated for this by creating large clickable areas, so you shouldn't have to do much hunting.

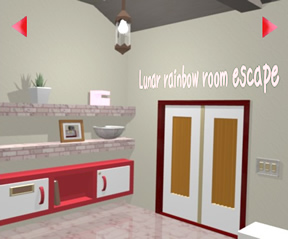
As with any Strawberry Cafe game, the visuals are lovely and largely done in shades of pink and red. Nicely done in 3D with appropriate lighting and shadows, Lunar Rainbow Room Escape is a feast for the eyes. Not for the ears, though, as there is no music accompaniment. Sound effects, but no music. A soothing tune would have complemented the atmosphere perfectly.

Analysis: Lunar Rainbow Room Escape is one of those light, frothy, cure the mid-week blahs room escapes that will stretch the brain without breaking it. With its cool, airy graphics and multitude of small and large logic puzzles, this is the very definition of casual gameplay. 20 minutes or less should see the average gamer through to the end.

The game is not without its flaws, of course. Some music would have been nice, and would have added to the relaxed feel. Lunar Rainbow Room Escape leans a little heavily on color-based puzzles, which makes it difficult if not inaccessible for the small percentage of the population that suffer from color-blindness. The "construction" aspect is more complex than usual, which might make it frustrating for those who don't like that sort of thing. And, since this is the English version of a Japanese room escape, there is some awkwardness with the translation.

Nevertheless, don't let the minor flaws put you off what is still fun, relaxing, casual gameplay. Although dark, brooding, atmospheric, scary, or slam-your-head-against-the-desk hard room escapes are always fun, in the middle of the week it's nice to kick back and enjoy something simpler. A nice break from the everyday that won't take up the entire day (or even the entire break, if you're really quick). So sit back, relax, and enjoy a cappuccino of an escape game. With colorful sprinkles!

Play Lunar Rainbow Room Escape

Walkthrough Guide


(Please allow page to fully load for spoiler tags to be functional.)

Lunar Rainbow Room Escape Walkthrough

General Information

  • Navigation can be a bit tricky as there are no "up" arrows when you can look up.

  • Pay very close attention to the drawings in the book when you find it. There's more than one page.

  • Click on an item in the inventory then click on the "about item" button to see it in close up.

  • Objects disappear from your inventory when you are done using them. If you have used them and they stay, you may need to use them again.

  • Some knowledge of baking might be helpful.

Double Doors/Shelves

  • You start by facing a set of double doors (locked, with a code) and some shelves and cabinets.

  • Look up.

  • What is that furry thing?

  • Ignore it for now and go back down.

  • Zoom in on the code by the door.

  • It's a three digit number code which we don't have yet. Back up.

  • Zoom in on the picture on the lower shelf.

  • Hey, it's that furry creature (bunny? cat? guinea pig?) from the rafters, and it's eating something.

  • Click on the bowl to the right of the picture to take it. Back up.

  • Zoom in on the cabinets below.

  • The left cabinet wants a code, but we don't know if it is numbers or letters. The right cabinet is locked and needs a key.

  • But hey, there's a book in the middle. Take the book.

  • Click on the book to open it. If you keep clicking on the right page of the book you will see several instructional drawings and a three letter code: OJP. Wonder what it's for?

  • Back up and turn right.

Art Nook

  • How pretty!

  • Click on the left picture (rainbow colors) for a close up.

  • Is that a bunny?

  • If you click on the left light fixture you'll notice it's out. Back up.

  • If you click on the striped lamp shade you will notice that it is missing a lightbulb.

  • Click on the left side of the bench seat (below the rainbow picture) for a close up.

  • Gee, another lock and a pair of scissors! Take the scissors and back up.

  • Turn right.

Sink

  • Wow, lots of stuff here.

  • If you click on the faucet twice you will notice that the handle is missing.

  • You can click on the box on the floor to the left. Notice the pretty colored buttons and the mysterious arrow on the wall.

  • If you click on the plant to the right of the hutch you will see a power outlet.

  • If you click on the hutch to the right you will see some wine glasses and some mysterious holes. You will also be told that the wine bottles are too high to see.

  • Click on the lower cabinets of the hutch and then click on the right door for a close up. Hey, a letter code!

  • Where have we seen a letter code?

    • Enter the code from the book: OJP and click the button on the right.

  • When you open the lower right cabinet you get a hammer. Yay, smashing time!

  • Back up and turn right.

Door/Squares

  • You are now facing a single door and a bunch of squares on the wall.

  • Click on the squares for a close up, then click on that orange thing to the left of them.

  • Hey, a button covered with glass.

  • Well, we do have a hammer...

  • Smash the glass with the hammer then push the button.

  • Now the squares have colored stars which look suspiciously like the colored star buttons on the box over by the sink.

  • It would probably be a good idea to note the positions of the stars.

  • Back up and turn left.

Sink

  • Click on the box with the colored stars for a close up.

  • Let's look at that mysterious arrow line on the wall.

  • Perhaps it has something to do with the order the buttons are pushed?

    • Imagine taking the arrow line and overlaying it on the squares over by the door.

    • Following the direction of the line from the beginning to the arrow gives you the order to push the buttons.

    • Push the buttons in this order: blue, red, purple, cyan, yellow, green, orange.

    • For the colorblind: number the stars from 1 to 7, left to right. Push: 6, 1, 7, 5, 3, 4, 2.

  • Once you push the buttons in the proper order the box will pop open and give you a light bulb.

  • Back up and turn left.

Art Nook

  • Click on the striped lampshade for a close up.

  • Place the lightbulb in the socket.

  • Hey, a number code appears!

  • Where have we seen something that needs a three digit number code?

  • Back up and turn left.

Double Doors/Shelves

  • Click on the three digit code thing to the right of the doors.

  • Once it is in close up enter the three digit code you discovered on the lampshade (737).

  • Back up.

  • Cool, a terrace!

  • Go onto the terrace.

  • Click on the right chair for a close up.

  • Cool, a spatula! Take the spatula and back up.

  • Click on the wine bottle on the table. There's a metal object lurking behind the wine bottle, take it. Back up.

  • Click on the plant to the left of the table.

  • If you look closely you will see a key stuck in the plant. Take the key (bronze key). Back up.

  • Back up again until you are off of the terrace, then turn right.

Art Nook

  • Click on the left side of the bench to see the little locked cubbyhole in the wall.

  • Use the bronze key on the cubby.

  • Gee, all sorts of things in here!

  • Take both of the objects (triangular shaped thing and a valve) then push the exposed red button. Back up.

  • Take a look at the rainbow painting again and you will see that the left light is now on, and that there is an arrow that runs from the cyan stripe to the orange stripe. The color order is cyan, blue, purple, red, orange. I wonder if that is significant?

  • Back up and turn left.

Double Doors/Shelves

  • Pull up the triangular shaped object from your inventory (that you just found in the cubbyhole).

  • This is a piping bag, used by pastry chefs everywhere to decorate cakes and to create decorative dough patterns.

  • If you click on either of the upper corners of the bag it will turn around.

  • Look, there's something stuck on the back!

  • Take the object, it appears to be a half of a note with letters on it.

  • Time to refresh our memories with the book.

  • Click on the book to pull it up.

  • The first page of instructions shows two things, the tip of the bag being cut off and the little metal insert being put inside the bag. This is how piping bags work. Go to the next page.

  • The next page shows water and some other stuff being added to the bowl and then mixed with the spatula. Go to the next page.

  • The next page appears to tell us to add the mixture from the bowl to the piping bag. Go to the next page.

  • We are now back at the three letter code we used earler. However, there is something strange about this code.

  • Notice the brackets underneath?

  • Brackets like that usually mean to place something there.

    • Place the half note that we found on the piping bag onto the book code.

    • Look, a new code, QIB!

  • Close the book, back up, and turn left twice until you are at the sink.

Sink

  • First, let's fix the faucet.

  • Click on the faucet for a close up, then click on it again and you will see where the handle is missing.

  • Place the metal valve from your inventory in the open square and you now have a handle.

  • Back up and click on the faucet again.

  • When you click on the handle water will run into the sink.

  • Hey, we need water in the bowl, don't we?

  • Go ahead and put the bowl under the water to fill the bowl.

  • Back up.

  • At this point we have nearly everything we need to follow the instructions in the book. We have the bowl (with water), a spatula, a piping bag, a metal insert, and scissors. Now all we need is the mysterious mix that needs to be added. I wonder where it could be?

  • Now click on the lower right cabinet of the hutch.

  • I wonder what will happen if we enter the new code in there?

    • Enter the new code obtained from combining the half note with the book: QIB then push the silver button.

  • Cool, if you enter the proper code stairs will appear on the left. Maybe we can use them to look at the wine bottles on the top shelf?

  • Before we do that, though, click on the stairs for a close up.

  • Oh look, a key! Take the key (silver key).

  • Back up twice until you are looking at the middle of the hutch.

  • Click on the upper left of the hutch and you will see the wine bottles.

  • Note the colored labels! Gee, another color puzzle.

  • Click on the bottles for an even closer look.

  • Notice when you are in extreme close up that the labels on the bottles have numbers on them. You can also only see 3 - 4 of them at a time.

  • On the left the bottles are: red = 7, orange = 2, yellow = 4.

  • On the right the bottles are: green = 6, cyan = 1, blue = 5, and purple = 3.

  • Back up until you have the long view of the sink and hutch.

  • Turn right twice until you are back at the double doors (terrace doors)/shelves area.

Double Doors/Shelves

  • There are still two cabinet doors here that we've not been able to explore.

  • Let's try opening the right door first with the silver key.

  • Cool, we have a bag of doughnut mix.

  • Now examine the left door.

  • We need to type in a code of some sort.

  • We still have that unexplained arrow on the rainbow picture.

  • We also have the mysterious wine bottles with colored and numbered labels.

  • I wonder what would happen if we combine the two?

    • The order of the stripes under the arrow is: cyan, blue, purple, red, orange.

    • Each bottle with the same colored labels has a number.

    • The cyan bottle = 1, blue = 5, purple = 3, red = 7, and orange = 2.

    • The code created is 15372.

  • Type in the code from the rainbow painting and the wine bottles (see above spoiler) then click the handle.

  • Take the machine and back up.

  • Turn left twice until you are in the sink area.

End Game

  • We now have everything we need to get out of the room.

  • First, click on the hutch for a close up.

  • The machine we just picked up has four legs that would fit perfectly in the four mysterious holes in the right of the hutch.

  • Place the machine in the holes. It looks like some sort of cooker.

  • But it is an electric cooker.

  • Back up until you see the long view of the sink/hutch area. Notice the cord hanging down?

  • Click on the plant for a close up.

  • Click on the cord and it will plug itself in. Back up.

  • Let's follow the book instructions, shall we?

  • First, pull up the piping bag from your inventory.

  • Use the scissors to snip off the bottom tip of the bag, then place the metal insert into the bag.

  • Close the piping bag and pull up the bag of doughnut mix.

  • Use the scissors to cut open the bag.

  • Close the bag and pull up the bowl of water.

  • Add the bag of mix to the bowl then stir with the spatula. You now have dough!

  • Close down the bowl and pull up the piping bag. Put the contents of the bowl into the bag. Time to pipe! Close down the bag.

  • Click on the waffle iron looking cooker for a close up, then click on it again. It opens to reveal a series of doughnut-shaped holes.

  • Click on the piping bag and put dough into one of the holes (the lower left hole). Close the machine.

  • Open the machine again and you have a burnt doughnut. Yay!

  • Wait a minute, how are we going to use a doughnut to get out?

  • Remember way back in the beginning, we saw a picture of a furry little creature eating a doughnut?

  • Isn't there a furry little creature in the rafters?

  • Maybe if we lure it down from the rafters we can use it to somehow escape.

  • Back up twice and turn left until you are at the art nook.

  • Notice the plate on the table?

  • Click on the plate for a close up, then put the doughnut on the plate.

  • Back up, go left and look up. Our furry friend is no longer there.

  • Back up and go right, then click on the plate for a close up.

  • What a nice little furry creature, it left us a present!

  • Take the gold key, turn left twice, and use the gold key to open the door.

  • Wait a moment and enjoy the lunar rainbow.

52 Comments

I've got

a bowl, spatula, metal fitting, scissors, and a key...now what

Reply

yes, but forgot about it already...thanx

Reply

I'm a bit farther. So far, I've:

created the squeeze-bag, and hooked up the donut machine.

Can't quite figure out what to do from there. Apart from the first time, I haven't found a use for the

scissors.

Reply

OUT!! that was a pretty decent game...does anyone know of any

alternate endings?

Reply

I have:

The spatula, the pastry bag all ready to go, a bowl full of water, this scissors, the note from the pastry bag, and the donut machine plugged in and ready to go. Still no sign of the mix.

I've run out of places to look.

Reply

I've done the latter, but I haven't found the

dough.

Reply
Billy Nitro November 11, 2009 1:16 AM

I also got the feeling there might be alternate endings. I only got out the do'. Good game though. T'was fun.

Reply

have you tried

"using" the note on something with letters?

Reply

Okay, I found the item I was looking for, and was able to finish afterwards.

Once you get the stairs to appear, be sure to examine them closely.

Reply
Patreon VIP Chiktionary November 11, 2009 1:35 AM

When I logged onto JiG and saw 'Weekday Escape' I was in paroxysms of joy. Just exactly what I needed between assignments.

Where did you guys find

a 'donut machine'?!

I've managed to locate the

piping bag and fill it with the donut mix

but I can't work out what to enter on the left hand cupboard next to the book. Is that where

the donut machine is, and if so, does anyone know the combination, or secret phrase, or password, or whatever?

Thnx GrinnyP for yet another oasis in my world of no fun.

Reply
wickedcherub November 11, 2009 1:42 AM

I've only found two objects.

The

scissors and the bowl

Does the box with coloured stars on it have to do with the bottles or the painting?

Is there anything else I haven't found that is just 'lying around' so to speak?

Reply

Walkthrough. First time poster, long time cheater. Don't shoot me if it's awful. I'm not good at detailing each little step, so each spoiler section probably contains a lot more than you'd want to know :P

Click the shelves that you see on the first screen. Take the bowl. Back up.

Click on the book on the bottom shelf, between the two locked cabinets. Make a note of all of the pictures and note the code at the end. Back up.

The code is:

OJP

Turn right so that you're facing the cough and the coffee table. Click on the section of the wall below the multi-colored bar picture. Take the scissors and note the locked cabinet. Back up and turn right.

You should be facing a sink and a cabinet with wine bottles. Click on the box that's sitting on the floor to the left of the sink. Take note of the pattern drawn above the box. Back up. Click on the cabinet near the two doors to zoom in, then click down toward the doors again to look at them. Using the code you found from the book earlier, set the dials accordingly and press the button. Take the hammer. Back up three times, then turn right.

Now you're facing a door (the way out!) and a 3 by 3 panel with an orange box to the left of it. Click on the orange box to zoom in on the 3 by 3 panel, then click on the orange box again to take a closer look. Use the hammer on the panel and push the button. Now you're looking at the 3 by 3 panel and you see a series of colored stars. Using the pattern you saw above the box, take note of the correct order of the stars, then backup and turn left, click on the box and click the stars in the correct order.

The order is:

Blue
Red
Purple
Light Blue
Yellow
Green
Orange

The box will open. Take the light bulb. Back up and turn left.

Click on the red and white striped lamp. Use the bulb you just got on the lamp socket and take note of the number that appears.

The number is:

737

Back up and turn left.

Click on the number panel to the right of the double doors and enter the code you just found. Back up and you'll find that the double doors have opened onto a patio. Click to go outside. Click on the seat of the chair on the right and take the spatula. Back up and click on the seat of the chair on the left. Take the key that is sitting between the branches of the plant near the stem. Back up once and click on the wine bottle on the table. Take the metallic piece that's behind the wine bottle. Back up twice so that you're inside the room again.

Once you're back inside, turn right and click on the wall under the picture of the multi-colored bars again to view the locked cabinet. Unlock it using the key you just found. Take the faucet knob and the triangle-shaped object. Press the button that you see. Back up once then click on the multi-colored bar picture. Notice the arrow and take note of the colors that the arrow spans across.

The colors are:

Light Blue
Blue
Purple
Red
Orange

Click the triangle-shaped object and view it closer by clicking "About Item". Click on it once to flip it over and take the note that's attached to the back. Back up once and turn left so that you're facing the shelves on the left and the opened door to the patio on the right.

Open the book again and turn to the last page where you got the first code. Use the note you just got on that code and a new code will be revealed.

The code is:

QIB

Close the book and back up once, then turn right twice so that you're facing the sink again. Click on the liquor cabinet, then click down toward the doors. Click on the door with the three letter combination device. Enter the new code you just got and press the button. The other door will open and form stairs. Click on the stairs once and take the key that's there.

Back up three times then click on the multi-colored wine bottles, then click up toward the bottles again to view them. Click on the bottles will allow you to get a closer look at each colored bottle. Using the colors you noted earlier on the picture with the arrow, note each bottles label number in that order.

The code is:

15372

Back up twice and turn left twice so that you're facing the open patio door again.

Of the two cabinets on the left, click on the left most one, then click it again to zoom in further. Enter the code you just found and then click the handle. Take the machine. Back up once and click on the other cabinet. Use the key we found on the stairs earlier to unlock and open the cabinet. Take the package inside and back up once.

Turn right twice so that you're facing the sink. Click the faucet, then click the base of the faucet. Attach the faucet knob you got earlier. Back up once then click on the bowl next to the faucet. Click the faucet knob to turn on the water.

It's time to assemble everything. Select the triangle-shaped object from your inventory and click "About Item" to zoom in. Use the scissors on the bottom to cut off a piece. Now select the metallic object you got from the patio and click on the triangle-shaped object again. Click "Close" to go back to the screen and zoom in on the faucet again. Click the bowl in your inventory then click the stream of water to get a bowl will water. Click and zoom in on the package in your inventory. Once again, use the scissors to open it. Now zoom in on your bowl of water and use the opened package on the bowl, then use the spatula on the bowl. Finally, zoom in on the triangle-shaped object and use the bowl on it. Now you have a pastry bag full of doughnut mix!

Click on the liquor cabinet once, then click the four white squares on the right. Select the machine in your inventory, then click the white dots. Back up twice and click on the plant to the right of the liquor cabinet. Click the cord to plug in the machine. Back up and zoom back in on the machine, and click the machine to open it. Select the pastry bag in your inventory then click on the machine. Click the machine's lid to close it and wait 10 seconds. Open the machine and take the finished doughnut.

Back up twice and turn left. Click on the plate on the coffee table. Put the doughnut on the plate and back up once, then zoom in again. The animals you saw in the rafters earlier have swooped down and eaten the doughnut, and left a key in its place. Take the key, back up once and turn left twice so that you're facing the exit door. Click on the door, then use the key to unlock the door and open. Voila, you're free.

Reply
wickedcherub November 11, 2009 1:45 AM

It's okay. I keep forgetting that books have pages. :(

Reply

Very nice, either I am getting better of they are getting easier (I assume the latter)...this is the second in a row without a walk through. either way I like it, there is nothing like the emasculating defeat of having to give up and get help. (I know that feeling well!!!)

Reply
Patreon VIP Chiktionary November 11, 2009 1:55 AM

Hey Grinny,
Thanks!

I forgot about the bottles being 'too high' and thought the stairs were merely for the silver key... (forehead slap)

So I'm out now. Nice little room escape game.
My ending

a rainbow over the moon

Very nice :)

Reply

Hi Peeps

First Id like to thank Jay and everyone else who maintain this site. It has been a nice therapy for me during some tough times.

Thanks also for the handy cafe-walkthrouh. It was a very detailed step-by-step manual and it made it easy for me to find the clue I needed. (got stuck once)

Hope I can return the help someday.

warmest regards to you all / Abe

Reply
Papachabre November 11, 2009 7:09 AM

Thanks for another excellent Weekday Escape, grinnyp!

Reply

Nice one, flows well and enjoyable.

Reply

Finished, but it still feels like there's something more to be done... I've still got the

scissors in my inventory after cutting the bag and the ...other thing, maybe it can be used somewhere else?

Reply

Found a bug. I managed to back up before noticing that one of the keys

were on the stairs. Trying to click them just made me look at the wine glasses.

Since I couldn't return I had to start over. Doh!

Reply

Disregard the above, I somehow missed clicking below that area.

Reply

link is not working for me. weird.

Reply

Any one else having problems to download access the game? I'm receiving a "404 not found" message

Reply

umm...broken link?

"The requested URL /memcache/strawberrycafe/article/132252854.html was not found on this server."

Reply

yeah i just posted that before you did manuel. hopefully it'll work soon. or maybe there will be a better working site that will be linked back to.

Reply

found a bug

when I clicked on the cabinet after entering the

wine bottle

code, I had the key selected. It unlocked the

cabinet for the bag

, but the key disappeared & now the

cabinet for the donut machine won't open

Reply

Now I'm really confused. I thought I had the bottle code, but it didn't work. I checked the walkthrough, and it agrees with me about the code. What am I missing?

Reply
Bloatedsack November 11, 2009 12:14 PM

did we bring down the server?

I guess I'll have to wait.

Reply

I was looking forward to playing it, too.
I wish I had more patience...

Reply

Paul and Manuel: I had to go directly to the Strawberry Cafe home site:I couldn't access it with this link or another link from another gaming page.

Reply

Thanks Rich.

Reply

Thanx RichW for the link =)

This might be why the link grinnyp put up no longer works:
"�'009年11月9�-��...�開              

ゲームファイルの転載、直リンクは厳禁です
�"のページ�'フレームページと�-て呼びだすのはやめてください
Please do not link directly with the game file.
Please do not copy the game
Please do not display the game page of your site by using the frame partially

If found, access from your country will be disabled,
and I will have to introduce a password system to this gallery."

Reply

Yes, but we linked to their site in a correct and normal manner, not within a frame nor did we link directly to the game file.

I am sure we did nothing wrong.

In any event, I've updated the review with the new URL. Let's hope they appreciate the traffic we're sending them by not moving it again. =/

Reply

The review contains two different links to the game. The one in the first paragraph doesn't work.

[Edit: Oops, thought I changed them all. Fixed. Thanks for the note! :) -Jay]

Reply

Am I the only one not finding an English version? The link posted takes me to the Japanese version, but the review mentions an English version.

Reply

Yeah, the link posted now goes to the Japanese version.

Reply

The current link seems to work, but the game does not - the frame with the flash doesn't load for me.

[Edit: You must have Javascript enabled for the game to load. Loads fine for me. -Jay]

Reply

If you're having problems with the 5-digit code, try pressing backspace and delete a lot in the code window, then entering the code again. Apparently the window can accumulate some unseen junk that invalidates your code.

Reply

Is anyone else still having trouble with the link?
I can't even get http://strawberrycafe.haru.gs to work for me. I'm trying to access it from Greece, if it makes any difference...

Reply

I couldn't finish the game since I can't put the dough in the bag. Oh well, fun relaxing game anyway.

Reply

now what?
"Forbidden
You don't have permission to access /gekko.html on this server."

Reply
nerdypants November 12, 2009 8:43 PM

This was a cute game.

Mmmm, donuts.

The only complaint I had was the color thing. That must get really frustrating.

Reply
Xaon Rider November 14, 2009 7:05 AM

I can't seem to even get to the game. I tried opening from the strawberry cafe homepage itself but it still gave me "403 FORBIDDEN You don't have permission to access /gekko.html on this server."

And I was so looking forward to playing! Is it because I'm accessing from Singapore?

Reply

That animal is btw a squirrel. Are you people sure youre never seen them??

Reply

The box with the rainbow stars on it will not open. I followed the instructions in the walkthrough to doublecheck myself. The buttons have no response to being clicked.

Reply

^ Scroll Up | Homepage >

Leave a comment [top of page]

Please consider creating a Casual Gameplay account if you're a regular visitor here, as it will allow us to create an even better experience for you. Sign-up here!
  • PLEASE UNDERSTAND SITE POLICIES BEFORE POSTING COMMENTS
  • You may use limited HTML tags for style:
    (a href, b, br/, strong, em, ul, ol, li, code, spoiler)
    HTML tags begin with a less-than sign: < and end with a greater-than sign: >. Always. No exceptions.
  • To post spoilers, please use spoiler tags: <spoiler> example </spoiler>
    If you need help understanding spoiler tags, read the spoiler help.
  • Please Preview your comment before posting, especially when using spoilers!
  • No link dropping, no domains as names; do not spam, and do not advertise! (rel="nofollow" in use)
chrpa Jayisgames needs your help to continue providing quality content. Click for details Welcome to the Roundup 66 - Retro with four games! After you find the ten monkeys in the chapter, look in the inventory. You will find a...  ...
chrpa Jayisgames needs your help to continue providing quality content. Click for details Welcome to the Roundup 65 with three games! As mentioned in the previous roundups, only odd-numbered episodes are featured since even-numbered are for Robin Vencel's patrons (the...  ...
chrpa Jayisgames needs your help to continue providing quality content. Click for details Hi! Weekday Escape and Weekday Puzzle are here! First we have two new cans from tomoLaSiDo and then two small rooms from isotronic. That's all for this...  ...
6,365 Views
0 Comments
chrpa Jayisgames needs your help to continue providing quality content. Click for details Welcome to Mobile Monday! We have another beautiful game from Nicolet and it's a winter game as it should be. Tasuku Yahiro have released another of their...  ...

HELP Jayisgames.com

Recent Comments


Display 5 more comments
Limit to the last 5 comments

Game of the week


Dark Romance: Vampire Origins Collector's Edition

Your Favorite Games edit

add
Save links to your favorite games here. Use the Favorites editor.

Monthly Archives